Leveling walls with gypsum board slabs is a popular procedure that is easy to do with your own hands, but it includes work that requires a responsible approach. Among them is the installation of sockets in drywall, which involves the correct placement of components and the connection of electrical wires. The accuracy of all manipulations guarantees the absence of problems in the future.
Popularity of drywall
Nowadays, plasterboard sheets are very often used for interior decoration and leveling the walls of rooms and creating partitions.
This material greatly facilitates finishing work, has a fairly large list of positive qualities, for which it has become widespread.
After fixing the sheets of drywall, it’s time to complete the next stage of work related to the electrification part - installing sockets and switches in the walls.
The installation work is not complicated, so it is quite possible to do it yourself, without resorting to the help of anyone.
Wiring in rooms with high humidity
Water is one of the best conductors of electric current, therefore, when installing wiring in a bathroom, toilet, or bathhouse, certain recommendations should be followed:
- The switch and distribution panel must be placed outdoors with a high level of humidity.
- Sockets must be located at least 65 cm from the water supply.
- Any electrical appliances used indoors must be grounded.
- The electrical line for this room must be protected by a separate fuse.
- It is important to connect all ground bars to equalize the electrical potential.
In rooms with high humidity, it is necessary to provide grounding for devices.
Features of choosing sockets and socket boxes
The successful completion of installation work depends on the correct selection of everything necessary - the sockets and switches themselves, as well as special plastic mounting boxes - socket boxes (these elements are fixed into a hole made in the wall, and sockets are already installed in them).
Socket boxes manufactured for installation in holes in plasterboard walls differ from those installed in concrete and brick walls.
Their peculiarity lies in the presence of special presser feet mounted on screws.
By rotating these screws, you can move these legs along the body of the socket box.
As for sockets and switches, manufacturers now produce them according to a single standard regarding the size of the internal part that will be placed in the installation box.
And yet, when purchasing all the necessary elements, you should check their compatibility.
Fastening the box in a plasterboard wall
You can install mounting modules using the following algorithm:
- The direction of approach of the wire is determined. The plugs in the socket box housing are removed through which the cable is passed. It is taken into account that during work the system must be de-energized or the ends of the wiring must be insulated.
- The box is gradually pushed into the hole. If the fixing tabs stick out, then they are placed in stages, slightly squeezing the last one.
- Before fixing the module, check the reliability and correctness of the level position.
- The screws of the device's legs are screwed sequentially without unnecessary pressure to prevent damage to the drywall.
When choosing a box, it is advisable to give preference to models with metal presser feet; socket boxes with plastic feet are a little cheaper, but they often break
Attention! It is taken into account that the box must be inserted into the hole as tightly as possible, vibrations are not allowed.
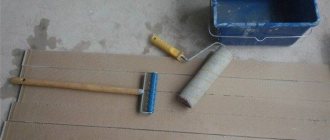
Required Tool
To carry out installation work, you will not need many tools:
- Drill or hammer drill;
- A special nozzle - “crown”, for making holes in drywall (diameter 68 mm);
- Screwdrivers;
- Pliers;
- Measuring tool (tape measure, ruler, level);
- Marker.
In some cases, you may need tools for cutting metal - a thin chisel, a hammer.
Read on the topic - what tool is recommended to have at home.
Selection of materials and necessary tools
For high-quality laying of wires under sheets of plasterboard you will need:
- Plastic or metal corrugation that protects the cable (suitable when the wire is located between drywall and the base wall). Metal corrugation is necessary if flammable insulation is used.
- Cable channel (it can replace corrugation, but this will increase overall costs and complicate the work).
- Power cable, which is selected depending on the specific situation. If corrugation is not used, then three-layer insulation should be chosen. If the cable is hidden in the grooves of the base wall, double insulation is suitable.
- Ground wire to equalize potentials.
- Fastening elements: clips, bushings, ties and so on.
- Special socket boxes for drywall or regular boxes if the sheets are glued directly to the wall.
- A drill or other tool for making holes.
Tools and materials for electrical wiring installation
Choosing a location for installation
In the rules of the PUE there are no requirements for the location of sockets and switches as such. That is, you can arrange them at your discretion.
But at the same time, the choice of installation location depends on the wiring, which is carried out before attaching plasterboard sheets to the walls.
In general, it is necessary to determine the approximate locations of sockets and switches at the stage of laying the wiring.
In this case, the length of the output ends of the wires to which the sockets will be connected should be left with a reserve.
After all, it is much easier to cut off the excess than to build it up in order to supply power to the switches.
Despite the possibility of choosing an arbitrary location for installing sockets and switches, now many are trying to adhere to the so-called European standards, according to which the height of sockets from the floor should be:
- In ordinary rooms - 30 cm;
- In the kitchen (above the countertop) – 120 cm;
- In the bathroom – 60 cm;
- To connect a washing machine – 100 cm;
Switches are installed at a height of 80 - 90 cm from the floor. But we note that these are only recommendations and do not require strict adherence.
When performing installation, first of all, you should still focus on ease of use and ease of access, and then on standards.
In addition, in some cases a non-standard position of the outlet may be required, for example, to provide power to a TV that will be mounted under the ceiling.
When choosing installation locations for sockets and switches, it is better to immediately make all the necessary markings on the drywall.
At the same time, if the floor is not yet completely finished and future laying of the floor covering is planned, this should be taken into account when choosing the height of the installation site.
What the PUE says
It is worth noting that, according to the rules for installing electrical equipment (PUE), it is necessary to install live wires for switches and sockets under the casing in a corrugated area. In this case, it is recommended to select corrugation marked NG for installation, i.e. non-flammable. There is no particular need for wires with safe voltage, which include telephone wires, to be installed behind drywall and secured inside corrugated pipes. But behind the drywall there is often a metal frame with sharp edges that can cause damage to wires.
Making a hole
Having completed all the necessary marking work, you can begin cutting out the holes.
There is nothing complicated in this operation:
- We install the prepared attachment on the drill or hammer drill;
- Before starting drilling, you need to correctly position the “crown” relative to the place where the hole will be (to make it easier, you can drill the center of the future hole with a regular drill);
- Using a crown, we cut a through hole in a sheet of drywall. When working with a drill and hammer drill, you should not create strong pressure, otherwise this may lead to the formation of torn edges of the hole, which will subsequently affect the installation work;
Note that you can make a hole without a crown, although it will be more difficult.
To do this, you can use two methods - cut it with a knife or use a drill with a regular drill.
But no matter which method is chosen, you first need to make additional markings to determine the dimensions.
You can do this:
- Using a ruler and a marker, draw a cross on the wall, the crosshair of which will be in the center of the future hole;
- From the center on each of the rays of the cross we measure 34 mm and make marks (the distance between two marks lying on the same line should be 68 mm);
- We take the socket box and apply it with the back side to the wall, positioning it according to the marks;
- We draw a circle around the socket box.
This way we obtain the required dimensions of the hole with the center at the selected location for the socket.
And then we cut it out. You can make a hole with a knife, but this is not very easy, since you will have to cut through the entire thickness of the sheet, but if you don’t have a mechanical tool at hand, then this method will work.
You can make the work easier by using a drill with a drill bit. We use it to make the maximum possible number of holes along the circle marked on the wall.
And then we simply use a knife to cut the jumpers between them. All that remains is to trim the resulting hole with a knife.
In general, cutting a hole is not difficult, but quite often a variety of unforeseen situations arise that will have to be resolved.
READ ON THE TOPIC: How to install sockets in the floor.
Preparatory work when installing an outlet
Where will the potential points of electricity consumption be located and will there be enough length and quantity of cords for household appliances? Where will the devices be installed? Many people ask similar questions. For example, you needed to turn on some household appliance, say a vacuum cleaner, but there was no free outlet, and in order to connect it, you need to turn off another one. The decision to insert an additional outlet or switch into the drywall will help prevent such situations in the future.
Scheme of preparing the wall for installation of sub-assemblies.
The height of switches and sockets must be marked on drywall in advance. The main thing here is not only the simplicity and convenience of the switch or socket, but the safety of children and pets. Installation will be easier if you draw each of the consumption points or sockets on the wall on drywall. Once you have decided on the location of the points, you need to draw how the electrical wiring will be laid.
In the future, a simple rule can be very helpful: it is better to secure the wire and run it straight vertically from the switch or socket, and place the horizontal sections at the same level as the distribution boxes. Next, you need to install the electrical wiring and fix it on the wall, but in such a way that the wires on the racks do not get tangled.
It is important under no circumstances to run any wires inside the profiles, because the screws will have to be screwed into them.
For ease of connecting the socket, it is worth leaving a reserve of wire about 100-150 mm long from the wall itself. After all this, you can secure the electrical wiring in the corrugated pipe.
Difficulties that may arise and their solutions
One of the most common problems that arise when making a seat for a socket box is getting into the profile to which the plasterboard sheet is attached.
In this case, it will not be possible to install the mounting box, since its height is much greater than the thickness of the drywall.
That is, for installation you need additional space under the sheet so that the socket box goes all the way.
This problem can be solved very simply - using a chisel (chisel, screwdriver) and a hammer, we cut out the interfering section of the profile. This will not affect the bearing capacity of the profile in any way.
The situation is worse if the drywall is glued to the wall without using a frame made of a metal profile (such installation also occurs, although it is rare).
In this case, you will have to make a recess in the wall using a hammer drill with a chisel or a hammer with a chisel.
Another situation concerns the installation of a block of sockets (several of them are located in a row, one next to the other).
For reliable fastening of each socket box, it is necessary that there are jumpers between the holes for them.
And this is where correctly executed markings will help.
It is done like this: select the location for installing the outermost socket, and mark the center of the hole.
Then draw a straight horizontal line through the marked point.
Next, measure 72 mm from the center of the first hole and make a mark (this will be the center of the second hole).
We make a few more marks on the line (according to the number of sockets in the block), observing the specified length between the points.
It's simple - the diameter of the hole is 68 mm, and between the centers we have 72 mm, and after cutting the holes we will get jumpers 4 mm thick in the thinnest place.
POPULAR WITH READERS: Smart sockets, what they are, types, design and principle of operation, how to install and connect to mobile devices.
Installation and connection of sockets and switches
The devices must be fastened carefully so that all connections are correct and extremely reliable. House wiring is most often divided into two or three main wires:
- working zero – N (mostly blue);
- phase – L (brown);
- grounding (protective zero) – PE (yellow-green).
But you can rely on color only if the distribution was initially carried out according to this rule. To do everything without errors, each device has its own connection sequence.
If the switch is built in series with the light bulb, then the sockets are usually connected in parallel
It is also necessary to first determine the type of wiring. The fact is that in old apartment buildings there is no separate outlet for grounding, but there is a ground connection. In such a situation, the PE connection terminal remains free, and the green-yellow core (if any) is bent and insulated.
The easiest way to install sockets. Standard technology:
- The wires removed from the box are cut to the required size, and the ends are stripped. It is taken into account that everything must fit freely inside the module.
- The outer plastic cover is removed; to do this, the central screw is unscrewed.
- The internal base most often combines a metal plate and an element with contacts. To connect the cores, screws are unscrewed, which release the connectors.
- Phase and zero are connected in any order and attract well.
- Next, you need to attach and align the frame and fix the overlay with openings for the fork on top.
Before connecting the socket, all 3 wires should be checked for the presence of voltage with an indicator.
Switches on plasterboard walls should be placed slightly differently. The main difference is that it is the phase that is supplied to the break (to the contacts). The device will also work when the zero is connected, but in this case the lamp will always be energized.
When installing the switch, a phase wire is placed on the break; it can be detected using an indicator; under voltage, the indicator light should light up
Important! All processes are carried out with the power off. If a large number of electrical devices are expected in the room, then a separate machine is provided.
Installing socket boxes
After cutting the holes, we prepare the electrician’s tool and install the socket boxes. But before that, you need to make a hole in them for drawing the wiring.
Next, we pull the wire through the mounting box, place it in the hole and fix it with the help of paws.
But there are some nuances regarding the design of socket boxes.
In some types of boxes, the groove along which the foot moves has a smooth transition.
In the extreme position (near the bottom of the socket box), the foot turns out to be completely recessed into the groove.
But as you move (when you tighten the screw), due to the transition, it begins to protrude above the body, which allows you to fix the socket box (on the outside side, the edge around the circumference of the body acts as a stop, and on the inside there is a tab pressed to the sheet with a screw).
It is not difficult to secure such a socket box - we install it in the hole and fix it. In this case, the position of the paws does not matter.
The second type of box differs in that its groove is even along its entire length. But so that when installing the socket box in the hole, the tabs do not interfere, special niches are provided for them, in which they hide (by turning on a screw).
This type of socket box is mounted like this: we make sure that both legs are in the niches and install it in the hole.
Then, rotate the box so that the screws of the legs are positioned vertically.
In this case, the foot of the lower screw will come out of its niche (will protrude above the body).
If you tighten it a little with a screw, it will no longer be able to change its position.
To pull the second tab out of the niche, turn the socket box 180 degrees so that the top screw is at the bottom.
And then we attract both legs, fixing the box. But we note that you should not immediately clamp the tabs completely; it is better to leave them unstretched for now (so that you can rotate the box).
Self-installation of socket boxes in drywall
In modern construction, gypsum boards - plasterboard sheets - are often used. This material is used for the installation of hollow walls and interior partitions. The installation scheme for electrical installation equipment has changed accordingly. In particular, additional fittings for electrical sockets and switches.
Previously, these elements were mounted in the wall; for this, the installation box was inserted into a drilled hole, where it was fixed with mortar. This option is not suitable for hollow structures, so special socket boxes designed for drywall have appeared on the market.
Note that the socket box is a mandatory element when installing electrical equipment. It is used for installing sockets, switches, dimmers, and thermostats. In addition, they can be used for wiring. Please note that even a novice craftsman can easily install a socket box in a plasterboard wall.
The work process is intuitive, however, there are certain nuances that will be useful for the home craftsman to know. Let us immediately clarify that expensive equipment or special skills are not required to install socket boxes in drywall.
I am glad to welcome you, friends, to the blog “Electrician in the House”. In today's episode we will examine in detail the topic of how to install a socket box in drywall .
Dimensions of socket boxes for drywall
Before starting to describe the installation process, it makes sense to understand the features of the product. Let us immediately note that a regular socket box is not suitable for installation in plasterboard partitions; only a certain type of product intended for such cases is used here. Among the reputable manufacturers, the following brands can be distinguished:
- — Hegel;
- — Schneider Electric;
- — Legrand;
- - IEK;
- — Kaiser.
These products are classified by planting depth and outer diameter. These parameters are labeled H and d2 respectively. The standard diameter of the socket box for plasterboard is 68 mm. In addition, models with external diameters of 60, 64, 65, 70 and 75 millimeters are available.
If we talk about planting depth, here you can find the following sizes: 40, 42, 45, 60 and 62 millimeters. Please note that you can find products with non-standard fit dimensions on sale, but this is the exception to the rule rather than the norm.
Socket boxes are selected individually, depending on the installation location. If possible, and the thickness of the partition allows, we recommend choosing models with a seating depth of 60-62 mm. Such designs are much more convenient when disconnecting wiring, especially if the circuit excludes the installation of junction boxes. In this case, the wires are disconnected in the socket box, so every extra millimeter will play a decisive role.
In addition, in products with a large planting depth it is much easier to connect wires and install electrical equipment.
In today’s article, as an example, I will use socket boxes for plasterboard Schneider Electric modification IMT35150. These products have a standard outer diameter (68 mm), the seating depth is 45 mm.
The housing of the Schneider Electric IMT35150 socket box is made of non-flammable plastic. It uses a combined polypropylene + fire retardant material that can withstand temperatures up to 850°C. The case is quite durable, equipped with a wide front edge. There are plugs of various diameters designed to accommodate wires of any cross-section.
To fix the socket box in the partition, two metal tabs are used. The use of metal clamps provides a large area of adhesion to the surface, without damaging the plasterboard coating. To fix the legs, screw self-tapping screws are used, which, when tightened, securely press the box to the surface.
For variety, let’s look at Polish socket boxes for plasterboard from Pawbol Euproduct. The plastic feels very dense and reliable. Only here thin metal legs (similar to antennae) are used, fixed with plastic stoppers.
Please note that in both modifications the mounting tabs do not protrude beyond the external dimensions of the socket box. This greatly simplifies the installation process.
When the box is installed in the seat, the tightening screws tear off the plastic stopper, moving the clamps beyond the boundaries of the socket box. Please note that Pawbol Euproduct are equipped with mounting screws with small and shallow slots, which causes some difficulties during the installation process.
Marking walls for installing socket boxes
Installation of socket boxes in drywall begins with marking the partitions. A pre-compiled electrical wiring installation diagram will help with this; here, special attention should be paid to the distances to the floor and the nearest wall. These parameters are calculated as follows: the height is taken from the floor to the center of the product, the distance to the walls is determined from the central part of the group of socket boxes.
If other landmarks are taken into account during the calculation, there should be corresponding marks in the diagram about this. For example: the distance to the wall is calculated not from the center, but from the edge of the frame.
In order to illuminate the marking procedure as much as possible, we will analyze the process using the example of installing a block of four socket boxes from Schneider Electric. Note that the above diagram is also relevant for products from other manufacturers.
First, mark a horizontal line at the required height from the floor level. To do this, we use a tape measure and a simple pencil. Then we determine the location of the socket boxes , taking into account the symmetrical location of the structure relative to all sections of the wall.
Now we retreat 71 millimeters from the central part of the first socket box and mark the center of the second box, and so on, at equal intervals.
Of course, if you need to install one socket box, then you just need to mark the point on the wall in the right place and at the right height where you need to install the box. This point will be the center of the future outlet or switch.
Please pay attention to one important nuance: the distance between the centers of the socket boxes should be exactly 71 millimeters, without exceptions or errors. Otherwise, problems may arise with installing the overhead frame: the structure may not fit, or, on the contrary, will leave gaps.
In addition, it is necessary to take into account the location of the metal profiles that serve as support for the plasterboard sheets. Otherwise, when drilling a hole, you can damage the profile, which will make the partition less stable.
After these manipulations, four points appeared on our wall, which define the central part of the socket boxes. Now you can start drilling holes.
Cutting holes for socket boxes in drywall
So, we completed the markings, and we did it accurately and accurately. Now we need to take care of the mounting holes for our “plastic boxes”. To do this, you will need a drill or screwdriver equipped with a bit with a diameter of 67 mm.
I have a whole set of them with different diameters: 51, 57, 67, 76, 89,102. This set of Chinese crowns is therefore not very expensive. Anyone can afford such a set. But I must note that despite the fact that the Chinese set is very reliable and has served me for almost five years. Each crown for socket boxes on drywall when assembled has a centering drill.
The further procedure is quite simple: we rest the centering drill against the marks we made, and carefully drill four holes with a crown.
Please note that drywall is a fairly soft and pliable material, so you should not use excessive force when drilling. This may dent or break the partition. Considering the characteristics of the material, you can completely do without a crown. Drywall can be cut with a utility knife, however, in this case, the holes will not look very presentable.
Assembling socket boxes into one block
Considering that you are not installing a separate structure, but a block of four boxes, the socket boxes must be fastened together. Therefore, the installation of socket boxes in drywall begins with the removal of the side plugs. This is done according to a certain scheme: the first socket box has one plug, in the second and third there are two, in the fourth there is again one.
In this case, I will use cable adapters-connectors to connect Schneider Electric socket boxes to each other.
What’s interesting is that most ordinary concrete socket boxes are structurally designed to connect them into a block without additional adapters (there are special protrusions on the sides). GCR boxes do not have such protrusions, so you have to use special connectors.
The process of combining individual boxes into one structure looks like this: the adapter is installed in the mounting hole and snaps into place.
The procedure is repeated several times, depending on the number of socket boxes in the block. Considering that the adapters have a standard diameter, the distance between the socket boxes for drywall will be exactly 71 mm. According to a similar scheme, all electrical installation structures are installed, brought under one frame.
How to install a socket box in drywall
So we come to the main thing - installing socket boxes in drywall . To do this, you need to remove the partitions that remain between the holes. To do this, we use a mounting knife or saw. Next, in one of the boxes we remove the plastic plug intended for inserting the power wire.
If the preliminary calculations are made without errors, the design exactly matches the location of the cable. Please note that some socket boxes for plasterboard are equipped with fastening tabs protruding beyond the outer diameter, so the structure must be installed diagonally.
We insert the power cable through the hole in the plug, and carefully insert our unit into the prepared hole. All socket boxes should go in without effort. Before fixing the block, we check that everything is level.
After installing the socket block into the seat, all that remains is to tighten the fastening screws. This can be done with a regular screwdriver. After twisting, the clamping tabs will securely pull the structure to the inner wall of the plasterboard sheet. We remind you that you should not apply excessive force so that the drywall does not begin to crumble. Now all that remains is to check the symmetry of the installed block using a building level. This completes the installation process.
Until we meet again, friends. Thank you for your attention. Subscribe to the project's social networks. If you have any questions, ask them in the comments, I will be happy to answer.
How to install a socket on drywall
Before installing a socket on drywall, you need to carry out a number of preparatory work. Moreover, some of the work is done during the installation of the partition.
Preparatory work
Sockets are installed according to the socket arrangement plan. According to the same plan and single-line design diagram, electrical wiring around the room is carried out. Electrical wiring is carried out inside the partition structure or under the plasterboard wall sheathing. The wiring is carried out using an electric cable with copper conductors and double (VVG cable) or triple insulation (NUM cable). According to the technology, the cable must be enclosed in electrical installation corrugation or special plastic pipes for electrical installation work.
The places where it is planned to install overhead sockets must be reinforced inside the structure with transverse wooden blocks. The bars will serve as a support on which the sockets will be attached.
Tool for installing sockets on drywall
For work you will need the following tool:
- Construction level and pencil for marking;
- A drill with an attachment called a crown. The crown is designed for drilling large holes;
- Assembly knife and screwdriver with a small slot.
Important! Any work with electrical wiring must be carried out with the power supply turned off. Before work, check that the power supply is disconnected in the circuit where you plan to work.
Marking the space for the socket
The marking is made according to the socket placement plan. It is worth paying attention to the installation height of the sockets. She should be a wound all over the room. For a single level of installation of sockets, you can take the bottom of the installation box (socket box) or its middle.
About the socket box for plasterboard walls
A socket box for plasterboard is a special mounting box with a design for durable fastening. The essence of the fastening design is as follows. Special plastic spacers are made in the socket box, which from the inside cling to the sheets of drywall when the mounting screws rotate.
Drilling a hole for a socket box
It is worth noting that the socket boxes can be fastened together to install 2-5 sockets in a row. The hole or holes for the socket boxes are drilled in the drywall using a drill with a crown-type attachment. The diameter of the crown is selected according to the size of the socket box.
Before drilling, markings are made and the center of installation of the socket box is looked for. Drilling is done at medium speed.
The photo shows drilling drywall for two socket boxes. By the way, to install built-in switches on drywall, the same mounting boxes are used.
Installing a socket on drywall is easy
Let's go through the steps of installing a socket on drywall.
- Drill holes for the socket box;
- Lead the pre-laid cables into the drilled holes;
- Break out perforated holes in the socket boxes for cables;
- Install socket boxes in pre-drilled holes and route electrical cables into them;
- If you install two or more sockets, you need to place jumpers between the sockets;
- The end of the cable protruding from the box should not exceed 12 cm in length. Strip the insulation from the cable by 10 cm. Strip the ends of the cable cores by 5 mm;
- Connect the cable to the outlet terminals. Maintain the same wire color for all outlets in the room. We must connect the yellow wire to ground. We connect the phase and neutral conductors, for example, like this: the blue conductor to the right terminal of the socket, the brown conductor to the left terminal of the socket;
- Tighten the terminal screws securely and tighten them again;
- Unscrew the mounting screws in the socket boxes that are located along its edges;
- After connecting the wires, straighten them and insert the socket into the socket box. Insert the sockets so that the mounting screws fit into the holes on the socket frame. Turn the sockets horizontally and tighten the mounting screws;
- For additional fastening, tighten the screws of the spacer “mustache” of the socket. They will move apart and attach to the walls of the socket box;
- The installation of the socket is completed by installing a protective cover and decorative frame.
Installing a surface socket
As I already mentioned, overhead sockets are placed on drywall on bars pre-installed in the frame of the structure.
The electrical cable is routed from the top or bottom of the beam or through a hole in its middle. It is important to route the cable so that it is not damaged when attaching the socket to the beam.