One of the main advantages of drywall is its high plasticity: if you have the skill and necessary knowledge, you can make a structure of almost any shape from this material with your own hands.
Curvilinear plasterboard structures, such as oval shallow niches in the walls, arches or multi-tiered ceilings with rounded elements, look most advantageous and unusual in the interior. The main difficulty in the manufacture of these elements is the technology of bending plasterboard, and therefore in this article this issue will be covered in as much detail as possible.
Roller for bending drywall
Materials and tools
To cover curved surfaces with plasterboard we will need:
Devices for bending drywall strips
- Drywall . It is better to take not standard, 12 mm thick, but restoration plasterboard. Its thickness is 8 mm, making it bend much easier.
- Metal profiles for drywall.
- Fasteners (anchor bolts and self-tapping screws).
- Putty and other finishing materials.
Among the tools we should have:
- Hammer.
- Drywall screwdriver.
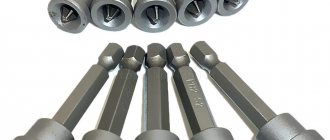
- Drywall stop bit (used to prevent damage to drywall when fastening).
- Needle roller for rolling strips of drywall.
- Knife or saw with fine teeth.
- Measuring tools.
Bit with limiter
Curved surface frame
The basis of any plasterboard structure is its frame. Wooden blocks of small thickness can be used for the frame, but most often the drywall is mounted on a special profile made of galvanized steel.
The sequence of installation of frame elements depends on what exactly we will do - a niche, an arch or a ceiling element. This article provides instructions for installing a plasterboard arch with your own hands, since it allows you to clearly demonstrate the features of covering non-rectilinear surfaces using a simple example.
Note!
In this case, the main thing is to understand the principle by which the design and cladding of curved elements is carried out.
If you can handle a fairly simple element, you will subsequently be able to sheathe even the most complex shaped structures.
We install the frame as follows:
- First, we attach the starting profile to the walls of the doorway . For fastening we use anchor bolts with metal and plastic sleeves.
- Then, from a segment of the starting profile, we make the arc part of the arch . To bend the starting profile, we make several cuts on it using metal scissors.
Profile cutting for a curved frame
Advice!
If the starting profile bends along the inner radius, then the cuts on its edges should have a triangular shape. For the outer radius, you can make straight cuts.
- We attach the two arc parts of the arch to the frame along the edges of the doorway (as shown in the photo).
Arc part of the arch
- To give our structure rigidity, we connect the arc parts with transverse sections of the profile. When connecting, it is necessary to ensure that the edges of the profile do not protrude beyond the plane of the arch.
The frame of our future structure is ready - it’s time to start covering it.
Covering the frame with curved plasterboard
Bending drywall is quite a difficult task, so it is better to sheathe straight sections first. To do this, we cut out sheets of drywall of the shape we need, apply it to the frame and fix it with self-tapping screws. This is where a drywall bit with a limiter comes in handy - it will not allow the excessive force of the screwdriver to break through the cardboard layer.
After all straight surfaces are sheathed, we begin to bend the drywall:
- First, we cut out a strip of drywall of the size we need. We process the edges of the strip with a special plane so that the end of our arch is as smooth as possible.
- Then we lay the strip of drywall on a clean, flat surface with the wrong side up and moisten it with water. You need to wet it sparingly - so that the moisture does not saturate the drywall through and through.
Rolling strips of drywall with a needle roller
- After the drywall is moistened, take a drywall roller and roll it over the entire surface of the strip. The points of the roller needles should pierce the cardboard layer and go several mm into the core of the sheet.
Advice!
To ensure the best possible bending, the sheet of drywall needs to be bent across, not lengthwise.
Also, you should not use moisture-resistant drywall, since it practically does not get wet and, as a result, bends poorly.
- After rolling the drywall with a roller, wait a few minutes for water to get into the punctures and be absorbed into the gypsum filler.
The drywall, which has become relatively elastic, is bent to the radius we need and fixed.
The prepared drywall needs to be bent and fixed
- As soon as the strip dries and takes the shape we need, we attach it to the bottom of the arch. At the same time, do not forget to use drywall bits, because curved drywall is damaged much more easily than flat one.
Alternative ways to bend drywall
What to do if you don’t have a needle roller at hand?
Experts offer several other ways to bend drywall:
Which is better: heated floors or radiators?
Warm floorBatteries
Attaching Curved Drywall
- Firstly, you can bend drywall over a fairly large radius without rolling it with a roller, using only moisturizing the backing layer .
As practice shows, with some skill you can bend a strip of drywall of almost any width in this way. The main thing is to ensure that moisture does not penetrate the drywall too deeply. - Secondly, drywall can be bent using an ordinary awl .
To do this, we apply many shallow punctures on the underside of the plasterboard sheet - exactly the same as the needles of a roller do. To prevent the punctures from being too deep, you can put a plastic stopper on the awl. - It is also possible not to bend the drywall, but to sheathe the curved surface with straight sections . However, in this case you will need a large amount of putty to align the cladding lines.
Sheathing the arc in straight sections
And yet it is much easier to use a special roller - fortunately, the price of this tool is quite affordable.
The construction of curved objects from plasterboard is a kind of “aerobatics” of finishing. To master this technology, you should carefully study all available video lessons and recommendations, and also practice on simple forms. But if you are diligent enough, you will definitely succeed!
source: //gipsokartonom.ru/podgotowka/instrumenti/320-igolchatyj-valik-dlya-gipsokartona
Plasterboard structures can be extremely complex and intricate in shape. To bend a sheet in the desired way, the easiest way is to wet it through the holes in the material so that it is saturated with water to its entire thickness and becomes soft.
What is a needle roller?
In order not to pierce holes with a needle or awl, you can use a special roller with spikes. By rolling a sheet of drywall under pressure, you can quickly make a large number of holes in it, located at an optimal distance from each other. Moisten should be applied from the edge of the sheet where the punctures are located. Water should come out of the holes slightly
Do not use a needle roller
, rolling it back and forth, as you do when painting a ceiling or applying wallpaper paste. You can only roll the sheet once in one direction!
How to choose an aeration needle roller
In general, a needle roller is a fairly simple device, but it is worth considering certain aspects of the pouring technology to select the right tool. Let's look at what you need to pay attention to when choosing.
The material from which it is made
Rollers are made from metal and wear-resistant plastic. Plastic rollers are more common due to their low cost. According to other characteristics, they are no worse than metal ones. However, when purchasing, you should ask the seller whether this roller is resistant to solvents.
Roller width
The width can vary from 20 to 60 centimeters. It is more convenient to work with a wide roller and the mixture rolls out faster. A narrow roller will be indispensable in hard-to-reach areas of the floor. Therefore, it is better to immediately purchase a pair of rollers of different widths. According to technology, floor rolling should be performed at least 3-4 times. The required number of rolling is determined individually.
Roller needle length
Most often you can find rollers with needles ranging from 1 to 3.5 centimeters in length. When choosing the length of the needles, you need to start from the thickness of the rolled composition you will be working with. The basic rule here is this: the length of the tenons should be greater than the thickness of the floor covering.
Rollers with long needles are usually equipped with a protective screen. This screen protects the already treated surface from splashes of fresh solution. It is not difficult to make a protective casing yourself.
You should also pay attention to the shape of the spikes. It can be cone-shaped or drop-shaped. The latter is less effective, so rollers with this shape of needles are not recommended for use.
Roller handle
The length of the handle affects the ease of working with the roller - the longer the handle, the better. Also inspect the handle for a mounting hole for the holder. If the roller is already offered complete with a holder, choose the one that is longer. It is more convenient to work with a long holder.
Arched plasterboard for curved structures
To create bent structures, it is best to take so-called arched sheets, which, in addition to gypsum, contain reinforcing fiberglass in the middle layer, which protects the sheet from fractures. The thickness of such a sheet is only 6.5 mm, and it is somewhat more expensive than ordinary drywall, but it can be bent without the risk of fracture.
It should be remembered that even ordinary drywall for bent structures should not be thicker than 9 mm. Of course, such a structure should not then bear any additional loads other than bending stresses.
What to do if there is no roller
If you are unable to purchase a needle roller, you can simply use a sharp knife that you use to cut plasterboard sheets. Carefully cut the cardboard from the side that will become the inside when bent, to a depth of no more than 3 millimeters. The smaller the bend radius, the more frequent the cuts should be. In this case, there is no need to moisten the sheet before bending.
If you need to make parts with a very small bending radius, then instead of using a knife, you need to cut the sheet with a hand cutter so that the remaining gypsum layer is no thicker than 3 millimeters. You can cut right down to the cardboard layer of the opposite side.
Of course, the sheet needs to be bent using special templates that specify the curvature and profile of the curved structure. After this, the cuts need to be filled with putty and wait until completely dry.
To dry bend, you need to have a well-developed intuition that will tell you how much force the sheet will withstand without breaking. In general, it is better to use the wet method.
Drywall allows you to create not only flat, even surfaces, but also intricately curved shapes. To do this, take sheets no thicker than 6 mm and bend the sheets wet or dry. The wet method is preferable, in which the material is perforated using a special needle roller; Water is poured into the resulting holes. After this, the material must be fixed to a template or directly at its permanent location and dried. If you cannot use a roller, you can simply cut or saw grooves in the sheet parallel to the bend line.
Removing wallpaper - what needs to be taken into account and prepared?
Plasterboard sheets (gypsum plasterboard, gypsum board) have a special structure. They are made from gypsum filler, which is pressed into place and covered with cardboard or very thick paper on both sides. Depending on the scope of its application, drywall is divided into different types. It can be fire- and moisture-resistant, intended for finishing ceiling surfaces or constructing partitions and wall cladding. Regardless of the type of gypsum board and the presence of special additives in it, the top layer of such products will be paper. This is something to definitely consider if you want to figure out how to remove old wallpaper from drywall.
Removing old wallpaper
The specific method for dismantling the old coating depends on what kind of wallpaper was glued to the gypsum board - paper, vinyl, washable.
To effectively remove plasterboard sheets from the old coating, you need to stock up on a simple tool in advance - a wide paint roller, a wallpaper tiger or a needle roller, narrow and wide spatulas, a sharp knife, as well as the following devices and materials - a water container, masking tape, a steamer or steam mop. Be sure to cover the room with newspapers or plastic wrap before starting the operation. Don't forget to turn off the power to your home and seal all electrical outlets in the room with masking tape.
If you plan to stick new wallpaper on gypsum boards, removing the old coating is a mandatory operation, even in cases where the previous products were installed perfectly - with knowledge of technology and on a perfectly flat surface. If you do not remove the old wallpaper in such a situation and stick new ones on top of them, believe me, there is no guarantee that the fresh coating will be without flaws.
Why do you need a needle roller for drywall (video)
source: //tvoyprorab.com/valik-igolchatiy
Such a widespread material as drywall allows you to obtain not only a perfectly flat surface, but also all kinds of bent elements with different bending radii. For these purposes, special arched plasterboard is used, which has a reduced thickness (6.5 mm) and a fiberglass reinforcing layer. Having in the tool kit a needle
roller for plasterboard, bent surfaces can be made using ceiling and even wall plasterboard.
Of course, the minimum bend radius increases when bending thick material, but usually such small bends are quite rare.
Bending drywall
The gypsum boards themselves are rigid and not prone to bending. Attempts to bend the sheet result in the internal gypsum filler cracking and the paper layer tearing, rendering the material unusable.
To give the plasterboard the necessary flexibility, it must be wetted. To do this, the sheet is moistened with water until the paper base and the gypsum layer are wet. Paper, especially moisture-resistant drywall (green), gets wet very hard.
Before using a needle roller, you can place a damp cloth on a sheet of drywall, in which case the perforation process will be easier.
To facilitate the penetration of moisture into the inner layers, a number of holes must be placed on the surface of the paper. But piercing a sheet with an area of 0.5 m2 with an awl in increments of 1 - 2 cm is a thankless task. roller was invented for.
.
The design of the needle roller is similar to the usual one used for painting. On the surface there are steel pointed needles ranging in length from 0.5 cm to several centimeters.
By rolling a roller over the surface of the drywall, the paper base is perforated, through which moisture enters the gypsum layer. The force of pressing on the roller can produce holes of varying depths. The required force can be determined experimentally. The work will be easier if you first moisten the paper base with water by placing a damp cloth on the plasterboard sheet for a few minutes, and after piercing, moisten it again more thoroughly.
After the sheet has been wet to the desired depth, you can try to bend it. A damp curved sheet cannot be fixed immediately. Most likely, it will break at the points where it is fastened with self-tapping screws under its own weight. You must first make a template from scrap materials and attach a curved sheet to it, which you will leave there until it dries completely. The risk of defects when using dried material will be small, even if the curvature of the template is slightly different from the required one.
How to remove paper products, and why do we need an iron?
Experts say that the easiest way to dismantle inexpensive wallpaper made from paper. True, this statement is true only when the previous coating was glued to a plastered (putty) surface. If the material was mounted directly on gypsum board, the problem of removing it may be unsolvable - along with the old wallpaper, the top layers of plasterboard, which, as we have already said, are made of ordinary cardboard, will also come off. The procedure for tearing off paper materials is as follows:
- Wet the wallpaper with a damp cloth. The main thing here is not to overdo it and not to fill the wall so that pieces of gypsum board begin to fall off along with the old coating.
- After 30–40 minutes, using a spatula, carefully pry up the pieces of peeling material and carefully remove the wallpaper. In theory, they should come off without any problems.
- If the paper covering does not want to peel off from the wall, take a steamer and use it on stubborn items. After using such a device, the surface of the drywall will be guaranteed to be freed.
Moistening the wallpaper before removing
Some craftsmen use a regular iron instead of a steamer. You need to plug it in for a couple of minutes, heat it up, and then simply iron the walls. After this, the products will come off easily. Note that the described methods are also suitable for removing photo wallpaper from gypsum board.
Various types of rollers
On sale you can find several types of needle rollers, which are used for various types of work:
- for applying perforations to drywall;
- for leveling self-leveling floors.
It is very easy to distinguish between these types. The roller for self-leveling floor has a larger number of needles, which also have blunt ends. This roller is used to smooth the surfaces of self-leveling floors to eliminate air bubbles and obtain a smooth surface. Another difference is the presence of a protective casing to eliminate splashing of the cement mixture. Such rollers cannot be used for working with plasterboard.
Choosing a cassette screwdriver for working with drywall
The necessary device has needles on the surface, usually fixed in a spiral at a distance of about one or two centimeters, since at a shorter distance the paper layer may rupture. The ends of the needles are sharp.
The rollers have a bracket to which a handle of various lengths is attached. The optimal length of the handle is 50 cm. High-quality and more expensive rollers have a metal bracket and a wooden or metal handle. But if you are planning a small amount of work, then you can take a cheaper tool - with plastic parts. Their service life is short, but it should be enough for home renovation work.
Features of choice
The choice of roller is an important stage in the preparatory work for laying the self-leveling floor. These tools differ in many ways that should be taken into account when choosing:
- According to the material, the tool can be metal or plastic. A metal device is more difficult to bend or break.
- By width. This parameter varies between 20-60 cm. At the same time, a wider needle roller for self-leveling flooring is better suited for rolling large areas. However, in some cases, narrow models have to be used to roll hard-to-reach small areas of the floor where there is no access for a wide tool. Without such narrow tools, it is almost impossible to roll hard-to-reach places, since wide rollers cannot be adapted to work in such conditions. If you are going to remove wallpaper, then here you can choose medium or wide tools. In order to bend drywall, you can use a product of any width.
- Along the length of the spikes that cover the surface of the roller. Basically, these devices have a play length in the range of 1-3.5 cm. If the length of the needle is not of fundamental importance for removing wallpaper with your own hands, then when working with self-leveling floors, you should pay attention to this parameter. The choice of length depends on the desired thickness of the self-leveling floor. A thicker layer of mixture will require longer spikes. It is advisable to select this parameter so that the length of the spikes is slightly greater than the thickness of the self-leveling coating. Therefore, if you need to roll a thin layer of mixture no more than 5 mm thick, then you should choose a needle roller for self-leveling flooring with the shortest needles. At the same time, choosing thin studs will eliminate even the smallest air bubbles. If you plan to work with gypsum or cement mixtures, then it is better to choose tools with a maximum needle length. With their help you can easily bend drywall.
- By type of handle. The tool can have either a regular or telescopic handle. The second option is more preferable, since the telescopic handle has an adjustable length. It’s better to choose it, because if you work with a long handle, you get tired significantly less. Using such a tool, you can easily bend drywall or roll a self-leveling floor.
When choosing a roller for drywall, you need to ask the seller how strong the handle of the tool is and whether it is easy to bend. In addition, you should find out whether it is resistant to aggressive environments, such as solvent. It is advisable to have a special casing to protect the tool from splashes.
If there is no roller
A small sheet can be bent without using a roller. If the radius of curvature is large, you can simply wet the paper base by covering it with a wet cloth for a while. Paper on moisture-resistant drywall gets wet very poorly, so this method is only applicable for ordinary sheets. You can use an awl to pierce the paper. To ensure that the holes are the same depth, you need to put a limiter made of a tube of a suitable diameter on the awl or tape a limiter made of wood or plastic with electrical tape.
Very often, curved elements are made not from a bent sheet, but from a cut sheet. To do this, notches are made on the sheet to the depth of the paper layer. The distance between the notches should be the same as the cuts on the profile of the supporting frame, but not less than 2 centimeters. Otherwise, when screwing in the screws, the gypsum layer will crack and fall out. With this method, the surface will not be uniformly curved, but stepped. All irregularities will then need to be smoothed out with putty. To obtain the most uniform bending, the notches must be strictly parallel to each other.
Tips and Cautions
Almost nowhere does it say that only the side of the sheet that will be inside the circle needs to be pierced and moistened with water. Wet paper retains its strength only in compression, and when stretched it instantly breaks.
When using a needle roller, only the inside of the sheet needs to be processed.
When rolling the surface of a plasterboard sheet with a needle roller, you need to move the roller only in one direction, without passing over the same place twice. If the holes are close together, the paper may tear.
The permissible bending radii for different thicknesses of drywall are:
- 100 cm with a thickness of 12.5 mm;
- 50 cm with a thickness of 9.5 mm.
It is problematic to make smaller radii; you will have to either look for arched plasterboard, or trim in the form of parallel strips.
source: //mrgipsokarton.ru/instrumenty/igolchatyj-valik
Currently, plasterboard is widely used in renovation work of apartments and houses. With its help, unique items for decoration are produced, and housing is also improved beyond recognition. To create beautiful elements, use a drywall roller. Using this tool, a sheet of drywall is bent into any shape and painted in different shades with a soft transition.
Needle roller
Needle roller for drywall is produced by different companies, it can be of different models:
- Model FIT 15280: this roller is manufactured in China;
- weight 410 g;
- roller length 58 cm;
- handle length 50 cm;
- roller width 17 cm;
- the length of the roller itself is 15 cm;
- product radius 2.25 cm;
- the roller is made of plastic;
- the handle is made of wood;
- steel needles in the roller;
- the roller holder is made of steel;
- the product is stored in a plastic case;
- The price of the product is 650 rubles.
- made in China;
- This product is manufactured in China;
Needle
This tool is actually quite scary to look at, but also incredibly useful. It is used in construction work to carry out the following tasks:
Scope of use
- Removing wallpaper from the wall . Well, here everything is completely clear: a “terrible” spiked device was used to tear apart the pre-moistened paper covering, and it came away from the wall;
Removing wallpaper using a needle roller
- Creating a self-leveling floor . The spikes penetrating into the created layer help release the air buried in its thickness, which makes the coating better;
"Rolling" self-leveling floor
- Creating curly forms from gypsum plasterboard . But I will analyze this further in detail.
Drywall bending
Multi-level ceilings, niches and arches are created from gypsum boards. But, stop! The sheets themselves have an absolutely even, straight shape, so how can you bend them into an arched structure with your own hands? This is where the needle roller comes into play.
But before you get started, check out the table showing the possible bending angle for plasterboard sheets of various thicknesses:
| GKL thickness, mm | Minimum possible bending radius, mm |
| 6,5 | 300 |
| 8 | 380 |
| 9,5 | 500 |
| 12,6 | 1000 |
Then the instructions that I followed looked like this:
- First of all, I wet the side of the sheet on which the bend will be made;
Do not allow water to get on the opposite side of the gypsum board, since the product, having then lost its rigidity on both sides, will simply break when you try to bend it.
- Then I went over the wet part of the section with a needle roller . At this moment, both the outer cardboard and the inner gypsum layer rupture and weaken; the previously applied liquid penetrates inside and softens the structure of the product;
The principle of the action of a needle roller on drywall
- And only now, finally, I bent the sheet , checking the above table.
Nuances of choice
What should you pay attention to when buying a needle roller? There are actually not very many particularly important criteria, but it is still worth listing them:
- Material . First of all, pay attention to what the roller holder is made of: plastic or metal? The price of the first option, of course, is much lower, but the second is more reliable in operation. I most often found wooden handles; they fit comfortably in the hand and have good strength. The roller itself is usually made of plastic and studded with steel needles;
If you need to make, for example, only one arch, then you should not overpay for a tool with a metal holder, but if you plan to make money from this, I recommend forking out for steel. As a result, you will more than return the money invested in such a purchase.
- Needle length . The more, the easier it will be to subsequently bend the plasterboard sheet, so do not hesitate to choose the most terrible-looking “tool”;
- Width . Here, be guided only by your preference, there is no single advice.
Shopping
I came across the following samples in construction stores:
- Model "FIT 15280":
| Parameter | Meaning |
| Manufacturer country | China |
| Weight | 410 g |
| Length of the whole product | 580 mm |
| Handle length | 500 mm |
| Product width | 170 mm |
| Working length | 150 mm |
| Working part diameter | 45 mm |
| Roller material | Plastic |
| Pen | Wooden |
| Needles | Steel |
| Roller holder material | Steel |
| Equipment | Plastic case for safe storage of the tool |
| Price | 650 rubles |
Sample model "FIT 15280"
- Model "MATRIX MASTER":
| Parameter | Meaning |
| Manufacturer country | Taiwan |
| Weight | 530 g |
| Length of the whole product | 640 mm |
| Handle length | 530 mm |
| Working length | 150 mm |
| Working part diameter | 55 mm |
| Roller material | Plastic |
| Pen | Wooden |
| Needles | Steel |
| Roller holder material | Steel |
| Price | 570 rubles |
Sample model "MATRIX MASTER"
- Model "STAYER":
| Parameter | Meaning |
| Manufacturer country | China |
| Weight | 460 g |
| Length of the whole product | 560 mm |
| Handle length | 500 mm |
| Product width | 160 mm |
| Roller length | 150 mm |
| Roller diameter | 32 mm |
| Roller material | Plastic |
| Handle material | Tree |
| Needle material | Steel |
| Roller holder material | Steel |
| Price | 580 rubles |
Sample model "STAYER"
Application of a roller
Drywall is used to make not only an ideal surface, but also curved shapes.
To do this, make holes on a sheet of material and wet them with water. After which, the wet workpiece is placed on a special form and left to dry. For such work, a needle roller is used. When it passes over a sheet, many small holes from steel needles remain. The sheet should be rolled using a little force.
You should not roll the roller back and forth several times, preferably once, for the required number of holes. Then the sheet of drywall needs to be well moistened with water so that it protrudes from each hole.
Removing vinyl coverings - you have to try
Vinyl products, with a competent approach to the operation, can also be removed without noticeable difficulties. But in this case, you still need to suffer a little longer. Wetting the vinyl wallpaper alone will not be enough to remove it from the plasterboard sheets. You will have to treat the surface with water at least 5-7 times, taking breaks between individual approaches for 10-15 minutes.
Removing Vinyl Covering
After this preparation, try to peel off the vinyl using a putty knife. In many cases, the operation will be successful - the coating will come off in one piece, leaving behind an intact plasterboard surface. But sometimes this technique does not help. Then use another method:
- Using a needle roller (or better yet, a special “tiger” for wallpaper), scratch the vinyl products over the entire finished surface.
- Work intensively with the steamer (note that some pros say that you can do without this operation).
- Carefully pull off the old coating. At this stage it is important not to rush. Wallpaper can stick to the wall quite tightly. If you pull them too actively, there is a high risk that the surface of the gypsum plaster board itself will begin to peel off after the material being removed.
DIY needle roller
You can make a drywall roller yourself. There is nothing complicated about this:
- You need to take a board up to 2 cm thick, and treat its width up to 18 cm to remove burrs.
- On the edge of the board, along the entire width, you need to apply a grid of 1 cm by 1 cm with a pencil, it will be approximately 7 cm high and 15 cm wide.
- Holes smaller than 1 diameter should be made on the resulting crosses.
- After this, using a screwdriver or screwdriver, screw a regular drywall screw into each hole (it has a needle-like tip).
- To prevent the board from coming apart, you should screw in the screws carefully and not “tighten” them too much.
- Upon completion of the work, the almost half-sharp ends of the screws (tenons) will be visible on the back side of the board.
- Next, take a 15x15 wooden beam. 3 holes are drilled in it with a 4 mm drill, all the way through.
- Long screws will be required. When they enter the holes of the beam, they should look out 1.5 cm.
- In order for the screws to be longer than the beam, you need to use a 10 drill to deepen the holes in the beam by 1.5 cm.
- The finished timber, with inserted screws, should be attached to the board, from the side of the screw heads. This will be the handle.
- In order to prevent the screws from getting on the caps, you should lift the beam and look where the screws will go in (the places are marked with red dots in the diagram).
- After attaching the handle to the base, the board should be cut slightly below the working surface.
The needle base is ready for use on the surface of drywall.
Terms of use
The needle roller has a wide range of applications. The tool is used when working with concrete pavement, gypsum and cement composition, and polymer self-leveling floors. Its main task is to remove air from the solution and level the fill.
How to fill a self-leveling floor with your own hands. Instructions for pouring the Horizon Universal leveler.
After pouring the mixture, you need to walk over the surface with a needle roller to prevent the formation of voids in the screed. The movements must be intense. It is recommended to make passes carefully without skipping. To do this, you should focus on the working part of the tool and the edge of the processed strip.
When working with concrete or self-leveling floors, the base is first leveled with a spatula. Next, the roller is immersed in the screed and rolled for 15-20 minutes without removing it from the solution. There is no need to put excessive pressure on the tool. For comfortable walking on the surface filled with the mixture, you should wear special sandals. This will prevent the floor from deforming.
To efficiently remove air bubbles from the working solution, it is necessary to make at least 3 passes over the entire area. After completing the work, the roller is washed in water and dried naturally.
Soft roller for painting drywall
Rollers for painting drywall come in a variety of pile sizes, lengths and widths. Using a paint roller has a number of advantages:
- Speed. If a wide roller is installed on the roller, it can be used to paint a large square of plasterboard covering in a relatively short time;
- Ease. When working with a roller, no force is required. They are easy to work with;
- Economy. When painting a plasterboard surface with a roller, the paint does not splash in different directions, it is absorbed by the pile, and then evenly distributed over the surface.
But, before buying a roller for painting the surface, you need to understand the length of the pile. Each type of pile is applicable to a specific paint:
- Gloss paint – requires a 4mm nap roller.
- Matte type of paint - you need a roller with a pile of 4 to 8 mm.
- Textured paint – a roller with a long pile of 8 mm or more is required.
The rollers also differ by manufacturer:
| Brand/specifications | Manufacturer country | Pile length, mm | Roller length, mm | Roller radius, mm | Pile base | Pen | Price, rub. |
| ROS 02581 | Russia | 6 | 100 | 31 | polyacrylic | plastic | 90 |
| BISON EXPERT | China | 9 | 180 | 24 | velours | plastic | 236 |
| BISON MOHAIR | China | 4 | 180 | 24 | wool | plastic | 220 |
By choosing a suitable roller, the plasterboard surface can be perfectly painted in a single color scheme.
How to choose a roller with needles
There is a large selection of needle rollers available in stores and on many online sites. The choice of this tool must be approached with all responsibility. You can even find magnetic needle rollers used in the health and beauty field. For example, a magnetic roller with many needles can be used for massage procedures. This device was created specifically for massage, and not for construction work. When choosing a needle roller for repair and finishing work, it is important to consider the following nuances:
- What material is the instrument made of? The material greatly affects the life of the device. Experts recommend choosing a metal tool, which is more durable and strong, while a plastic one can be used for much less time. Metal models weigh more than plastic products, and plastic tools are much cheaper.
In terms of rolling quality, plastic devices are practically no different from metal models. But when purchasing a roller with PVC needles, it is important to make sure that this material can withstand the influence of solvents. Metal is not affected by solvents, and metal needles penetrate deeper into different materials.
- Roller width. The roller with needles is made in different widths - 150-600 mm. A narrow tool is very convenient for rolling hard-to-reach, narrow areas, and to process large areas, it is advisable to choose wide rollers, which greatly speed up the work process. To process drywall, you can choose any width, and for removing old wallpaper, the best option is a width of 400 millimeters. Wide models have poor maneuverability and cannot properly handle corners. And the narrow rollers are very mobile and maneuverable; they ideally roll corners, small rooms, and rooms with complex layouts.
- Needle length. The roller can have needles ranging from 8 to 35 millimeters in length. It is very important to pay attention to the length of the needles, which is important for high-quality floor treatment. If the screed is poured with a large thickness, then the needles should be long (slightly longer than the thickness of the screed), due to which they will penetrate deeply into the composition and ensure the creation of high-quality, wear-resistant and durable self-leveling floors. If the needles are too short, the cylindrical roller will come into contact with the grout, displacing it and making the floors uneven.
When you need to remove old wallpaper, the length of the needles practically does not matter; you can choose any length. When bending sheets of drywall, it is advisable to choose the maximum length of needles, thanks to which the bending process will be quick and easy.
- Needle shape Needles come in different shapes - spherical, conical and drop-shaped. Experts say that droplet-shaped needles are the least effective; sharp needles are used for the most viscous compounds, such as those based on epoxy resin. These mixtures must be thoroughly pierced to remove air bubbles. For liquid bulk compositions, spikes with a spherical shape or sharp needles are suitable.
- Roller handle. To make it as convenient as possible to process the floor, it is better to choose a long handle that will allow you to comfortably level the surface. Before purchasing a product, it is important to carefully inspect the handle so that it has a special slot for mounting the holder. Sometimes rollers are sold with ready-made holders, in which case it is better to choose the model with a long holder.
Some models have a telescopic handle for the convenience of a specialist; it allows you to increase or decrease the length of the handle if necessary. Handles are made from wood, metal and plastic. When choosing a particular model, you need to make sure that it is strong enough, does not bend, and is resistant to aggressive substances such as solvents. The best option is for the handle to have a special protective cover that provides protection against splashes.
- Manufacturer. The stores offer needle rollers from various manufacturers. The best option is to purchase a high-quality, certified product from a reputable manufacturer. The most popular manufacturers producing durable and high-quality products are the following, “Comfort”, “Sibertech”, “ZUBR”, “STAYER” - these are domestic companies. And the most popular foreign manufacturers are “MATRIX”, “Janser”, “Corte”, “Bauma”, “888”. When choosing a needle roller from a particular company, you must carefully read the description, characteristics and quality certificate of the product.
Decorative putty
Putty rollers are very widely represented on the market. They vary in design, width, and material. Plasterboard putty
roller has many advantages:
- Saving. It takes much less time to cover the surface with putty with a roller than working with a spatula.
- Working with a curved roller is easy; no extra force is required.
- When working with a patterned roller, a beautiful patterned relief is created. Which, after drying, only requires painting.
But there are also disadvantages:
- For decorative relief, special putty solutions should be used.
- There is an overexpenditure of material. To apply putty with a roller, a flat surface of drywall is required. To do this, all fasteners and joints are sealed with ordinary putty.
- The roller does not fit into the corner, so the design should be finalized with a regular spatula.
With all the pros and cons, the use of rollers when working with drywall and its surface after installation is irreplaceable. This saves not only time, but also with the help of these tools you can create unique decorative elements that have several shades of the same color. The video shows the process of puttingtying drywall with a roller.
Design
Typically, a toothed roller consists of a base covered with a needle cover and a working handle. In this case, the handle can be made of metal, plastic or wood. It is believed that metal is heavier, therefore, it is mainly used for working with large volumes. A metal tool is more durable and easier to bend drywall with. It is also good for removing wallpaper with your own hands.
Tools from many manufacturers are equipped with a universal handle, which provides for the installation of a telescopic extension. With this device there are no obstacles when working with self-leveling coatings or drywall in any conditions.
Liquid wallpaper
On the building materials market there are 3 offers of liquid wallpaper and a huge number of varieties of rollers. Wallpaper can be: with the addition of cotton, silk and cellulose.
The main advantage of such a coating is environmental friendliness, and the main disadvantage is that too humid air will destroy the structure of the coating.
Following the instructions, gluing liquid wallpaper onto drywall is easy. Before applying wallpaper to the surface of drywall, you should putty the fasteners and bring the entire surface to perfection. Next, using a regular roller, the entire area is covered with primer. You need to wait until it dries completely.
Brand/characteristics Country of origin Pile length, mm Roller length, mm Roller radius, mm Pile base Handle Price, RUR 02581 Russia 610031 polyacrylic plastic 90 BISON EXPERT China 918024 velor plastic 236 BISON MOHAIR China 418024 wool plastic 220
By choosing a suitable roller, the plasterboard surface can be perfectly painted in a single color scheme.
