Repair of floor coverings » Varnishing rollers
Varnishing a wooden floor covering is a rather labor-intensive process. It requires the use of special chemicals and equipment. The main tools for working with parquet at this stage are brushes, spatulas and rollers. The latter are most often used for manual application of varnish to any type of parquet or solid board. It is believed that the quality of the coating ultimately depends on whether the tool and composition for varnishing were chosen correctly. This has a basis, but there are other factors that affect the durability of the varnish coating. For ideal varnishing, the base must be completely dust-free. Naturally, it is impossible to achieve sterile conditions in everyday life. Therefore, a small amount of foreign inclusions is considered normal and does not affect the quality of the protective layer. As for the technique of applying varnish to parquet and boards, the equipment decides a lot here.
Choosing the right roller
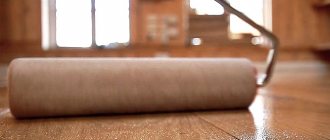
For varnishing parquet, two types of rollers are used: with short or long pile. The differences in the length of the pile are not accidental, since each type of tool performs its own tasks: short-pile ones are needed for working with water-based varnishes, long-pile ones are needed for varnishes containing solvents.
Moreover, there are no rollers that are suitable for working with any type of paint and varnish materials. Therefore, tools must be selected based on the type of varnish.
If you use a short-pile roller correctly (that is, do not lift it while varnishing and do not press it too hard), the consumption of paint material will be from 90 to 100 grams. per square of coverage. Rollers with long pile are more wasteful: from 100 to 120 g. paint material per square meter.
The rollers offered on the market also differ in the so-called “coat” (the working surface of the tool). For parquet work, “coats” made from the following materials are used:
- polyamide (perlon or nylon);
- polyester (faux fur or foam rubber);
- natural material (animal fur, felt, velor or mohair).
When working with parquet, rollers with a “coat” of polyamide or fur (both natural and artificial) are usually used. When it comes to tools with short pile, felt or velor is most often used.
A short-nap roller is more economical when used correctly
The key characteristic of the roller is the ability of the “coat” material to withstand the effects of certain chemicals. For example, foam rubber is only resistant to water-based varnishes. But if foam rubber comes into contact with a solvent, the destruction of the material begins. For solvent, a roller based on faux fur is better suited.
Another indicator that you should pay attention to is the size of the tool. A large roller is not as convenient as a small one, as it makes it more difficult to create an even and dense coating. When choosing a size, it is better to give preference to the golden mean: a medium-sized tool is the optimal solution.
Applying varnish
Applying varnish
After careful processing, it’s time to proceed to the main stage - applying varnish to the floor. To do this, take into account the following:
- using a respirator is important in any case, even when using water-based varnish;
- the temperature in the room where the work is being carried out should not be lower than plus 12 or higher than 25. Under such conditions, the varnish dries quickly and lays down as it should;
- The varnish can be applied with a roller or brush. But it is best to use a special varnish brush, since a roller may not be suitable for some varnishes. The width of the brush should be about 10 centimeters, with soft hairs. After use, brushes should be kept soaked in varnish thinner to prevent them from becoming useless before the first coat has dried;
- Don’t forget to keep a rag nearby to clean the boards from dust;
It is important to think about how you will apply the varnish in order to be able to leave the room without hindrance. Otherwise, you will have to step on the freshly painted floor and ruin the work done. Usually the floor is varnished from the wall opposite the doors and towards them.
- if you did not use primer impregnation, then the first layer of varnish should be diluted in a ratio of 1 part varnish to 3 parts solvent to 1 part varnish to 1 part solvent;
- With a brush, the varnish should be applied with movements along the entire length of the board so as to touch the adjacent layer. If you choose a roller, you should apply the varnish with crosswise movements, and then level the resulting layer with lengthwise movements. The first layer does not need to be made thick, otherwise the floor will look sloppy later;
- It is best to paint the floor without shoes or socks. Shoes bring dust with them and leave marks on the floor that will have to be thoroughly washed each time before applying varnish;
- Each layer should be applied only after the previous one has completely dried. Depending on the varnish you choose, drying time may vary: from several hours to a whole day;
- Softwood floors tend to become lumpy after the first layers dry. To restore the smoothness of the floor, you should treat the floor with fine-grained sandpaper. This treatment will also remove unwanted errors such as bubbles trapped in hairspray and dust. The scratches remaining after sanding will disappear under a new layer of varnish, so there is no need to sand the last layer. After treatment, be sure to clean the floor from dust with a wet cloth;
- Depending on the type of wood, a different number of layers of varnish are applied. So, soft wood requires three layers of varnish. Three layers are also necessary in high traffic areas. In other cases, two layers of varnish are sufficient.
Surface varnishing
When working with a roller, you need to take into account the peculiarities of the reaction of the pile to the process of operation. The longer the pile, the more it deforms when applying varnish to the surface being treated. The main changes in the pile: it bends, bald spots appear. The consequence of this is a decrease in the quality of the coating, the occurrence of irregularities and unevenness in the applied layer. To prevent such situations, it is better to use a long-haired tool with a reinforced “fur coat”. Such equipment costs more, but the quality of varnishing, subject to technology, compensates for the high price tag.
Rollers with long piles can cause all sorts of unevenness on the varnished object.
When varnishing a wooden surface, the roller should be positioned perpendicular to the hand. The varnish is applied across and leveled along. Moreover, each action is a movement of the tool by ¾ of its width. Uniform coverage can be achieved if the movements are smooth and back-and-forth.
High-quality work implies the absence of droplets and all kinds of defects on the coating, such as bubbles or craters. The coating should be dense and durable, and the tones should be uniform.
Nuances of correct varnishing
Before directly varnishing the floors, you will need to carry out a set of preparatory work, neglect of which destroys the very essence of the actions aimed at varnishing a wooden floor.
Initial preparation of the treated area
Before painting a wooden floor with varnish, a number of preparatory measures should be taken:
- Extracted fibers and large hangnails should be removed.
- You need to level the screws and nails with the floor - if they stick out, they will ruin the sandpaper that will be needed later.
- Recesses from nail heads should be masked with wood putty of the appropriate tone. You can mix the putty with your own hands: combine wood glue (or purchased varnish) with fine-grained sawdust. There is no point in overdoing the putty - it is enough to achieve the desired density. It is better to leave the floor until completely dry.
- If the wood was previously covered with a protective layer of wax, before covering the floor with a primer, it will need to be washed with a special solution.
- Resin from wood also needs to be removed (conifers are full of it). A rag soaked in gasoline will help you cope with this.
Once all instructions have been followed, the wood is ready for sanding.
In the video: varnishing the floor.
Surface priming and varnishing
After sanding, there is a stage of priming and varnishing the floor, which includes the following:
- When working with paints and varnishes, you must use protective equipment; prepare a respirator, protective suit and gloves. A clean cloth is useful for cleaning up dust.
- The optimal temperature is 10-25°C. You should maintain air fluctuations in the room (do not close all windows), but do not create a draft;
- Provide escape routes (for example, flights of stairs are covered by a step);
- It is recommended to test the new solution in an area hidden from view: see how the board reacts to the mixture.
- How to properly varnish a floor - it is applied evenly only to the primed surface.
- You can use nitro varnish. Finishing varnish can also be used for this purpose, having previously diluted it by 1/3 with the main solvent;
You cannot prime all tree species with one type of primer: oak darkens from polyurethane mixtures (it needs a primer with interfering qualities), beech sticks together from water-based mixtures.
- Some breeds resist the hardening process of the paint mixture. Essential oils and resins are neutralized with a cut-off primer (this is their key function);
- The directional vector is along the fibers of the board. A suitable brush is 100 mm, 10-50 mm thick.
- After the primer has dried, it’s time to manipulate the layer-by-layer application of varnish.
- Before starting work, mix the varnish, leave it for a while until the air bubbles disappear;
- The working tool is a similar priming brush or roller. Use a brush to make arched movements, crossing each next strip with the previous one. Use a roller to work crosswise: pour the material across the floorboards and spread it lengthwise with the roller. The stripes of the valiva should also intersect - by 1/3-1/4 of its length;
- Do not cover the floor with excess mortar - excess looks unsightly;
Related article: 4 effective methods for removing varnish from furniture
- After applying the base layer, there is no need to monitor the wood; it is left to dry. The situation is similar with each new layer;
- Sand all layers separately (except for the finishing layer), then the pattern will be rich and uniform (with your own hands using 220-400 sandpaper). An alternative is to carefully practice the grinding technique, but such actions will require more concentration;
- Complete drying will occur after 7 days. The surface is ready for use.
How to varnish wooden floors (2 videos)
Different types of floor varnish (28 photos)
Comparison of different types of rollers
Optimal selection of roller is one of the main factors determining the quality of varnishing. Often the choice is between polyamide and polyester based equipment.
There are the following arguments in favor of polyamide:
- Polyester-based rollers have a much faster decline in performance compared to equipment with a “coat” made of polyamide. In particular, this is manifested by a reduction in the volume of varnish applied, which means lower productivity per square meter of surface treated. This also means that polyester tools need to be replaced more often.
- The minimum thickness of the dried varnish layer should not be below 80 microns. This indicator can be obtained if the material application density is at least 300 g. per square meter. At the same time, polyester-based rollers allow the density of one layer to be up to 100 g. per square meter, while a polyamide tool is about 120 g.
Please note: a good indicator of the spreadability of the paint and varnish material is an important factor ensuring a high-quality result. If too little varnish is applied, the so-called orange peel, sagging, and uneven glossy effect may appear on the surface.
Thus, these factors allow us to conclude that polyamide tools have higher performance: their use is more justified both for financial reasons and from the point of view of high-quality work.
Preferred paint material
A professional always knows exactly which varnish is best to coat a wooden floor. It will take into account the frequency of movement on the coating, temperature and humidity indicators (daily and permissible critical figures), wood type, aesthetic component (gloss or dullness) and other factors. It is impossible to comprehend the intricacies of the matter after familiarizing yourself with the theoretical material; knowledge is acquired with experience, in this regard, it is advisable to cite only the key points:
- When choosing a varnish for floors in the kitchen, bathroom (rooms with increased moisture accumulation), you should pay attention to water-resistant mixtures - polyurethane, alkyd-urethane or pure urethane.
- When varnishing floors in living rooms, including children's rooms, the main factor of choice is environmental friendliness. When choosing a varnish in a store, look for the EN3 marking on the packaging. Often, the optimal choice is a polyurethane solution with a short hardening time (fewer toxins will evaporate in a short period of time).
- Not only polyurethane, but also epoxy mixtures are suitable for floors with high mechanical load and abrasive effects (in corridors, on wooden steps).
- Urethane varnishes are endowed with anti-slip properties, so there is no need to think about what kind of varnish to coat the stairwells with - the mixtures are ideal for the porch in front of the house, which is often a dangerous place in icy conditions.
- It is advisable to choose varnishes of a urethane composition (pure and with an admixture of alkyd) to cover the country floor with varnish, where the house is not heated in winter. The composition is resistant to moisture, increased plasticity will prevent deformation due to thermal expansion of the wood.
Related article: Features of varnishing parquet with your own hands
(2 ratings, average 4.5 out of 5)
