Do-it-yourself imitation stone from plaster: photos and videos
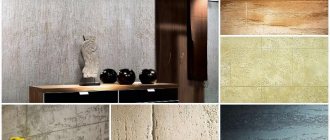
A “stone” wall can be imitated with plaster.
The method consists of creating a special texture of the coating, its colors, and squeezing out the relief. Imitation of stone for interior decoration is carried out using any composition - concrete, gypsum, lime, clay plasters. Both special mortar compositions (branded plaster mixtures), which have the most successful combination of ingredients, and ordinary cheap putties are used.
Techniques for creating plasters in the form of stone are divided according to the depth of elaboration of the pattern.
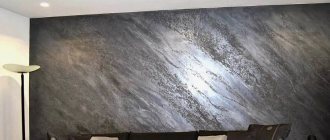
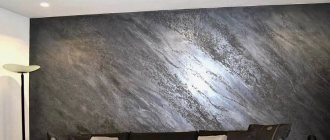
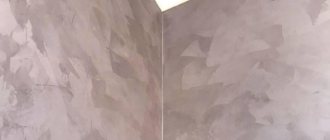
Smooth plaster, imitation of natural stone - marble, granite, polished stone slab (for example, Venetian plaster). Such coatings are made as smooth as possible, covered with a wax composition, and polished. The wall turns out perfectly smooth, glossy or semi-matte.
The pattern is obtained by mixing differently colored plaster solutions or painting the surface.
Textured.
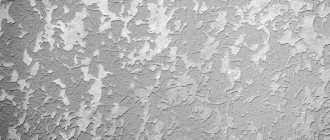
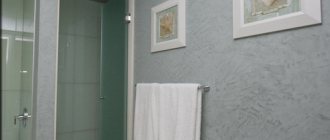
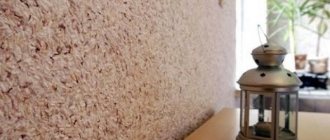
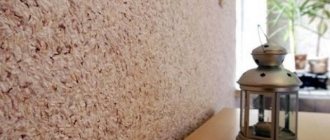
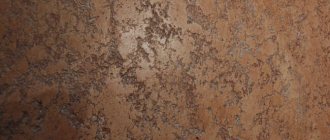
The walls are made as if from large solid stone (limestone, sandstone, etc.). The plaster has a pleasant, rough surface, similar to stone. Imitating stone with your own hands using this technique is the most accessible, since the work is simple and the effect is easily achievable.
Textured “stone” plasters come with a fine pattern and are quite convex. The nature of the surface depends on what material is ultimately desired.
Flat-relief.
Plaster with a stone texture can be designed like stonework. In this case, the development of seams may not be very deep, indicated by a small groove.
Flat-relief plasters are more suitable for simulating processed stone, stone blocks, and bricks. There are no deep grooves or depressions on such a wall; it is flat.
Creating such a coating with your own hands is a little more difficult, since the ability to draw believable masonry is important. But it’s not difficult to imitate a wall made of even blocks. Imitation of stone on a wall in the form of three-dimensional masonry, 3D plaster
More difficult to implement by an amateur: it requires the application of significant volumes of solution and layer-by-layer painting.
Imitation of stone on the wall in the form of three-dimensional masonry, 3D plaster. More difficult to implement by an amateur: it requires the application of significant volumes of solution and layer-by-layer painting.
It is easier to make three-dimensional plaster with your own hands if you use special molds (impressions) that allow a worker who is not inclined to draw to obtain a believable drawing. But you have to buy prints, which leads to additional costs.
Plastering work requires knowledge, backed up by skill and experience. However, a beginner can learn simple techniques to achieve success. At least when renovating your own home.
General information
It would seem that each building material has its own purpose, so tiles should be glued with glue, and walls should be leveled with plaster and nothing else. However, tile adhesive even has some advantages over conventional plaster, which we will discuss below.
In addition, many home craftsmen have successful experience in decorating walls with their own hands. But, at the same time, it cannot be said unequivocally that this can be done, since this operation has a number of its own nuances, which are described below.
Laying stone - step by step instructions
Laying decorative stone with your own hands begins with calculating the required amount of this stone. We multiply the area of that part of the walls that will be finished with brick or stone facing tiles in the apartment by 1.1, i.e. we give a reserve of 10% for trimming and rejecting the material.
Step 1 preparing glue
Pour the adhesive composition into a bucket and, having read on the label how to prepare it correctly, add water and mix thoroughly with an electric drill with a mixer attachment. Let it sit for 5 minutes, then repeat the operation. As a result, the glue should acquire the consistency of thick sour cream.
Step 2 laying the first row
Laying the first row can start from the floor, or from the ceiling. It is believed that when laying from the floor, the tiles following the first row, having support, will not slide down the wall. If you lay it from the ceiling, the solution falling from the spatula and tiles will not stain the tiles laid below. Both are correct. Using a notched trowel, apply the adhesive solution to part of the wall. The thickness of the glue layer should be about 7-8 mm. Press the appropriate number of tiles. Carefully level them to the building level. Then repeat until the first row ends. Subsequent rows must be laid so that the distances between the rows are the same, the width of the vertical seams must also be uniform. This is achieved by using plastic dividers in the shape of a cross. After the masonry has dried, the delimiters are removed. Another important point: vertical seams in adjacent rows should not coincide, that is, one should not be a continuation of the other.
Step 3: finishing the corners
Particularly often, corner cladding has to be done when finishing the front door with decorative stone, which, if the work is done “with your own hands,” can create difficulties for an inexperienced performer. If the stone is made in the form of tiles, the corner can be made in two ways: with dressing according to the pattern of brickwork, and with cutting the end of the tile at an angle of 45°. Trimming is done with a grinder or on a tile cutting machine. It is easier to finish a corner if the purchased decorative stone contains special corner elements.
Step 4: decorating the edges of the masonry
The expressiveness of decorative stone comes from the correct design of the edges. A possible option is to trim the free edge of the stone and then sand it with sandpaper.
Step 5 sealing joints
The joints between the stones are sealed with the same glue on which the tiles were laid. A budget option is to use gypsum putty. The sealing is carried out using a construction syringe, vaguely reminiscent of a pistol. The adhesive solution is squeezed into the space between the stones. Excess is removed with a spatula and a damp cloth.
Step 6 finishing
Finishing refers to the tinting of joints if the composition used differs from the color of the stone. It is advisable to cover the masonry with two layers of acrylic varnish. This will make it strong and durable.
Adhesive mixtures "Litokol"
"Litokol" is an excellent manufacturer. Their adhesive mixtures are indeed of high quality. The downside is the high price. But if you still buy this brand of glue, you won’t have to regret your choice. For natural stone, the manufacturer offers the “Litoflex K80” series. This is not the only option; the manufacturer offers several adhesive mixtures for natural stone. Do not skimp on spending your time familiarizing yourself with the line of cement adhesives on the website www.litokol.ru.
Methods of jointing and invoicing
After drying, cement plaster becomes granular and finely porous, which is not entirely natural for most types of rocks. Removing texture and applying jointing is the most creative and delicate part of the finishing process, which determines the believability of the appearance.
It is required that the surface acquires some semblance of a glossy film, which is possible by squeezing a small portion of dissolved cement onto the surface. The best way to achieve this effect is to spray the freshly applied solution with a small portion of water and cover the surface with a film about 10–15 microns thick. The film is laid on the surface and rolled with force with a hard roller, without smoothing out the folds. At the same time, through the transparent shell it is clearly visible how laitance accumulates on the surface.
Popular articles Happy birthday cards for men. more than 100 congratulations!
Stage one: marking and texture
For work, use finishing or starting putty. If the surface requires a grain size that is different from the starting putty, then it is better to use it. This solution is more suitable for imitation, despite the fact that additional texture will be created. If you need to depict a facing brick, use a finishing putty that provides a perfectly smooth surface.
A layer of mortar 0.5 cm thick is applied to the wall and distributed evenly. Immediately create a rough surface. To do this, use simple materials:
- foam sponge,
- hard bristled roller,
- hard fabric folded into a ball
- steel wool for cleaning kitchen utensils.
With short, jerky touches, they leave marks on the wet putty, filling the prepared area with them. This technique gives the surface the realism that is characteristic of rough natural stone.
Eunice
The manufacturer has developed several types of adhesives designed to work in different rooms, with different types of bases and tiles.
Eunice XXI
The material is used for covering floors without heating with ceramic and porcelain tiles. The composition is intended for indoor work - dry, damp, heated, freezing. For exterior use, the adhesive is used only with ceramic tiles or porcelain tiles no larger than 30*30 cm in size and water absorption no higher than 3%.
Unis 2000
Material for interior and exterior work with tiles and porcelain stoneware with water absorption of at least 0.5%. Maximum load 80 kg/m². The size of the tiles should not exceed 60*60 cm. Not used in heated floors. Purpose – external cladding, internal cladding of rooms with normal or high humidity (terraces, balconies, bathrooms, children's rooms).
Eunice Plus
Used for installation of mosaic, ceramic, tiles, porcelain tiles, up to 60*60 cm in size on the floor. Maximum load 100 kg/m². Recommended for use in the external cladding of buildings above the basement and inside buildings, applicable for rooms with normal or high humidity: bathrooms, terraces, balconies, children's rooms. Suitable for working with complex substrates, old tile coverings, heated surfaces (warm floors), etc.
Eunice composition Pool
The composition is designed for cladding swimming pools, floors of saunas, baths and other rooms with high humidity. The glue can be used for the same purposes as Eunice Plus.
Adhesion is the ability of a tile to adhere to the surface on which it is glued. This is an important technical parameter that should be taken into account when choosing adhesives.
Eunice Granite
The adhesive is intended for laying large-format and medium-sized porcelain stoneware slabs on the floor when carrying out external and internal work. Maximum load 100 kg/m². The cladding can be implemented on external stairs, in basements, on balconies, terraces, in interior spaces - in bathrooms, living rooms, kitchens, children's rooms. It is permissible to use heated floors in systems.
Belfix
White tile adhesive for laying decorative tiles and porcelain tiles. Laying on the floor of any premises is acceptable, including in water tanks, inside and outside. Maximum load 80 kg/m². Recommended for use on difficult substrates: warm floors, old tiles. It is used as a grout and when creating artistic and decorative effects (floor panels).
Eunice Hi-tech
Technological tile adhesive is used when working with ceramic tiles and porcelain stoneware no larger than 60*60 cm on floors that meet SNiP 2.03.13-88, in bathrooms, on balconies, loggias, and terraces. The composition has an increased pot life and styling. Suitable for use in conjunction with underfloor heating systems.
Eunice Fix
The adhesive is suitable for installing ceramic or tiles on unheated floors. The load does not exceed 30 kg/m². The material is intended only for interior work in premises of any type.
For interior work in rooms with medium and low load, an adhesion index of 0.5 MPa is sufficient
Advantages
The glue is convenient and economical to use. The line contains compounds that are effective in damp, freezing rooms. Eunice glue is capable of leveling differences of up to 15 mm and can be used for cladding using the top-down method.
Professional installers note the ease of mixing, which is feasible even for a beginner, and the strength of the finished cladding. Dry mixtures are available for free sale. The prepared solution does not flow.
Flaws
There was a discrepancy between the consumption declared by the manufacturer and the actual one. In practice, the dry mixture requires 2 times more. The manufacturer is constantly experimenting with the composition of the product, which causes defects in styling.
Advantages of stone plaster
The popularity of stone plaster must be justified in some way: after all, it is extremely popular among people of various social statuses, ages and even tastes.
So, what are the advantages that make people choose this method of finishing their home?
- Relatively low price. There are immediately two sides to this issue: people who believe that plaster is quite expensive, and people who disagree with this. In principle, both sides are right to some extent. One thing can be said: compared to the original natural stone finish, stone plaster seems really cheap.
- High quality workmanship. This is one of the reasons why decorative plaster seems so expensive: it is made of really high quality, and is suitable not only for people with low or average income, but also for people for whom the price of the product does not play a big role.
- You can make stone plaster yourself. Yes, you can even make it yourself: the main thing is to have all its ingredients, tools and some knowledge.
- A huge selection of different types of plaster. Since it is created by human hands, at the moment there are a large number of types of this plaster mixture that imitate a variety of rocks. The choice is huge: from ordinary marble to exotic rocks that will surprise even the most experienced designers.
- The ability to use some types of decorative plaster for exterior decoration, facade finishing or foundation. The most expensive options for decorative plaster mixtures are impervious to the influence of moisture and direct sunlight, which allows them to be used for exterior decoration.
If you pay attention to the price-quality combination, then decorative plaster has almost no disadvantages: but this does not mean that it is worth purchasing inexpensive options. If you have the opportunity to spend a little, then it’s worth doing it: in any case, if you purchased plaster in a company store, then after you see the result, you will not regret it
Material selection criteria
When choosing stove stones, you need to pay attention to the following aspects:
- price; very often the price of imported materials is higher than domestic ones - despite the fact that the quality is no better; This is far from an axiom, but it is recommended to take a closer look at the market;
- compliance of the slabs with the necessary requirements; first of all, the stone must be heat-resistant - otherwise the coating will not last long; the material must be strong and wear-resistant, preferably chemically inert; the packaging contains markings declaring the most important characteristics;
- date of manufacture; no, we are not talking about “delay”, but quite the opposite - too “fresh” concrete materials are not yet ready to become finishing materials, especially in the context of lining furnaces.
Remember! The lower your qualifications, the more desirable the blurry shape of the slabs. This will hide the flaws that will inevitably occur when installing it yourself.
Composition of types of plasters
Having chosen the desired design of the room in which you plan to imitate masonry, you need to be no less careful in choosing the type of plaster.
- Mineral based material.
The lime component is the main component in this mixture. Additionally included minerals, colored clay, stone chips. The advantage of such plaster is that time will only enhance the stability of the material, which will not be destroyed by ultraviolet radiation and water evaporation. If renovations are planned in a damp room, choose this option. Expensive compared to others. And you need to take into account the low elasticity and the fact that there will be difficulties in ensuring adhesion to the wall surface.
- Acrylic. Another name is polymer plaster. The binding material in the composition is acrylic resins. Good for use on the floor. Successfully resists exposure to sunlight, sudden temperature changes, and moisture. Vaporproof.
- Silicate. Based on organic silicon. It has good ductility and is vapor-tight. Resistant to dirt. But in the construction market the choice of color palette is limited.
- Silicone. The base and binder is silicone resin. Extremely resistant to aggressive environments, exposure to sunlight, hydrophobic and vapor-tight. The color range from which you can choose is wide. Considering the plasticity of the material, this type of plaster will perform well when creating relief surfaces.
Cost of plastering finishing works
The price for the services of professional craftsmen is ultimately more expensive than the materials purchased for wall decoration. This is not surprising, since the work of builders is highly valued.
The price for the work will be per square meter. Wall decoration with decorative plaster can be ordered cheaper from private craftsmen working without the mediation of construction companies. Private traders rarely give a guarantee for work; even reviews help little.
When paying professionals, they order a labor-intensive type of plastering and complex reliefs. It is not in the interests of builders to delay the completion of work, which has a positive effect on the speed of repairs. Imitating stone from plaster with your own hands will take much more effort.
The “stone-like” interior effect for everyone implies an individual vision of design. Rough brutal surfaces of the castle wall, or delicate brickwork, bright red shades, muted brick, or inconspicuous beige. There are a huge number of options for both textures and color palettes. But even an amateur designer will choose the right option for any room.
Walls
Natural stone has been used for aesthetic decoration of houses for a long time. Natural stone has always been very expensive. But today a way out of this situation has been found, which consists in making artificial stone with your own hands based on gypsum. Accordingly, the cost of such material will be lower than the price of natural material.
Content:
Features of artificial stone
The use of natural stone makes it possible to achieve different results when finishing the interiors of buildings. You can decorate the room in a knightly style, and the end result will be a real castle. It will be possible to line the fireplace with slates, which looks very aesthetically pleasing.
For all its advantages, beautiful shapes and colors of natural stone, it also has disadvantages. These include such characteristics as: high cost, heavy weight (not every wall can withstand such a load), considerable transportation costs. In order to use stones in interior decoration and to minimize all the disadvantages written above, a technology for the production of artificial stone was created.
In appearance, there are no special differences between natural and decorative stone. But still, artificial does not have such great disadvantages as natural. There are several options for making decorative material. In the first of them, water, sand and cement are used, in the second - gypsum or alabaster. There is another option when various polymeric substances are used.
Advantages of decorative stone
If you need to choose between natural and artificially created stone, then artificial stone has a number of the following advantages:
- If we consider two externally identical stones, decorative and natural, then the first one will be several times lighter. The low weight of artificial stone makes it possible to cladding thin partitions with it.
- Artificial stone is much easier and simpler to process. It is often made in thin tiles to reduce the weight of the object without any loss of strength. It is also produced at the point of use, eliminating losses during transportation. In addition, it is possible to make an artificial stone from gypsum immediately smooth, which will reduce the significant costs of stone processing - grinding and polishing.
- Decorative stone is not afraid of various atmospheric influences and corrosion, unlike its natural competitor.
- Decoratively finished walls with this material are easy to clean and do not get dirty. However, such a coating is hygroscopic.
- The design of the artificial stone can be arbitrary. We'll talk about its features later.
- Artificial stone has one more advantage compared to natural stone. It has a wide range of colors.
- Thanks to its diversity, decorative stone is suitable for any room. They can be used both indoors and outdoors.
In addition, decorative material can be made as similar as possible to any natural one. According to the type of surface, artificial stone can be:
- Stabbed. In this case, it seems as if the edges have been beaten off with a hammer, that is, an uneven surface is obtained.
- Sawn. The stone has uneven smooth edges.
- Butov. The stones look like natural boulders.
- Arbitrary. The designer realizes all his fantasies in the form of the material.
- Decorative. To bring it to life, other types of surfaces may be required, intended for finishing various ensembles, for example, decorative stones made of gypsum in the style of a marine theme or imitating slate.
Do-it-yourself artificial gypsum stone
Making decorative stone from gypsum is not particularly difficult. Of course, everything may not work out smoothly the first time, but don’t be discouraged.
Thanks to this decoration, your home will be filled with special color, comfort and beauty.
Preparatory work
At the preliminary stage, prepare the following materials and tools for the manufacture of artificial stone:
- White plaster;
- Anhydride;
- Water;
- Sand;
- A plastic container that is needed for mixing various components;
- Pallet;
- Rolled polyethylene;
- Matrices (forms);
- Electric drill;
- Glass is corrugated;
- Water-based coloring compounds.
The production of stone and gypsum does not require huge areas. A few squares will be enough. You should first arrange your workplace with a table. Racks and shelves should be close at hand. Next, we prepare a gypsum solution from elements such as water, gypsum, and anhydride.
Making molds for stone
Remember that you should pay enough attention to the forms for making decorative stone:
- The most optimal and flexible forms are those made of silicone. You can also use forms made of metal, plastic, and wood. But they do not provide a clear texture of the gypsum, that is, they do not reflect the small details of curves and various reliefs.
- Typically, making molds begins with choosing the size of the stone you like. You can pick up a sample for making your own stone in a store.
- To make molds in which artificial stone is cast, prepare silicone and a box of the required size. It should be slightly larger than the sample stone. This box serves as formwork.
- The box and stone should preferably be coated with grease, but other types of lubricants can be used. The stone is placed at the very bottom of the box.
- For better performance, it is necessary to make several forms and forms. With multiple molds, many more stones can be made.
- Next, silicone is poured into the formwork. For better compaction, tamp with a brush, which is moistened with a soap solution. Fairy is used as such a soap solution. After filling the mold with silicone, level the entire surface with a spatula (moistened with Fairy).
- Poured forms dry within a few weeks. After this, the formwork is broken and a sample stone is taken out. The mold for the plaster stone is ready.
- If there are minor defects on the surface, they are repaired using silicone.
- You can also use ready-made silicone models that are commercially available.
Preparatory stage
- remove old finishing material;
- carefully scrape off all the scraps that, one way or another, may interfere with you in the future;
- inspect the wall for cracks and irregularities;
- if you notice cracks, then use a hammer and chisel to make them a little wider and fill the holes with a deep penetration primer - this will help prevent the appearance of always unwanted mold;
- carry out the initial treatment of the wall surface with a primer - it is not necessary to achieve a perfectly smooth surface, since after puttying the priming procedure will have to be repeated;
- if the surface is very uneven and there are noticeable defects, then go over the wall with plaster, and also cover the cracks previously treated with primer;
- to achieve a perfectly smooth wall after plastering, it makes sense to use gypsum-based putty - it is not so rough in consistency and will help make the wall flawless, eliminating those irregularities that plaster, for objective reasons, cannot cope with;
- the final touch is re-priming the surface, this time we are pursuing the goal of achieving excellent adhesion to the decorative material that will be used to imitate brick, the treatment must be carried out carefully, generously lubricating those areas that very quickly absorb the solution.
Popular articles Corrugated paper rose
How to check if your wall is ready for the next stage? Everything is very simple: run your hand over it - if you don’t feel any obstacles or unpleasant roughness, it means you have successfully completed such a tedious, but still necessary preparatory stage.
Glue used
To lay gypsum tiles with your own hands, you need to choose the right glue. So, let's look at what you can glue gypsum tiles to. There are several options here:
- Regular cement tile adhesive. It is used for laying tiles. This is a standard option for laying almost any facing covering.
- Gypsum plaster. A more preferable option for interior decoration. The mixture has a white tint, so it is practically invisible under the tiles.
- Silicone sealant. Quite an unusual, but very effective solution. Provides strong adhesion to the surface.
Adhesive options for laying gypsum tiles
When using cladding on the outside of a building, it is important to choose a frost-resistant adhesive mixture, otherwise after a few cycles the solution will begin to crumble and crumble along with the tiles. Adhesive for decorative gypsum tiles must be fresh
If a bag of mixture has already been left open for several months, it will most likely harden quickly or clump together. This will make it much more difficult to work with the mixture and will also worsen the quality of adhesion of the materials.
Adhesive for decorative gypsum tiles must be fresh. If a bag of mixture has already been left open for several months, it will most likely harden quickly or clump together. This will make it much more difficult to work with the mixture and will also worsen the quality of adhesion of the materials.
Surface preparation
Before applying decorative plaster, the wall needs to be prepared. The surface must be completely cleaned of various coatings and made smooth. Although, no one demands perfect smoothness from you. Be sure to remove all salt bulges and grease stains. Only after this can the wall be primed. This is necessary to improve the contact of decorative plaster with the wall. By skipping this step, you risk getting an unreliable final coating.
In nature, masonry is made up of different sized stones. We will consider the option of laying on a flat surface, without bulges. Stones, just like in natural masonry, will have a variety of sizes. For this we only need imagination, a wallpaper knife and masking tape.
The primed wall must be covered with strips of masking tape. Thereby defining the seams between the stones. Cover the entire wall at once, even if the area of the room is very large and the decorative plaster is planned to be applied in certain portions.
Using this method you can create an imitation of brickwork. Simply tape the wall parallel to the floor with strips of tape to create straight horizontal lines. And then, using masking tape, make future vertical seams. This way you get a lot of small bricks, as if it were real brickwork.
Conclusion
Answering the question posed at the very beginning of the article, it should be said that, in general, plastering with tile adhesive is acceptable. However, this procedure has a number of limitations, both in terms of the type of composition and the thickness of the plaster layer.
Therefore, before you get down to work, you need to take all these nuances into account. Additional information on this topic can be obtained from the video in this article.
To obtain an original relief coating that imitates wood, stone or fabric, it is absolutely not necessary to purchase expensive decorative plaster. It is enough to stock up on regular putty, PVA glue or tile adhesive and choose the type of filler. You can use mineral chips, sand, fiber scraps and even sawdust.
Imitation brick made of porcelain stoneware
Ceramic granite is the most reliable and high-quality material for creating bricks. It differs from ceramics in that during production granite shavings are added to the solution, and then the material is fired twice in a kiln. This is what gives it such strength and durability.
The advantages of porcelain stoneware bricks include:
- Full resistance to temperatures (withstands frosts down to -50)
- Moisture resistance
- Easy to clean and does not absorb dirt
- Service life from 30 years.
The colors can be any - on store shelves there is a large selection of shades that will suit any interior.
Porcelain stoneware brick looks original and interesting in the bathroom, dining room or kitchen, as well as in the hall.
Peculiarities
Currently, construction stores offer a wide range of different types of tile adhesives. Each of them has its own advantages and disadvantages. It should be remembered that when choosing it, it is necessary to take into account the external conditions in which the tile will be located. The outside of your living space will often be subject to sudden temperature changes. To ensure that the tiles do not collapse and remain in their original form, when laying them you need to use special types of frost-resistant glue. In addition, such a base must also be waterproof in order to avoid the harmful effects of snow and other precipitation on the structure in winter.
Quite often I use tiled ceramic coating not only to decorate the clinker façade of a home, but also to decorate street paths and sidewalk areas. When laying tiles in these spaces, you should choose not only frost- and moisture-resistant, but also strong, reliable adhesive. After all, these places on the site are often subject to considerable weight loads and sharp temperature fluctuations.
Other ways to imitate brickwork
False bricks can be obtained by extruding them from flat ceiling tiles made of polystyrene foam without a pattern.
For false bricks, flat polystyrene foam tiles without a pattern are suitable. For our purposes, you can use any of its sides. The optimal size of the “stone” is 7/15 cm. If you increase the proportions, the wall will look unnatural. The process of making “stones” is simple: we squeeze them out of the ceiling tiles.
First, using a gel pen, apply markings to the polystyrene foam. Please note that to maintain the correct shape you need to make seam allowances. Next, take a toothpick and, tilting it, press straight lines along the ruler with slight pressure. Then you need to make a special device: a crusher. To do this, use metal scissors to cut out a flat tin strip from the lid of a tin can, and cut off both sides from one edge of it so that you get a “sting” 2 mm wide. Using this device we press our bricks along the lines in the ceiling tiles.
We glue the finished products with our own hands onto the desired part of the wall. We use ceramic tile adhesive as a binder. There is no need to fill the seams with plaster. The gaps between the “stones” need to be made very small: 1-1.5 mm. After finishing the gluing work, the bricks need to be painted. We try to apply as much paint as possible into the gaps, thereby creating an imitation of brickwork.
Popular articles Household cleaning products
wooden bricks
Using imitation brickwork, you can achieve the maximum decorative effect with a minimum thickness of the coating.
This method is quite simple: with our own hands we make the required number of wooden dies of the same size and rectangular shape. If you sand them on one side, you get a stylish, beautiful wall surface with an imitation of brickwork. Work on installing the “stones” begins with markings. Along this horizontal line, starting from opposite corners of the wall, we install the bricks, keeping an equal distance between them corresponding to the selected seam thickness.
First, we lightly nail the wooden dies to the wall with thin nails. When the entire row is laid out, we will drown them in plaster. When all the rows are completed, we will cover the ends of the brickwork with wooden slats. Then we paint the wood with our own hands in the desired color. It is recommended to make the seams much darker. Over time, the wall can be refreshed by repainting it or covering it with wood varnish. This imitation brick wall is very durable.
tile adhesive bricks
For the manufacture of parts, any tile adhesive is used, which is sold in the form of a dry mixture. It needs to be diluted with water until it becomes a very thick sour cream. It is best to use a white composition. Then we divide the whole mass into 3 parts, adding a little paint to each of them.
It is important that the paint differs in shade in each part
Mix the mass in each pile like dough. We will get a mass with beautiful stains. Roll it out into a “pancake” and cut bricks of the same size. We lay them out to dry. We do this until we collect the required number of “stones”. We glue it to the wall using the same tile adhesive. Fill the seams with a compound painted in a darker color. At the end, the wall surface can be covered with several layers of varnish.
How to make liquid wallpaper with your own hands
You can make the product for finishing the room yourself. To do this, use available materials:
- clean paper or waste paper;
- sawdust;
- ecowool;
- pieces of yarn;
- tinsel.
Such mixtures are cheaper than factory ones, although some components need to be purchased.
Instructions for making liquid wallpaper at home
The manufacturing processes of the finishing material differ depending on the selected base material.
Option one - paper waste
Waste paper is the most accessible basis for creating homemade and inexpensive liquid wallpaper from improvised materials. Discarded paper has no value but is a source of cellulose for the finishing mixture. They choose notebook sheets, children's coloring books, newspapers, old paper wallpaper. The pages of glossy magazines are not suitable for these purposes, as they do not dissolve well in water. Thick paper and cardboard are also not suitable.
The sequence of actions when producing a finishing mixture from paper waste:
- The paper is shredded (cut, torn, using a special shredder).
- Fill with warm water in a ratio of 1:5.
- Leave for 12 hours.
- Make a homogeneous mass from paper and water using a construction mixer or drill with a special attachment. The mixture of paper and water turns out gray. The preparation of such liquid wallpaper is the cheapest existing technology. To obtain a white mass, use clean paper.
- Finely chopped cotton wool is added to the resulting mixture and mixed, the volume ratio is maintained at 4:1. At this stage, they no longer use a mixer; they mix by hand. Instead of cotton wool, it is allowed to use synthetic winterizer or other similar material.
- Add small pieces of wool threads of any color in an amount of 1/8 of the total mass.
- Sprinkle glitter, pieces of tinsel, and mica. The amount of decorative additives should be no more than 200 g per kilogram of paper. Manufacturers may vary the proportions slightly.
- Add liquid PVA glue in an amount of approximately ½ of the original amount of paper. It is acceptable to use CMC glue in dry form. You will need 200 g per 1 kg of paper. Glue is the binding component. If it is added dry, a little more water will be needed.
- Coloring agents are added. Its quantity depends on the desired color. The color can be mixed evenly into the mass or left in the form of inclusions and spots to obtain volumetric color transitions. The manufacturer himself determines the intensity of future wall painting. The dye chosen is intended for water-based paint.
- The mixture is placed in a plastic bag. If it turns out too thick, you can add water. The material can be used after 12 hours; it can be stored for about a week. After aging, the mixture acquires a homogeneous consistency.
- Before applying the wallpaper, add gypsum to the mixture (0.5 kg per 1 kg of paper) and mix thoroughly.
If you use waste paper for the base, you won’t be able to get a bright color for the coating. These materials will produce a muted or dark color. Rich colors are obtained by using pure white paper, the purchase of which involves additional costs.
The structure of the future coating can be changed by adjusting the size of the paper grinding. The smaller the pieces, the smaller and more inconspicuous the relief will be. If you cut the paper larger, you can create the effect of river pebbles.
Recipe for making finishing material from paper
Approximate composition of liquid wallpaper and ratio of mixture components:
- paper - 1 kg;
- water - 5–6 liters;
- cotton wool - 250 g;
- wool threads - 100 g;
- PVA glue - 400 ml or dry CMC glue - 200 g;
- glitter and other decor - 200 g;
- dye - from 2 caps;
- gypsum - 500 g.
Option two - use of fibrous materials
Making liquid wallpaper from other materials with your own hands is a more labor-intensive process. Working with cotton wool or ecowool is more difficult than working with paper. If you need to decorate a small area, then the fibrous material is cut with scissors. To renovate an entire room you will need a lot of material; you should grind it with a drill with a mixer attachment.
In addition to cotton wool, to make the finishing mixture you will need:
- Glue (wallpaper glue based on natural casein, PVA, bustylate) as a binding component.
- Acrylic putty to impart wear resistance to the coating.
- Dye.
- Decorative elements.
To prepare such liquid wallpaper at home:
- Grind the base.
- Fill it with the selected binder in a 1:1 ratio and mix.
- Add the required amount of dye and decorative elements and mix thoroughly.
- Leave for 8 hours to soak.
- Before application, putty is added to the mixture.
Cellulose fibers can be replaced with wool, linen, or padding polyester. An additional component can be leftover knitting yarn, as well as old knitted socks and sweaters. It is recommended to chop yarn and threads with a cabbage knife.
How to make wallpaper from sawdust?
Liquid wallpaper is also used from waste from the woodworking industry; its production is possible at home. Small sawdust is suitable for this purpose.
The ratio of components of the sawdust finishing mixture:
- 1 kg sawdust.
- 5 liters of water.
- 500 g glue.
- 500 g of gypsum.
- Dye.
- Antiseptic additive.
- Sawdust is poured with warm water and left for 4–6 hours to soak.
- Add all remaining ingredients except gypsum and leave for 12 hours.
- Add gypsum and begin applying the mixture.
You should not neglect the recipe and add an excessive amount of glitter and other decorative components - this will ruin the structure of the wallpaper.
Stone surface imitation technology
Imitation of masonry on a plastered surface is carried out in several ways:
The “Wild Stone” technology involves applying a base to a small amount of surface, then covering it with a finishing coating and imitating a stone surface using a trowel.
After drying, color streaks are applied and rubbed into the surface with a sponge.
The Marmorino technology is based on knocking out rectangular stone boundaries using a chisel on a previously applied and completely dried layer of a special plaster mixture.
The formation of the “Ragged Stone” pattern is carried out in a similar way, only the notches are made not along straight lines, but chaotically.
Applying a relief pattern using special forms that replicate the structure of natural stone.
This form is applied with a little force to the previously applied and not yet set plaster mixture and the profile is squeezed out.
The molds are made from plastic. polyurethane or polymer. They can be in the form of brickwork. natural stones of different sizes and others.
Stone plaster has a wide range of uses. It is used for:
- External cladding of building facades;
- Coverings of basements and foundations;
- Column finishing;
- Decorative design of fences;
- Finishing of interior walls of premises, both completely and in fragments in the form of panels;
- For cladding arches, openings, fireplaces, bar counters and other elements of interior decor.
Beautiful interior solutions
Tiling in the hallway is appropriate and beautiful when decorating a doorway, arch, or niche. Choose products in light colors, since this room is usually dark.
In the design of a living room or hall, where the main finishing material is wallpaper, plaster or painted surfaces, it is advisable to use elements for decorating the entrance to the room, plasterboard columns, window slopes
When laying on a fireplace, choose the color of the tiles so that the tiled surface attracts attention and stands out from the general background.
In the kitchen, plaster elements are mounted on the hood box, bar counter, wall, excluding surfaces near the sink.
Gypsum tiles are a stylish, original addition to modern room designs and a worthy alternative to other finishing materials. The convenience of the installation method and the relative simplicity in the manufacture of decorative elements allow you to decorate a room without the help of specialists.
