The technology of pouring self-leveling floors compares favorably with concreting screeds in its high productivity and low labor intensity. There is no need to set beacons and level the mixture; it is enough to distribute it evenly in separate areas of the room. In a single horizontal level, the self-leveling compounds will spread on their own; the master will only have to expel the air bubbles with a needle roller.
Floor screed work
With the right approach to repairing floors, you can easily ensure that the parquet will not begin to creak after a while, the laminate will not sag, and the tiles can be laid with a thin layer of glue. Screed work is a critical stage that requires the close attention of builders. Here you need to know and understand that minor discrepancies in flatness can lead to defects in the final floor covering.
Materials used for screed
A cement-sand mixture is used to fill the leveling layer. When pouring a large layer, crushed stone or expanded clay can be added to the mixture. If the layer is small, up to 7-10 mm, then ready-made self-leveling mixtures are used. It is worth noting that in rooms where tiling work will be carried out, the screed should be as even as possible.
Waterproofing screed
It is worth noting one nuance when screeding work is carried out in the kitchen or bathroom. Since plumbing has been installed in these rooms and there is a possibility of accidental moisture getting on the floors (rupture of a water pipe, sewer leak, etc.), then in such rooms it is necessary to make a screed with preliminary waterproofing. The process does not differ from the standard one, only before laying the metal mesh, the surface of the old base of the floor and about 10-20 cm of the walls is treated with bitumen mastic or waterproofing mixtures of the “GLIMS-Vodostop” type. Next, you can begin pouring the screed according to the main technical process. After the screed has dried thoroughly (from 7 days for tiles and about 30 for parquet), you can begin laying any facing materials for floors.
Composition of self-leveling floor
Warehouse with self-leveling floor
Different mixtures have their own composition. Their name indicates the main component.
There are 4 main types of self-leveling floors:
Mixtures made on the basis of cement. They have high wear resistance, while they have an affordable price and a large selection of manufacturers.
The highest quality composition contains only 3 components: cement, sand and water. At the same time, they should not contain foreign impurities and chemical compounds.
For elasticity they contain plasticizers. Additives and ingredients for moisture retention.
These mixtures are not decorative; they are used as a base leveling and base for flooring.
Self-leveling fields on a gypsum basis. They don't like high humidity. But in dry rooms they are quite popular. This solution can be poured in a thick layer.
They differ from the composition of cement screed only in the main component. This type is not recommended for use in areas of high humidity: in the kitchen and bathroom.
Solutions based on polymers and polyurethane . Their installation is complex and requires certain skills. It is highly decorative. On their basis, artistic masterpieces are created.
The composition may contain fillers such as quartz, sand, and hardeners. They are added to improve the quality and durability of the coating.
Mixtures containing cement and polymers. This combination improves the quality of the floor, unlike cement. At the same time, the cost is reduced compared to pure polymer solutions.
Concept and classification
Self-leveling self-leveling floor is a variety of materials used to fill the base of the floor. In addition, the surface can be completely different. It has a main goal - to make the floor perfectly flat and durable.
The composition of the liqueur includes cement and modifier fillers. Each of them gives the finished solution the necessary qualities. Despite their name, they are self-leveling, but you still have to spread them over the surface of the future floor using a spatula. Subsequently, they can serve as the basis for tiles, linoleum or, for example, laminate.
Properties of self-leveling floors and coatings
If it is necessary to level a layer of concrete or screed made of cement and sand, then a base mixture is selected. In the end, you still have to use other mixtures, if the finishing coating is being done. The thickness of this layer can reach up to 80 mm, but will not be less than 10 mm. 12 hours after installation, you can walk on the surface, as the screed will gain strength.
When surface unevenness reaches up to 30 mm, the middle layer of the mixture is most often poured onto a layer of concrete or cement-sand screed. The minimum layer thickness is 7 mm. High surface strength is achieved after only 4 hours. Perfect for laying almost any floor covering that will be selected for the room.
The finishing coating after drying does not have any flaws if the filling technology is fully followed. You can do without floor coverings, and paint or otherwise decorate a floor that was not even noticeable before. This layer is not thick and is at least 2-3 mm. The maximum permissible thickness should not be more than 1 cm. Strength is achieved after installation after 4 hours.
This was said about mineral self-leveling floors. We must not forget about polymer ones, where they distinguish:
- Epoxy. They have a lot of positive qualities. Most often used in rooms where resistance to various chemicals, oils, solvents, paints, etc. is required.
- Polyurethane. Excellent properties of durability, resistance to high and low temperatures, elasticity, resistance to aggressive substances of the chemical industry. The main thing is to set the properties of the floor in the room and you can safely pour the polyurethane self-leveling floor.
- Methyl methacrylate. They are very demanding on the device, and for this reason they are less popular. But the drying time is only a couple of hours and they can be poured even at low temperatures no higher than +8 degrees. Ventilation of the premises is very important when pouring, as there is a huge release of harmful substances. This immediately removes the question of whether it is possible to fill the floor at such temperatures, outdoors and in adverse weather conditions. Methyl methacrylate floors can easily cope with this task.
- Epoxy urethane. This self-leveling floor device is used on parking platforms where there is intense and constant movement of vehicles and people. The strength is very high, and at the same time the floors are endowed with many of the qualities of the polyurethane version.
Stage I. Getting ready for work
Despite the fact that in most photographs you will see craftsmen working on filling the floor without any protective equipment at all, this does not mean that this is correct. Don’t take risks - follow the necessary personal safety measures, and then you won’t have to be treated for an allergy that came from nowhere:
- Protect the container with the polymer composition from direct sunlight.
- Wear respirators.
- Protect your hands with rubber gloves and your feet with hard-soled shoes.
- If the polymer composition gets into your eyes, quickly rinse them with plenty of water.
- If you get it on your hands, rub the area of skin with a rag soaked in gasoline.
- And finally, do not open metal containers with polymer with a metal object - if this causes a spark, the composition may catch fire.
So, let's list the main tools that you will need when pouring a polymer floor:
- A needle aeration roller that you will use to remove air bubbles in the base layer.
- Low-speed drill with a paddle attachment - this is used to mix the floor components.
- Synthetic padding rollers, which are convenient for priming a zero surface.
- A squeegee is the tool that will need to be used to apply the epoxy compound.
- Spatulas - we use them to level the floor in the most inaccessible places.
- Vacuum cleaner – they must clean the entire surface of dust and excess quartz sand.
- Personal protective equipment must not be neglected.
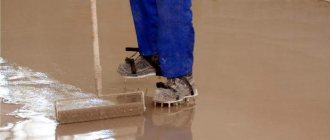
- Paint shoes are needle-shaped shoe soles in which you can safely walk directly on a freshly poured floor.
Advice: look to see if these special soles stick firmly to your shoes - it’s bad if they “walk.”
Tools and materials
Before you learn how to pour a self-leveling floor, you should worry about preparing the necessary equipment. The most important thing is to have the required amount of mixture.
The self-leveling floor must be carried out without interruption from work. That is, there cannot be any breaks, but everything is desired at one moment. Difficulties may arise if the amount of ready-made solution is limited. So the best option is to purchase literally a little more than the technology requires.
The container will play a role during kneading. Of course, the larger it is, the better it will be. But this will require certain equipment for high-quality mixing of the filling solution. If the buckets have a volume of approximately 30 liters, then you need to stock up on 4-6 such options.
In order not to waste energy mixing the components of the mixture, take a drill with a mixer. The drill speed should be at 300 rpm. The finished fill is fluid and easily spreads over the surface. But even in this case, a spatula is useful, which achieves the best result.
To be able to pour an even layer indoors, a squeegee is used. It has the ability to set the gap in millimeters above the floor level. The material will be distributed in the required quantity for each square meter. Bubbles will form as you knead the mixture. To avoid them in the future, work is carried out with an aeration roller with needles. It will be enough for a room of 40-50 m2.
If there is a need to walk on a solution that has just been poured, purchase a sole with spikes. It can be placed on the surface and not be afraid of damage to the top layer.
There is no need to throw away the tool upon completion of the work. It should be thoroughly washed from the solution so that it can be used in the future when performing any construction work. To make the task easier, a solvent is used.
How to do the flooring in an apartment yourself
The work of leveling the floor with self-leveling mixtures is not considered difficult. Carefully read the factory instructions for preparing the solution. If you have any questions, it is better to contact the retail chain where you purchased the mixture. You need to be careful when maintaining the proportions with water. Masters know that it is necessary not only to accurately measure the volume of water, but also to ensure that it is clean. It is important to pour the dry mixture into the water, and not vice versa.
Note! For the technology, the ambient temperature is from + 15 to + 30 C, and the humidity is up to 80%.
Preparing the base
Before leveling the concrete floor, the craftsman will need to prepare the surface for pouring. For a concrete base, large cracks are widened, the surface is ground, and the internal cavities are primed and filled with mortar.
Next, prepare a solution of the dry mixture with clean water by pouring the marked amount into the water and stirring with a construction mixer attachment and a drill. When preparing, you need to choose the right container size so that you can mix the required amount of the mixture to obtain a homogeneous mass.
Pouring the underlying layer
Floor leveling technology requires waterproofing the surface. Before this, a specialized tape is glued around the perimeter. When it is necessary to level the floor on a wooden base, use a gypsum composition and a polyurethane polymerizing ingredient.
Filling begins from the farthest corner. Use a needle roller to remove air bubbles. The pouring process must proceed quickly, so they work in a team of at least 2 people.
Finish coating
This is the final stage after leveling the concrete with a self-leveling mixture, an easy technology that does not require time. To work, you will need a needle roller and highly specialized shoes for leveling the liquid floor. When walking, the boots do not damage the uncured coating. Therefore, when walking on the floor, you will not need to adjust the level. Next, a finishing solution is prepared, which is purchased specifically according to the proportions specified in the instructions. The application technology is similar to the above procedure, the filling level is up to 2.5 cm.
Preparing the base
A very important stage is the preparation of the foundation. The quality of all work will depend on him. If the technology for installing self-leveling floors is not followed, then subsequently the base will begin to crack and shrink. There can be no question of any durability. Whatever the surface under the self-leveling floor, it must be completely cleaned. This is even done when laying on asphalt. Everything should be deleted without exception. Each of the materials has its own properties. For example, cement absorbs moisture well.
Self-leveling floor technology
If you lay a self-leveling floor on a cement-sand screed, problems may arise in the future with its service life. In addition, the surface should be cleaned and even dust removed. In this case, a construction vacuum cleaner will help.
Situations may arise when the base of the self-leveling floor has porosity. The working solution will easily get into these pores in the future. Special impregnations available in construction stores will help you cope with this.
Wood can also serve as a base. This is very popular in private construction of houses. Here you will need to grind it and rub it with sandpaper until it becomes rough. Avoid leaving grease, varnish, oil or any kind of dirt on the wood.
When performing work on pouring self-leveling floors on ceramic tiles, you should carefully inspect them. When it fits snugly to the base and does not bulge anywhere, you can safely pour the solution. Otherwise, the tile is removed and the surface is cleaned.
Possible errors when filling
High quality pool floor
It is easy for a person without experience to make mistakes when pouring a self-leveling coating:
- Failure to comply with the parameters for base moisture, or ignoring its measurement. This oversight leads to the fact that the solution does not spread well and the distribution is uneven. Once dry, the floor will have low wear resistance. It may peel off from the base, especially if it is concrete. Cracks will appear on the surface
- The mixture is prepared by eye, without observing the proportions - it leads to the fact that the polymer coating becomes brittle. During use it quickly wears out and crumbles. It is also fraught with the appearance of stains, holes and peeling.
- Ignoring the drying time of each layer will lead to short-term use. The floor covering will quickly lose its decorative appearance
- Avoiding some recommended tools. Especially refusing to buy a squeegee will lead to disastrous results. The mixture is unable to spread perfectly evenly on its own. Without the help of a squeegee, bulges and pits will appear on the surface
In order for the self-leveling floor to serve for a long time, you need to adhere to the recommendations of the mixture manufacturer for installation and operating rules.
Adviсe:
- When choosing a mixture, you need to know what rooms it is intended for. There is a division of solutions for installation in domestic and industrial premises
- The self-leveling coating needs regular cleaning. In this case, detergents must be selected according to the recommendations. They should not contain fluorine and ammonia
- If defects are found, restoration must be carried out
- Felt should be placed under furniture legs. It will help avoid the formation of dents
- Furniture and other heavy objects must not be dragged along the self-leveling floor.
By adhering to the recommendations and advice described above, even a beginner can cope with pouring a self-leveling floor with his own hands. This coating can make any fantasy come true. It will bring zest to the interior of the room and will be a wonderful addition to the interior.
VIDEO: The easiest way to level the floor! Self-leveling floor in 20 minutes
The easiest way to level the floor! Self-leveling floor in 20 minutes.
Self-leveling floor: device, recommendations and step-by-step instructions on how to do it yourself (50 Photos & Videos) + Reviews
Seam processing
When constructing any house, the concrete foundation shrinks. This is even provided for by building rules and regulations. Each seam must be thoroughly cleaned of dirt. Only then should it be covered with a special primer for concrete surfaces. In some situations, you even have to use sealed putty to cope with the tasks. At the junction of the walls and the base, sealant is applied to prevent cracks and the penetration of the finished solution for the self-leveling floor.
Preparatory stage
Before you make a self-leveling floor, you need to prepare the base. Remove dirt and dust using a vacuum cleaner. If there are mortar or paint splashes on concrete floors, they must be cleaned off using spatulas or a grinder. If there are through holes in the floor, they must be sealed with mortar or sealant. A damper tape is attached along the perimeter of the room at the junctions of floors and walls. A rail or galvanized profile is installed in the doorway and secured to the floor. The required amount of primer is determined by the area of the room.
Preparation of the solution
First, calculate the required amount of solution. Everything will depend on the area and thickness of the layer. If the layer is 3 mm, then for each m2 you will need 3 liters of fill. But no one will give you an exact answer, so you should prepare a little more than required. In addition, the consistency will depend on the manufacturer. The screed should harden at a temperature from +5 to +25. These temperatures are optimal. The base itself should not cool to less than +4 degrees. Heating the mixture will also not bring a positive result. Its maximum temperature should not rise above 20 degrees.
All components of the future filling are mixed using a drill with an attachment. After a few minutes of rest, stirring is repeated. Additional fillers are added during the second stirring of the solution.
The amount of solution should be such that it is enough for 1 hour of work. Otherwise, it will begin to dry out and lose its properties.
To obtain a variety of patterns and colors, various pigments and decorative inclusions can be added to the mixture.
Screed technology
The main rule of a correctly filled layer is a perfectly horizontal level and plane without differences. An important point if screed work is carried out with additional reinforcement.
Metal mesh is used as reinforcing elements for the screed. Depending on the layer, the mesh cell is selected: for a thin layer a small cell, for larger ones, a large one. Next, beacons are installed. In order to find the ideal level for the floor, marks are first made on the walls. This is done using a water or laser level. The marks are connected into one solid line and from it you can already take the base size, thus determining the height and horizon for the lighthouse. If the screed work is carried out in large rooms, then after placing the beacons, their flatness is checked, achieving an ideal horizon without differences and bulges. After the beacons are set, the old base is primed and the mixture can be poured, evenly distributing it over the entire surface starting from the far corner and ending at the entrance to the room.
How much material will be needed, calculation of consumption
As a rule, if a ready-made mixture is purchased in a retail chain, the manufacturer’s annotation provides information about the rules for choosing the amount of building material, at a level of 1 mm and a prepared base.
The master can independently make such a calculation for 1 m2 of floor using the formula:
P = S * H * P
Where:
S—floor area;
H—layer thickness;
P is the density of the bulk mixture.
The first 2 indicators are measured with a tape measure, and the density is taken according to the passport data for a specific composition.
Additional Information! To level a floor of 15 m2 with a layer of 1 mm you will need: 24 kg or 1 bag of 25 kg. To fill 15 m2 and 5 mm thick, 120 kg is required, 5 bags of 25 kg each.
Applying fill layers
You should at least understand how to pour a self-leveling self-leveling floor. To begin with, an underlying layer is formed, which most often consists of quartz sand. At the same time, consumption is reduced by approximately half. Leveling occurs using a needle roller. Next, the face layer is poured.
There should be no questions about whether it is possible to pour a self-leveling floor onto an unprepared base. There can only be one answer - no. Otherwise you will have to dismantle it. But no one wants to deal with this, not even specialists in the construction industry. The fact is that the self-leveling floor eats into the base and it is practically impossible to remove it from there using improvised means.
You should start pouring the solution from a high point, and then move on to all the rest gradually. To move, you can use paint shoes.
Features of the use of finishing mixtures
Finishing mixtures are applied to any solid base, including wooden floors. But it is considered optimal if the self-leveling floor is poured onto a screed or concrete base.
To ensure a durable finish, the base must be level. Moreover, the fact that a thin layer will not cover large tubercles and the surface will be uneven is not the main reason. In the pits and in the places of the tubercles, the poured floor has a different thickness, which will lead to uneven drying and a decrease in strength in some places. Therefore, if possible, it is recommended to perform a rough screed.
Having completed a preliminary rough screed, you will get an ideal surface that can be leveled with a regular finishing poured floor and even a colored or 3D floor.
Heated floor installation
Warm floors under self-leveling flooring should be done after detailed consultation with a specialist. Not every polymer floor option will remain environmentally friendly when heated. Some will believe that at a base temperature of 30-36, toxic substances will begin to be released. There is no need to be afraid of this, but you should adhere to certain rules when the question arises as to whether a warm floor can be filled with self-leveling flooring.
After preparing the base, which is standard for all options, it should be degreased. Next, the heated floor is laid, the option that was previously selected for the room. The first layer is poured onto the finished surface. This layer should settle for an hour. During this time, the cement begins to set. After the set time, the finishing coating is installed from the selected mixture for the self-leveling floor. After drying, the surface will not have any slipperiness; it will be perfectly smooth.
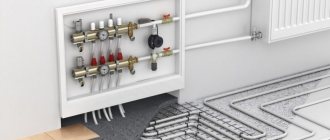
Questions may arise about whether it is possible to lay a self-leveling floor on a heated floor from water pipes. Here, first of all, the concrete screed is poured, which is controlled using a level for evenness. Next, foil-coated polypropylene is laid, and the pipes for the heated floor are installed. On top of this, “Scorline” is used and a polyurethane primer is applied. Only after all this work has been completed can a self-leveling floor be installed. The drying time for such a “pie” is two days.
Having studied all these subtleties in detail, there should be no questions about whether it is possible to fill a heated floor with self-leveling flooring. At first, these nuances will seem petty, but later they will help you get the truly desired result, without any flaws. The self-leveling heated floor will delight you for a long time.
Self-leveling 3D floor
3D floor
The 3D floor consists of 3 layers:
- Base coat
- Volumetric drawing
- Finishing layer
The installation process begins in the same way as for a conventional self-leveling floor. The preparation work is no different.
The base can be either a cement or gypsum screed or a polymer layer. When choosing, you need to consider the size of the picture. If you plan to place an image on the floor over the entire area of the room, then you can use a rough base. If only a pattern, ornament or image is applied that occupies part of the floor covering, then the base coating will be a polymer-based layer.
The drawing is applied in 2 ways:
- Printed on a banner and pasted
- Painted with paints on the base coat
When gluing a banner, its size should slightly exceed the area of the room .
The surface on which it is applied must not have defects in the form of bubbles and roughness. A finishing layer is applied over the image . Varnish is used for it. The thickness should not exceed 0.5 millimeters. You need to apply it with a toothed roller, and then go over it with a needle roller. To remove any air bubbles that have formed.
Advice from professionals
A list of minor tips will help you avoid difficulties when pouring self-leveling floors:
- An unprepared base will give the self-leveling floors cracks and crunches.
- If you leave cracks before pouring the solution, air gets into the solution and bubbles appear.
- Hardening will be uneven unless the poured solution is rolled in time with a roller.
- It will not be possible to pick out flies, hair, or any debris from the resulting floor. This indicates the need to use special suits during work, as self-respecting construction companies do.
- The mixture and all components are thoroughly mixed. If you don't do this, certain areas will become dark and constantly feel wet and sticky to your feet.
- Before drying, any solution releases various harmful substances. So you should use special protective masks to avoid poisoning.
- High speed of the drill when mixing the solution will lead to the appearance of bubbles, which will be difficult to get rid of.
- It is best to fill the floor in zigzags. In the future, all that remains is to level it over the entire area.
Option #1 - mastics
As a rule, mastics are most often used for laying linoleum. They are characterized by high strength and moisture resistance, which allows them to act as waterproofing.
To glue fabric-based linoleum, dispersion adhesives or synthetic bitumen mastics are used. They are applied to the floor in a layer of about 0.5 mm. Linoleum on a heat-insulating base is glued using dispersion adhesives.
The thickness of the adhesive layer on the surface is 0.7 mm. For baseless linoleum, mastics made from resins and rubber of synthetic origin are used. They are applied in a layer of no more than 0.4 mm.
There are many recipes for making linoleum glue at home. But it should be noted that store-bought adhesive is more reliable, since if you prepare it yourself there is a risk of making mistakes or doing something wrong.
In order to properly fill a liquid floor, you must follow a number of rules.
The dream of any owner renovating his apartment is a flat floor. In the future, this will allow you to lay any covering on it without any problems. Today, thanks to the introduction of modern technologies, anyone can make a floor that is close to ideal.
For this purpose, there are a number of mixtures for leveling floors:
- epoxy,
- cement-acrylic,
- based on polyurethane,
- based on methyl methacrylic resins.
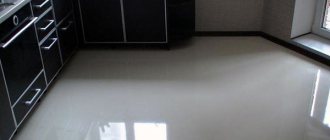
When dry, this liquid mixture creates a perfectly smooth surface.
Filling process step by step
The solution must be mixed strictly following the instructions of the material manufacturer. Violations of proportions and deviations from instructions, entailing a deterioration in technological qualities and operational characteristics, are not allowed.
Important. Polymerization of the mixture for manual pouring occurs after 35-40 minutes. after cooking. Accurate data on the life of the solution must be indicated on the packaging.
Due to the short period of time when the solution is suitable for pouring, attempts to install a self-leveling floor without an assistant must be nipped in the bud. It is better to enlist two pairs of friendly hands and initially distribute responsibilities. One prepares the mass, the second pours it, the third distributes it with a spatula or a long-handled iron.
All that remains is to list the actions, following the sequence:
We install a limiter in the doorway - a rail, a piece of drywall or profile. We will do the same if it is not possible to fill in one step in a room that is too large or if you plan to install combined floors. We fill the mass prepared according to all the rules in strips no more than 50 cm wide.
The first lane runs along the wall opposite the entrance.
Avoiding any breaks, fill in the second strip, at the same time evenly distributing the solution with a spatula or iron. And we continue like this until the end of the work.
We treat the filled layer with an aeration roller, due to which the self-leveling floor will be free of air bubbles. During processing, we move along the surface in paint shoes - shoes with support spikes on the sole.
We cover the filling with polyethylene and wait the time required according to the instructions for the self-leveling mass to mature.
If the surface needs to be given anti-slip properties, the poured floor is sprinkled with washed sand or not too zealous, expelling air from the mixture with an aeration roller. The “craters” left from the bursting bubbles will interfere with sliding.
It’s not difficult to understand the technology of applying self-leveling flooring, and it’s also easy to do it with skill. You just need to find out all the important points in advance, take into account the technological specifics and plan your actions correctly. Knowing the nuances of pouring will not harm those who decide to entrust it to workers.
Well, now it's time to finish the article. All the material I wanted to share has been reviewed. I hope it will be useful to you, and you will use it if you need to lay a self-leveling concrete floor with your own hands. Improve your own practical skills and gain new knowledge, as they say: “It’s never too late to learn!” That's all, thank you for your attention, successful and easy repair!
Option #2 - special glue
A good glue for linoleum is quite elastic, which does not allow it to peel off under load. According to the method of gluing linoleum, compositions are divided into two types: for fixation and continuous gluing.
There are five types of adhesives for continuous bonding: one-component, two-component, water-dispersed, polyurethane and solvent-based adhesive. Water-dispersed compositions are environmentally friendly and popular. At the same time, they are quite elastic and fix linoleum with high quality.
As a more economical option, use adhesive for fixation - a special composition that has moderate adhesive ability and constant stickiness. This glue is easy to apply and the consumption is not high. It is best to buy glue together with linoleum, which will allow the seller to give full advice and offer the best option.
Having chosen the adhesive composition, you can proceed directly to the procedure for laying linoleum.
The adhesive composition is evenly applied to the floor surface with a notched trowel, sequentially spreading the linoleum and pressing it to the floor surface with a roller or brush.
Drying times vary; to find out exactly, you need to read the label and instructions on it.
Types of floor levelers
Floor levelers are building mixtures that are laid or poured between the base and finishing.
Based on their composition, solutions are divided into two categories:
- Plaster.
- Cement.
By purpose:
- Corrective.
- Starters.
- Finishing
By installation method:
- Layable (rough levelers).
- Poured (thin-layer self-leveling mixtures or self-leveling floor).
You can buy floor levelers in the form of a dry mixture or a ready-mix.
Note! In most cases, suspensions are compatible with underfloor heating systems. But the installation of a water-type system is carried out exclusively in a cement mortar screed, with a pouring thickness of 3.5 cm. The diameter of the pipe is taken into account. And the electrical system can be mounted both in a cement screed and in thin-layer mixtures with a thickness of 1 cm.
To level and strengthen wooden floors, surfaces with weak foundations and “floating” structures, the thickness of the leveling mass should be more than 3.5 cm.
