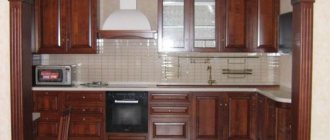
The arch as a building structure is the most ancient type of ceiling. Until they began to cover buildings with wood and reinforced concrete slabs. It still prevails in church buildings.
In residential buildings and public buildings in Russia that have survived to this day, windows, doors, and inter-house openings for the passage of people and vehicles remain arched.
They were performed on connecting walls made of brick, hewn stones with a special wedge in the middle. This is exactly how arches are created in private homes today. They are legal if they are included in the construction project. Below are recommendations on how to make an arch with your own hands.
Arch fashion?
In municipal housing there is a ban on alterations to apartments. Most often, arched structures are illegally installed between kitchens and adjacent rooms, similar to European living rooms. Not knowing the layout of the floors, home-made workers often destroyed the wall, which was a load-bearing or main one.
And the Housing Code of the Russian Federation prohibits changing the configuration of housing. In particular, you cannot destroy, change or carry out any actions with load-bearing and main walls.
If the door arch does not affect the strength of the structure, then specialists may give the go-ahead or legitimize the structure without permission.
Our advice below is also for such residents, but mainly for those who are building their own residential building or those who bought a new apartment without finishing and will furnish it themselves.
The developer will provide them with a layout diagram of the main structures. You can place arches, at least one after the other. And then the living room will be divided, but with a beautiful, side slope, semi-arch.
Dye
So, the second most popular option is painting the arch. Here you can show your individuality and paint your own unique ornament, design or inscription, the main thing is to have good imagination and paint brushes, and do not forget that the skills of an artist are not the last thing in this matter, and if you do not have this gift, then it is better to call a specialist.
But if, unfortunately, you don’t have any of the above, then you can simply buy paint and tools, and then paint each room with monotonous and boring paint
To highlight the arch, and this is important, otherwise why did you make it in the first place, you can make a beautiful painting on the inside and outside of the arch using a stencil and spray paint. By choosing a suitable color background for this painting, you can easily stun any guest in your home.
Naturally, painting has its drawbacks. Firstly, this is the price, because a can of good paint can cost a lot of money and it won’t be enough money to cover the whole house with such paint or it will cost a pretty penny. Secondly, at such a price, these paints can be easily damaged by children or you if liquids, colored pencils, pens, paints, etc. accidentally come into contact with it.
Types of arched doorways
There are at least a dozen of them:
- classic;
- modern;
- romance;
- ellipse;
- portal;
- trapezoid;
- semi-arch (one corner is beveled from above to the floor).
If the arch is mounted as a decorative rather than a load-bearing element, then all of the above will do. The best fastening of walls and ceilings will only be with classics, ellipse and trapezoid. Since these types of architectural elements are the most curvilinear.
An arch is constructed on through or blind openings and spans. Previously, they decorated enfilades of rooms.
Look at photos of arches made by yourself in different places, and also take a photo of your own such ceiling at the end of the work.
Review of finishing materials
The cladding of an arch in an apartment can be made with various materials - there are plenty of options
The modern market of finishing materials offers a sufficient number of solutions so that a through opening can be finished.
If there is an arch, how to finish it? Let's look at the most popular materials:
- Decorative rock;
- Wallpaper (a classic solution that has been proven for more than one decade);
- Mirrors - used for decoration not so long ago;
- Mosaic;
- Textile;
- Cork;
- Decorative plaster ;
- Ceramic or tiles;
- Facing brick.
Arched corners
Vulnerable spots of the arched structure are necessarily marked with corners - that’s just the way it is. Protection is not required only for their hard cladding.
If the arch is finished with some kind of hard material, you don’t have to use arched corners - this is not necessary.
But, if you have a completely different design, it is the corners that are needed in order to protect the entire architectural structure from mechanical damage. This way you will maintain the aesthetic appearance of your arched opening for many years.
When finishing, pay special attention to arched corners, they are vulnerable
Today on sale you can choose arched plastic corners of various widths - they produce products for structures of any volume. But experts note that the following solution is a convenient size: 1 by 2 cm. The wide side of the corner is glued inside the arch - liquid nails are used specifically for this procedure. The narrow side of the corner is fixed to the facade of the arched structure.
To achieve maximum effect and finish the arch with high quality, the corner must be pressed against the base for a long time. It is best to wait about 12 hours. Therefore, use masking tape to secure the already securely glued plastic element to the arched structure.
Wooden arch
Working with this material must be very delicate. Oak, beech, mahogany are suitable, but pine is no worse in strength - durable and inexpensive wood. Any wood must be well dried so that it does not warp or dry out.
The arched part is made together with the door, being its upper part. The door ramp should also have the same top configuration. A solid arched opening is made from wood, preferably with one beam.
Let's consider not an arch compatible with a door, but an open arched opening. The work occurs through a number of stages:
- the fastening frame is mounted;
- prepared parts are stacked and connected;
- possible voids are foamed and puttied;
- external cladding is applied.
Frame
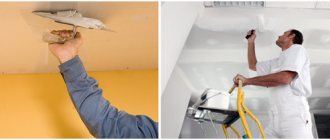
For the frame, guide profile slats will be used to create the base, and slats of a thinner cut profile (you can make the cuts yourself using metal scissors) to create bends in the structure. First, you need to place a guide profile along the boundaries of the structure; it will create the skeleton of the product, securely fastening it to the base. The guide profile is attached both to the top of the opening and to the side parts.
The guide profile must be secured with a drill or hammer drill using dowels. Take a step between them of 15-20 centimeters. After securing the guide profile, you need to create bends. If you did not purchase a profile with ready-made cuts, then create them yourself. To do this, you will need a rack profile and metal scissors; most importantly, do not use a grinder, as it removes the galvanization from the profile, after which it becomes susceptible to corrosion. Make cuts in the profile with scissors; if the bend will be made inward, then make slightly triangular cuts; if in the opposite direction, then ordinary ones.
The bent profile is connected to the guide using self-tapping screws or a cutter; in the latter case, you do not have to use a screwdriver. In addition, if the design is planned to be complex, then there will be many bends in it, so more profiles will be needed than when creating a standard arch. Particularly complex frames are obtained when asymmetrical indoor arches are created from plasterboard, so when creating them, be especially careful so that you don’t have to correct or redo anything later.
DIY plasterboard arch
Draw the shape of a full arch on a large sheet of paper, capturing 10-15 cm of the sides of the walls and the entire top. Transfer the drawing to a sheet of plasterboard or plywood, first cut it out on one sheet with a jigsaw, then place it like a stencil on the second and outline it, and also cut it out.
Reinforce it on the wall with dowels, and inside with spacers. Attach a plywood arc from below. Repeat everything else as described above.
The question: how to decorate an arch with your own hands is decided by yourself according to your taste or preference for the interior style.
Materials
When choosing the material for interior arches from which the entire structure will be constructed, it is important to take into account the durability of the coating, strength, as well as its resistance to the special conditions of some rooms: for example, arches in the kitchen should not be deformed by steam, and arched openings that are located under straight lines sunlight, should not fade, maintaining its original color
Note! Some materials are flammable: you should always remember safety, especially if you are decorating the interior of a children's room. Interior arches made of plasterboard in an apartment, photo
What types of interior arches are there depending on the materials used?
For your home, you can choose different designs from the list presented:
- drywall is the most common option for arches. It easily takes the desired shape: if necessary, the plasterboard sheet can be bent or, having outlined the outline, cut to the required size. This material can have different thicknesses, so you don’t have to worry about the strength of the structure. In addition, steam, moisture, sunlight and other factors will not affect the appearance of an interior plasterboard arch;
Interior arches made of plasterboard for the kitchen, photo wooden interior arches are the next most popular option. It is not easy to give such structures an unusual shape: ready-made interior arches made of wood do not differ in special design or color variety, except for the relief cut on the surface. But you can make an interior arch out of wood with your own hands, giving it the desired look and providing additional decorative finishing that would correspond to the overall picture of the design and decoration of the room. Craftsmen advise installing wooden arches in spacious rooms - due to the fact that the wood always looks quite massive; Beautiful interior arches, photo interior arches made of plaster are separate curved structures, decorated with columns along the edges. When installing these elements near the walls using special glue, you will only have to putty the connecting area or cover it with a mixture of plaster. After all these manipulations, the arch is repainted in the chosen color and treated with varnish for protection; Types of interior arches, photos from polystyrene foam you can create an imitation of columns with an upper transition in the interior. Such arches are popular due to their low cost, although they also have a major drawback: low resistance to mechanical damage and fragility. Foam arches are fixed with glue, after drying they are puttied and painted to obtain the desired decorative effect. In addition, it is not necessary to paint them: a white interior arch is considered a classic and will suit any design; plastic arches today are not as popular as before, but in some interiors you can see such options. These are designs of simple shape, often they are devoid of decorative details and are more suitable for minimalism than for those styles where it is necessary to emphasize certain features and characteristic features of stylistic trends; Interior arches - modern design with a wide opening, photo arches made of chipboard and fiberboard - a budget and quite a good option for an apartment
Such materials allow the use of a variety of decorative coatings; they are flexible, bend well, are subject to shape correction, and do not lose their appearance over time.
Important! A more competent solution would be if you choose interior arches with a door connecting the room being decorated with the adjacent one, since all existing transitions should be decorated in the same or similar color scheme. Arched interior doors, photo
How to make an arch instead of a door: method three - typesetting technique
Another way to make arches from plasterboard with your own hands is by typesetting. The arch is divided into segments and assembled from pieces that create a curvature close to the required one.
The arch is assembled from plates cut from plasterboard
They are attached to putty diluted with a mixture of PVA and water. This batch dries quickly, so first we cut the plates and try them on. You can fold it on a table, but the vault will turn out upside down, but it will allow you to evaluate how correctly the plates are assembled.
Side view of the arch opening
Then the plates begin to be attached to the opening, periodically strengthening them with self-tapping screws for reliability. Place washers under the heads so as not to push through the cardboard. Remove excess putty immediately. If it gets stuck, it’s impossible to tear it off. The finished surface is treated with a primer to improve adhesion (adhesion), and then puttied, leveling the arch. To make it easier to display, you can use a template attached on both sides.
A putty arch looks like this
Making sharp bends using this technology is not easy, but for rounded corners and semi-arches it is a great way to do without profiles.