It is often necessary to redesign premises, change the location of partitions and walls, and with them the location of communications. To hide new utility lines laid, you can use an element such as a false plasterboard wall. Assembling such a structure requires a minimum of time and cost, but it is imperative to adhere to the correct technology.
What you need to know before getting started. Production stages
The first thing you need to remember is that a false wall made of plasterboard must be sufficiently stable and reliable.
To do this, special attention must be paid to such stages of construction as marking and building the frame. Work must be carried out in the following order:
- Design. At this stage, the false wall made of plasterboard should be embodied in the form of sketches, on the basis of which, after taking all the necessary measurements, a design drawing is constructed.
- Depending on the size, width, shape and other features, it is necessary to calculate the amount of materials needed for the work and purchase them.
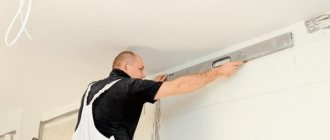
- Now that the design and planning stage has been completed, you can begin preparatory work for the construction of a gypsum plasterboard structure. Using a tape measure, a building level and a marker, make markings along which the floor and ceiling profiles will be installed - the basis of the future structure. You can check yourself using a plumb line.
- Secure the guides according to the markings. It is best to additionally lay a sealing tape between the guides and the surface to reduce possible sound effects; the compacted structure will not hum or rattle in the future, no matter what happens around it. The profiles must be fastened at a distance of no more than half a meter, the dowels must have an edging, and the hardware must have a wide head.
- Upon completion of this stage, vertical supporting structures are erected. Check yourself with a level to ensure that the resulting grate is level. The distance between the guides should not be more than sixty centimeters. If you need to make rounded elements, use metal scissors and a die cutter. Make a series of cuts on the sides of the profile and bend it inward, giving the desired shape. Secure the result using a die cutter. Now you can mount the curved part to the rest of the frame.
- Having finished with the vertical rails, take care of the horizontal bars. They are made from the same supporting profile as follows: measure the distance between the verticals and make blanks with an allowance of 10 - 15 centimeters on each side. Mark and make diagonal cuts on the sides of the workpiece, diagonally, from the border to the outer edge. Now fold the edges outward. The result should be a design in the shape of the letter “P”. It is these structures that are installed between the vertical posts, securing them with a die cutter.
- Now that the supporting structure is built, proceed to covering it with plasterboard. Sheathe one side first, then, if necessary, install all the necessary channels in the wall, be it ventilation pipes or electrical wiring. In the case of wiring, use corrugated cable; in the future, this will facilitate the installation and dismantling of new lines.
- Finally, you can sheathe the second side and start working on the sides.
When working with the sidewalls, remember that to give the plasterboard a curved shape, you need to prick it on one side with a needle roller and moisten it with water. If the bend is very large, make cuts every 2–3 cm on the front side; in the future, these places will be covered with putty.
The main thing in installing a false wall made of plasterboard is proper marking and installation of the frame
Upon completion of construction work, begin finishing. Putty all joints with the starting compound, then glue it with serpyanka onto the raw mixture and finish everything with a finishing layer of material. Strengthen the corners with a construction corner, where a bend is required, bend it using metal scissors. Use a construction stapler to secure it to the corners.
Finally, you can finish the resulting structure.
Installation features: step-by-step guide
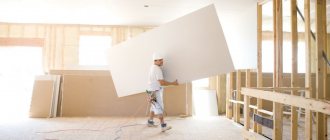
Installation of drywall sheets should begin only after you have verified the strength of the frame. Place the prepared material on the floor. To cut it, use a construction knife. Directly during installation, follow the rules:
- Installation should begin from the door or window - then you will be able to save material and join the sheets.
- The cut panels are applied to the frame, after which they are attached to it with self-tapping screws with a drill at the end.
- Place the screws at a distance of at least 15 cm from each other. Recess the caps into the plaster as much as possible.
Do not make holes in the drywall in advance - this will not allow the sheets to fit tightly to the frame.
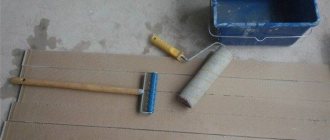
Once the sheets are secured, surface treatment begins. A primer is applied to the material with a roller. Large gaps at the joints are filled with putty or building mixture. The screw caps are treated with fine sandpaper. After these measures, another layer of primer is applied and finishing begins.
How to make a false wall in an apartment with your own hands
Do-it-yourself installation of sliding interior doors and other doors - step-by-step instructions + video
Before starting work, you need to acquire building materials. Drywall is used to install false walls. Its quantity is determined from the area of the future wall - it must be multiplied by two and a few more sheets added - it all depends on the thickness of the structure. To create a frame you will need a metal profile and dowel-nails. You need to take care of the tool. You will definitely need a construction knife, tape measure, drill, hammer and spatula with a brush - for preparing and finishing surfaces. The process of creating a false wall itself consists of 4 stages:
- Surface preparation.
- Creating a sheathing.
- Installation of plasterboard sheets.
- Surface finishing.
Surface preparation includes removing the old finish and applying a primer. It is also necessary to secure all communications that will be hidden by the false wall. Carefully seal water pipes to avoid leaks and dampness. Take care of wiring for household appliances in advance.
Treat the surface to which the false wall will be attached with an antiseptic compound to prevent the appearance of fungus!
The further sequence of actions depends on what functional value your future false wall will have.
Ventilated false wall near the window for the battery
To ventilate the battery behind a false wall, you need to purchase a decorative screen. You cannot cover the radiator with a solid wall - this will lead to heat loss and the risk of fungus. With a ventilated grille, the air will circulate on its own due to the temperature difference in the room and outside the wall. You need to start by applying markings for mounting the frame:
- Vertical posts should be located from each other at a distance equal to the width of the plasterboard sheet for its further joining. As a rule, it is 60 cm.
- Additional vertical guides are installed at a distance of 30 cm from the corner of the wall.
- A profile for installing slopes is mounted around the perimeter of the window.
- On each side of the radiator, step back 10 cm to attach a vertical profile on which the ventilation grille will be installed.
- Place the profile horizontally on the floor and ceiling so that the distance from it to the wall is 10 cm greater than the thickness of the battery.
After carefully marking the location for the frame, they proceed directly to its installation. It is recommended to buy a screen for the radiator slightly wider than the battery itself. In the future, this will allow access to the cranes and eliminate the need to make special hatches.
In the form of a pantry
To install a false wall frame in the form of a storage room, you need to purchase a reinforced metal profile with transverse stiffeners so that it can support all the objects. The first horizontal guide is installed on the floor, at a distance from the wall equal to the width of the shelf. Do not make the shelves too wide - this will create additional stress on the frame. For the shelves themselves, use durable materials, such as wooden boards or chipboard sheets.
Vertical guides are mounted in increments equal to the width of the drywall sheet. At the edges of the wall, the length of the racks should correspond to the height of the room. In places where shelves will be located, it is necessary to provide cross members connecting the wall and horizontal beams.
Blind wall
The installation of a frame for a blank wall begins with the placement of vertical posts along the entire height of the room. They should be located at a distance of 60 cm from each other. Additional guides should be installed for the door to add strength to the structure. Vertical posts are attached to horizontal beams.
Both horizontal and vertical profiles must be connected to each other using crossbars hidden in the wall cavity. It is necessary to ensure reliable stability of the frame structure, otherwise it may become deformed and the drywall sheets will become covered with cracks. To give strength, the profile elements are fastened with metal corners.
Materials required for work in the right quantities
- Drywall. A regular wall gypsum board with a thickness of 12.5 mm will do. If a false wall is made in a bathroom or toilet, then you should use moisture-resistant plasterboard.
- Rack and guide metal profiles will be required to create the frame.
- Dowels are needed to attach the frame, and self-tapping screws are needed to attach drywall.
- Sealing tape is used to reduce the noise level when exposed to a false wall.
- Mineral wool immediately plays the role of sound insulation and insulation.
- Primer, putty and reinforcing tape will be required when preparing the structure for finishing.
Before you make a false wall from plasterboard, you need to stock up on tools and materials. If in the first case everything is clear, then with fasteners the question always arises about its required quantity. To do this, you need to know the dimensions of the wall being created.
It’s almost impossible to buy exactly the right amount of material the first time
The area of the false wall must correspond to the area of the plasterboard sheets. Typically, the dimensions of gypsum boards are 1.2x3 meters, 1.2x2.5 meters, 1.2x2 meters and 0.8x1.5 meters. To create walls, the first two options are used. It is easy to calculate the area of one sheet and determine how many are needed. It would be useful to draw a diagram indicating how the sheets will be attached to the frame. In this case, it will be clearly visible that a little more material will be required than originally planned (it all depends on how the sheets are cut).
The guide profile will be attached to the floor, wall and ceiling. Therefore, we will find out what perimeter the future false plasterboard wall has. The number of linear meters of this profile must correspond to the resulting perimeter. If the wall dimensions are 4x3 meters, then you need 24 meters of guides. The rack profile is inserted inside the frame in increments of 40-60 cm. Therefore, its quantity is also easy to calculate.
When calculating the profile footage, you need to take into account the presence of openings in the structure. Niches in a false wall are not uncommon.
The frame is attached with dowels in increments of 60 centimeters, so it is easy to calculate how many of them are needed if the perimeter of the wall is known. With self-tapping screws it’s a little more difficult, because there are a lot of them and it’s different for everyone.
The same amount of sealing tape is needed as the rack profile. Mineral wool will be laid inside the wall, so its quantity can also be easily calculated. The amount of putty and primer required can be found on the manufacturer's packaging.
How to finish: options
How to make a bathroom in a frame house with your own hands: rules and step-by-step instructions + video
There are no restrictions on the decoration of false walls. We list the most common and simplest options:
- Wallpapering.
- Coating with acrylic or oil paint.
- Use of decorative plaster.
- Decoration with ceramic tiles in the kitchen and bathroom.
To effectively decorate a blank wall, decorative slits are made in it using an ordinary construction knife. Glass or other interior elements are then installed into these holes - it all depends on your imagination.
Caring for a false wall does not differ in any special ways. To make a false wall always look beautiful and neat, you need to:
- Periodically remove dust and dirt from its surface.
- Avoid over-wetting it in the kitchen and bathroom.
- Inspect the space behind the grated screen in the wall for the heating radiator.
- Check for condensation, smudges and leaks on hidden water pipes and taps.
- Inspect the wiring hidden behind the false panel for defects.
Carrying out such measures will not only protect your apartment from fungus damage, but will also protect you from unexpected costs for major repairs associated with leaks or short circuits.
False walls are an inexpensive and easy way to diversify the design of your apartment. With the proper approach, anyone can handle their installation. They do not require special care and can always be easily demolished to reorganize the free space of the room. The presented designs fit perfectly into the framework of strength, usefulness and beauty.
Application in the interior
Designers use false walls to decorate rooms.
In this case, niches and shelves are cut out in them. Subsequently, they are filled with items that complement the interior. This visually complicates the design of the premises, making it more stylish and memorable. Colored glass can be installed in through holes to create a whimsical play of light and shadow. The same can be achieved with built-in lighting.
Such designs have not only decorative, but also functional significance. They are used to install household appliances - televisions, audio systems and multimedia players. In this case, the walls are reinforced with a strong frame that can support the weight of all devices.
False walls are hollow - two panels are connected to each other by a frame, but there is always an air gap between them. Thanks to this, they can be used for installing sliding doors. By closing the doors, it is possible to isolate one room from another, and by moving them apart, you can create a spacious room, for example, for receiving guests. The advantage of the design is the fact that they can be given any shape and diversify the design of the apartment.
Construction technology
Make a cat house with your own hands: step-by-step instructions on how to make a simple and beautiful cat house (105 photos and videos)
In order to level the walls, it is not necessary to seek help from professional builders. Building a wall yourself is quite simple if you follow all the recommendations for constructing plasterboard structures. False walls around the perimeter of the room are installed in several stages.
Preparation
Before marking and installing the sheathing, it is necessary to treat the main wall. Remove all crumbling plaster and repair large cracks. Treat the surface of the main wall with an antifungal compound and primer. Carefully remove all generated debris.
Pros of shelves
Shelves made of plasterboard are appropriate in any room. They can be done:
To place the shelves, do the following:
The most important advantage of DIY plasterboard shelves is that they can have a wide variety of shapes. Everything in this case depends solely on the general concept of the room and the imagination of the shelf creator.
Drywall is valuable precisely because a shelf from it can be made into any intricate shape, including radial semicircular structures and complex geometric shapes. This allows you to create unusual exclusive interiors with your own hands.
How to dismantle plasterboard walls?
One of the important features of gypsum plasterboard structures is the possibility of quick and not too dusty dismantling. This procedure can be done in two ways:
- With preservation of material.
- No saving.
Dismantling without preservation has the sole purpose of destroying the existing structure. It is produced quite simply - the gypsum board is broken through and removed, the metal elements are disassembled and all materials are removed from the room.
If you need to save the material for recycling, then the structures must be disassembled in the reverse order of assembly:
- All foreign objects in the room must be protected from dust with plastic wrap.
- First of all, you need to remove the doors, lamps and other decorative elements.
- Remove tape or corners from the seams and corners of the sheets.
- Clean the putty from the screw locations.
- Remove the sheets and disassemble the metal frame.
Attention! When disassembling, be aware of the electrical wiring inside the structure. If possible, it should be unplugged
Careful disassembly of the structure may not damage the materials at all, providing the opportunity for reuse.
Final work
Don't forget about the platbands.
To finally complete the process, the door should be refined and decorated. Platbands are used for these purposes. It is best to select platbands immediately, especially those that come with the door in the set.
If there are none, you will have to select them by color. It is better to refrain from all kinds of drawings and patterns if you are not an artist or designer.
The platbands are nailed with flattened nails to the frame to close the gap and foam. The planks are cut so that they are joined end-to-end at 45° each, resulting in the desired 90°. It's simple.
If the price of cutting in the store is low, it is better to cut the planks immediately upon purchase. Otherwise, you will need a guide template or manual precision, because any deviation from the given angle can result in damage to the plank.
We nail the trims with a hammer around the perimeter of the door with a fastening pitch of 20–25 cm.
DIY installation of false plasterboard walls step by step
High-quality plasterboard false walls are becoming an increasingly modern and widespread method of finishing rooms. It has a great advantage. After all, with the help of false walls you can change not only the appearance, but also the very shape of the room and the actual walls. In addition, the installation of such a wall is not too difficult even for a beginner in terms of repairs.
This is very convenient, since you can adjust the thickness of the wall in the right places, and the structure made in this way will be highly reliable, despite the void between the false and real wall.
Materials used
Especially for the bathroom or kitchen, modern manufacturers often produce false panels from moisture-resistant components. Some focus on environmental friendliness of materials, durability and other characteristics.
There are products made from stone, marble and other unusual materials that are relatively expensive, but can make the interior memorable and original. Most products on the market lack this touch of luxury, but are easy to install and practical. To understand which products have the most significant advantages, you need to familiarize yourself with the most popular materials for them.
Solid wood
Raw materials of completely natural origin, which have many advantages, including noble aesthetic qualities. As a rule, for the production of false panels from solid wood, the following species are used:
- cedar;
- oak;
- maple;
- alder.
Is it worth mentioning that this material is distinguished by its environmental component and safety for both human health and pets. To give the products greater durability, moisture resistance and fire safety, manufacturers additionally treat such panels with special compounds such as wax.
Chipboard products
- they have low resistance to mechanical damage;
- temperature changes have a negative effect on them;
- they are badly affected by household chemicals;
- have almost no protection against moisture.
But not everything is as bad as it might seem. Installation of particle boards is quite simple, but in the eyes of guests they will not be so simple - many types of chipboards have a sophisticated appearance.
MDF products
They are based on pressed wood fibers. Compared to chipboard, they have much fewer disadvantages. They abound in various color variations, excellent resistance to mechanical stress and are sometimes quite realistically stylized to look like natural wood. Good for decoration and can have photo printing.
As for the durability of such structures, it depends on the strength of their upper protective layer. In this regard, the most reliable options are those with an acrylic or varnish coating.
Plastic panels
PVC is the cheapest and easiest to install product. It has a wide color palette and options for imitating natural materials, for example, there are products with imitation brickwork, wood or stone. At the same time, plastic false panels can not lose their colors for a long time, since they do not fade in the sun. You should refrain from attaching products made from this material near the stove - when heated, they will melt and release harmful substances.
The ease of installation of PVC comes down to the fact that the light weight of such false panels allows them to be installed on walls using ordinary glue (the walls must be even). This is their undeniable advantage, since more sophisticated products require more effort and tools. The only requirement for the glue is that it must meet the context of the room, that is, in rooms with high humidity, you need a waterproof glue that will not come off the walls.
Glass false panels
They deserve to be bought at least for their beautiful appearance. But due to their prices, many may have difficulties with this. High prices are associated, first of all, with the difficult process of producing such glass products, as well as their environmental friendliness. Attaching it at home is also not an easy task. Among the advantages, in addition to external splendor, we can highlight:
- ease of care;
- very high strength (made from tempered glass);
- moisture resistance;
- withstand high temperatures.
In addition to this, false glass panels can be decorated with printing, sandblasting, photo printing, textiles...
Metal variations
Material such as stainless steel is rarely present in false panels. It is she who presents the metal versions of these products. Despite all their steel hardness, they do not look rough; on the contrary, on the surface of many metal plates there is a touch of glossy shine. Some of them have matte shades, and all are smooth, without any roughness or angularity. Such products are not afraid of temperature changes or moisture.
Purpose
A false wall is an inexpensive way to zone small spaces. This is true for one-room apartments and studio apartments, where one room performs several functions at once. This technique is also suitable for large rooms - here you can create secluded relaxation areas. At the same time, you do not need to have special skills, and thanks to the availability of materials, a large amount of money.
With their help, you can hide communications, for example, pipes in the bathroom or hide household appliances in the kitchen. But it is worth remembering that in small rooms such structures will waste precious space and create discomfort - it is better to resort to another method of zoning.
False walls for a fake house
Page navigation
Even from a small one-room apartment you can create a cozy and stylish nest, you just need to correctly distribute the free space and create functional zones. This can be done in various ways. One of them is installing a false wall. This is a great way to bring your fantasies to life, express your feelings and diversify your home.
Decorating walls with false panels wainscot
The fashion for such panels also originated in Europe. They were much cheaper than boiserie panels. Wainscot panels were made from oak. They lined the wall with them from below - from the floor and about one third of the wall height (from 90 to 150 cm). The panels protected the walls from damage - for example, by the backs of chairs. The panels are easy to clean and last a long time. Hence the high popularity of this finishing method.
This is how real wall panels are mounted
Wainscot panels on the walls
Wainscot panels are still very common in the USA today. But not all Americans use real oak panels, because wall paneling can be imitated. Decorating walls with fake panels is very common there. How it's done?
It’s very simple: the wall is divided horizontally using a wide profile - molding, which is attached to the wall at a height of 90-150 cm from the floor along the entire perimeter of the room. This molding used to be called chair rail - this wide strip was supposed to protect the wall from damage by the backs of chairs. Now it has an aesthetic function.
After fixing the horizontal strip, a “panel” layout of polyurethane moldings or wooden strips is made, which are attached to the bottom of the wall using self-tapping screws and/or glue.
The layout can be different - it all depends on the desires and imagination of the owners. You can divide the bottom of the wall into sections with vertical lines, and lay out one rectangle in each section. Or do without sections, making only large rectangles or polygons.
The surface inside the sections and rectangles can be painted over or covered with wallpaper, or left as is.
Wall false panels
Sequence of installation of a gypsum plasterboard wall on a metal frame
The cost of installing a false plasterboard wall is not that high, but why pay someone if you can do it yourself?
Wooden or metal structures are used as a frame for the false wall.
Metal ones are more elegant, durable and perfectly smooth. We’ll dwell on them to talk about the nuances of installation.
What you need for work
To work, a home craftsman will need a set of common repair tools:
- a screwdriver or electric screwdriver with a pair of batteries so as not to waste extra time on charging;
- an electric drill with a hammer drill for drilling concrete walls;
- a sharp construction knife or a well-sharpened kitchen knife with a wide and thin blade;
- special scissors for cutting metal profiles. If you don’t have them, it’s better to buy them, because the profile will have to be trimmed.
Don’t forget marking tools: tape measure, level, pencil and cord
To make a false wall, you will need the plasterboard itself, a metal profile for the posts and guides, dowels for fixing the frame to the support and self-tapping screws for installing the plasterboard. Mineral wool is usually used for sound insulation. To finish the surface, it is first primed and puttied. The methods of decorating such a surface can be any: wallpapering, decorative plaster or painting.
How to make false walls from plasterboard: video instructions
The process of installing drywall is clearly demonstrated in this video on how to make a false wall from drywall with your own hands:
How to dismantle plasterboard walls?
One of the important features of gypsum plasterboard structures is the possibility of quick and not too dusty dismantling. This procedure can be done in two ways:
- With preservation of material.
- No saving.
Dismantling without preservation has the sole purpose of destroying the existing structure. It is produced quite simply - the gypsum board is broken through and removed, the metal elements are disassembled and all materials are removed from the room.
If you need to save the material for recycling, then the structures must be disassembled in the reverse order of assembly:
- All foreign objects in the room must be protected from dust with plastic wrap.
- First of all, you need to remove the doors, lamps and other decorative elements.
- Remove tape or corners from the seams and corners of the sheets.
- Clean the putty from the screw locations.
- Remove the sheets and disassemble the metal frame.
Attention! When disassembling, be aware of the electrical wiring inside the structure. If possible, it should be unplugged
Careful disassembly of the structure may not damage the materials at all, providing the opportunity for reuse.
Advantages of partitions, selection nuances
If you want to make repairs quickly and on a budget without affecting the load-bearing walls, lightweight structures will be the optimal solution. For example, a fabric partition installed in front of the bed will separate the sleeping area from the living room and will not take up much space.
To install a design element, you will not need to change the design of the room or obtain additional approvals. Most structures can be manufactured and installed independently.
Table 1. Requirements for partitions for different zones
| Purpose of the premises | Requirements for a false wall | Recommended Material |
| Kitchen | The design must be heat-resistant and easy to clean. | Stone, tempered glass |
| Bathroom | Must be moisture-proof, resistant to mold and mildew. | PVC, glass |
| Bedroom | The design must isolate light and sound. | Brick, drywall |
| Children's | The partition must be stable, wear-resistant, and non-traumatic. | Tree |
It is best to give preference to durable natural materials. But in the above selection you can also find budget options.
What kind of drywall is used for false walls?
GCR is a universal building material that is used not only for walls, but also for ceilings, ventilation shafts and many other objects. It consists of a gypsum board covered with a cardboard jacket.
Manufacturers add various modifying additives to the gypsum mixture, giving the sheets special properties.
Simple gypsum boards for domestic premises
These sheets do not differ in any special properties and can be used in rooms with normal temperature levels and humidity up to 70%. The color of the cardboard on them is gray, and the marking is simply “GKL”. Even a beginner can install a false wall made of such plasterboard.
Moisture-resistant gypsum boards for false plasterboard walls in the bathroom
To achieve moisture-resistant properties, silicone granules and an antifungal compound are added to the gypsum mixture. The outside of the sheet is covered in a special cardboard that is resistant to moisture.
Despite these properties, professional builders recommend additionally protecting gypsum boards with a waterproof coating: paint, tiles or PVC. This material is intended for bathrooms, toilets and kitchens, it is green in color and marked “GKLV”.
The photo shows false plasterboard walls in the bathroom.
Fireproof sheets for special purposes
This version of fire-resistant products marked “GKLO” is used in the construction of ventilation shafts, cladding of electrical panels and installation of heating boilers, and leveling the walls of production workshops. This drywall is gray, with “GKLO” written on it in red.
A false wall made of fireproof plasterboard in the kitchen in the stove area is a reasonable precaution
Features of drywall
Why is it worth making your own shelves from plasterboard? The thing is that this material has many advantages, because it is one of those rare materials that, due to its hygienic qualities, is absolutely safe and ideal for decorating interior spaces with your own hands.
Advantages
Pros of drywall:
- does not contain toxic substances harmful to health, hypoallergenic;
- has soundproofing properties;
- fire resistant;
- non-flammable and fireproof;
- is able to breathe - absorb moisture or release it, which allows you to create comfortable climatic conditions in the room;
- easy to process - easy to cut;
- easy to install.
Flaws
Cons of drywall:
- the material does not withstand prolonged exposure to humidity and becomes deformed;
- requires careful installation, especially when it comes to complex geometric structures - sloppy execution can lead to deformation of the structure;
- the material does not like impacts and falls of heavy objects and can be damaged.
Important : plasterboard shelves require the use of special fasteners in order to increase their load capacity and stability. Inside the structures, especially if they are shelves for household appliances and a TV, it is worth placing a mortgage in the form of a sheet of plywood.
Plasterboard structures require decorative design after assembly. Drywall should not be left as is. Shelves and other products made from it must be painted. The seams between the sheets of drywall are masked carefully. To do this, the seams are taped and covered with putty, achieving the illusion of a single whole. If the putty work is done carelessly, the seams will be visible and the product will lose its aesthetic appearance.
Varieties
Drywall can be:
Waterproof drywall contains substances that prevent mold and mildew from growing on it. From this plasterboard you can make your own shelves for the bathroom and loggia. Again, we must take into account that moisture-resistant drywall will become wet and deformed if it is exposed to water for a long time. Therefore, the shelves should be out of reach of water. And they must be covered with moisture-resistant paint or ceramic tiles. The latter reliably protects the drywall from getting wet.
There is a particularly durable drywall - tongue-and-groove. It even has seismic resistance, so it can be used to make shelves of special strength for heavy equipment. However, such drywall is expensive and is not sold everywhere.
Recess the battery into the wall. Is it worth hiding the battery behind a false wall?
When making a good repair, there is a desire to hide the heating pipes behind a false wall, but at the same time not to deteriorate the quality of their work. This is a good solution that allows you to get rid of joints between pipes and floor coverings that cannot be joined together nicely.
There will always be a gap around the pipes in which dirt and dust will accumulate. It's the same story with the ceiling. It is almost impossible to attach a stretch ceiling baguette to a pipe.
There is an opinion that this will lead to loss of usable space
If you pay attention, you still can’t put anything on the wall with a pipe or radiator. This area can no longer be used
Also, the space behind the radiator and pipe is very inconvenient to wallpaper. These are always places where joints and shortcomings will be visible.
If we build a false wall, this will allow us to get a flat plane. The room will have a rectangular shape and we can easily place furniture against any wall. In addition, we will get wide window sills.
There is also an objection in terms of servicing the heating risers, because... access to them is closed and in case of leakage the false wall will have to be dismantled.
Potential places for leaks are the joints of pipes, taps, and radiators. This is the area near the battery. These places are covered with a removable decorative grille and are always accessible.
Only the pipe is hidden. If the pipe is solid and not rotten, then nothing will happen to it in a dry room. False walls can be installed if you are confident in the reliability of these pipes.
In order not to deteriorate the performance of radiators and not to reduce the heating of the room, the following recommendations must be taken into account.
The radiator itself must be closed in such a way that there is at least 10cm, preferably 12cm, left from the top edge to the window sill. Also, the distance from the floor should be at least 8 cm. The radiator should also be at a certain distance from the wall (about 2 - 5 cm). A larger distance will create (by the principle of a lever) an excessive load on the brackets, and a smaller distance will not allow air to effectively wash the surface from all sides and carry heat into the room.
By following these recommendations, you can get the greatest effect from the battery when heating the room and avoid loss of room heating when erecting false walls.
It's worth hiding batteries behind false walls! It's beautiful and aesthetically pleasing!
Painting
How to choose paint
Suitable for painting:
- water-based paint;
- acrylic paint;
- alkyd enamel.
Water-based paint is not waterproof. It can be used to paint parts in dry rooms, such as the bedroom, living room, hallway, kitchen. Alkyd and acrylic paints are waterproof and durable, so they can be used for painting products that are expected to bear heavy loads in difficult rooms.
Surface preparation
Drywall is puttied before painting. After this, the shelves must be coated with primer. For durability of the structure, it is better to choose an acrylic primer. After the primer has dried, you can begin painting the product.
Stages of work
Initially, you need to carefully paint all the corners and joints of the material. For this it is best to use a thin small brush. It is better to paint the surfaces of the shelves with a wide brush. If the shelves have a large surface, you can use a roller - then the painting will look smoother and more aesthetically pleasing. The paint is applied in 2 layers, each layer after the previous one has completely dried.
Important : a room in which the plasterboard shelves are painted the same color as the main wall looks very beautiful and stylish. This gives the design some integrity.
False wall made of plasterboard: how it works
Any false wall, be it an interior partition or simply covering an existing surface in a house or apartment, consists of only two main elements. Despite this, its design is very complex and it will not be possible to assemble it yourself, as they say, right away - you should understand that each of the main elements of the structure, in turn, consists of several more components, which also need to be dealt with when solving the issue How to install a false plasterboard wall with your own hands.
- Frame.
The basis of the entire structure. It is assembled from two types of profiles and auxiliary fasteners. The ud profiles are guides - they are used to set the plane of the false wall, and the cd profiles are load-bearing and cladding panels, in this case plasterboard, are attached to them. The two types of profiles are fastened together with small metal screws, and fastened to the wall using dowels and special U-shaped brackets. If we talk about interior partitions, which also belong to the category of false walls, then they are assembled from a different type of profile - uw and cw. Essentially, this is the same thing, only with a larger cross-section. False plasterboard wall for battery photo - Sheathing. In addition to drywall, the frame can be sheathed with other materials. We should talk about them separately, which we will do next.
Naturally, we should not forget about the false wall filler. Even if you do not pursue goals such as insulation or sound insulation, it would still be better to insert mineral wool into the cavity behind the sheathing. The fact is that an empty partition or simply the covering of an existing wall is nothing more than a drum - a resonator that amplifies sounds and creates an echo. I think you won't like this effect.
Preparation
In order to make a shelf on the wall, you will need tools and the most basic skills in working with them.
Which is better: heated floors or radiators?
Warm floorBatteries
Tools and materials for work:
- jigsaw;
- screwdriver or drill;
- level;
- Bulgarian;
- hacksaw;
- roulette;
- hammer.
Materials you will need:
- self-tapping screws;
- metal profile;
- guide rails;
- reinforcing mesh;
- putty.
Before you start making a shelf, you need to decide on its sketch and develop a concept for its placement in the room.
After the sketch, a detailed drawing is made, where all dimensions are indicated in real size. Based on the drawing made, the space for the shelves, which are to be made with your own hands, is measured. The necessary parts are also cut out.
Important : before starting work, drywall must be stored correctly. Sheets of material must be kept flat on top of each other. This will prevent them from becoming deformed. Deformed sheets will result in a shelf with flaws. In addition, it will not have the necessary strength.
Wooden partitions
A slatted wooden partition for zoning a room is optimal for most apartments. First of all, they are inexpensive if you do it yourself. They consist of ordinary slats fastened with screws. Secondly, a wooden partition for zoning a room allows light to pass through.
This is a natural material that at least will not harm your health. True, it does not suit every interior.
Sliding partitions
Sliding room partitions look impressive. First let's note the advantages:
- They take up almost no space. They are made mainly from thin glass, so the room is not cut down.
- The size of the room can be adjusted. Moving makes them mobile, meaning the size of the room can always be increased by simply moving the partition.
That's where the advantages end. Now let's move on to the cons:
- Sliding partitions for zoning the space of a room will constantly have to be adjusted. They connect to each other with hooks that always fall off. As a result, only one panel will move.
- They often fall out of the rollers, which is also unpleasant.
- They need a plasterboard extension, so the room will already be smaller.
Shelving partitions
A shelving partition in a room is suitable if you need to separate a part of the room that is far from the window. The same plasterboard will block the lighting and create twilight.
The rack offers the following:
- A shelving unit for dividing is also a useful space. You can put books, photo albums, various frames, and figures there. This way you won’t lose the closed space, but use it to your advantage.
- Passes light through the cells. Most often, racks come without a back wall. That is, light will pass through the shelves freely.
By the way, the rack can be furniture or plasterboard. In the second case, it also contains the advantages of the previous false wall.
Glass partitions
Glass partitions for zoning are suitable if you need to divide the room without cutting down in size. By the way, not ordinary glass is used, but tempered glass. You definitely won't be able to break it.
Without taking into account the price, glass has enough advantages:
- A glass partition in a room for zoning does not narrow the room.
- There are versions with a wide frame (costs a little less) and with a hidden one.
- Glass does not deteriorate in principle, so its service life reaches 100 years.
- You can make a matte or transparent wall.
Blinds
How to zone a room mobile? The answer is simple - blinds! They can be horizontal, vertical – it doesn’t change the essence.
Blinds zone the room well, as they create an impenetrable barrier, but if guests come, they simply go upstairs.
Their advantages include:
- Reasonable price. Regular metal or plastic blinds are inexpensive. If you want beauty, there are wooden and bamboo ones, but they are more expensive.
- You can always remove it!
- They don't cramp the room.
- Well protected from prying eyes.
Their only disadvantages are low strength. If children or animals live in the apartment, the blinds will not last long. But for this case there are fabric versions. However, they are good for dividing a room.