Major home renovations often involve replacing pipes. After the installation of pipes or radiators is completed, it becomes necessary to hide communications to create a favorable appearance for the walls in the bathroom, toilet or any other room. A lot of work done during the renovation period using expensive tiles, heated floors and attractive plumbing fixtures, and a lot of effort put into creating a pleasant interior can be in vain if you do not think through the camouflage of communications.
For such work, various materials are used, but the most acceptable is the use of plasterboard, from which the box is made. Why does the choice fall on drywall?
The advantages of a plasterboard box for covering pipes are due to the following:
- affordability of drywall;
- ease of production of plasterboard structures.
- environmental safety of drywall, characterized by the absence of harmful substances in its composition. This is especially true in the manufacture of boxes for batteries and heating pipes that generate heat when heating rooms.
Features of drywall
Some information about drywall. This popular building material is characterized by a multilayer structure with alternating gypsum and paper layers. Drywall sheets are available for sale in sizes of 2.5 by 1.2 meters. One sheet of drywall will be enough to make a box for the fan riser.
Note!
To construct a box in rooms with high humidity, such as a bathroom and toilet, you should use a moisture-resistant type of plasterboard.
Wood or metal
Metal profile base
First of all, you need to assemble the frame. To make the box, either a metal profile or a wooden beam can be used. The advantages of a metal profile made of galvanized steel are that, unlike wooden beams, it has increased resistance to moisture and is not exposed to rust for a long time.
The advantages of a wooden frame include the environmental friendliness of wood and a higher degree of sound insulation.
What do you need to consider?
- Before starting installation work, you need to take into account the dimensions of all plumbing fixtures in the room.
- Before “sewing up” pipes with plasterboard, you need to carefully consider the design of the box. It will be necessary to ensure that the internal space can be used as efficiently as possible. Inside the box there should be space for household chemicals, a broom and other toiletries.
- Since condensation forms on pipes, drywall to hide communications must be moisture resistant. Before closing the pipes, they must be treated with a special agent that will prevent the formation of moisture on the outer surface of the communications. Metal lines must first be cleaned of rust and painted with two layers of paint. Plastic pipes also need thermal insulation. It can be made using mineral wool, a heat-insulating membrane with a layer of aluminum foil, or using a special resin.
- Additional sound insulation must be made inside the structure. If this is not taken care of, then the noise from water flowing through the sewer pipes will have a great resonance due to the empty cavity of the box. Insulation can be done by wrapping the pipe with mineral wool. You should know that polystyrene foam is not suitable for these purposes.
- If the material is protected from moisture and the room is well ventilated, the structure will serve you for quite a long time.
- For greater rigidity of the box, you need to take drywall with a thickness of at least 12mm.
- You must remember to make a hole in the structure for ventilation.
- Make sure that the heads of the screws do not protrude above the surface of the drywall. They must be completely recessed.
Materials and tools
Drill for frame assembly
Before you start making a box, you should consider a set of tools and materials.
Materials and tools:
- sheet plasterboard;
- metal profile (guide and rack);
- dowel-nails, self-tapping screws for fastening parts of the box;
- special knife for cutting drywall.
You will need materials such as polyurethane foam, shock-absorbing tape, putty to level the surface of the box. Tools that will be useful are a drill, a hammer, a screwdriver, a tape measure, a level, a plumb line, and a pencil.
Is it possible to hide gas pipes under drywall?
The kitchen is traditionally a receptacle for heating, gas, water and sewer pipes, which are constantly in sight, thereby violating the integrity of the interior of the room.
The main problem is gas pipes, since hiding them in grooves is prohibited by operational rules. Modern building materials can provide assistance, the most popular of which is plasterboard.
Its versatility and ease of processing makes it possible to hide a gas pipe in the kitchen effectively and stylishly.
Preliminary work
Heating pipe box
Preparatory work includes processing steel heating pipes and radiators (heating radiators), from which old paint is removed and, if necessary, new paint is applied. Paint as an insulating material will protect metal pipes from premature damage by rust. These works must be completed before installing the box, which will subsequently block access to the pipes.
The above work will not be required if the box being manufactured will be used for sheathing plastic water pipes.
Note!
You can continue installing the box only after the paint on the pipes or batteries has completely dried.
Conclusion
You can sew up pipes with plasterboard quite quickly, and the costs will be minimal. This technology is one of the easiest to learn, but it also has its secrets (find out here how to cover pipes with plasterboard).
That’s why before you start, you should carefully study all the recommendations that we have collected above, as well as watch the video in this article. If you don’t rush and carefully plan each operation, you will succeed!
Did you like the article? Subscribe to our Yandex.Zen channel
Installation of the frame and its covering
Heating pipe box
The plasterboard box is fixed to a strong metal frame with vertical and horizontal elements made of profiles.
Note!
When alternating horizontal elements, a step of 60 cm must be observed.
The finished frame is sheathed with sheets and strips of plasterboard, pre-cut to fit the dimensions of the frame. Plasterboard parts are fixed to the profiles using self-tapping screws. They are screwed into the drywall with a small recess so that they can be hidden under a layer of plaster.
There are several methods for covering pipes with plasterboard:
1. Carry out “preservation” of the vent riser pipeline: remove rust from the pipes, replace damaged sections of the pipeline, prime or paint the pipes, seal the joints between sections of pipes.
2. Work on installing the casing box should begin from the bottom. This means that the dimensions of the box, taking into account its contours, should be marked by drawing straight lines using a corner, starting directly from the floor surface - to the left and right of the pipe. Sections of profiles of the required length are fixed horizontally using dowels along the lines drawn on the floor. Horizontal profiles are installed in the same way on the ceiling (or in another place at the top of the future box). Vertical profiles are attached to installed horizontal ones. Next, the remaining horizontal profile elements are added in increments of 60 cm.
Self-tapping bug
Note!
The vertical profile elements are attached to the horizontal guides using special self-tapping screws.
3. Cutting plasterboard blanks is carried out after the final installation of the profile frame. Drywall is cut with a special knife, often used for cutting wallpaper. On the front side of the plasterboard sheet, lines of the external dimensions of the individual sides of the box of profiles are drawn. Furrows are applied along these lines with a knife, one at a time for each workpiece. The cut plasterboard blank is simply broken and then cut on the back side of the plasterboard sheet.
Note!
Plasterboard blanks are secured to the box frame using ordinary metal screws.
How to hide pipes in the bathroom
4. Arrangement of a window (ventilation hole) in a plasterboard box opposite the fitting (taps and connecting devices on pipelines). The need for such a window is obvious - during operation, regular inspection and repair of the sewer system is necessary.
Only after you have learned how to cover pipes with plasterboard and have completed all the work on installing the box, can you begin finishing work. They may include applying plaster to the surface of the box and then painting it, or lining the box with ceramic tiles.
How to provide access: 3 most convenient ways
To ensure easy and fast access, it is most convenient to use one of the options below:
- Roller shutters or blinds. An excellent solution when creating a false wall at the back wall of the toilet. Attached to the frame, they provide the widest access to the pipeline. In this case, the finishing area is reduced, and there is no need to think through mounting methods for the hatch. In addition, behind them you can organize shelves for storing household chemicals.
- Plumbing hatch. You can make it yourself, but it’s easier to buy it in a store. Can be metal or plastic, used independently or under tiles.
- Removable tiles with magnets. An interesting solution that can be used when decorating a toilet with large tiles. A hole is made to fit the size of the element, magnets are inserted between the drywall and the tile on its surface, and 4 metal plates are glued to the sides of the removable tile.
USEFUL INFORMATION: How to get rid of condensation on the toilet tank
As you can see, the process of high-quality masking of water pipes and sewer risers with plasterboard is not so complicated. With due care, attentiveness and a little skill, it is quite possible to do it yourself, significantly saving your own money.
Construction of frame support
Usually, when making a frame, metal profiles are used, made from special galvanized sheet with a decent shelf life and resistant to rust. Sometimes a frame is made for a box made of wood beams.
To hide the risers behind the drywall, a profile support is erected, focusing on a sequential alternation of procedures.
- Marks are placed on the ceiling, walls and floor for the future frame, and they are armed with a pencil, a plumb line, and a level.
- The guides are placed according to the markings, fixing them to the wall surface using dowels.
- The work on arranging the supporting structure is completed by installing rack-mount elements along guide profile beams. The connection of profiles joining each other is carried out with a special fastening device - the so-called bugs.
Is it worth taking it?
Let's start with a tedious but probably necessary introduction.
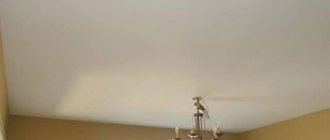
Before you take on this, in general, quite complex work, keep in mind that the risk of hopelessly ruining an expensive stretch ceiling is quite high . The canvas easily tears in the direction of the cut, and if you move awkwardly, you risk its entire value.
In addition, most companies provide a guarantee for their products only if the installation is carried out by their representatives. At first glance, this is not a completely correct rule; however, it saves a lot of time and stress on both sides.
In fact, imagine the bickering over whether the cause of the tearing of the canvas was its original defect or excessive force when stretching the ceiling...
Once again: take on the work of installing the ceiling, cutting out holes and installing lamps, and going around pipes only if you clearly understand all the pitfalls and the sequence of actions (
Is the plasterboard partition that covers the riser considered a redevelopment?
So in Article 25 of the RF Housing Code, part 2 it is written:
Redevelopment of a residential premises is a change in its configuration, requiring changes to the technical passport of the residential premises.
Here the question arises whether a change in the form of a plasterboard wall is a change that must be made to the technical passport of the room. We look at the resolution of the State Construction Committee of the Russian Federation dated September 27, 2003 N 170 “On approval of rules and standards for the technical operation of housing stock” (RG. 2003. October 23) provides approximate types of changes to the premises for the specified groups, in part 1.7.1.
Redevelopment of residential premises may include: moving and dismantling partitions, moving and installing doorways, disaggregating or enlarging multi-room apartments, installing additional kitchens and bathrooms, expanding living space through auxiliary premises, eliminating dark kitchens and entrances to kitchens through apartments or residential premises, installation or refurbishment of existing vestibules.
That is, our plasterboard wall is not subject to redevelopment. As a result, such a change will not require inclusion in the technical passport.
How to close a sewer riser in a toilet
Knowledge of how to close the sewer riser in the toilet is necessary in order to make the most attractive design of the toilet and bathroom, ensure their functionality, and create comfortable conditions for using the bathroom. Why is this important to know? Because the sewer riser is the main element of the entire sewage system in the apartment; it is through it that water is transported.
- Roller shutters. If you don't want to waste time on complex methods, you can close the sewer pipes with roller shutters. They do not require finishing, they are easy to install, as they are ordinary blinds, and they provide maximum access to the riser. Now there are special designs, for example, with sound insulation and heat conservation.
Long pipelines affect the design of the bathroom, which is why it is so important to properly disguise the pipes. The appearance is affected not only by pipes, but also by filters, meters, hoses, and couplings.
- Plastic panels. This is a very practical material that is not affected by external irritants such as humidity, temperature changes, and mold. They are also easy to disassemble and assemble, no need to paint or putty. It is enough just to choose plastic panels of the required color. You will need to build a frame for the wall and box, and lay the panels.
Is it possible to close a sewer riser? Yes, you can, the main thing is to do it right. There are several ways to do this job.
How to treat the surface → Room decoration → How to choose the right paint → Surface treatment technologies → Leveling and finishing the walls → Selecting and applying a primer → Removal from the surface → Stretch ceilings and technologies → Reviews and testimonials
Stretch ceiling - bypassing the pipe near the wall for white and colored ceilings, bypassing the detachable ventilation duct
The specifics of pricing for suspended ceilings and their installation have led to the fact that increasingly the ceiling is made to the size of the apartment owner. It is much cheaper to install it yourself. Today we will touch on one of the typical problems of novice installers: how to bypass a pipe with a stretch ceiling (read also about PVC stretch ceilings).
Looks like we have a problem.
Who is responsible for the riser (central sewerage) or what is common property?
The riser itself is community property. This conclusion can be made on the basis of the Decree of the Government of the Russian Federation of August 13, 2006 N 491 (as amended on July 9, 2016) “On approval of the Rules for the maintenance of common property in an apartment building and the rules for changing the amount of fees for the maintenance and repair of residential premises in the case of the provision of services, etc. , namely part 2, paragraph 2
... other equipment serving more than one residential and (or) non-residential premises in an apartment building (including boiler rooms, boiler rooms, elevator units and other engineering equipment);
also part 5 of the same document
The common property includes an in-house engineering drainage system, consisting of sewer outlets, fittings (including bends, transitions, pipes, revisions, crosses, tees), risers, plugs, exhaust pipes, drainage funnels, clearings, branches from risers to first butt connections, as well as other equipment located in this system
That is, the riser (central communication) belongs to the common property of the house. As a result, the management company, residential complex, homeowners association, etc. should be responsible for its maintenance. She is the one who raises funds for the renovation of common property.