Ceiling finishing options for renovations
Depending on the chosen design of the room, the types of ceiling repairs in the apartment may differ significantly. This can be either the simplest and most laconic finishing option, or a complex multi-tiered design. When choosing a specific option, what matters is the height of the room, its area, the number of window openings, as well as the type of lighting that the owners want to install.
The most commonly used options for repairing ceilings in an apartment are:
- painting;
- whitewash;
- pasting with wallpaper or decorative materials;
- suspended structures;
- stretch fabric.
Of course, in each case there are both positive and negative sides. In addition, not every type of finish is acceptable in a particular type of room. The cost of repairing the ceiling on your own, as well as the level of complexity of its implementation and the list of works depends on which option you choose.
Any repair work on ceilings requires preliminary preparation of their surface. If you plan to paint, whitewash or wallpaper, then the surface of the ceiling must be thoroughly cleaned, the peeling coating must be removed, the seams and joints must be primed and sanded. In this case, it is necessary to achieve a perfectly smooth surface. For stretch and suspended ceilings such thorough preparation is not required. It will only be enough to remove the peeling coating so that it does not damage the suspended structures.
Choosing a ceiling chandelier for a garden house
It is difficult to imagine a comfortable modern building without lighting. The main source of light for the garden house is the ceiling chandelier. Its operating conditions are difficult. But now you can find suitable models for such buildings. Many manufacturers include in their range a series of products designed for difficult conditions. In terms of aesthetic indicators, these lamps are not inferior to home options. But ceiling chandeliers for a dacha are inexpensive, and you won’t need to spend a lot of money on the purchase.
The main enemy for lighting products in conditions without heating is moisture. It can cause significant harm to some materials. Damage to the structure not only spoils the appearance, but also makes it unsafe to use. There is a risk of short circuits and fires. Ceiling chandeliers for a summer residence are inexpensive, but you need to choose them carefully to ensure comfort and safety. When purchasing you need to consider:
- room area;
- interior style;
- specifics of operation.
The power of the device depends on the size of the room. The chandelier should provide comfortable lighting. If you want to change the intensity if necessary, you need a design with several light sources that are turned on autonomously in groups.
The required lighting power depends on the area of the room
The ceiling lamp is one of the most noticeable elements of the interior. The design style of the chandelier must comply with the general canons of design. The modern assortment offers many options for modern and classic chandeliers, traditional and original options; making an informed choice will not be difficult. You can choose a luxurious model for classics, a cozy lamp for country, a laconic design for high-tech, etc.
Dampness, which is inevitably created in an unheated building, can prematurely destroy wood and lead to the formation of rust on metal. When choosing a design, you need to pay attention to the materials. Preference is given to models with plastic shades, lampshades, metal frames coated with a protective layer, nickel-plated, and stainless steel. Such ceiling chandeliers for a dacha are inexpensive; exorbitant expenses will not be required. A lamp in a garden house must have the required degree of protection from dust and moisture. Working units must be in a sealed housing.
The material of the chandelier must be resistant to rust on metal
Cleaning the ceiling
If we are not talking about a new building, where the ceiling does not contain remnants of the old finish, then you need to start repairing the ceiling with your own hands by cleaning it.
Until recently, the most popular ceiling design options were whitewashing, painting or wallpapering. Removing the remnants of such finishing is very simple. To work, you will need a paint roller with a long rod, which is well moistened with water and wrung out so that it is sufficiently wet, but no water drips. Then they begin to gradually roll the surface of the ceiling with a roller, gradually increasing the pressure. When the water from the roller is absorbed into the ceiling, it must be re-moistened and the same steps repeated on the next section of the ceiling. Thoroughly wet wallpaper or old plaster is cleaned with a spatula down to a layer of putty or concrete.
Please note that if old putty is found under the wallpaper, you need to make sure that it is held firmly. Otherwise, it also needs to be cleaned with a spatula, and then a new layer must be applied.
Plastic panels in the ceiling cladding in the country house
Those who want to know how to cover the ceiling in their dacha without spending extra effort and money should pay attention to plastic panels. The features of this material ensure that it fully complies with the specifics of buildings for periodic use. The polymer finish is different:
Lightweight plastic can be installed in any building; it does not create loads on load-bearing surfaces. You can use this ceiling finish in an unheated dacha without fear for its condition. Frost and heat, high humidity do not affect the structure of the polymer.
Plastic panels do not create load on supporting structures
An affordable price does not prevent these materials from giving the interior the proper attractiveness. The panels are offered in a wide range of colors and differ in texture. It is possible to create an attractive, stylish environment. Photos of dacha ceiling designs with plastic panels will help you choose interesting, original options.
Thanks to the wide range of colors it is not difficult to create a stylish interior
How to remove old paint
In some cases, oil or water-based paints were previously used for minor ceiling repairs. To remove them from the ceiling surface, you will have to work hard. There are two approaches to removing old paint: chemical and mechanical.
Mechanical cleaning involves using a spatula or sandpaper. This creates a large amount of dust, and it takes a lot of time. The chemical method is the use of special reagents; they are sold in any hardware store. After applying the chemical composition to the ceiling surface, it may take about 12 hours for the old paint to soften. The soft loose paint will then be easy to remove.
Any decorations and decorative parts, as well as polystyrene tiles, must be cleaned with a spatula with a metal blade. If a little glue remains on the surface of the ceiling, it must also be thoroughly cleaned. Upon completion of the work, you should have an absolutely clean surface.
If you plan to overhaul the ceilings with your own hands in an apartment where suspended or tension structures were installed, they must be very carefully and carefully dismantled so as not to damage them. If, of course, they are intended to be reused.
Let's start priming
Before repairing the ceiling, its surface must be primed. They proceed to this stage immediately upon completion of cleaning of the old finish. Priming should begin with seams and joints. In these places, the gypsum or plaster mortar must be held firmly and reliably. If this is not the case, then the joints are cleaned and filled again with gypsum cement mortar or a special building mixture with fiber inclusions. When the solution dries a little, the surface is cleaned, leveled and left until the mixture dries completely. Only after this can priming begin.
A deep penetration primer is used so that the materials for repairing the ceiling, which will be applied later, firmly adhere to the surface. The primer can be applied either with a brush or with a roller. It is important to protect your eyes and skin from contact with the primer mixture. When the primer layer is completely dry, you can begin further finishing.
We apply plaster and putty with our own hands
If the apartment's rough ceiling consists of concrete slabs, then their surface is not ideal. Therefore, further plastering or puttying is a mandatory stage of repair, especially if further whitewashing, painting or wallpapering is planned. What to choose - plaster or putty - depends on the preferences of the owner and his construction skills.
The plaster has a fairly large mass, and it must be applied in a layer of 2-3 cm. However, plastering work is quite simple to carry out, and further leveling does not cause problems. As for putty, after application it shrinks, so to get an even surface, you need to apply several layers. This requires some skill and time. However, as a result, you can get a perfectly smooth surface with a small mass and a minimum layer.
Panels
This type of finishing will make it possible to hide the shortcomings of the existing base - the installation of individual coating elements is carried out on the frame, and wooden blocks or special profiles, which are more often found in plasterboard structures, are used to assemble it.
The installation technology is exactly the same as for wooden coverings - the base is assembled, and panels are attached to it. The appearance of such a coating depends only on the material of the panels themselves - plastic has the largest selection of colors, and parts made from MDF look best.
Technology of using plaster
If plaster was chosen for the work, then the following materials and tools will be needed: Betonokontakt primer mixture, dry plaster, for example the Rotband brand, beacons with fasteners, a 1.5 m long rule, a hammer drill and a building level.
The technology for making a ceiling in an apartment using plaster looks like this:
- You need to step back 15-20 cm from the wall and put a mark for the first guide. On the opposite side, at the same distance from the wall, you need to place a second mark for the guide. Between these marks we mark a line using painter's thread.
- Having retreated 1.25 m from the first line, we apply markings for the next guide in the same way.
- Based on preliminary markings, holes are drilled for installing fasteners.
- The guides to the ceiling surface are fixed with self-tapping screws. The horizontal lines are controlled by the building level. If necessary, you can slightly unscrew or screw in the screws to adjust the position of the profile.
- The fixed guide profiles must be additionally fixed with a thick plaster solution and left until completely dry.
- At the final stage, the gaps between the guides are filled with plaster and leveled using the rule.
It is worth noting that repairing walls and ceilings with your own hands in terms of applying plaster is very similar. The only complication when working with the ceiling is that it is not very convenient to work above your head. However, after the plaster solution has completely hardened, the surface becomes smooth, and putty and finishing materials can be freely applied to it.
Method of applying putty
Let's look at how to repair the ceiling with your own hands, if you use a putty mixture for this. Puttying takes significantly more time than plastering. Although the goal of both processes is the same - leveling the surface. In addition, the puttying technology is somewhat different from working with plaster. In this case, the worker will need two spatulas (narrow and wide), a painting mesh, a mixing container, as well as two types of putty - the starting “Isogypsum” and the finishing “Satengypsum”. The surface is pre-treated with the Betonkontakt primer mixture.
Let's describe how to repair a ceiling using putty:
- The thoroughly cleaned and primed surface must be examined for the presence of potholes or level differences. In these places it is necessary to apply the starting putty in several layers. This material practically does not shrink, and its layer in some places can be 5 cm. For work, it is most convenient to use a wide spatula or a rule.
- A painting mesh is placed into the wet starting putty. This simple method of reinforcement makes the ceiling surface more durable. The mesh needs to be slightly pressed into the surface of the putty, for which purpose a wide spatula is passed over it with some pressure.
- If there is no need for additional leveling of the surface, repairing the ceilings in the apartment before painting can be done with finishing putty. It is applied to the surface with a wide spatula, removing excess. If desired, you can use a painting mesh for reinforcement.
- When the first, main layer of putty is completely dry, you can apply the finishing layer, leveling it until smooth.
The final cleaning of the surface until smooth is carried out with special graters and emery. It removes the slightest nicks. After this, the final decor can be applied.
Alternatively, the ceiling surface can be covered with plasterboard panels. The joints and irregularities between them are filled with a putty mixture, and then the ceiling is decorated according to your choice - painted, whitewashed or wallpapered, or a decorative finish is made.
Coloring
When deciding how to repair a ceiling with your own hands, you turn to painting as a finishing method quite often. This popularity is primarily due to the availability of paints and varnishes on the construction market, as well as the ease of performing the work. Moreover, in some areas, such as kitchens or bathrooms, painting is a practical and convenient option. Mandatory conditions for high-quality ceiling painting are careful preparation and leveling of the surface. Otherwise, all irregularities will be visible.
Most often, water-based paint is used, less often - oil-based paint. Before use, just stir the paint thoroughly and, if necessary, dilute it until the desired thickness and color are obtained. After this, you can finish the ceiling - repair the ceiling by painting. To work, you will need a brush and a paint roller with a long rod. Painting begins from the wall, where a narrow strip is worked with a brush. For the central part of the ceiling, use a roller.
Sometimes an already painted surface needs a do-it-yourself cosmetic repair of the ceiling. In this case, the ceiling is examined for the presence of blisters and peelings of old paint. Defective areas are cleaned with a spatula and then painted again. In this case, a full repair will soon be required. However, if the old paint layer is holding up well, you can simply refresh the appearance of the ceiling by applying a new coat.
Internal insulation option
You can install ceiling insulation using installation inside a country house at any time. The process is similar to the construction of a plasterboard ceiling. In fact, the exact same design is often used, with the addition of a heat-insulating layer.
The first to assemble is a special frame or sheathing. If necessary, a vapor barrier film is laid between the frame joists and an insulating layer is laid. After this, everything is covered with another layer of vapor barrier film.
The final stage will be the external finishing of the constructed structure. Any suitable material can be used here, but in most cases plasterboard is used.
Whitewash
The process of how to repair a ceiling using whitewashing is somewhat different from painting. The fact is that in this case it is not paint that is used, but quicklime, which needs to be diluted, filtered and applied to the ceiling surface. For work in this case, a roller, brush, spray gun or vacuum cleaner is suitable.
Please note that a brush and roller will not give a sufficiently even layer of whitewash. A better job will be done using a spray gun and a vacuum cleaner. Although the appearance of a whitewashed ceiling blends harmoniously with any interior, it needs periodic updating, at least once a year. However, the cost of materials is quite affordable, so this type of repair will not be too expensive. The surface of the ceiling that is planned to be whitened must also be properly prepared - cleaned and leveled.
Finishing with MDF
This type of decoration is often found in country houses. It is represented by slabs made from sawdust. The panels are divided into several types: painted;
- laminated;
- veneered.
Each of the designated types differs in external characteristics. Specialized stores offer a wide variety of MDF panels with wood imitation. There is a huge range of multi-colored solutions, original and unusual shades. Experts often recommend finishing the ceiling on the veranda of a dacha in this particular design.
With such universal finishing materials, any room will be transformed beyond recognition. An undeniable advantage of the panels is that there is no need for additional painting or gluing. It is enough to install a frame for attaching MDF. Designers often use this particular material in their work, because it is inexpensive, does not require additional care, periodic wet cleaning is sufficient.
It is not suitable for finishing cold buildings and verandas, since it is susceptible to deformation at high humidity levels and sudden temperature changes. A ceiling design that is too complex will look garish in a simple country house.
Pasting wallpaper
To apply wallpaper to the ceiling, the joint efforts of at least 2 people will be required. This is quite a difficult job, since you will need to hold the wallpaper above your head and join it correctly. To work, you will need glue, selected wallpaper, a roller, a construction knife, as well as a glue bucket and dry rags.
The wallpapering technique looks like this:
- after thorough preparation of the surface to be glued, it is necessary to prepare the glue in accordance with the manufacturer’s instructions;
- wallpaper is cut into panels of the required length, parallelly joining the pattern on adjacent sections, if necessary;
- A cut piece of wallpaper is spread on the floor, glue is applied to the back side with a brush and it is allowed to lightly saturate the wallpaper;
- in the meantime, glue must also be applied to the surface of the ceiling along the entire length of the panel;
- then a piece of wallpaper is rolled into an accordion and pasted onto the surface of the ceiling, gradually straightening it out;
- using a roller, remove all air bubbles from under the canvas, and wipe off excess glue with slightly damp rags.
All other sections of wallpaper are glued in the same way. If there is a decorative pattern on the wallpaper, you should make sure that it matches the adjacent canvases. The room is closed and the wallpaper is left to dry for a week.
We install fabric economy ceilings
Fabric ceilings are a budget finishing method. This economy class material has good performance characteristics and is very durable. In addition, the fabric is suitable for finishing the ceiling in any room.
The advantages of fabric fabric also include:
- Practicality. Fabric ceiling does not require special care.
- Non-flammability.
- High strength.
- No unpleasant odor. In addition, the fabric material does not emit harmful substances when exposed to high temperatures.
Before hemming the ceiling with fabric, you need to prepare the surface. It is desirable that the surface is perfectly flat. It is recommended to apply primer and plaster to the ceiling. Defects and cracks also need to be eliminated.
Algorithm for installing a fabric ceiling:
- Set up a profile. It is recommended to use products made of aluminum.
- Fix the fabric in the profile.
- Pull up the fabric. At the same time, try to level it out as much as possible.
- Secure the canvas in a baguette.
- Fix the end of the fabric in the corners of the profile.
- If wrinkles have formed on the ceiling, remove them using a hair dryer.
- Install decorative caps.
How to stick polystyrene tiles
Compared to wallpaper, the process of covering the ceiling with polystyrene tiles is much faster and easier. You can do the job alone. You will need tiles, acrylic glue, painting thread, a spatula, a construction knife and a mounting gun.
The working method is as follows:
- Calculate the center point of the room by drawing two diagonal lines from the corners of the room. Through this point, draw two lines perpendicular to each other between the walls.
- You should start gluing the tiles from the center of the ceiling. Glue is applied to the tile along the edges in a dotted line and a little in the center, after which it is applied to the ceiling. The angle of the tile must strictly coincide with the lines on the ceiling.
- All other tiles on the ceiling surface are glued in the same way. If the tile does not fit completely at the edges, it is cut to the required size.
- Finishing is done using decorative skirting boards or borders.
In this material, we looked at how to make ceilings in an apartment with your own hands, using several of the simplest methods. We hope the information will be useful to you. As for suspended and tensile structures, they are a separate topic for description.
Suitable and inexpensive materials for country ceilings
If people do not live in a country house permanently, the rooms will be cold in winter. When temperature changes, condensation forms on the ceiling. And due to the remoteness, it is not always possible to call craftsmen, and you have to do the finishing yourself. At the same time, I want the ceilings to be beautiful, durable and not have to constantly repeat repairs, and the materials to be inexpensive and easy to install.
Due to the lack of constant heating, an important requirement for interior decoration in a country house is resistance to changes in temperature and humidity.
Let's consider the 10 most suitable materials that meet these requirements. At the end, we provide a brief summary table for a convenient comparison of the main characteristics.
Whitewashing or painting
This is the simplest option for finishing a ceiling in a country house, but it requires a surface without differences in height. Small cracks, depressions and other irregularities are hidden under a layer of plaster (1-2 cm).
The composition is applied with a roller, and in corners and near walls - with a wide brush. It is better to paint in 2-3 layers, each one across the previous one. This way the rough surface will not show through the coating. Before painting or whitewashing, the ceiling is primed. This reduces paint consumption and the decorative layer holds up better in the future.
Whitewashing is rarely used, but it allows you to decorate a country house in a rustic style. You can add wooden beams (or imitation) as decoration.
When choosing paints, choose water-based products that dry quickly and do not leave an unpleasant odor. The traditional color for the ceiling is white. But you can choose a different shade to match the color of the interior. The texture of the paint can be glossy or matte.
Advantages of whitewashing and painting the ceiling in the country:
- low cost;
- ease of execution (one person can handle it);
- environmental friendliness;
- variety of colors (for paint);
- the ceiling remains at the same level (important for low rooms).
Flaws:
- preliminary preparation is needed (ceiling leveling);
- you have to repaint or re-whiten every 3-4 years.
Wallpaper
This material also requires a flat surface. But minor defects will not be noticeable, so the requirements for the base are slightly lower.
There are several types of wallpaper; the following are suitable for a summer residence:
- Paper ones are difficult to stick, and if the house is not heated, they can get damp in the winter.
- Non-woven ones are more convenient to work with, they are stronger and more durable.
- Vinyl - an additional protective layer of PVC is applied to the material, thanks to which the wallpaper is not afraid of moisture.
- For painting - you can give it any shade, and then change the color.
They produce special ceiling wallpapers that differ in pattern (designed to be viewed from below, not from the side). But you can also glue ordinary wall ones. When choosing, you need to take into account that the small pattern will merge at such a distance.
You can paste the same wallpaper on the walls and ceiling. This looks interesting with a sloping roof. The boundaries are not so noticeable and the room seems more spacious.
The work is simple and does not require expensive tools. But it’s inconvenient to glue wallpaper to the ceiling alone; it’s better to find an assistant.
Advantages of the material:
- various designs (color and pattern);
- low price;
- speed of work;
- The ceiling height does not decrease.
Minuses:
- do not level the surface;
- Over time, they may come off at the joints and in the corners.
Foam tiles
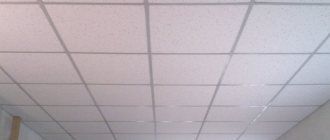
Ceiling tiles are made from polystyrene foam; this is the cheapest and easiest finishing method that does not require special skills or tools. The panels are simply glued close to each other on a flat surface. Minor defects are corrected during the installation process. As a rule, they produce square tiles measuring 50x50 cm. Other sizes (including rectangular) are less common.
There are three types of ceiling tiles on the market with different properties:
- Pressed (or stamped) is the cheapest option with a noticeable “grain”. After installation, be sure to paint it, otherwise it will quickly lose its appearance.
- Injection - obtained by sintering foam. This tile is stronger and thicker, the pattern is clear. You can paint it, but it is not necessary.
- Extruded - the tile is thin but durable. It is more difficult to produce than others, therefore more expensive. The surface is laminated. There is a film of different colors, plain, wood or stone.
Typically, ceiling tiles have curves or beads around the edges, so the joints are visible. But there is also a seamless option. The surface is smooth, often the edges are made wavy so that the boundaries between the elements are not noticeable. With this finish the ceiling looks smooth.
The tiles are laid on a layer of glue from the center to the edges of the room. To avoid mistakes and lay it flat, it is better to make markings in advance. If necessary, cut the tiles near the walls with a knife. Foam plinth is used as decoration.
Advantages:
- quick installation;
- low price;
- variety of patterns;
- can be painted.
Flaws:
- “cheap” appearance;
- short service life, especially without painting.
Wooden lining
This is the name of an edged board with a tongue-and-groove connection. Lining is a traditional material for finishing a dacha, suitable for both ceilings and walls. Differs in quality classes depending on the presence of cracks, knots and other flaws.
The lining is laid in different ways:
- on a lathing made of wooden slats;
- right on top of the beams;
- on the ceiling if the rough ceiling is flat.
The first two methods allow you to hide a layer of insulation behind the lining. The board is secured with nails or self-tapping screws. They are driven into the part that will be covered by the next element. The boarded ceiling is varnished or painted. This layer is not only decorative, it protects the surface from moisture.
Attention! The lining, like other wooden finishes, must be treated with mold and fire protection agents.
Advantages of lining in the country:
- environmental friendliness;
- pleasant appearance, creating a cozy country atmosphere;
- the ability to lay an insulating layer;
- hidden laying of communications;
- simple installation;
- durability.
Minuses:
- high-quality lining is expensive;
- unstable to temperature changes;
- at high humidity it rots and molds;
- burns.
Plywood and OSB
These are wood-based materials with binding components. These include chipboard. Due to their structure, they are less susceptible to deformation than natural wood. Sold in large sheets of different sizes, which can be filed if necessary.
Plywood, OSB, chipboard and fiberboard are mounted on wooden logs, a frame made of metal profiles or on top of beams. The free space between the trim and the ceiling allows you to further insulate the attic. If the rough ceilings are level, the slabs are laid on the base. Then they do without protection against heat loss.
Advice: it is better to decorate the ceiling with thicker plywood, which does not bend under its own weight. This material is often used for wall cladding.
Sheets are sold in two versions: uncoated and with lamination (coated with film of different colors or painted to resemble wood). In the first case, they are painted or varnished. The slabs are large and quite heavy, so it is more convenient to work with an assistant. But some craftsmen cope on their own, using supports under the sheets.
Pros:
- quickly installed;
- easily create a smooth surface.
Minuses:
- if the house is not heated in winter, the decorative coating peels off over time and has to be repainted regularly;
- inconvenient to install and transport due to weight and size.
Laminated MDF panels
The shape and method of fastening of the material resembles lining. The panel is elongated, on one long side there is a groove, and on the other there is a tenon going into it. But it is not made from solid wood, but from fibers pressed with binders. The top is covered with lamination. The film protects the room from the release of formaldehyde, and the panels from moisture.
Sheathing made of laminated MDF is resistant to temperature changes; it is not affected by freezing and thawing. Installation follows the same principle as for lining. The tenon of the element is inserted into the groove of the previous one and snaps into place. But MDF is not painted or varnished, since there is already a film.
The panels are installed on a frame (with the possibility of additional insulation) or on a flat rough floor. You can do the job alone.
Advantages of MDF panels:
- durable;
- absorb sound;
- look beautiful;
- tolerate a drop in temperature;
- easy to install;
- varied design;
- resemble natural wood, but lighter and cheaper.
Flaws:
- not completely natural and environmentally friendly material;
- If the film layer is damaged, moisture will get inside and the panel will swell.
Unedged board
The material is obtained after longitudinal cutting of the log without processing. The edges are uneven; the bark remains on them. Such a board is cheaper than edged or profiled (lining). The material can be dry or naturally moist. To hem the ceiling with high quality, it is better to choose the first option. When dry, wood with natural moisture does not retain its shape. Gaps form between the boards, and they themselves can curl.
The untreated board is nailed onto a frame made of slats. The top is coated with varnish, or you can pre-treat it with stain to give it a beautiful shade.
This ceiling has a peculiar rough appearance that does not suit all styles. Pairs well with rustic interiors.
Advantages of unedged boards:
- natural material;
- environmental friendliness;
- interesting appearance;
- low price (compared to other types of boards).
Minuses:
- protection from moisture, rotting and fire is needed;
- the bark on the edges promotes the development of insects and harmful microorganisms.
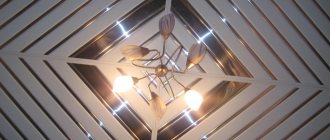
PVC panels
This is an economical version of the lining, made of plastic. The panels are lighter and cheaper, but are inferior in strength to wood. Not everyone likes the unnatural appearance. There are panels with a rounded edge or a smooth one, without noticeable gaps during assembly. The second option looks more modern.
PVC panels are available in different colors, as well as with imitation of other materials (wood, stone, etc.). The drawing is applied in different ways. The film peels off quickly, but thermal printing lasts longer.
The panels are mounted on a wooden frame. Each subsequent part snaps into the previous one. The last element often has to be cut to width.
Advantages of plastic cladding in the country:
- resistance to cold, humidity and mold;
- variety of design;
- simple installation;
- low price;
- possibility to install lamps;
- low weight of the finished ceiling.
Flaws:
- turns yellow in the sun;
- with poor ventilation, condensation forms on the ceiling;
- panels in the lower price segment break easily.
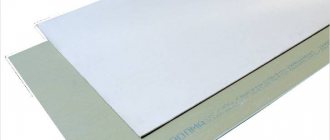
Drywall
GKL allows you to create smooth ceilings of a familiar appearance, like in city apartments. You can also create complex designs with projections, niches for curtains, built-in lighting, etc.
For an unheated dacha, choose moisture-resistant plasterboard - GKLV. Installation takes place in several stages. First, a frame is assembled from aluminum profiles. Thermal insulation can be installed in the free space behind the ceiling. Then the frame is covered with plasterboard. The sheets are secured with self-tapping screws. After this, the seams are sealed using putty and reinforcing tape. The surface is primed and painted.
If the rafter system is flat, the ceiling is hemmed without a frame directly to the rough beams.
Making a flat plasterboard ceiling, horizontal or inclined, is relatively simple. GCR is often combined with other finishing materials, for example, lining. But due to the size of the sheets, it is more convenient to work not alone, but with an assistant.
Advantages of plasterboard for a summer residence:
- environmental friendliness;
- a flat ceiling that can be painted, wallpapered or covered with decorative plaster;
- possibility to install built-in lamps;
- allows you to create multi-level structures of complex shapes;
- goes well with other materials.
Minuses:
- high price;
- instability to temperature changes and dampness;
- dirty work (with the formation of construction dust);
- long installation (up to several days, including finishing);
- reducing the height of the room, as with other suspended ceilings;
- need to repaint from time to time.
Stretch ceiling
Cold Stretch PVC film is best suited for country houses. The canvas is made from polyvinyl chloride with the addition of latex. Unlike a conventional stretch ceiling, the coating is resistant to cold. And when installing it does not need to be heated, so there is no need for a heat gun.
Cold stretch film will cost less than fabric. At the same time, the ceiling will protect the house from flooding if the roof leaks. The canvas can withstand loads of up to 100 liters per m². Then the water is drained, and the film is restored back, taking on its original appearance. But this canvas is available in only one design option - white and with a matte surface.
Stretch ceilings are often ordered along with installation. But you can purchase a ready-made kit to suit the size of the room. No complex hardware is required for Cold Stretch ceilings, so you can install it yourself. To do this, special profiles are fixed to the walls, into which the canvas is tucked and fixed in a tense state along the entire perimeter. For installation, use a spatula with rounded corners.
Advantages of a stretch ceiling:
- quick installation (from 3 hours);
- clean work without dust and dirt;
- resistance to frost and humidity;
- perfectly flat surface.
Minuses:
- at the dacha the canvas can be chewed by mice;
- It’s not easy to properly stretch a ceiling if you don’t have the skill.
