The correct sequence of work is important for any repair, regardless of its complexity. Repairing a bathroom and toilet with your own hands requires especially careful adherence to the planned order, since if stages of work are not completed in a timely manner, you can ruin what has already been done. For example, you cannot finish the walls and floors and only then think about replacing wiring and pipes.
The specificity of bathroom renovation is, firstly, the small size of the room, and secondly, the large concentration of various devices and communications. Repairs in the bathroom and toilet are done less frequently than in residential premises, but usually more thoroughly. Experts recommend starting a major renovation with the bathroom, because this is often the dirtiest part of all work. That is why the most important step, which should never be neglected, is drawing up a detailed repair plan.
We draw up a bathroom renovation plan
The first thing to do at the planning stage:
- Decide on the design and style of the future bathroom and toilet, choose a color scheme. Traditionally, bathtubs are decorated in pastel colors; two shades will look most successful, for example, green and olive, beige and peach, blue and light blue.
- Decide what types of materials will be used in the finishing. Most often, tiles, plastic panels, porcelain tiles, and mosaics are used to decorate a bathroom.
- Inspect the plumbing and, if necessary, decide on replacement options. When purchasing new plumbing fixtures, be sure to ensure they fit correctly.
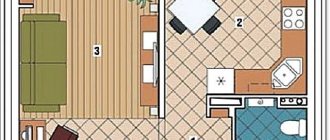
- Measure the parameters of the room (height, width, length) and calculate the area. Consider the location of plumbing fixtures and other necessary parts and draw a detailed plan. You need to decide how and where the bath or shower, sink, toilet, mirror, heated towel rail, and washing machine will be located.
Tip: when planning, you need to take into account that after plastering the walls, the dimensions may change slightly. This needs to be taken into account when purchasing everything you need, and if you are not sure of the sizes, put this item aside until the rough finishing is ready.
The extent of do-it-yourself renovations in the bathroom depends on various factors: the degree of wear of pipes and plumbing, obsolescence of finishes, and the desire to update the design of the room. Let's consider the sequence of actions during a major overhaul, which involves replacing electrical communications and water supply, plumbing fixtures and remodeling the premises.
Important! Before remodeling a bathroom, for example, demolishing a partition between a bathtub and a toilet, you need to obtain permission from the BTI.
An approximate work plan would be as follows:
- removal of plumbing fixtures and all interfering objects;
- dismantling old coverings, doors;
- demolition of partitions (if necessary);
- dismantling plumbing and electrical wiring;
- floor leveling;
- replacement of risers and pipes for water supply and sewerage;
- installation of electrical wiring;
- finishing of floors, walls and ceilings;
- installation of plumbing fixtures;
- installation of doors and electrical equipment.
USEFUL INFORMATION: Design of a small bathtub in a Khrushchev-era building (16 photos)
Now let’s look at each stage of the renovation in more detail.
Where to start: basic preparatory work
Procedure for work in an old house
1) Objectively evaluate the location of the plumbing fixtures.
And at the same time – convenience of planning.
What to leave in place? What's better to move? How can you make the room area more ergonomic and comfortable for everyone?
Perhaps a spacious cast-iron bathtub can be restored and organically fit into the new interior? Or expand?
2) Develop a new design project.
Draw a detailed sketch of the future interior for water procedures on paper or (which is preferable) order/make a visualization in a special computer program. Think through everything in detail, taking into account the plumbing and fittings that will remain.
Ideas for inspiration can be found on our Kvartblog here and here.
3D visualization, of course, will save you from unexpected inconveniences. But if you change the location of the plumbing, plan to demolish or, conversely, make an additional partition, it is better to discuss the new plan with a specialist from an engineering company. Moreover, it is advisable to immediately ask for advice regarding further installation of electrical wiring.
3) Remove any plumbing fixtures that need to be replaced.
Old cast iron pipes must also be dismantled.
4) Remove old finish.
In a house built before the early 2000s, it is advisable to completely clean the walls and remove the old flooring. And in addition, before finishing, cover the wall with light partitions.
This is, firstly, due to the fact that in old buildings the bathroom and toilet were made in a compartment built using harmful asbestos cement.
Secondly, in any case, fresh, modern finishing materials will look better in the new interior.
5) ...And old electrical wires.
They can be left only if the new wiring system is external.
Procedure for work in a new building
1) Develop a project.
In a new apartment with a spacious bathroom, you have the opportunity to think from scratch about convenient zoning, a plumbing layout plan, and introduce new design features.
2) Design a plumbing diagram.
This stage complements the previous one. You can use a special computer program that will draw up a diagram of communications and heating for you and simplify some of the work.
We dismantle and remove all unnecessary
During the dismantling stage, the following work will have to be done:
- Remove the door along with the jamb. It is advisable to complete this point first, since it will be easier to take out garbage and bring in materials and tools through a free doorway. If you do not plan to replace the door, it is still better to remove the door from its hinges and put it away so that it is not in the way, and also to avoid damage.
- Dismantle and remove old plumbing fixtures. Even if you are not going to replace the sink or toilet, it is better to remove and take them out during the renovation. If this is not possible, you need to reliably protect them from chips and cracks. You can lay foam rubber, rags or polystyrene on fragile objects and cover them with film, securing it with tape.
- Take down the partitions. This is necessary if you are expanding the bathroom or making a combined bathroom.
- Remove old coatings: ceramic tiles, paint, loose plaster from walls and floors. The tiles are easily knocked out using a hammer drill.
Wall panels instead of tiles
The range of modern panels for bathroom decoration is so rich that choosing them will not be difficult. The simplest and cheapest option is PVC, higher quality and more expensive is MDF. PVC panels are long sheets of plastic with internal perforations and an external pattern. They can be matte, glossy, imitate stone, wood, tiles and mosaics, or have a neutral shade.
PVC panels can be installed without the help of specialists and are easy to clean. Goes well with coloring. To install the panels, you need to attach a frame made of wood, metal or plastic to the facing wall, purchase a special fastening solution, primer, sealant and corners.
Leveling the floor and walls
The floor in the bathroom should be smooth and level. You can do it this way in different ways.
- “Self-leveling floor” is a self-leveling screed based on gypsum or cement. Sold as a dry mixture, suitable for DIY installation. The diluted solution is simply poured onto the floor and rolled with a needle roller.
- The use of a gypsum-based plaster mixture and, additionally, a water-repellent mixture, especially for the bathroom. It is necessary to cover not only the floor, but also part of the walls located near the bathtub or shower stall with waterproofing material.
- If necessary, after installing the waterproofing, a concrete screed is made. If it already exists, before finishing it you need to apply waterproofing mastic and use waterproof adhesive for the tiles.
The walls can be leveled using plaster or sheets of moisture-resistant plasterboard. The latter material has a number of advantages over plastered walls.
- Firstly, drywall is excellent as a base for tiles.
- Secondly, when finishing gypsum board walls, the work of laying electrical wiring is greatly simplified, since the wires can be placed in the frame of the wall structure.
USEFUL INFORMATION: Design of a small bathroom without a toilet (15 photos)
Correct installation of plumbing
Large elements of the bathroom - a bathtub and a sink - are installed at the very end of the finishing work. You need to think about connecting them to the water supply. The siphon in the bathtub is hidden, so you can ignore its appearance. The siphon is visible in the sink, and it is needed for interior decoration.
Water supply and sewerage
Old pipes must be removed down to the riser. The water supply and sewer risers must also be replaced at this stage, since this will be difficult to do later. This work requires certain qualifications, so it is better to invite a specialist to carry it out.
It is quite possible to do the internal pipe routing yourself.
The work is carried out in the following sequence:
- the risers are given the required configuration;
- Hidden pipe wiring is laid to water intake points;
- a heated towel rail is installed in the bathroom;
- filters are installed;
- emergency water shut-off valves are installed;
- if necessary, a water heating system is integrated.
Useful tips for doing DIY repairs
- The hot water pipe must be located above the cold pipe.
- If there are a large number of water intake points, a collector connection system will be more convenient, which involves running a separate pipe to each point.
- The routes for sewer and water pipes are marked directly on the walls.
- It is customary to install a bathroom faucet 10 cm above the side of the bathtub; the optimal distance between the pipes that go to the faucet is 15 cm.
- It is necessary to mark the location of the cold water pipe for the washing machine; the pipe outlet should be at a distance of 50 cm from the floor.
- Sewer pipes are located at an angle for drainage.
- The risers can be closed using a metal profile box and moisture-resistant plasterboard, which is then plastered.
- Don't forget about the technical hatch on the box for access to the meters and tap.
Redevelopment
When making repairs, you can easily cross the line of the law. This can happen when replacing plumbing, electrical and other communications. Such changes must be shown in the technical passport.
The same applies to work that involves changing walls. Care should be taken when creating openings and moving partitions.
How to avoid breaking the law? It is necessary to contact professionals who are licensed to develop project documentation.
- At the moment, GOSTs and SNiPs are in force in Russia, which are implemented everywhere. However, there are still restrictions set by local legislative bodies.
- For example, in Moscow, such restrictions include a ban on expanding the bathroom at the expense of living rooms, a ban on installing heated floors connected to a hot water supply riser, and a ban on carrying out repair work in dilapidated houses.
The Internet is full of photos of renovated bathrooms where you can see similar violations. You cannot repeat what you saw.
Electrical installation
To avoid damaging the final finish, electrical wiring is first installed. If you hide the wiring in metal pipes, then in the future to replace it you will not need to open the walls; you can simply pull out the wires.
Due to high humidity conditions, wiring must be installed strictly according to the following rules:
- sockets and devices must be grounded;
- switches, lamps, sockets and cables must be protected from moisture and elevated temperatures;
- You can connect sockets and the lighting system only after the repair is complete.
USEFUL INFORMATION: Bathroom design in an ordinary apartment: 38 ideas, 10 schemes
When determining the locations of future outlets, marking electrical wiring, as well as pipes, can be done directly on the walls. Afterwards, grooves are made along the marked lines using a puncher into which the cable will be laid.
A natural stone
Marble and granite, travertine and onyx bring a touch of luxury to the room. Natural materials are expensive. The cost is compensated by high durability and decorativeness. Wear-resistant stone types can withstand mechanical damage and constant fluctuations in temperature and humidity.
Natural finishes will appear in a large bathroom, but will be invisible in a tiny one. To prevent a room from looking pompous, cladding is often combined with other materials. For example, with decorative plaster, painting or wallpaper. Partial finishing will help place accents or visually change the irregular shape of the bathroom.
Natural stone Source zen.yandex.com
Finishing with facing materials
After completing the rough work, you can begin finishing the floor, walls, and then the ceiling. For convenience, finishing work is also best carried out in a certain sequence:
- First you need to prime the walls and floor and make sure that all surfaces are level and there are no wires or pipes visible anywhere.
- Then the floor tiles are laid. It is necessary to ensure that during the installation process there are no voids left between the tiles. The seams must be cleaned and rubbed down.
Tip: if you are going to install a bathtub with a closing screen, you don’t have to lay tiles on the floor that will be hidden underneath it to save material.
- After the floor, the walls are covered with the selected material.
- At the end the ceiling is put in order.
There are many options for finishing the ceiling:
- coating with water-based paint;
- installation of a suspended or suspended ceiling;
- installation of plastic panels.
Bathroom renovation options in different styles
The environmental theme has become the most popular in residential interior design. This trend has not bypassed bathrooms. Natural finishing materials, soft, natural shades, soft shapes, without aggressive corners and technogenic expression – these are current trends that should be taken into account when starting to renovate a bathroom.
The most popular styles are still minimalism and modernism.
Not attracted to modern bathroom design? Do you prefer classical styles? When choosing renovation options, you shouldn’t give up on realizing your dreams for the sake of changing fashion. Moreover, classics are also in trend, but not in their pure form, but as an eclectic mix of several stylistic trends.
A combined bathroom, thanks to an increase in area , allows you to realize the most original ideas. For creative and extraordinary individuals today there are no restrictions; they can easily turn a standard bathroom into a kind of artistic salon, colonial bungalow or Victorian living room.
Swimming among such luxury is an incomparable pleasure! We hope that the examples of bathroom renovations given below with photos will inspire those who are just thinking about remodeling to use bright design creativity. There is no need to be afraid of flights of fancy. The results of such experiments speak for themselves.
Take a look, for example, at these photos of an unusual bathroom after renovation . Isn't there something to learn here?
Installation of electrical equipment, doors and accessories
After completing the installation of plumbing and a washing machine that requires a free doorway, you can install a door.
Now you can safely start installing sockets, switches and lamps. In addition, it’s time to take care of ventilation, which is best done by force by equipping the air duct with a fan.
All that remains is to hang mirrors, hooks for towels in the bathroom, equip shelves, and don’t forget about the paper holder in the toilet.
European-quality renovation (new items for 2022)
These are more cosmetic repairs, but complex ones are also carried out. They require a special approach to implementation and consist of a number of steps. For an excellent European-quality renovation you will need:
- Develop a project;
- Calculate cash costs;
- Dismantle all old equipment and coverings;
- Replace plumbing;
- Create ventilation;
- Decorate the room;
- Lay electricity;
- Install equipment;
- Install a new door.
Complex bathroom renovation work should be carried out in stages, step by step, this will ensure the quality of the work.