Brick houses are more popular than wooden structures. The fact is that wood is not always available in a particular region, and its delivery can cost a hefty sum. But building a house out of brick is one thing, but how to decorate it inside is a completely different matter.
Before the interior decoration of a brick house is completed, it is worth selecting the necessary material. When choosing, be sure to take into account that the cladding products are not only beautiful, but also durable; for this reason, many designers recommend giving preference to wood products.
Drywall and plaster
Internal cladding using plasterboard sheets has many positive aspects:
- Economical finishing option;
- The work of finishing with plasterboard is simple and allows you to do it yourself without special skills and quite quickly;
- When finishing gypsum board, the effect of a perfectly flat wall is achieved;
- Drywall is an environmentally friendly material and does not have a harmful effect on the environment and humans;
- The use of drywall allows you to further decorate it in almost any way;
- When sheathing gypsum boards, you can insulate the walls without difficulty.
This finish can be used when insulation was carried out outside. It is needed when decorating with liquid wallpaper or decorative plaster.
To plaster the walls, it is necessary to prepare the surface. The walls must be cleaned of dust, mortar deposits, and other contaminants. Then apply priming.
You need to start plastering work from the floor, gradually moving higher up the wall.
The first layer of plaster should be made with a high content of binder; the layer thickness should be about 5 mm. After a few minutes, it is necessary to level the plaster layer using the rule.
Before applying each subsequent layer, it is necessary to treat the surface with a primer. This should be done when the previous layer has already dried.
Leveling the walls is carried out in several approaches, and at one time a layer of no more than 1 centimeter is applied to avoid subsequent peeling of the plaster.
Internal wall cladding of a brick house
Scheme of insulation of brick walls.
Interior wall decoration consists of two stages:
- creating a rough coating,
- finishing (decorative) cladding.
Rough finishing of the house allows you to create favorable conditions for applying the main coating. This work can be done in two ways:
- “wet”, which involves the use of plaster,
- “dry”, that is, covering the walls with plasterboard.
Return to contents
Plastering brick walls
Scheme of applying plaster to a brick wall.
Plastering is the most popular method of rough cladding, with which you can hide unevenness and create optimal conditions for applying a decorative layer. To plaster the walls of a brick house with your own hands, you may need the following tools and materials:
- level,
- Master OK,
- putty knife,
- as a rule,
- metal brush,
- components of the solution.
All work on creating a rough coating can be divided into several stages:
1st stage preparation of the base.
If there is an old coating, it should be completely removed, after which all installation seams should be thoroughly cleaned with a wire brush. If necessary, the seams can be further strengthened with a binder. After this, guides are installed or the mesh is mounted. Immediately before plastering begins, the wall surface is wetted with water, which reduces the likelihood of cracks occurring after the plaster has dried.
2nd stage spray.
A layer of liquid mortar about 5 mm thick with a high content of binder is applied to the brickwork. This allows for better adhesion of the plaster. After a few minutes, using the rule, the plaster is leveled. This work must begin from the bottom, gradually rising to the ceiling.
3rd stage soil.
After the 1st layer has set, you can proceed to applying the 2nd layer, for which a thicker mixture is used.
In one go, you can apply plaster no more than 1 cm thick, as otherwise it may fall off.
If to level the walls it is necessary to create a thicker layer, then the work should be carried out in several approaches. In this case, the next layer is applied after the previous one has dried.
4th stage covering.
This is the final stage before applying the finishing layer. For these purposes, a carefully prepared working mixture is used. Before applying it, the wall surface must be moistened with water. After the plaster has dried, it is grouted, with the help of which all roughness and bumps are removed.
Return to contents
Rough finishing of a brick house with plasterboard
Scheme of finishing a wall with plasterboard.
Despite the many advantages of “wet” wall preparation, it has some disadvantages:
- a high probability of cracking of the coating after it dries,
- the complexity of the plastering process,
- insufficiently reliable adhesion to the base,
- dusty work with a lot of debris.
The “dry” method of preparing the base eliminates these shortcomings. Covering brick walls with plasterboard allows you to get a perfectly flat surface, which is perfect for finishing walls with wallpaper, paint, polystyrene or gypsum tiles. It is also important that drywall allows you to zone the space and create decorative niches in the wall. To install plasterboard sheets, wooden or aluminum lathing is used, which allows not only to create a reliable fastening of the sheet material, but also to create an air gap between the base and the plasterboard, resulting in increased thermal insulation of the walls.
Materials for finishing cladding of brick walls
Scheme of external finishing of a brick wall.
The choice of materials for finishing the walls is made based on the purpose of the room. In rooms where residents spend a lot of time (bedroom, kitchen, living room), special attention should be paid to the environmental friendliness of the coating. For such premises it is not recommended to use plastic, as well as those materials in the manufacturing process of which formaldehyde and resins are used.
When buying decorative material, you need to pay attention to its environmental safety labeling:
- E1 can be used in residential premises,
- E2 for use in toilets, hallways, utility rooms,
- E3 for industrial premises.
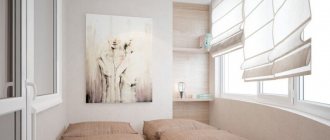
Interior: how can it be decorated?
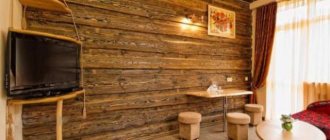
To prevent the house from looking like a wooden box from the inside, it is necessary to limit the amount of wood. The wood will look expressive, and the furniture against the background of the ceilings will look impressive. But the lining around the entire perimeter of the rooms will not be harmonious with the overall interior. It is necessary to choose one style for the entire house, but the materials for the cladding should be different.
For example, for a hallway or attic you can choose slats from kiln drying lining. Such material will not shrink over time. For the bathroom, toilet and kitchen, you can choose wall panels, which will free the wall ceilings from dullness and allow you to arrange the furnishing elements more harmoniously. With all this, the texture of wall panels can be different - this depends on the ability to imitate different materials.
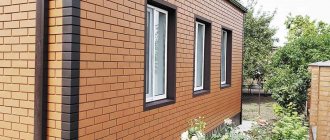
For example, you can decorate the living room wall with imitation brick or stonework. , marble or tile finishes will look great
INTERIOR WALL FINISHING WITH CERAMIC BRICK
If there is natural ventilation, then panels made from derived wood, as well as beech and leather boards, can be used for cladding. Water-resistant drywall will also look great. It can be painted, wallpapered, or combined with stretch film.
Decorating a brick wall
Wet finishing of brick walls is carried out after complete shrinkage of the house. Haste will lead to subsequent cracking of the plaster, tearing of the tiles, and tearing of the wallpaper. Using plasterboard along aluminum guides can reduce the waiting time between building a house and finishing it.
Advice! Installation of gypsum plasterboard sheets is carried out with a compensation gap vertically at the top and bottom, then shrinkage of the house will not have a negative impact on the final finish.
After installing the drywall, it is necessary to putty the joints of the sheets. To reinforce the seams, use perforated paper tape. Serpyanka is not recommended for these purposes, because the plaster solution is applied on top of it, while the perforated tape is located in the thickness of the plaster. When moving gypsum board sheets, punched paper tape prevents the formation of cracks, while serpyanka will not cope with this task. After sealing the joints, go through the places where the screws are attached.
Important! Do not use finishing putty to putty joints and screws; after drying, it shrinks significantly.
Wallpaper on walls
There is an opinion that for further finishing of gypsum boards with wallpaper, finishing putty is not needed, because small errors under thick vinyl wallpaper will not be noticeable, however, a thin layer of finish will not only even out minor errors in the walls, but will also prevent damage to the drywall paper when removing the wallpaper. Before gluing wallpaper, it is necessary to remove dust from the surface using an acrylic primer, which impregnates and fixes the previous layer and reduces the consumption of wallpaper glue. Wallpaper on gypsum plasterboard walls is glued according to the manufacturer's recommendations; the work is no different from gluing wallpaper on other surfaces.
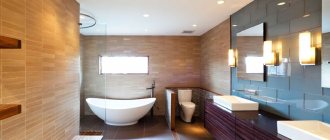
Surface tiling
Due to their low hygroscopicity and ease of maintenance, ceramic tiles and porcelain stoneware are perhaps the most practical way to decorate surfaces with high loads. Tiling is appropriate in bathrooms, boiler rooms and the kitchen. There are fewer requirements for leveling the walls, because minor errors will be compensated for by tile adhesive, so applying finishing putty and priming the surface can be skipped. The tiling of a pre-plastered brick wall is carried out according to general rules, including:
- Marking the wall vertically and horizontally;
- Pre-lay out tiles to minimize undercutting.
To avoid problems when using tiled walls, use crosses to separate the rows. Depending on the size of the tiles, lay 2-4 rows, wait for the glue to dry completely, then continue to increase the height. Failure to comply with this rule will result in the tiles sliding under their own weight.
General provisions
A house made of rounded logs looks original. In some cases, it is not at all necessary to coat the internal surfaces of wood walls. But the logs do not always look aesthetically pleasing – I would like to cover them with a more interesting type of cladding. And here it is important to take into account that the development of the installation of the coating will differ from the cladding of walls made of concrete or brick. This is determined by the qualities of the wood species.
Depending on this, the general provisions look like this:
- finishing of internal surfaces is carried out only after active shrinkage of the house;
- the process of caulking before finishing work is mandatory;
- to avoid mold, it is necessary to use materials with permeability for finishing;
- when using sealed raw materials, forced ventilation is used;
- It is important to use lightweight materials so as not to create additional load on the foundation and walls;
- if there is an attic, then they painstakingly think through the type of finishing raw materials, taking into account comfortable installation on the walls of the roof, which is also the walls of the house.
READ Projector screen ceiling mount
If the building has already been built, then the condition of the floors is assessed before finishing. As necessary, pay attention to places that differ in color, density and texture. For example, crumbling speaks of the destruction of the massif by beetles. In this case, it is necessary to remove the cause of the damage and treat the wood with special impregnations.
External decorative finishing
The exterior decoration of a house and the insulation of its walls are directly interrelated. It is after the insulating layer is laid that the external decoration is carried out.
There are two ways:
- laying the outer material “dry”, that is, fixing it using various types of fasteners,
- or the “wet facade” option, which involves applying plaster.
What is a “wet façade”?
The so-called “wet” method of finishing facades combines both insulation and wall decoration. Its essence lies in the sequential application of several layers of various materials to the facade of the house, forming a kind of “pie”.
The layers contain everything necessary for a quality finish:
- A primer that protects the base and is necessary for adhesion to the following layers:
- Adhesive layer;
- Actually insulation, which each owner can choose based on his preferences, climatic conditions and financial capabilities; reinforcing layer;
- Finishing - most often it is played by decorative plaster, but porcelain stoneware, tiles, and stone are also used.
The advantages of this method are undoubtedly its effectiveness and functionality:
- The reduced weight of the structure does not require reinforcement of the foundation.
- The thermal insulation properties of such a cake guarantee protection against condensation and the occurrence of “cold bridges”.
- The properties of the materials used prevent freezing of the structure and, consequently, its possible cracking.
- The presence of layers increases the sound insulation of the house.
- It should also be noted that the cost of finishing is reduced compared to some options for a ventilated facade. You can prepare such a “pie” with your own hands, which means saving money on paying for the work of specialists.
But it is important to remember that the method will only work if the technological conditions are met - the correct choice of materials and time of work. A “wet façade” can only be installed at above-zero temperatures, in the dry season. Otherwise, the result may be disastrous.
Types of putty materials used
Putty, like all building mixtures, is divided into types. The main difference is the base of the dry mixture: cement, gypsum or polymer.
Putty is applied on the base from which the plaster is made.
That is, if plastering work was carried out with gypsum mortar, then the putty should contain gypsum.
Attention. Cement putty should not be used on gypsum plaster. This will lead to peeling in no time.
Subtleties of finishing
First of all, no matter what finishing option is chosen, you need to take care of the vapor barrier layer to protect the insulation from absorbing moisture from the air.
At the rough finishing stage, utilities and insulation are installed. It’s good if you can immediately take care of sound insulation. Finishing concerns materials that will be the immediate finishing layer on the walls.
If there are wooden floors in the room, then the best option would be clapboard finishing. If the beams are reinforced concrete, you cannot do without putty and plaster.
Briefly about the main thing
The variety of methods and methods for wall cladding is infinitely diverse, but not all of them suit the owners in terms of costs. Each type of finishing has the most budget option. You can decorate your walls stylishly and inexpensively using wallpaper, plaster and paint. There are inexpensive varieties among tile varieties.
Wooden panels can seriously undermine the family budget, but they can easily be replaced by PVC panels that reliably imitate the shade and texture of wood. In order for a budget material to meet expectations, it is important to select it taking into account the operational properties and characteristics of the room for which it is intended.
Ratings 0
Interior decoration of a brick house
The design of the interior space of a house can be divided into two sequential processes: roughing and finishing. The rough stage includes thermal and sound insulation of the building, laying cables and pipes. To create a soundproofing layer in the walls, you need to use porous materials; let’s look at suitable options in more detail. After all, soundproofing means peace and sound sleep in your home.
- Cork. Environmentally friendly material, not susceptible to mold, mildew and rotting. Light weight does not cause problems with transportation and installation.
- Mineral wool and glass wool. Has excellent soundproofing effect. Sold in the form of rolls and slabs. Neutral in relation to other materials. Quick and easy to install.
- Izover. New generation synthetic material. Safe for the health of residents, lightweight and non-flammable, which adds an additional plus to it.
The interior decoration of a brick house should not only perform a decorative function, but also serve to insulate the house, protect walls from wear and tear, and maintain a favorable indoor microclimate.
The main goal of the rough stage in finishing the walls of a brick house is to create an optimal surface for installing the base material. Here again there are several building materials to choose from.
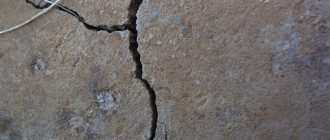
- Plaster. It makes the surface smooth and aesthetic; all resulting imperfections can be easily removed by re-wetting the problem area and grouting. However, remember that its layer should not exceed three centimeters. A few more advantages of using plaster inside are the possibility of self-processing and the affordable cost of materials. Among the disadvantages are the insufficient reliability of adhesion of the material to the wall, the complexity of independent work and the impossibility of winter work in a room with poor heating. There is also always a risk of getting cracks after the layers have completely hardened.
- Drywall. A fairly simple job of rough cladding, suitable even for non-professionals in the construction and finishing of a brick house. Ideal as a future base for wallpaper. However, it is worth remembering a few nuances: handle the sheets carefully, because in a crumpled state they are completely unsuitable. The nails you use to nail drywall should be varnished to prevent rust stains from appearing on the wallpaper.
- Magnesium glass sheets. A less popular method of interior finishing of brick walls. However, this flexible and durable material has two very important characteristics. It is moisture-resistant and fire-resistant at the same time, which makes it an ideal candidate for furnishing a kitchen, for example. The environmentally friendly material is safe for human health, convenient and easy to install.
The peculiarity of glass-magnesium sheets is that they have two sides, rough and smooth. The first option acts as an external one if the cladding is made of veneer, decorative plaster, tiles and other materials that require reliable adhesion to the surface. The smooth side is suitable for laminating, painting and wallpapering.
Let's take a closer look at all the work on finishing the brick walls inside the house.
Plastering a brick wall
You can start applying plaster only when you make sure that the base has dried well and the masonry mortar has hardened securely. If you are impatient and start plastering too early, the material will soon begin to crack and peel.
- First you need to clean the seams to a depth of at least a centimeter. We also prepare the rest of the surface for applying the solution: use a stiff brush to remove dust from the wall.
- To ensure better adhesion of the plaster to the surface, the wall should be pre-moistened with water and then sprayed with liquid cement mortar.
Direct application of plaster can be done using three different approaches:
- Without using beacons. The cakes of the mixture, scattered on the wall in conventional horizontal or vertical lines, at a distance of 100-150 cm from each other, are leveled. Then they are connected from bottom to top.
- Steel beacons are first driven into the masonry as follows: one edge is driven into the masonry joints, and the other along a plumb line. The distance between them should be approximately 130-150 centimeters. The solution is laid from bottom to top, and the thickness of the layer is monitored using beacons.
- Pieces of the mixture are thrown onto the wall in the form of vertical rows, and then profiled beacons are immersed in them level by level. Subsequently, after applying the cakes, the solution is leveled from bottom to top using wave-like movements. After the covering layer, the beacons can be removed and the resulting grooves can be sealed.