Functions and purpose of soil
Priming the walls before the puttying process has a lot of advantages. Such as:
- Since materials such as brick, drywall, concrete and wood have a porous structure and sometimes cracks, the primer acts as their “filler” and makes the base monolithic and strengthens it.
- Increasing the adhesive properties of the base, increasing adhesion and preventing crumbling and shedding.
- Filled pores and cracks will allow you to save on putty mixture in the future. Agree that economical work is an important plus.
- Stains on the walls and uneven color? A primer will do an excellent job with this task, but putty often cannot do such a job.
- The ease of applying putty to the ground speaks for itself.
- The presence of a range of moisture-proof and antiseptic properties of some types of primers allows you to protect walls quite well from the effects of humidity and various types of fungi such as mold.
The listed advantages of preliminary priming will help you complete your intended work with sufficient quality.
Some experts have an ambiguous question about whether drywall should be primed before puttying. However, in the opinion of the most experienced of them, this is simply necessary, because the outer layer of drywall is ordinary paper, coating which with a primer will give additional mechanical strength.
Do I need to prime the wall?
A special coat of primer after finishing putty is necessary to protect the final finish. The same question concerns the need for priming before puttying work. The use of each composition causes certain consequences. Studying information from the manufacturer will help you decide which materials are best suited. But the main advantages of priming are easy to highlight:
- Each layer of the original materials will hold tighter;
- The bases do not fall off or crack over the entire area;
- The plastered wall becomes protected from deformation and fungi and mold.
Do I need to prime before applying putty? If you choose the right materials, then priming determines how high-quality and durable the repair work will be in principle. Each composition, with its properties, is suitable only for certain surfaces. All these materials are different from each other:
- brickwork;
- concrete blocks;
- wood;
- drywall.
The porosity and density of these materials are at different levels. However, the initial primer before plastering the walls increases strength in any case. The composition adds grip and solidity.
Primer before the puttying process
Let’s say that the renovation of your apartment or premises is planned “on the level”, and you decide to do everything right. So that the repair is preserved for a fairly long period. As noted earlier, in this case, priming before puttying is a necessary job. Having dealt with the question “why?”, let’s move on to considering the types of soil.
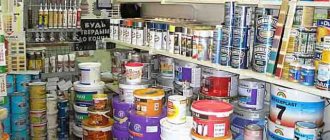
Currently, construction stores and manufacturers of related products offer the following types of primers:
- acrylic based primer. It is considered one of the most universal. It can easily be applied to almost any wall. Approximate drying time is two to four hours. Perfect for drywall;
- phenol primer. Ideal for processing wood and metal. If priming work is carried out on top of a layer of putty, then it cannot be used, but if we are talking about drywall, then it’s a different matter;
- alkyd primer. This type is best applied to wooden surfaces;
- perchlorovinyl primer. If it comes to priming work over putty, then this type should be used. It is recommended to apply to concrete or brick walls only from the outside;
- glyphthalic. This type has increased toxicity. It is not recommended for use both before and after puttying work. When working with this type of primer, take care of sufficient ventilation of the room where the work is carried out;
- primer on polyvinyl acetate. It is used when it comes to subsequent coating with polyvinyl acetate paint. This variety is distinguished by a short drying time, its range is from 30 to 60 minutes;
- polystyrene primer. It will fit perfectly on a wooden surface before painting. Quite toxic.
The composition of the primer must be selected taking into account its properties and what the base is made of. In construction stores you can find various types of primers, in addition to the basic ones that we reviewed earlier. From concentrated ones with various additives to ready-to-use dry mixtures, for dilution of which sometimes a special solvent may be needed.
First, let's pay attention to the composition of the soil. Taking this into account, we will select the mixture we need. In any case, I would like to note that primarily priming work is carried out with acrylic, phenolic and perchlorovinyl mixtures. You should take into account the humidity and other conditions of the room, which must be primed before puttying work.
How to properly putty wood for painting and for wallpapering?
Wooden walls have their own characteristics, so they should be puttied differently than other surfaces, for example, concrete or brick. Wooden walls have breathable properties and retain heat well. But in order to extend the life of the material and preserve its properties for a long time, it should be puttied. We'll look at how to putty wood for subsequent painting or wallpapering.
Walls made of OSB boards must be puttied before gluing.
How to choose putty?
The main purpose of putty is to level the surface so that finishing can be applied to it in the future.
There are many options for putty mixtures, so choosing can be difficult. To choose a quality mixture, you should pay attention to the following factors:
- the putty must have high adhesion properties, this largely affects the durability of the result;
- high-quality putty should dry quickly;
- putties must be sufficiently plastic, the ease of their application and distribution over the surface depends on this;
- when purchasing a mixture in dry form, you should make sure that it is well crushed, otherwise large grains will turn into unpleasant lumps when adding liquid;
- It is important to pay attention to the environmental friendliness of the mixture, because you will spend a lot of time indoors.
Also pay attention to the cost; it is almost impossible to buy a high-quality putty mixture at a low price.
The result of the work depends on the correct choice of putty.
What types of putty mixtures exist?
The most common putties are the following:
- latex;
- gypsum;
- acrylic;
- adhesive;
- oil
Gypsum-based putty is the most popular. It has earned popularity due to its excellent adhesion to surfaces and good elasticity.
Mixtures based on latex and acrylic have similar properties, but are more expensive. But they are more durable. They need to be applied in a thin layer of no more than 2 mm.
Glue and oil putties are actively used for priming wood products, such as doors or window frames. These mixtures perform their functions well when applied to surfaces that are exposed to high humidity.
There are special acrylic-based putties for wood.
There are two types of putty:
- basic;
- finishing.
The basic putty is applied in a wide layer from 2 mm to several centimeters. But after it the surface will not be perfectly smooth; visible roughness will remain. Therefore, the finishing mixture is designed to eliminate this effect. It has a minimum width and is applied over the base coat.
If you plan to glue wallpaper, then one base and one finishing layer is enough. Before painting you will have to apply up to five layers of the finishing mixture.
Putty for wallpapering
In order for the wallpaper to last as long as possible, you should stick it on the most flat surface possible.
Sometimes drywall is used to level wooden surfaces, but this method is not very convenient and is expensive. To install the slabs, you need to purchase screws, profiles, and hangers.
For adhesion, apply a primer
A simpler way of leveling is putty, especially suitable for wood surfaces. Applying the mixture under wallpaper has its own characteristics. To improve the quality of work, wooden walls are covered with plywood. Then base plaster is applied. To obtain a high-quality surface, the dried plaster layer is sanded with sandpaper.
Preparing the surface
What needs to be done so that the surface can be considered ready for work? To begin with, be sure to remove dirt, dust, various suspensions and large excess particles from the wall, be it cement or old plaster. You should also carefully remove the old coating; it can often and imperceptibly begin to lag behind the walls.
Found greasy stains? They need to be degreased. If the surface is damp, you may need a fan heater, a hairdryer, and if weather conditions permit, you can simply ventilate the room.
Next, you can safely prepare the primer mixture directly. If you purchased a finished product or mixture, then you should mix it as best as possible, shake it and pour it into a special container in the form of a small trough that is convenient for use.
Some concentrated primers may need to be diluted in addition to the label instructions. Dry types, as we noted earlier, are diluted with running water in the same way - according to the conditions specified by the manufacturer on the packaging.
How to apply putty on a wooden surface
Puttying wooden surfaces ensures the formation of a layer that holds the paint/wallpaper coating and the wood together. Eliminates existing defects. Performs a protective function.
Why putty wooden surfaces and what does it give?
Wood is not a perfect building material. It has small cracks, burrs, and traces of knots. The putty will eliminate imperfections, hide imperfections, and level the surface. It is applied to obtain the following results:
For putty
There is a lot of variability in its use. It is used for:
- Restoration of wooden structures;
- Preparing freshly laid parquet for painting;
- Repair of floor coverings;
- Restoration of window frames, door panels and jambs.
- environmental cleanliness;
- ease of application.
Against putty
The only argument put forward against puttying wooden surfaces is the fear that they will swell when exposed to moisture. But this is refuted by the fact that all wood putties are waterproof and protect against the harmful effects of precipitation, temperature changes, and ultraviolet rays.
What types of putty can be used
Putty is available in the form of a dry or liquid mixture. It is chosen taking into account its composition, color, purpose (basic or finishing). The following types of putty are suitable for working with wood.
Acrylic
The purpose is universal. Suitable for laminate, chipboard and other finishing materials. Used for exterior and interior decoration. Characterized by:
- Elasticity;
- No shrinkage;
- Increased strength;
- UV resistant;
- Ease of tinting;
- Fire resistance;
- Excellent thermal insulation properties;
- No smell.
Epoxy
Material providing maximum joint density. It is applied for
- sealing cracks and joints when repairing floors;
- eliminating scratches, potholes, cracks and other defects before painting.
It has a significant drawback: it is incompatible with stain .
Plaster
Water-soluble type of putty. Doesn't fit well on wood. Requires priming of the surface before filling. After drying, a heterogeneous structure is formed, prone to cracking and crumbling. Suitable as a topcoat over a base layer of polymer mixture.
Polymer
Made from latex. Doesn't bubble. Withstands temperature changes. Available in a wide range of colors.
Priming process
Let's move on to the main question. How to prime walls before puttying?
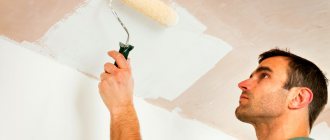
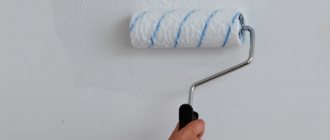
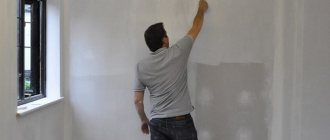
We apply the primer to the walls in a thin and even layer with a small “overlap” in order not to leave areas that will later suddenly remain unfinished. If the primer mixture is transparent, then it is easiest to make a mistake or error, so it is recommended to choose (and it is more convenient) a white primer.
After the first primer layer has dried well enough and you have found visible and noticeable pores, it is recommended to apply a second, and if necessary, a third coat. The only thing worth remembering when applying additional layers is that complete drying of the previous layer will ensure reliable and high-quality application of subsequent ones.
It is important to determine the time after which it will be possible to apply a layer of putty to the primed layer. Typically, the drying time for the primer can be found on the product packaging. The main thing is not to overtighten, otherwise the walls will begin to collect dust, suspended matter, etc., which will negatively affect the adhesion of the putty to the ground.
Some people ask an interesting question: is there a need to re-prime after the puttying process? The answer is yes! Yes, such work can be done, and sometimes it is absolutely necessary. This layer will help strengthen the base to improve the fastening ability of subsequent wall finishing in your room.
Features of priming before puttying
Before wallpapering, it is also advisable to prime the surface after puttying. This will reduce the consumption of wallpaper glue and improve the adhesion of the paper webs to the base. You can also make a primer for wallpaper yourself. The recipe for preparing this composition is as follows: mix PVA glue, plaster, chalk and drying oil. And we use it as a primer. The only disadvantage of this composition is that over time it turns yellow and can appear through the wallpaper.
Priming the walls with putty before painting with water-based emulsion is also necessary. After all, this procedure will significantly reduce paint consumption per sq.m. It is better to spend money on primer than to overpay for paint, the cost of which is much higher.
When puttingtying gypsum boards, you first need to putty the seams, joints, reinforced areas, and only then apply primer before finishing.
Whether it is necessary to prime between layers of putty - there is no definite answer. So, if the base is cement, then simply wet it with water. And when using the same type of materials, there is no need to apply primer.
Let's sum it up
In conclusion, I would like to say that proper preparation of walls for future finishing work is almost of paramount importance. Especially when it comes to priming before puttying. Despite the common misconception that if the repair is cosmetic, then it is quite possible to get by with ordinary plaster, paint the walls or hang wallpaper without preliminary preparation and treatment of the surface of the walls - this is just another mistake of those who like to do everything “in a hurry”.
The result of such negligence in relation to work that can be called art - repair - will be plaster falling off in pieces, mold and fungi crawling through the layers of paint and wallpaper, and the wallpaper will gradually slide to the floor or peel off in pieces.
Have you already guessed what the reason is? In the absence of a high-quality primer applied before applying putty.
Agree, it is better to do it once, but with high quality, and spend a couple of hundred rubles more than originally planned, but to do the work on the walls efficiently and for a long time, than in the future to spend money on repeated repairs, done once without proper attitude and responsibility.
Happy priming and strong walls!
Types of primers for wood by component composition
Before use, you should distinguish the primer for wood for painting. There are different types of this mixture. Each of them performs its own specific tasks, so you should select them correctly.
Acrylic
Acrylics are universal. Suitable for different materials, including wood. They are convenient to use, since the emulsion base is diluted with water. An ideal base for paints containing acrylic.
Basic properties:
- Non-toxic - suitable for interior work;
- They have no odor;
- Dries quickly - it takes about 3 hours to completely set;
- It is able to be absorbed into the deep layers of wood fiber, thereby increasing its quality.
They are convenient to use, since the emulsion base is diluted with water.
Alkyd
Alkyd compounds are suitable for a variety of materials, including metal, cardboard, plaster, concrete and others. They have the maximum amount of solvent and chemical composition, which allows you to create a dense film on top with waterproof qualities.
Basic properties:
- High level of grip;
- Suitable for surfaces that are operated at low temperatures;
- To achieve the desired effect, 1 layer is enough;
- It is characterized as wear-resistant, making it suitable for external work;
- Suitable for materials that have already been painted;
- It is completely absorbed and hardens in 12-13 hours, taking into account external conditions;
- Alkyd primers have a pronounced chemical odor that is difficult to remove, which must be taken into account when working indoors;
- Does not penetrate layers of material too deeply.
Alkyd compounds are suitable for a variety of materials, including metal, cardboard, plaster, concrete and others.
Silicone-acrylic
Silicone-acrylic compositions, like wood primers, are simple mixtures that are low in cost compared to other primers with similar characteristics.
Basic properties:
- Suitable for metals, wood fibers, other building elements;
- Used in construction work, can be used both indoors and outdoors;
- Dries in 3 hours;
- Has moderate consumption.
Used in construction work, can be used both indoors and outdoors.
Shellac
Shellac primer for wood contains among the ingredients the following components - water and aqueous chemical compounds of shellac.
Basic properties:
- Used exclusively on wood, often on damp wood;
- Isolates knot areas;
- Smoothes wood base;
- Stops the release of the resinous component on wood that has already been painted.
- Able to penetrate into the structure of the material, penetrating even into the inner layers. Thanks to this, the wood becomes harder and has increased strength and density.
This deep penetration primer for wood ensures resistance to water, which means warping of this material during further use, especially in unfavorable conditions.
Basic properties:
- Disinfectant effect, protecting wood from attacks by insects and fungi;
- Reduces the natural property of wood to absorb moisture;
- High degree of penetration;
- Ideal for working with raw wood, untreated boards, while helping to improve the quality of the material.
It is important to remember that high-quality shellac primers contain an admixture of wax. And this significantly improves the quality of the coating. True, for operating conditions at high humidity levels, it is worth choosing slag soil, cleared of wax.
Able to penetrate into the structure of the material, penetrating even into the inner layers.
Polyurethane and epoxy compositions
Polyurethane primers can protect the surface and at the same time strengthen the base. Basic properties:
- Can be used on an unprepared surface;
- Can be applied to slightly heated wood;
- The application is universal, which allows it to be applied to surfaces both outside and indoors;
- Consumption is economical;
- Suitable for various materials including metal, wood, concrete;
- Has a high degree of reliability and durability;
- But this type of primer takes quite a long time to dry.
Polyurethane primers can protect the surface and at the same time strengthen the base.
Epoxy primers are a combination of 2 main components - epoxy resins and polyurethane. Most often, this option is used for working on metal, but if it is necessary to protect wood from adverse weather conditions, this mixture works quite reliably.
If it is necessary to protect a tree from adverse weather conditions, this mixture works quite reliably.
Materials and tools
To get a high-quality surface and avoid difficulties during the process itself, you need to make sure you have the following tools in advance:
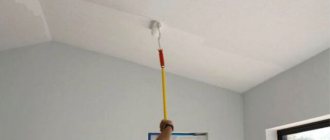
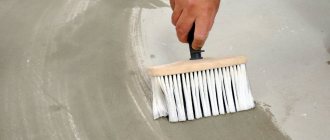
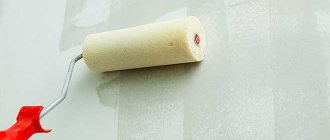
- roller (choose the right size taking into account the surface area), brush, paint brush (an alternative is a roller with a long handle);
- comfortable and spacious, but not very large capacity;
- spatula to remove dirt and remnants of old materials;
- a stable table or stepladder.
You will also need the primer itself and water (if you purchased a dry mixture or concentrate). The average consumption is indicated by the manufacturer on the packaging container. To avoid shortages, it is better to take it with a reserve of 10-15%.
If the composition remains, it can be used for the ceiling surface, as well as for priming cement screed.
How to treat the wall after finishing putty: what to wipe it with?
After the finishing putty, when the surface of the wall has been leveled as much as possible, you will need to smooth it out as much as possible and rub the finishing layer itself directly.
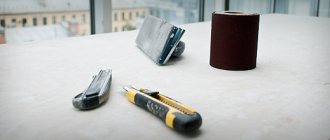
The grinding operation in this matter will be the best solution, and it can be done using the following tools: a sanding block and an abrasive mesh. It will be necessary to provide additional lighting and work from top to bottom.
The article discussed the importance of applying a primer to the surface of walls made of various materials. In addition, the features of multi-layer wall treatment by alternating layers of putty and primer were presented.
