The quality of finishing work depends not only on the selected materials, which can be expensive and branded. Preparatory work plays a huge role. If the wall of the room is crooked, with cracks and defects, then the finishing will not last half the stated period. And if we talk about gluing wallpaper, then special attention is paid to adhesion, i.e. adhesion to the surface. To improve it, use a wallpaper primer. Many people skip this step and perform the work without such preparation. So is it necessary to spend additional money and prime the walls? What types of primers are available and how is the entire job completed from start to finish?
What is a primer
The dictionary says that a primer (also called a “primer”) is a composition or substance that is used in the construction industry and beyond. It is applied as the first layer to a previously prepared surface for further: painting, applying putty, wallpaper and similar materials. Thanks to this, the top (covering) building materials have better adhesion to the surface. The primer penetrates the pores of the wall and evens out its absorbency. This reduces the consumption of finishing material.
Wall priming is the process of applying a primer to the surface. Produced using pre-selected tools. In addition to its main function, the composition protects metal from rust, reveals the structure of wood, closes pores and ensures the best adhesion to any finishing material. And thanks to antiseptic additives, the compositions protect surfaces from the formation of fungus and mold.
Liquid vs thick primer: pros and cons
Another classification option is the consistency of the primer and the depth to which it can penetrate. This:
- Thick surface primer. A mixture of creamy white color that lays like a film on the surface of the wall and masks all its imperfections.
- Liquid primer with deep penetration. A transparent solution with a consistency similar to water. The structure helps to penetrate deeply into the wall surface and make it stronger.
Each type has its own advantages and disadvantages; we will analyze them in the table.
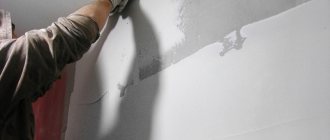
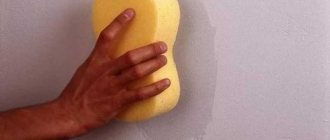
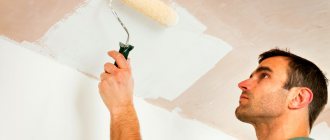
Applying a thick white primer
Table 3. Thick and liquid primers, their advantages and disadvantages.
| Purpose | Advantages | Flaws | |
| Superficial | Used to fill loose surfaces, strengthen walls and eliminate minor irregularities. After application to the wall they turn into a smooth film. Some manufacturers add antiseptics and additives to their primers that neutralize alkali. | qualitatively fills micropores; ideally smoothes any surface; the coating is no different from decorative finishing. | does not penetrate deep enough into the wall. |
| Deep penetration | Used in cases where it is necessary to further strengthen the wall. For example, if the material is quite old and there is a risk of cracks. In addition, they are often used when preparing walls in rooms with high humidity (kitchens and bathrooms). Prevents the development of mold and fungi spores. | affordable cost; the ability to penetrate 25% deeper into the wall texture than thick primers; strengthens the loose texture of concrete and makes it as resistant to external influences as possible. | transparency; uneven application (due to the lack of color it is impossible to apply layers without overlapping); absorb moisture, so after the first layer has dried, you need to add a second one; different degrees of impregnation in different areas of the wall (because of this, the adhesion in the texture of the material will be different). |
To prepare a wall for wallpapering, a thick primer is most often chosen. This composition creates a surface that is ideal for further procedures. But for bare walls made of foam blocks, gas blocks and old cement plaster, a liquid variation must be used. It will help to hold together all particles of material at a depth of up to 15 mm .
Important! Some masters use both varieties at once. So, they apply a liquid penetrating primer for detailed work as the first layer, and a thick finishing primer as the second.
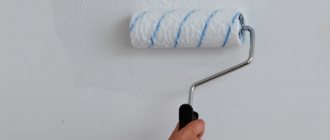
Applying liquid primer to the wall
Is priming required before wallpapering?
There are many adherents of the old school who think: why prime the walls before wallpapering? Our ancestors didn’t even hear about it, and the wallpaper itself was impossible to tear off the wall. On the one hand, this is correct. True, there is one caveat: a couple of decades ago, priming of walls was done using diluted glue (made by hand), or PVA glue mixed with water.
What kind of wallpaper did you have before? Mostly paper-based, single-layer and simple. Their peculiarity is their light weight, so a homemade adhesive made from flour or starch has withstood such canvases for decades. But for some reason this fact is ignored. Moreover, previously walls were made of uniform materials of the same type: brick, wood, concrete, on top of which a cement-sand mortar was applied for leveling. Accordingly, such a surface already obviously had excellent adhesion and the question of whether it was necessary to prime the walls disappeared by itself.
Time moves forward, and today the construction market is richer than ever. Non-woven, metal, vinyl, 3D wallpaper, etc. appeared on the shelves. They have a lot of weight, so it’s not so easy to hold them on the wall. Walls began to be built from gas blocks, foam blocks and other cellular concrete. Instead of plaster or on top of it, putty, sheets of plasterboard, OSB boards, and plywood are applied. Therefore, achieving high quality adhesion has become more difficult; glue alone cannot help. It is the primer for apartment walls under wallpaper that best copes with its task.
The primer is a liquid composition applied immediately before painting, puttying or wallpapering. Therefore, you should always use the mixture. There are only three exceptions to the rule:
- It is required to make quick, cheap and temporary repairs for a period of 3–5 years.
- Thin, single-layer paper wallpapers that are light in weight are used.
- It is necessary to put up wallpaper in the utility room, where priming of the walls is not needed.
Other cases require the application of a primer. This will allow you to achieve the following goals:
- Increase the quality of adhesion between the wall and the adhesive. The wallpaper will hold securely.
- Microparticles of dust that remain after cleaning and preparing the walls are bound. Is it necessary to prime wallpaper before painting? Yes, as with any finishing materials.
- The wall gains better resistance to mechanical damage; microcracks will not form on the surface.
- If you need to remove a layer of wallpaper, the wall will not be so damaged. This is especially important for plasterboard surfaces. When peeling off the wallpaper, the cardboard layer will not be damaged.
- The primer will reduce the likelihood of microorganisms such as mildew and mold forming in the house.
- A white primer for wallpaper allows you to disguise dark spots that appear on the wall. If the wallpaper is thin and light, then such stains will appear and spoil the appearance.
- The consumption of adhesive is reduced, since the primer fills all microcracks and also forms a kind of film on the wall that repels water. This means that the wall will not absorb excess moisture from the glue.
This is why a primer is needed in modern realities. However, before starting application work, it is important to understand the types and characteristics of primer compositions.
Wall preparation algorithm
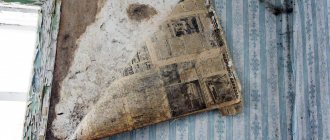
Removing old wallpaper
In order to get rid of old wallpaper, you should wet it. Then, using a spatula, carefully remove them. If, after you have moistened the wallpaper with water, it does not lag behind the wall because it has not been saturated with moisture, then you need to make cuts. You can use a special wallpaper removing liquid, which can be purchased at hardware stores. The liquid is added to a bucket of water and applied to the walls. After 30 minutes, you can begin removing old coatings. Now you won't have to put in a lot of effort. The process will be easy.
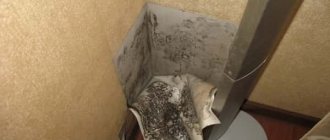
After removing the old trim, you need to get rid of the old adhesive. To do this, wash off the surface with warm water and clean the glue from the glue using a spatula. Mold may have appeared in the bathroom, where there is high humidity, or in other rooms. It must be removed so that it does not show up on the new finish. In addition, mold is very harmful to health. To combat mold, use a bleach solution, which is used to treat the necessary areas. For such premises, glue is purchased that contains fungicides.
After the old coating is finished, we tackle the cracks and holes. They need to be carefully puttied so that the surface becomes smooth. If the apartment is not very warm, then you can glue a thin layer of polystyrene foam. This way you will add warmth to the apartment and make the walls perfectly smooth.
Applying the first coat of primer
Now you need to make a decision - what to prime.
You can buy the material in the store. Some people do this with PVA glue. You can use wallpaper glue, just make it more liquid. If you bought soil in a store, then first of all, carefully read the instructions. In accordance with the recommendations studied, dilute it in water. Stir thoroughly to avoid lumps. It is unlikely that this effect can be achieved manually. Therefore, you can use a drill with a mixer attachment.
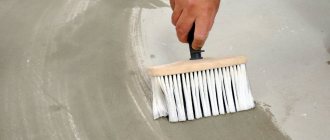
The primer is applied to the surface using a brush. Outwardly, this resembles the painting process. You can pour the primer into a tray and use a roller to apply. The latter is moistened, lightly squeezed, and the primer is applied to the wall in an even layer, avoiding drips.
Tidying up the surface
After the initial stage is completed and the first layer is applied, you need to let the wall dry. The packaging indicates the period of time required for the coating to dry completely. Even if it seems to you that after all the manipulations done the wall looks beyond praise, you should still apply a second layer.
Types of primers
The primer solution is selected based on the type of material to which the substance will be applied. It is noteworthy that would-be masters write on the Internet that a special primer is available for sale for every wallpaper: non-woven, vinyl and paper. Actually this is not true. Otherwise, manufacturers would have to make about 100 different types of adhesives for a given wall material and wallpaper. And this is not beneficial for either producers or consumers.
All products designed to improve adhesion can be divided according to the form of release, the solvent in the composition, the primer and the area of application. This makes it easier to find the right option. Let's consider the types of primer according to their release form. The substance happens:
- in the form of a solution that is ready for use after opening;
- concentrated substance requiring subsequent dilution;
- dry mixture that you will need to prepare yourself.
The composition may include a solvent. Products are divided into the following types depending on the presence of solvent:
- water-based primer (water-based);
- with organic solvents by adding white spirit, acetone, isopropane and butyl alcohol.
If we talk about purpose, then primers are:
- penetrating. Scope of use: brick, concrete and stone walls;
- strengthening. Scope of use: plasterboard, cellular concrete, gas silicate;
- adhesive. Used if you need to paste wallpaper on glass, plastic or tiles.
Let's look at the most popular primers used for wallpaper:
- Water-based or acrylic mixture. It is most often called a universal composition, because the substance is used for almost any wall surface. These can be concrete, wood, brick, plastered surfaces, OSB or plywood. If we talk about the purpose, then there are deep penetration, hardening and adhesive compositions. Features: dissolves in water, no unpleasant odors appear after priming the walls, dries quickly. It is sold in stores as a concentrate, ready-made solution or dry mixtures. There is even a primer in the form of an aerosol, from a can. If you add an antiseptic to the composition, the primer will have antiseptic properties. Can be used for kitchen and other rooms. The best manufacturers: Ceresit, Prospectors, Knauf, Alpina, Composite, Perfecta.
- Alkyd compositions. Made on the basis of alkyd resins with an organic solvent. Most often this is white spirit. Universal primers, not used only for gypsum plasterboard, drywall, putty and plaster made of cement and gypsum. It has a pungent and unpleasant odor. It is released over 15–18 hours. The room needs to be ventilated. How long after alkyd primer can you glue wallpaper? It dries in 16 hours. After this, you can begin work. And since the composition contains polymers, after application a whip is formed that is not afraid of temperature fluctuations and minor mechanical stress. Protection from moisture allows the composition to be used in damp rooms. Disadvantages: toxicity. The best manufacturers: Tikkurila, Composite, Aura.
- Mineral primer. It is produced on the basis of cement, lime and gypsum. It has no odor, is environmentally friendly and dries quickly. Manufacturers: Caparol, Ceresit and Remmers.
The last two types of primers are quite difficult to find on sale. After all, acrylic-based compositions have all the necessary characteristics and are affordable. The best option for wallpapering.
The soil penetrates and strengthens
When choosing an acrylate primer, you may see designations: strengthening, deep penetration, universal, adhesive, with antiseptic additives, etc. You can get confused by such diversity. But in fact, everything is quite simple: the names speak for themselves. Moreover, manufacturers add antiseptics to all soils so that the walls under the wallpaper are not exposed to mold fungi.
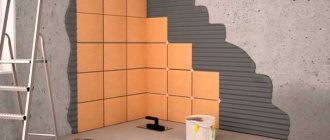
You need to pay attention to the composition called “Adhesive”. It has a special mission: it does not penetrate deeply, but on the surface it forms a durable layer that adheres well to the subsequent coating. It is used for priming poorly absorbent or even non-absorbent surfaces, for example, dense concrete, areas painted with oil paints. A good solution for such questionable areas would be to use an adhesive primer with fine quartz sand. Mix thoroughly, apply to a glossy surface and wait for it to dry. An even, rough layer appears, similar in appearance to sandpaper. Any wallpaper will stick firmly to this layer. This quartz mixture is especially suitable for heavy textured vinyl wallpaper on non-woven fabric.
Selecting a primer based on the type of wall
The most popular primers on the market are Ceresit and Knauf. The following table will help you choose products for your needs and find out their characteristics.
| Primer | Tara | Product type | For which surface? | Consumption l/m2 | Cost, rub) |
| Ceresit ST17 | Bucket 10 l | Acrylic based | Concrete, brick, wooden walls, gypsum plasterboard, plaster, putty, gas silicate | 0,05–0,25 | 500–550 |
| Ceresit ST19 | 15 kg | Acrylic adhesive | Concrete, glass, plastic, tiles | 0,3–0,75 | 1100–1200 |
| Optimist | 10 l | Acrylic based | Wood | 0,1 | 550 |
| Knauf Tiefengrund | 10 kg | Alkyd | Drywall, plaster, putty, gypsum plasterboard. | 100 gr. | 700 |
| Knauf Grundirmittel | 15 kg | Alkyd | Foam and aerated concrete, silicate brick walls. | 0,2–0,3 | 3000 |
How long does it take for primer to dry before wallpapering? It all depends on the composition. You can find this out on the packaging from the manufacturer.
Pre-treatment of walls
Before gluing non-woven wallpaper, you need to properly prepare the walls. First of all, it is necessary to remove old wallpaper, especially if it is brightly colored or has a very prominent pattern. To do this, they should be moistened with water, wait until they swell, and clean off with a spatula.
Then, using putty, pronounced unevenness and chips are eliminated. The non-woven base is transparent, so it is better to cover walls with an uneven or dark color before pasting with a uniform layer of putty. Walls made of plasterboard or concrete are primed with liquid wallpaper glue and then left to dry.
At the end of the preparatory work, it is recommended to remove sockets and switches and insulate the wires.
Preparing the composition at home
To save money, some people make their own primer. To do this you will need:
- 7 liters of boiling water;
- 100 g drying oil;
- 150 g laundry soap;
- 2 kg of slaked lime;
- 2 buckets;
- sieve;
- grater.
Instructions:
- You need to grate 150 g of soap.
- Dilute the resulting mass in 3 liters of boiling water.
- After dissolution, add drying oil and mix thoroughly.
- Pour the remaining 4 liters of boiled water into another container and add lime.
- Mix the contents of the second bucket.
- Pour the contents of the first bucket into the resulting lime milk and mix thoroughly. When the primer has cooled, strain the liquid through a sieve.
After complete cooling, the mixture will be ready to be applied to the walls.
But the walls are different
Imagine that you bought non-woven wallpaper to be painted in delicate pastel colors. Here you will need not only ideal smoothness of the walls, but also uniform color of the base, since dark spots will be noticeable under the translucent non-woven layer. The wall should be uniformly light over its entire area, and this can be achieved by using a coloring primer. In order not to waste time searching for the right composition, you can add a little white water-based paint to the universal primer, and the problem of leveling the tone of the base will be solved.
Detailed instructions for applying primer
How to prime walls before wallpapering? This is a simple process that anyone can handle. It can be divided into 3 stages:
- Preparatory work with the wall.
- Preparing the primer.
- Padding.
Preparation
Work begins with an inspection of the walls. The old finishing material is removed. If there are irregularities, they are leveled out. Putty is applied. The same goes for cracks and peeling areas. After this, the wall is cleaned of dust and dirt. The work requires a broom and a damp cloth.
Preparing the primer
This item depends on the type of primer selected. The features are:
- If we are talking about ready-made compositions, then there is nothing complicated, just open the container and start working, after shaking it.
- Concentrated formulations are diluted according to the instructions, which must be on the packaging. After priming the walls, further work is carried out.
- To make a primer from a dry mixture, you will need a standard set, as when making putty. This is a construction mixer, solvent and container. Water is poured into the bucket, and then the dry mixture is poured into it. The contents are stirred with a trowel or stick until there are no dry lumps left. Then give the primer uniformity using a mixer.
Priming before applying wallpaper
There are tools for the job, all that remains is to put everything into practice:
- Plastic film will help protect the floor from splashes and dirt. It is spread around the perimeter.
- The required amount of soil is poured into the roller tray.
- The roller is soaked in the bath and soaked in the mixture.
- After which you can transfer it to the wall.
- The process starts from the bottom and gradually moves up. This way the composition will not drip onto the floor, but flow down the wall.
- The layer is applied thinly, there should be no underflows. The entire surface is gradually processed. There should be no undeveloped areas.
- Corners and other hard-to-reach places are treated with a brush.
How long before you can glue wallpaper? It's still early. You need to wait until the layer dries, and then apply the second layer. And only after it dries, work is carried out. How long should the primer dry before wallpapering? All information is indicated on the packaging from the manufacturer.
As we have learned, in modern realities it is simply impossible to do without priming the walls. This simple step allows you to improve adhesion, reduce material consumption, protect the wall and extend the service life of the decorative layer. Therefore, is it necessary to prime the walls before wallpapering? The answer is yes!
What is non-woven wallpaper?
Non-woven wallpaper is a finishing material used for gluing walls and ceilings and consists of two layers. The bottom layer is made of non-woven fabric, and the top layer can be paper, vinyl, or textile.
These wallpapers have excellent characteristics. They can be used for painting, easily allow air and steam to pass through, hide cracks and unevenness in walls or ceilings, and are easy to glue because they do not stretch or shrink in size after drying. When working with non-woven wallpaper, the adhesive is applied only to the wall, after which the dry sheet is applied and pressed with a roller. This greatly simplifies the work, allowing you to carry out renovations on your own.
The only drawback of this finishing material is the fragility of the top covering, which is made of foamed vinyl. The relief pattern can be damaged by touching the back of a sofa or chair; it can be easily scraped off even by hand. To make the top layer more durable, the canvas is painted with dispersion paint.
What tools are needed
After all the preparatory activities, you can begin the gluing process. To carry out the preparation and gluing itself, you will need some tools, including:
- Construction metal spatulas.
- Special solutions of water and soap.
- Special compositions for removing paint material.
- Fine-grain sandpapers.
- Paint rollers or sponges.
- Metal brushes.
- Irons.
- Garbage bags.
- Fabric pieces.
- Knives.
- Buckets.
It should be understood that this list is not exhaustive, because each wall requires an individual approach. However, this list shows the basic tools and materials you will need.
Type of putty and its purpose
Wall putty is selected according to two criteria: composition and functions. The mixture is selected based on its constituent components, because the quality of the final result depends on them.
So, putty is divided into the following groups:
- gypsum – levels the wall well and does not shrink in the future. The only disadvantage of such a mixture is that the composition is afraid of moisture;
- cement - has a high resistance to moisture, but may shrink over time. The negative aspects can be added to the long drying time;
- acrylic – moisture resistant, does not shrink. Perhaps this is the most suitable finishing option for both wallpaper and painting.
The list shows the three most common types of putty that can be purchased on the construction market.
The main thing is to remember that the purchased materials must be produced by the same company, which will affect the quality of the finished surface.
In order to ultimately get the result you want, you should consult with the seller and choose a putty that is suitable specifically for your purposes.
Regardless of the components present in the mixture, putty is divided into two types:
- starting mixture, which is used to smooth out large flaws and cracks on the wall. This type of composition can correct any errors in the walls, because the thickness of its layer can be five millimeters;
- finishing option - a type of material designed for repeated puttying in order to eliminate minor defects and give a smooth surface to the wall.
Sometimes a third type of putty mixture is used - universal. This product contains both finishing and starting putty at the same time.
The price of such material is much higher, but the quality is better. Which choice will be correct?
It turns out that all types of mixtures are good, and the question of which putty is best for walls under wallpaper remains unclear.
The answer can be obtained directly from the sales consultant, explaining to him for what purposes the putty solution is needed.