Repair is a serious matter that involves many processes. Even simple wallpapering involves a lot of additional work that needs to be done to ensure that the wall has a beautiful appearance. Of course, you can glue wallpaper on any walls, as long as they are dry and even.
It is logical that if the wall is crooked, it is necessary to carry out work to level it, namely to plaster it. The process is long and effective. But here the question arises: is putty necessary before wallpapering? Here we will take a closer look.
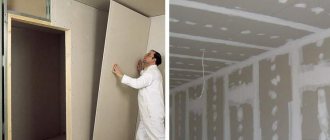
Applying starting putty
In order to understand how to putty walls, it is recommended to follow the following technology:
- Cover the floor in the room with newspapers or film. This must be done so that particles of building material do not harm the floor.
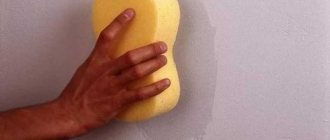
- Use a spatula to cover all defects and cracks.
- Using a larger spatula, you need to apply the material in an even layer.
- Using a small spatula, apply the mixture onto a wide one. Make consistent movements from bottom to top. The layer should be as even as possible, no more than 7-10 mm thick.
- When performing these steps, you need to completely plaster the wall. On top, near the ceiling, the layer is laid with a small spatula.
The putty must be applied in one procedure. After the layer has dried, you should use sandpaper and smooth out the defects.
Luxury or necessity
Modern technology for finishing walls with wallpaper requires the mandatory application of a leveling layer, which is due to new building materials used in repair work. The common practice of removing the old coating and applying a new one immediately after this process is not applicable when finishing work with OSB boards, plasterboard, concrete or brick walls.
The most fashionable and expensive coatings lose their appearance immediately after application if it is applied on an uneven surface with cracks, chips or pits. A smooth wall contributes to both greater preservation of the finishing material and less consumption of applied glue.
If you putty the walls under wallpaper, the applied composition promotes greater adhesion between the wall and the coating, significantly increasing the adhesive ability of the base.
This guarantees long-term operation without bubbles, peeling and deformation, which is especially necessary if you choose universal wallpaper, which has excellent properties, but is not nearly as cheap as paper wallpaper.
Leveling the surface is not just making it even and smooth, but also ensuring significant strength of the material used for rough finishing of the wall.
Is it easier to putty?
Almost the same thing if you putty in one layer. Anyone who knows how to putty, putty. If you don’t know how to putty, glue it onto the plaster (but you also need to know how to plaster), but remember that it needs to be smoothed out in almost the same way as you would with putty. It may be a little easier, but you don’t need to buy putty.
If you take expensive putties, like Rotband Paste, then even a teenager will putty with such putty after watching 2-3 videos on the Internet, working “to peel off”, without giving a layer. That is, using a spatula, simply spreading the putty over the base with force. There is a separate detailed article about puttying walls, I won’t dwell on it here, → read (with pleasure!).
Preparing the base for putty
Puttying walls must begin with preparation. First of all, it is advisable to ensure that the surface is clean and dry. All old finishing materials are leveled and removed.
The room must be warm so that the surface dries quickly.
The next step before puttingty is applying a primer. The soil increases adhesive properties, and it is easier to lay the material. This is very important for people who do not have the necessary experience in construction.
The solution should be of uniform consistency
Textile
There are two types of textile wallpaper. The first involves gluing multi-colored fabric threads onto a paper or non-woven base. This way texture and pattern are created. The second method involves gluing a single piece of fabric onto a base. Both natural and synthetic fabrics can be used: fly or felt, silk or jute, cotton, wool, viscose, polyamide or polyacrylic.
Textile wallpaper for walls absorbs sound well and is a good heat insulator. However, in everyday life they require careful care, and gluing them is also quite difficult.
Puttying brick surfaces
The specificity of brickwork is its heterogeneity, deepening of the seams and possible vertical deviations. It is important to ensure that the wall does not have any bulges by using a plumb line. If there are no problems, the work will be easier and there will be minimal consumption of materials. In case of large deviations, alignment is performed using beacons.
To level the masonry, an inexpensive putty for wallpaper on any base is suitable:
- Polymer;
- Cement;
- Plaster.
Select a variety that meets functional requirements. If you have to do multi-layer leveling, there is no point in buying the most expensive compound.
The cement that sticks out at the seams must be chipped off or beaten off, but the masonry itself provides high adhesion. After preparing the surface, a working solution is prepared and distributed over the wall. The technology for applying the finishing layer of wall putty under wallpaper with your own hands is no different from working on any other surface.
In case of large deviations, alignment is performed using beacons.
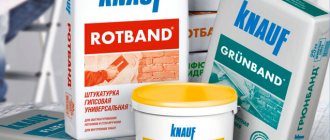
Types of putty and selection rules
The range of finishing mixtures is varied. Manufacturers offer a choice of ready-made and dry compositions, putties for the base and finishing layers, and universal ones. The choice is made depending on the type and characteristics of the coating, work experience and budget. Experts recommend taking into account a number of factors:
The choice of putty depends on the operational characteristics of the room
- Features of the composition. Ready-made putties do not require guidance. Dry ones require cooking.
- Purpose. Mixtures are divided into basic, finishing and universal. They differ in the degree of grain size.
- Budget. If your budget allows, then it is better to use two separate types, for the base and top coat.
- Manufacturer. Choose based on price-quality ratio.
- Compound. There are cement, gypsum, polymer, and water-dispersion compositions. The type is chosen depending on the conditions in the room and the characteristics of the base.
In addition to the above points, the expiration date and quality of packaging are taken into account. It is not recommended to use the mixture at the end of its life or with a leaky bag.
Cement
Cement compositions are easy to use.
Among the advantages:
- ease of use;
- high strength;
- moisture resistance;
- resistance to adverse natural factors;
- low cost.
Cement-based putties are universal building mixtures
One of the disadvantages of cement mortars is their high granularity. Therefore, they are less often used for wallpaper.
Plaster
Gypsum putty is made from white gypsum.
Among the advantages noted:
- environmental friendliness;
- vapor permeability;
- ease of application;
- high degree of adhesion;
- no shrinkage;
- efficiency;
- affordable price.
Using gypsum putty, you can obtain a smooth surface, which is subsequently used for wallpapering.
The material is applied to the walls in a small thickness. It fits well, fills small chips, cracks and other defects.
Among the disadvantages is the lack of moisture resistance. Such mixtures are not suitable for use in rooms with high humidity.
Polymer
Polymer compositions on the market are divided into acrylic and latex. They are based on polymer components. Such materials have a number of advantages over other types of putties.
Among the advantages are:
- no shrinkage;
- high degree of adhesion;
- vapor permeability;
- plastic;
- high strength;
- long viability.
Polymer putty is successfully used for painting walls and gluing wallpaper.
The material is elastic. It is easy to apply in a thin layer.
The market offers universal, base and finishing compositions. Manufacturers of building mixtures include Sheetrock, Glims, and White House.
Water-dispersed
Water-dispersion putty is a product intended for finishing ceilings, walls, and floors. It contains acrylic components and synthetic resins. The material is easy to apply, dries quickly and is highly durable.
Characteristic properties include:
- resistance to adverse natural factors;
- moisture resistance;
- high degree of adhesion;
- plastic;
- environmental friendliness;
- ease of application;
- long period of operation.
Among the disadvantages, a short service life is noted. Once the package is opened, the mass is not stored.
Water-dispersion putty designed for high-quality finishing of work surfaces
How to make putty with your own hands
Some craftsmen refuse to use ready-made compounds in favor of making putty with their own hands. There are many recipes for making the mixture: plaster, acrylic, glue-based. Let's consider one of the recipes for preparing gypsum putty.
Materials:
- drying oil – 25 grams;
- 10% glue solution – 2 kilograms;
- sifted chalk - 2 kilograms.
Components for making your own putty
Before cooking, the glue is heated, but not brought to a boil. Drying oil is introduced into it. The mass is stirred until smooth. Chalk is added last. Pour the powder in a thin stream, continuously stirring the mass. To increase the plasticity of the composition, laundry soap is added.
Preparing the walls
Continuing to understand why walls are puttied before wallpapering, let's look at the preparatory stage.
Work is carried out in strict sequence. The surface is cleaned of dirty stains and dust, for which it is best to use a vacuum cleaner or a damp cloth. Then the primer mixture is prepared - shaken, poured in portions into the tray for rolling the roller. The wall is carefully treated with it; after complete drying, a second layer is applied.
If the base is sheathed with plasterboard sheets, chamfers are removed from the smooth edges, the joining areas are glued with serpyanka, after which it is allowed to begin puttying.
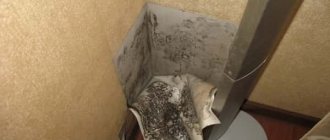
Possible defects in finishing work
Some repairmen insist on the ideal smoothness of the created top layer.
If, when applying the finishing layer, you distribute the material evenly with a spatula, and then level it using a special tool, you can do without sanding.
When deciding how to putty the walls before wallpapering, you should take into account the specifics of the material of the wall panels, selecting the appropriate brand of putty that has the necessary properties.
Using putty compounds for other purposes may lead to results that are opposite to those expected. The use of a protective layer allows you to avoid the usual defects that accompany wallpapering. For more information about puttying, watch this video:
Table of finishing defects when wallpapering.
Surface preparation
How to do without wall putty for wallpapering? In order for the repair to be of high quality and last for many years, you need to prepare the surface for applying the material. To work you will need the following tools:
- glue bucket;
- sandpaper;
- measuring tape;
- roller and brushes;
- plumb and level;
- scissors and knife;
- spray bottle with water.
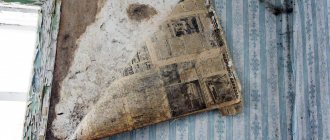
When installing wallpaper to replace old wallpaper, the latter must be removed from the wall. Removing them is quite simple. Old paper sheets are moistened with water and carefully removed using a spatula.
If it was not possible to remove all the material, then the surface is cleaned of irregularities and paper residues with sandpaper.
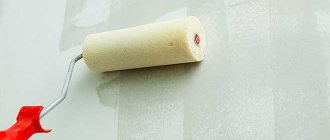
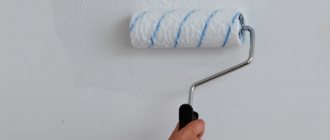
Wallpapering tool
After cleaning, the walls are washed with water and dried. Pits, cracks and other serious defects will have to be smoothed out using putty. You can use starting mixtures for this.
Nails and screws must be removed or recessed into the wall and also puttied.
Uneven walls will have to be brought to perfection with starting putty. Especially if the finishing material is very thin. Liquid wallpaper can be applied to a concrete wall without putty.
When the walls are leveled with plasterboard, the joints are treated with putty. After it dries, they are cleaned with sandpaper. GCR also needs additional processing.
Without a primer, when gluing wallpaper onto drywall, all the moisture from the glue will be absorbed into the surface, which will lead to peeling of the canvas and soaking of the base.
Useful tips
- If finishing walls with putty is your first experience in life, you should use a narrow spatula. Once the process is clear, you can begin to carefully use a wide spatula;
- During the work process, it is worth checking the quality of the coating using a level. If even at the finishing stage it is possible to replace unevenness, they can be quickly eliminated. When the wall is puttied and the material is dry, this will be much more difficult to do;
For better adhesion of subsequent layers of putty to the previous ones, it is better to use a painting mesh.
Despite the fact that the putty is applied under the wallpaper, this does not mean that unevenness can be allowed. Thin wallpaper or wallpaper without a clear pattern will only emphasize the recess, and over time may completely peel off in place with an uneven surface.
Material consumption, how to calculate
When purchasing putty for uneven walls before wallpapering, it is important to check the consumption of the dry mixture and the finished paste. It is recommended to “stock up” on the scope of work for the room. Consumption rates are indicated in the instructions. It happens that recommendations are written illegibly, in an incomprehensible language, or are lost during transportation. Then they focus on general norms.
Experienced craftsmen know that a 1 mm layer takes about 1-1.5 kg of mixture distributed per 1 m2. This rate varies depending on the composition and method of preparation of the mixture.
Consumption is determined by the method of applying the putty, the experience of the technician and the type of surface. A rough wall “eats” the mixture much more than a smooth surface with a primer. Sometimes a base is not needed. In this case, craftsmen prefer a universal composition in order to properly putty the walls under the wallpaper and save a little money.
Coarse mixtures require more consumption than is indicated in standard calculations. But it is impossible to do without a base layer when preparing a brick or stone wall for wallpaper. Dry starting putty is sold in paper bags of several kilograms, so the consumption has to be rounded up. There is at least 1.5 kg per square meter.
Under the painting mesh, which is embedded in the putty, you need to double the consumption rate. To level out crooked walls when the house shrinks, you will need a thick layer - up to 5-8 kg of base for each square. If you trim off the bulges, alignment will be easier and there will be less material consumption.
The instructions for the Ceresit CT 29 starting mixture indicate great variability - 1 layer can be in the range of 2-20 mm, respectively, the consumption in a thick layer increases several times.
Consumption is determined by the method of applying the putty, the experience of the technician and the type of surface.
Putty technology
The puttying process can be divided into four stages:
Stages of preparing walls for wallpapering
Next, we will take a step-by-step look at this procedure from start to finish.
Preparation of materials
First of all, let's look at what you need to putty the walls. So, you will need:
- White starting putty, it is best to use gypsum mixture as it is inexpensive and easy to work with;
- Acrylic universal primer (if the base is loose, deep penetration primer should be used, but if the surface, on the contrary, has poor adhesion, an adhesive primer should be used);
To prepare the base you will need an acrylic primer
- Abrasive mesh P80-P120;
- Set of spatulas;
- Paint roller with cuvette;
- Clean plastic bucket;
- Electric drill and special mixer attachment.
It is also advisable to have a long rule to control differences in the surface of the walls.
Preparing the base
Before you putty the walls, you need to prepare them as follows:
| Illustrations | Actions |
| Cleaning from dirt. The surface must be cleaned of dust and dirt, if any. To do this, the walls can be vacuumed or wiped with a damp cloth. | |
| Padding: |
- Prepare the primer - shake it and pour it into the cuvette;
- Soak a roller in the liquid, squeeze it out lightly and carefully treat the surface of the walls with it;
- Wait for the surface to dry and repeat the procedure.
- If the walls are covered with plasterboard, it is necessary to cut chamfers from the smooth edges of the sheets;
- Then a sickle mesh should be glued to all joints.
Now you can start puttingty.
Puttying
The putty technology is as follows:
| Joint reinforcement: |
| Illustrations | Actions |
| Preparation of putty: |
- Pour clean water at room temperature into a clean plastic bucket;
- Add the required amount of dry mixture. The manufacturer indicates the ratio of water and mixture on the packaging;
- Mix the solution thoroughly with a mixer.
Do not prepare gypsum putty in large quantities, as after 15-20 minutes it begins to set and, accordingly, it can no longer be used.
This completes the puttying. Many beginners are interested in how many layers of putty should be applied to properly prepare the surface? It all depends on the condition of the base and the putty itself. If, for example, the differences are a centimeter, and the composition can be applied in a layer no thicker than 7 mm, then, accordingly, two layers will be needed.
If the differences exceed 10 mm, then plaster should be used to level the walls.
Therefore, you need to inspect the walls in advance and apply a rule to know how many times you will have to putty them.
Which putty to choose
When selecting such finishing material, the condition of the wall is taken into account. Surfaces covered with cracks must be treated with a starting putty mixture. Puttying is completed with a finishing layer. For smooth surfaces, only the finishing type of material is used.
Putty is sold in the form of a dry powder or solution or mass. The finished product is of high quality, but its cost is higher than that of the dry mixture.
The putty mixture is selected according to the type of base:
- Plaster
— used in finishing works most often. The composition has an affordable price, is easily applied to the base, and is not subject to shrinkage. Gypsum putty is used in rooms with dry air (living rooms, bedrooms) and is not recommended for the bathroom and kitchen.
- Cement
putty is affordable, moisture resistant, but can shrink. This mixture is recommended for utility rooms, but is not used when renovating living rooms.
- Polymer
The putty is of high quality, easy to apply and corrects unevenness, cracks, and does not shrink. The cost of production is high.
When purchasing a putty mixture, it is recommended to consider the following parameters:
- shelf life of the material;
- packaging quality;
- time for the solution to harden, etc.
How to putty walls under wallpaper
Let's get to work!
First, remember, the drywall must be completely puttied! This rule is. If your walls are made of plasterboard, then they must be completely plastered, otherwise the next time you want to do a renovation, you will face big problems, because it will be extremely difficult to peel the wallpaper off the plasterboard. To begin with, a reinforcing mesh is applied to all drywall joints, and only then putty is applied. Otherwise, cracks may form at the joints.
Wall putty looks like this:
- The walls are first primed. The primer is diluted according to the instructions. There are primers that do not need to be diluted with water. Be careful when purchasing!
- The mixture is diluted according to the instructions. The required amount of mixture is taken for a certain volume of water. It is best to stir using a drill and a special attachment.
- Using a construction shovel and spatulas, the mortar is applied to the walls in a semicircular motion, regardless of whether they are concrete or brick.
- After the solution has dried, the walls are cleaned and coated with primer.
After you have puttyed the walls, it is advisable to close all the windows and leave the room for at least a day so that the walls dry and all unnecessary moisture evaporates. Only after this can you proceed to wallpapering. If time permits, then it is better to leave the room to dry for several days, this way all the moisture will leave the walls and you will get strong walls that will not transfer moisture into your finishing materials, be it wallpaper, paint, etc.
Tools
We've sorted out the materials, let's move on to the tools. To begin with, you can assemble a minimum set if you plan to do the repair yourself.
It is best to purchase tools immediately when purchasing materials. This way, store consultants will know what they have to work with and will give recommendations on the selection of tools.
To putty the walls you will need:
- Container for solution;
- Construction mixer or drill;
- Building level;
- Set of spatulas;
- Grouting mesh;
- Primer roller;
- Brush for priming hard-to-reach areas;
- Serpyanka mesh for adhesion of layers of putty.
Important! To putty the walls, you need to purchase at least two spatulas - a narrow one and a wide one. If the spatulas have been previously used, they must be cleaned of dried contaminants.
What you need to know for proper wallpapering
Puttying walls and gluing wallpaper are two processes that cannot be done without one. But this is only if you want to have beautiful and smooth walls. Be sure to follow the entire diagram and instructions.
First you need to purchase materials for puttying walls under wallpaper:
- high-quality tools - spatulas . You need to take several;
- good quality putty.
Of course, you can glue wallpaper without puttying the walls, but this does not guarantee you perfect walls. Any unevenness in the wall will appear in the form of a wave through the wallpaper.
Plastering walls without putty under the wallpaper can cause it to crumble and the wallpaper to peel off. And this means that all your repairs may be reduced to zero.
You can glue wallpaper onto plaster without putty. The main thing is to first apply a primer to the concrete wall.
You can also glue the wallpaper onto the starting putty, but again, you need to apply it in two layers. The need to follow the technology of applying the material to the wall will allow you to quickly cope with this task.
When is it not recommended to glue wallpaper onto plaster?
The durability of the finishing coating and the aesthetic appearance of the room depend on proper preparation of the walls. Wallpapering without puttying the walls requires careful preparation, but allows you to save on other materials ( plaster , tools, etc.). Experienced craftsmen advise beginners to carefully familiarize themselves with the possible difficulties that arise when working with different types of plaster.
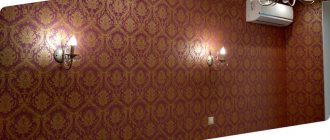
What wallpaper can be glued without puttying the walls? Craftsmen recommend giving preference to denser non-woven and vinyl models. Fashionable today, liquid wallpaper is one of the types of material that adheres perfectly to any surface, including a wall treated with plaster.
Before applying them, it is necessary to carry out preparatory work, as for other types of finishing materials.