The primer is used to remove dust and prepare the walls for the next stage of work. In the future, it will be much easier to apply paint or glue to the surface. In addition, the primer helps the material applied on top of it to adhere more firmly to the wall and stabilizes the porosity of the coating. If you prime the walls before the putty, then the putty, in turn, will be applied evenly and easily.
The primer is applied to the walls before:
- painting,
- putty,
- wallpapering,
- laying tiles.
The main positive feature of the primer is that any subsequent coating will adhere better. The situation does not change depending on the basis. Wood, concrete, metal and drywall base surfaces are also included in this list.
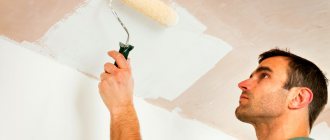
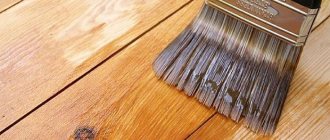
Preparing for painting
In certain situations, a primer is used before and after applying putty. For example, this happens in the case of a plasterboard base. Only then do specialists begin painting the surface. In this case, it is better to give preference to tinted soil. In today's conditions, you can easily match the mixture to the color of the subsequent paint, which will improve the final effect.
The question of whether it is necessary to prime after finishing putty is not the easiest, because this action requires special professionalism on the part of specialists. The corresponding stage of repair or construction will clearly pursue specific goals.
Do I need to prime the walls before applying putty? Necessarily!
Priming is the process of applying a special composition – a primer – to a surface.
The primer is applied to the base after it has been prepared for painting or other type of finishing. The purpose of priming is to increase the adhesion of the finishing coating to the surface being designed and to level out the absorbency of the base.
In addition to the main purpose, primer compositions can perform other functions, depending on what material the primer is intended for - protection against corrosion, reduction of hygroscopicity, fungicidal properties.
Possible errors
If you leave a specific wall without a primer, then the likelihood that defective areas of the surface will appear will automatically increase. It is absolutely wrong to refuse this type of work in order to save money. This is absolutely not cost-effective, because the service life of even the most expensive coatings will be quite short. Very quickly the walls will again need expensive repairs. Using a primer pays for itself in the long run.
Do I need to prime the walls before wallpapering? Definitely yes! In this case, soil mixtures are also capable of performing a very important fixing function, and also significantly save the consumption of wallpaper glue. To achieve your goals, you need to choose the right mixture. Experts prohibit the use of polymer dispersions and water-based paints as primers.
Priming as the basis for all putty work
The plastered wall should be smooth and not crumble. This requirement is basic for any surface. You cannot apply simple gypsum putty to the previous dry layer. Otherwise, instead of adhesion, this coating will absorb liquid from the subsequent one.
At the same time, the quality of surface treatment will deteriorate. Then later the ceiling or wall will peel off greatly and crumble. Therefore, before each new coating, the treated area must be primed.
To do the job correctly, you should use step-by-step instructions:
- Apply a primer between the loose lower layers of plaster, penetrating deeply into the applied materials for better adhesion within the 2 coatings. The product prevents the putty from crumbling in the future. Deeply penetrating mixtures hold other plaster layers.
- If the surface moderately absorbs moisture, it is recommended to use an acrylic composition. If it is not available, use a deep penetration mixture.
- For waterproof putty, it is recommended to use a special primer. To understand which material is suitable, you need to read the composition of the product on the can.
- If necessary, apply an additional coat of primer. Sometimes it helps create better grip.
Priming walls before plastering
Before plastering, priming the walls is also recommended. However, it is still necessary to strictly follow the technology. To achieve this goal, you need to purchase a special roller. Alternatively, you can apply the mixture to the wall using a simple brush or sprayer.
After the mixture is applied, you need to wait an average of 30-40 minutes, which will give it the opportunity to dry. Many factors in this case depend on the degree of absorption of the surface. If this indicator is at a high enough level, then most likely you will have to apply a second layer of the mixture.
Properties and purposes of using primers
The need to use a primer when finishing premises depends on the characteristics of the surface and the material used.
The primer increases adhesion between materials, penetrates deeply into the wall and strengthens it. After this, the applied putty is smoothed out more evenly on the surface, and the layers adhere well to each other.
Another function of the primer is its ability to resist the development of fungus and bacteria. This composition significantly reduces repair costs - the surface after priming can be covered with a thinner layer of putty.
According to its characteristics, the putty is not capable of creating strong adhesion of separately applied layers. It serves another purpose - eliminating imperfections on the surface. The composition of the mixture, how it should be used and how it will help, can be read in the instructions on the package. But there are characteristics inherent in almost any primer composition:
- Increases the adhesion ability of the materials used - the applied primer mixture increases the adhesion ability of the putty. This directly affects the ability of the applied putty to adhere to the surface being finished.
- Fills even minimal cracks and micropores present on the wall surface. The components of the composition used, being absorbed in defective areas, gradually polymerize. This layer does not allow moisture to penetrate the wall material, disrupt its structure, or spoil the finishing layer. The primer protects against most destructive influences.
- Forms a thin protective film over the entire treated surface. Due to this, the layer of applied putty is placed evenly. Strength also increases, the smallest particles of the material bind together and dust removal occurs.
Note! When choosing a certain type of primer, you need to take into account not only the cost of purchasing the material, but you also need to take into account the operating conditions of the structure. By analyzing these factors, you can figure out the composition that is suitable for specific conditions.
Main tasks
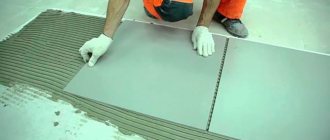
It is not difficult to determine whether it is necessary to prime the walls before laying tiles, because these mixtures significantly improve the quality of adhesion of various materials to the surface. Even tiles in this case are no exception. Thanks to the primer, the base itself becomes stronger, which will allow the wall to withstand the load much more easily.
Even if some parts of the base do not adhere to each other very well, then this circumstance can be changed with the help of a primer. Do not forget about the protective capabilities of soil mixtures. As a result of their use, the walls will be reliably protected from the occurrence of fungi, mold and other pathogenic bacteria. You can achieve the best result only if you choose the right primer for a specific finishing material.
It is easy to understand whether the walls need to be primed before plastering or applying other finishing materials. Soil mixtures have a lot of positive properties, which is why experts do not advise saving on this action.
If you find an error, please select a piece of text and press Ctrl+Enter.
At what stages of finishing work is primer required?
Usually, only one layer of putty does not completely remove potholes and defects on the surface being treated. To get the proper result, you have to putty the walls several times, allowing time for the applied layer to dry. As a result, the question arises: is it necessary to prime the surface of the putty wall before applying the next layer. This depends on the solutions used during the work. If the putty compositions are homogeneous and do not differ in structure, then a primer is not required at all. When using mixtures of different fractions, a primer is required.
The plastered surface is treated, then wait until the applied solution is completely dry. Sometimes you have to wait several weeks. According to technological requirements, this work can begin only after the applied mixture has been absorbed and completely dried on the area to be finished. But it is undesirable to create long breaks between stages - dust will appear on the surface of the walls, and oily and greasy stains may even appear through the gypsum layer. If you have to putty the surface after removing wallpaper or other finishing materials, the walls and ceiling must be primed. The solution will increase its strength and hide stains of any kind of contamination under the protective film. Otherwise, from these stains, dirt may appear through the wallpaper or paint.
Maximum strength of the putty is achieved by applying a primer. Exceptions are allowed only when working with products of the same brand - plaster, primer, starting and finishing putty. In this case, only the surface of the base is primed, before applying plaster and final finishing.
Is it necessary to prime between layers of putty?
Putty is used to cover a surface previously leveled with plaster. This material has a fine-grained structure and cannot remove volumetric defects. The base layer is applied up to 1 cm thick, it is made thicker, which allows you to remove small irregularities and depressions. The finish is perfectly leveled, after which only decorative finishing is needed. A logical question arises: is it necessary to prime the surface between layers of putty?
Attention! Do not mix layers of plaster and putty, in which case the leveled wall will begin to crumble. The primer is used to prevent the possibility of shedding; it combines compositions of different structures.
Surface putty
After the surface and tools are prepared, they begin to putty the walls or ceiling. The putty is applied in a thin layer of a few millimeters. This is easier to do if you use a long spatula of 40-60 centimeters. Using a small spatula, the material is picked up onto a long spatula, after which it is applied to the walls with smooth movements and leveled.
The process is time-consuming, but easier than starting putty on walls. If during the initial putty the walls have to be leveled for a long time, then during the finishing putty the main thing is to apply the layer evenly. In inner corners, using a special corner spatula helps. With its help, the process of finishing corners is accelerated.
To avoid dust getting into the respiratory tract, grouting is done wearing a respiratory mask.
Further painting implies an excellent level of surface smoothness. Therefore, after completing the application of putty, the surface is rubbed with fine sandpaper. Sandpaper grain size – P150. When creating a mirror layer, after sanding the surface is rubbed with a special plaster trowel. The result is a perfectly smooth wall/ceiling.
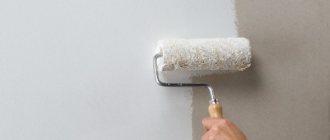
Advantages of priming putty before painting
A primer applied to putty allows you to smooth the surface, making it visually smoother and more pleasant to the touch. This is important, since paint can only emphasize the unevenness of the plane. Also, the primer applied to the putty has other advantages:
- The product material penetrates the surface and holds it together. This allows you to make the surface stronger.
- The raw material effectively levels the plane, eliminates visual imperfections of the plane such as cracks and small pits.
- Using a primer allows you to save on consumable paint materials. The fact is that a smooth, prepared surface requires much less paint for a high-quality paint layer.
- There is a thin film on the primed surface that interacts well with the paint. We can say that if the product lays down evenly, then the paint will also lay down in an even layer.
- The product is available in different colors. This will help you choose the color to match the future paint. Then this will make the finishing layer brighter and more saturated.
- Raw materials effectively help cope with the formation of mold and mildew. Thanks to this, it can be applied in rooms with high humidity.
- Paint that is applied directly to the putty often cracks. If you pre-treat the surface with a primer, this can be avoided.
Advice! If you have doubts it is necessary to prime the wall before and after puttying, then it is better to do so. The product will not make the coating worse, but failure to do so will be more difficult to correct.
Recommendations for choosing a primer
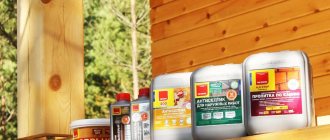
The primer is divided into different types. It can be classified according to its main functions and compositions. Based on functionality, the following primer solutions are distinguished:
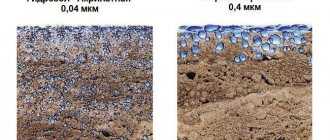
- Strengthening. This type of raw material is designed to stabilize the surface and increase its strength. Quite often this material is used on a porous surface. Such soil can penetrate deep into the plane, up to 10 cm, depending on the amount of product used and the porosity of the plane.
- Adhesive. Such a primer significantly increases the adhesion functions of the surface. It is used before painting and puttying. The material is able to penetrate the surface to a depth of 3 cm.
The following types of primer mixtures differ in composition:
- Universal. This type of building material is quite common. It is suitable for different materials. Excellent for improving the quality of subsequent painting.
- Acrylic.Used for almost all existing surface materials. The composition is based on acrylic resin. Thanks to this, it holds subsequent finishing components well and is also moisture-repellent. Such raw materials have no odor. The main disadvantage is severe intolerance to cold.
- Alkyd. Used for application on surfaces of metal, concrete and wood. Protects against corrosion, pests, mold and mildew. But it is not recommended to use it on plasterboard walls, since behind a small relief, which is strongly emphasized by paint.
- Mineral. The composition is based on mineral components such as cement, gypsum and lime. Excellent for direct application to putty and plaster.
The primer mixture should be selected based on the type of raw material to which it will be applied. It is also better to pay attention to primers that are already painting. They help make the color brighter and more uniform.
How to putty with your own hands?
How to putty yourself - 5 stages of work:
- applying the first layer and leveling;
- 2-3 layers - for significant unevenness;
- surface drying;
- coating with a finishing composition;
- grouting and obtaining a smooth surface.
The application procedure itself is simple. Irregularities and grooves can be corrected with a spatula. For curly elements, corners and arches, a thicker solution is needed.
To get the most even coating, create markings. For this, metal and wooden plaster slats are used. Beacons are best secured with plaster.
For do-it-yourself puttying, you need dry mixtures to independently regulate the consistency of the solution. They are diluted with warm water. Let the mixture sit for a while before use. To avoid staining the floor, it should be covered with plastic film.
How to learn technology?
To learn how to putty, you need to combine theoretical knowledge and practice. You can level the layer until the material has completely hardened. This takes a lot of time, so you can practice.
You should not immediately take on large volumes or complex shapes. It will be difficult for a beginner to putty a surface with waves and curves.
Useful tips
To keep the wall smooth and even, you should follow simple recommendations. Tips for beginners:
- The thickness of the starting putty layer should not exceed 3 mm. If the thickness is greater, the material will begin to crack when drying.
- The next layer can be applied only after the previous one has completely dried.
- When calculating the drying time of the putty, it is necessary to take into account the air temperature in the room, humidity, and the size of the room.
- Do not allow high temperatures in the room, as the drying coating begins to crack, and if there is a draft, it may peel off.
- When applying each layer, you need to carefully control the evenness: use a level or rule.
- When using a dry mixture, it must be diluted with water to obtain a uniform consistency. It should stick a little to the spatula.
- For high-quality work on corners, an angle spatula is used.
- To make the coating durable, you need to buy high-quality materials.
Features of putty primer before painting
Primer is often used for repair and finishing work. This material allows you to effectively prepare the surface for applying subsequent decorating layers. The primer improves adhesion to subsequent building materials, which makes the surface much stronger and more resistant to mechanical stress. Putty is also used in repairs. Many people do not see the difference in these materials. But it is imperative to know whether needs to be primed before painting or not.
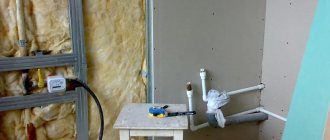
Plasterboard putty under wallpaper
It is impossible not to take into account the joints of the sheets, which must be sealed first. For this purpose, special white paper is used, which also stands out significantly against the background of the general surface. If finishing with plasterboard was carried out in a newly built house, then perhaps after some time the structure will shrink.
If the joints of plasterboard sheets are not reinforced and the entire surface is not puttied, then when the walls of the house shrink, folds and creases will appear on the wallpaper. For rooms where a high level of humidity is expected, it is better to use primers that also have antiseptic properties. Drywall today is firmly established in leading positions of popularity among other construction and finishing materials. It is used for leveling walls and installing partitions, creating suspended ceiling structures and other original interior elements. It can become an excellent base for any decorative finish - it can be wallpaper, paint, ceramic tiles and even artificial stone. - Due to the rapid setting of ready-made mixtures, it is necessary to work with them quickly enough. When making it yourself, do not knead a large volume of material.
The container with the prepared mixture must always be kept closed, collecting a small amount of putty in a separate container. The disadvantages of cement putty include a coarser-grained structure, in contrast to gypsum or polymer putties.
Additional information on the topic:
- How to make a transom over an interior door from plasterboard
- Plasterboard partition in a nursery for two children of different sexes
- Suspended plasterboard ceilings combined with stretch ceilings
- Installation technology multi-level plasterboard ceiling installation
- Plasterboard ceilings and plasterboard arches