Sanding is usually carried out after the ceiling and walls have been puttied. This work is quite labor-intensive and, among other things, if it is performed frequently, it is associated with health hazards for the plasterer-painter due to the large amount of dust. However, if you just decide to do the finishing work in your apartment yourself, you shouldn’t be afraid; it’s enough to take maximum measures to protect yourself from dust.
In this article we will talk about how to sand a ceiling with maximum efficiency and speed, and describe what tools and methods exist for this.
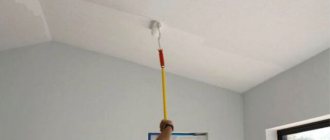
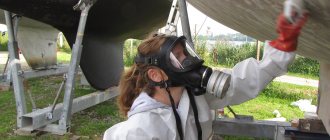
Manual sanding of ceiling surface
Workflow Description
We will consider the manual method of carrying out the work. This option is best suited for novice craftsmen, since it is difficult to ruin the finish when working by hand. Another advantage of this method is the ideal result, which cannot be achieved when using a power tool.
Power tools require certain handling skills
Stage 1 - collecting the necessary tools and materials
Sanding the walls after puttying is done using a standard set of devices. All of them are sold in construction stores and cost little, which makes the sanding process even more affordable.
For work we will use the following:
- The sanding block (also called a manual skinner) can be made in two versions. The first option is a classic design with a handle and metal clamps, the second is in the form of a bar with grooves for fingers in the upper part and semi-automatic clamps. Width varies from 85 to 105 mm, length from 165 to 230 mm, price ranges from 170 to 300 rubles;
This is what the simplest device looks like
A more modern version with semi-automatic abrasive clamping
- To accurately mark the corners, a special abrasive sponge with a beveled end is used. Use options with a grain size of no more than P120. The cost is about 80 rubles;
This sponge makes it easy to work on corners.
- Sandpaper or abrasive mesh. I will discuss all aspects of grit selection in detail below;
- Spotlight or carrying lamp. Necessary not only for general lighting, but also for control of the work process;
The lamp must be mobile
- A stepladder or table from which you will reach all the surfaces to be leveled;
- A putty spatula, it will be used to cut off all the sagging mortar to make sanding easier;
- Sanding putty is a very dusty process. For work, be sure to stock up on a respirator, safety glasses and a cap . It’s better to wear a special protective overall so as not to spoil all your clothes.
These two elements are required, the rest are optional
Now let's figure out what kind of sandpaper to sand the putty for painting. The technology involves the use of several abrasive options. All necessary information is presented in the table.
| Type of work | Materials used |
| Sanding the rough layer | For work, it is best to use sandpaper or mesh with a grit of P100-P120. Don't listen to those who advise something rougher, you'll just ruin the finish |
| Initial sanding of the finishing layer | Personally, I use the P150 option, it is almost scratch-free and quickly removes noticeable irregularities. If the surface has many flaws, then try P120; if the surface is not very scratched, then use it |
| Final sanding | What kind of sandpaper should I use to sand the finishing putty to perfect condition? The roughest option is P220, try it, if there are small scratches on the surface, then take P240 or even P280. That is, you need to try a couple of options on the spot to choose the best one |
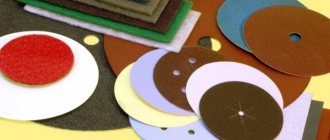
The abrasive mesh is produced in pieces for a specific grater size
Sandpaper is sold by the meter, you simply tear off a piece of the desired size before use.
Finally, let’s look at another common question: which is better – mesh or sandpaper? The good thing about the mesh is that it becomes much less clogged with dust during operation and therefore lasts longer. And the good thing about paper is that it is sold everywhere and costs noticeably less than mesh.
Don't buy cloth-based sandpaper, it's a waste of money. All the same, the sandpaper wears out very quickly, and the strength of the base is useless; cheap paper will suffice.
Stage 2 – primary surface grinding
When preparing walls and ceilings for painting, they are puttied at least twice, and between these stages it is advisable to sand the surface.
Let's figure out how to sand the putty at this stage:
- Work can begin only after the surface has completely dried. This is very easy to determine: there should be no wet spots on the wall, the putty should be of a uniform color over the entire area;
- Before sanding the surface, it is necessary to remove all large flaws from it. Take a spatula and use it to carefully cut off all stains from the spatula, sagging at corners and junctions, etc. The tool is placed at an angle to the surface, pressed with moderate force and guided to the places where excess needs to be cut off;
How to properly sand walls after puttying, surface cleaning methods
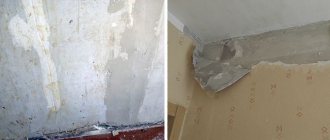
The puttying process, no matter how well it is performed, does not allow obtaining a perfectly flat surface. There are traces left on the wall from the spatula, transitions between layers, small irregularities, bumps and depressions are visible.
You can't do it without sanding the surface. Sanding is the final process that prepares the surface for final finishing.
Any person with the desire, patience and perseverance can perform sanding after puttying. The main thing is to choose the right tools, consumables and accessories, and know the technology for doing the work.
Sanding is performed dry or wet. Wet sanding is advisable on plasterboard, normally plastered walls. The main advantage of wet grinding is the relative purity of the process. You will not be bothered by the dust that is necessarily present during dry sanding. The subsequent cleaning process is forgiven.
Dry sanding is more commonly used in home renovations.
Rule 1 Sanding after puttying is carried out no earlier than 24 hours after applying the putty layer.
Tips for choosing tools, abrasives and accessories
Without the right tools and devices, it will not be possible to perform high-quality sanding of walls after puttying.
You must have:
- sandpaper and sanding mesh;
- a sanding sponge with edges cut at an angle, allowing sanding in hard-to-reach places. Let us immediately note that the sanding mesh does not become clogged with dust during operation, but it is somewhat more expensive than sandpaper.
You will need to purchase a sanding block or mandrel to secure the sandpaper or sanding mesh. This device is properly called a manual skinner.
Rule 2 Sanding paper has different grain sizes and this is important for sanding walls and ceilings for painting. Numbers from 20 to 220 indicate a coarse-grained structure of the material, numbers 250-2500 correspond to fine-grained sandpaper.
In terms of equipment, you will definitely need a stepladder, a lamp or spotlight, and a wide spatula. A wide table or trestle will also work if their height allows for work on the ceiling.
To ensure safety when performing grinding work, be sure to buy safety glasses, a mask or respirator, a cap, a beret or a scarf.
Let's move on to the process of grinding the surface after puttying. Sanding walls and ceilings after puttying is done in a well-lit, ventilated room on a completely dry surface.
Wall grinding technology
At the first stage, use a spatula to go over the entire surface of the wall. Remove tubercles, all kinds of protrusions, and swellings. If you find large depressions or pits, fill them with putty, do not try to remove them by sanding.
Rule 3 Start sanding only on a completely dry surface.
Rule 4 High-quality lighting should be installed on one side at an angle to the surface. Its position must not be changed during the entire grinding cycle.
The second stage involves treating the surface with coarse sandpaper or sanding mesh. The consumable material is attached to the sanding block.
Surface grinding is carried out from top to bottom, processing small areas with rotational movements. The size of the plot should not exceed 1×1 m.
It is better to grind from top to bottom in strips no wider than 1 m. When grinding, hand movements are made in a circle, but you can also move up and down or left and right.
Do not press hard on the tool or grind for a long time in one place. You can erase the entire layer of putty.
After going through the entire surface with a coarse abrasive, continue sanding with fine sandpaper. When using finer sanding material, be sure to bring the light source as close to the wall as possible.
Rule 5 Finish grinding is performed with less sweeping movements and with less pressure on the tool.
Hard-to-reach places are sanded using sanding sponges or the old-fashioned method of adding sandpaper in several layers.
Never use a skinner to clean corners and hard-to-reach places. You will only ruin the surface.
Rule 6 Choose the right grit size of consumables. Properly selected sandpaper should not leave deep scratches on the plaster.
If the abrasive material leaves scratches, choose a finer sandpaper. Under the wallpaper, minor scratches are allowed on the polished surface after puttying. But before painting, the surface of the walls must be absolutely flat. Read how to prepare a wall for painting.
The grinding process is labor-intensive and requires considerable effort to complete. It can be mechanized if you use a special grinding machine. Grinding machines are available that can be connected to a vacuum cleaner, which makes the grinding process virtually dust-free.
Do not use belt sanders. They are suitable for working with wood. An eccentric or orbital sander will work.
Although the use of a grinding machine speeds up the grinding process, it is very difficult for a novice builder to obtain a high-quality sanded surface without special skills.
It is necessary to feel the tool not only to move it correctly, but also to regulate the force of pressing the tool on the plane being sanded. And such a tool is quite expensive.
After sanding, remove the dust layer, do a wet cleaning and check the quality of the surface. Before finishing, a layer of primer must be applied.
Tip 1 For a novice builder, it is better to use hand grinders
devices.
Source: https://sdelalremont.ru/poleznye-sovety-novichku-po-shlifovke-sten-posle-shpatlevaniya.html
Nuances, tips
A few simple recommendations. By following which you can improve the result, which is especially important if grinding is done for further coloring:
- Don’t neglect protection - a respirator and glasses will help you do better than without them. If dust gets into your eyes, you will rinse them with water for a long time, but you don’t need dust in your lungs at all - protect yourself to the maximum.
- Install the illuminator so that it shines from the side onto the plane. This way the existing flaws will become visible - the shadows from the unevenness will show where there is still work to be done.
- Clean both the tool and the work surface from dust. Small and almost weightless dust particles can greatly affect the result - you don’t want to get scratches on an almost finished surface. Use a rag or brush to regularly remove dust from everything used in your work.
- Do not try to cover a large area with your attention at once - you will definitely increase the speed insignificantly, but the risk of defects increases. It’s better to spend more time than to redo it again later.
The rest is just your effort and accuracy. If you approach the matter responsibly and do not rush to work anywhere in a measured manner, then the result will please you and you will not have to spend money on hired craftsmen who are not guaranteed to do better.
Important points
To make you happy with the result of your work, you need to follow a few simple recommendations that can significantly improve the quality of grinding. This is especially important when sanding the ceiling for painting - no errors in the work are allowed here and the surface must be perfectly smooth.
- Always use safety glasses and a respirator. Glasses will allow you to better see what you are doing, and a respirator will ensure safe breathing.
- Light plays a key role - install it so that it falls on the surface being processed from the side. This way, the slightest flaws in the surface will be visible - when the shadows from the bumps and irregularities disappear, you can move on to the next section of the floor.
- Make sure that working tools do not become clogged with dust. Accumulated particles can damage already treated surfaces. For the same reason, brush off dust from the ceiling often with a brush.
- Do not try to level a large area of coating at once - this will increase the speed of work slightly, but the risk of making mistakes and not noticing some surface flaws will greatly increase.
The rest is up to you - how carefully and accurately you do the whole complex of work, the result will be so good.
What to use to sand walls
Sanding the walls after puttying can be done using improvised means or tools specifically designed for this purpose.
- Sanding block or skinner. It is a working plane 5 by 20 cm and a handle attached to it. Made from wood, plastic and light metal;
- Abrasive sponge with rounded edges - good for corners;
- A grinder significantly speeds up the process and is used during major repairs when you need to quickly prepare a large area.
- Fine sandpaper with a grit of P150 and a small block the length of your palm. A strip is cut out of paper and wrapped around the beam. Its size should be such that it can be wrapped around it, leaving small overlaps on the side edges. A piece of wood wrapped in this way fits well in the hand. They are comfortable to work with, which is why this method is widely used by both professionals and those who are doing repairs for the first time. When one side becomes clogged with dust or worn out, the tool can be turned with the other side or the working surface can be changed by moving fresh sandpaper outward.
Grinding rules
To sand the ceiling, use fine-grained sandpaper screwed onto a special grater. You can start sanding only on dry putty. Even places that seem even at first glance need to be lightly sanded, and where sagging or scratches have formed, they need to be sanded very well.
In order not to miss untreated areas, you need to sand in sections: visually divide the ceiling into several parts and process them one by one. Errors on the ceiling are best seen in evening light or a directed beam of light, so you should stock up on a suitable lighting device. This kind of work is quite tedious, but you can’t do without sanding: all defects will show through the putty and paint, and even under the wallpaper, unevenness will be visible.
How to properly and efficiently sand walls after puttying
Sanding the walls after puttying is a necessary measure for finishing the walls. Excessive graininess and unevenness of surfaces that remain after puttying as a result of the junction of layers of the mixture are removed. Sanding can be done using a sanding machine, sanding mesh or fine-grained sandpaper. Grouting the walls after puttying is done before covering the surface with wallpaper or treating the walls for painting.
Step-by-step instructions for sanding walls
It is better to sand the wall while wearing a respirator or a bandage that protects the face. Putty dust does not contain toxic substances, but its quantity makes staying in the room extremely uncomfortable. It will be difficult to breathe without protective equipment. You will also need glasses and clothes that you don’t mind getting dirty.
One of the important interior details of any house or apartment is the ceiling. An even and smooth ceiling gives our home a noble and well-groomed appearance. You can achieve a well-maintained ceiling yourself if you know how to properly putty the ceiling using technology. Even if you are not going to do this yourself and hire builders, you will need this information in order to check the quality of the work performed.
In what cases is it needed?
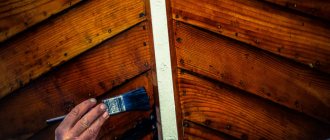
Oddly enough, sanding is most often required in new wooden houses, and not for repairing old coatings. Everything is explained quite simply: the new coating must be prepared for painting or varnishing, and for this, the surface must be even and smooth.
The second case when this procedure cannot be avoided is applying paint of a new shade. The old one will have to be removed and done efficiently, this can only be done by grinding. You will also have to subject the coating to such a procedure when cosmetic repairs are being made to the floors, without fundamental changes - you need to remove the thin outer layer of wood to reveal the existing texture of the wood and its natural pattern.
Naturally, the coating will have to be sanded even when the material initially has any defects: knots, protruding splinters and other similar details. Before further processing, the surface must be made beautiful so that after varnishing or painting no flaws spoil the appearance of the ceiling.
How to sand properly without dust?
Step-by-step instruction
The grinding process must take place in several stages:
- After puttying, inspect the surface for minor defects. There should be no unevenness, voids, wet areas, or deformations on the wall that could interfere with work.
- Before sanding, wear all protective equipment: gloves, glasses, durable clothing.
- Turn on the lights if it's cloudy outside. If the day is clear, then the curtains are removed from the windows to make the lighting in the workroom brighter.
- Take a spatula of suitable size and use it to mow down all the large bumps and chips on the surface. Carry out the work as carefully as possible, so as not to waste additional effort on it later.
- First, primary grinding is performed to understand the boundaries of the processing area and the depth of sealing of small seams. They work with sandpaper from above, only after that they gradually, with smooth movements, move down and complete the processing stage.
Preparation for puttying
Surface leveling is one of the important stages of home renovation. For this, two types of putty are used: starting and finishing. Starting putty is intended for initial leveling. It is more granular than the finishing one, as it contains larger particles. Finishing putty is the final stage, its particles are very small, which create such an attractive smoothness of our ceiling.
Preparation for puttying depends on what kind of ceiling you are going to level. In a new, “raw” apartment, the surface is simply concrete or plasterboard, so it will be enough to prime and putty.
In an apartment that has already been lived in, it is necessary to clean the old coating before priming. You need to get rid of all old layers of paint, putty, wallpaper, etc. We remove everything from the surface.
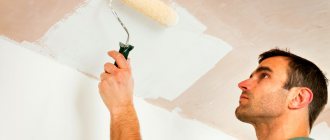
After this we prime the ceiling. To do this, we need a primer that will provide us with better adhesion of our putty layer to the ceiling.
How to prime a ceiling before puttying
We purchase a primer for our type of ceiling. The manufacturer usually writes on the packaging what surfaces it is used on (concrete, drywall, etc.)
We pour it into a cuvette (it is very convenient to use for such purposes) and apply it to our ceiling with a roller. Waiting for it to dry. The manufacturer usually indicates how long it takes for complete drying.
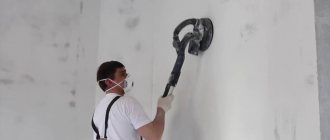
Sanding the ceiling
The ceiling, after puttying, also requires sanding before further finishing, and perhaps even more than the walls. After all, there are lighting fixtures on the ceiling that will show all the slightest flaws on the surface. And the ceiling is painted or wallpapered, usually in light colors, which will also highlight existing defects. It is very difficult to rub the ceiling with sandpaper or mesh. Therefore, the best option is to use a grinder. To complete the work, we will need a stepladder or a special bar for working from the floor.
For rough processing we use mesh No. 60-80, for finishing – No. 100-120. To obtain an excellent result, sand in a circular motion. After finishing the initial sanding, we apply the finishing putty, and after it has completely dried, we begin the final sanding. We use fine-grained abrasive. We make small and neat movements with the machine.
First we prepare everything
You can't start working if you don't have the right tool and need to buy it or borrow it from friends. You will need to find the following things:
- A lamp - a carrying lamp, a spotlight or something else that you will use to illuminate yourself during the process.
- A brush, rag or other type of device for removing dust - there will be a lot of it.
- To cut off small protrusions you will need a sharp, flat object - a spatula will do.
- The main tool is a grater with a mesh or with an attachment for sandpaper.
Important: sandpaper is only needed on a textile basis, since the abrasive that will be used to rub everything down will stick better to it.
It’s also worth preparing a vacuum cleaner right away - you need to remove dust not only from the surface, but also from the floor, as well as from everything around you. Eyes should be protected with goggles, and hands should be wiped with a rag or rag.
Things to remember
The first thing you need to understand is that sanding a wooden ceiling is a very tedious and time-consuming task. You will need not only a lot of time, but also physical strength to achieve an acceptable result. You will have to work above your head and your arms will constantly get very tired. At the same time, the cost of the work, even if done independently, remains considerable - sanding discs or a belt for a machine are not so expensive at first glance, but the main problem is that you will need a lot of discs, as well as sandpaper.
The second point is work experience. If you don’t have one, it’s better to turn to professionals or take an experienced person as a mentor. Although a power tool makes your work much easier, it will not protect you from mistakes that will inevitably happen. At the same time, there is a chance not only to not make the plane beautiful, but to ruin it even more.
The last point is the tool. If you already have it in stock, carefully read the instructions - some models of machines and drills will not be able to withstand a long load and you need to constantly give them a “rest”. Otherwise, you will simply lose a specific device - the tool will simply burn out. When purchasing everything specifically for repairs, ask the seller which of the selected models is best suited for your tasks and do not give preference to the cheapest options - the stingy pays twice.
Source
Materials and tools to putty the ceiling
Now we are ready to putty the ceiling.
- Two types of putty mixture: for starting and finishing work. You can purchase an already diluted ready-made mixture. But this is far from a budget option; the ready-made mixture is more expensive than the dry one. Such a mixture can be stored for a very long time, unlike a mixed dry one. The dry diluted mixture must be used within several hours, otherwise it will then dry out and become impossible to use.
- Two metal spatulas. One is large, from 47 to 60 cm long, the other is small, 10-12 cm in size.
- Container for mixing the mixture (bucket or large basin).
- A drill with a special (mixer) attachment for mixing the mixture.
- Stepladder or stable table.
What tools are needed
Unlike plastered ceilings, which in most cases are processed exclusively by hand, working with wood will be a little easier - a variety of power tools are used here, which significantly facilitate the work. At the same time, sanding a wooden ceiling can be done not even with specialized devices, but with the same tool. Which is almost always available - with a regular drill.
Its productivity is not too high and large areas will require a lot of time and effort, but the result will still be better than when working with bare hands and ordinary sandpaper. Sandpaper will be needed in any case - a network of places where it is very difficult to get to with a bulky tool and you have to do it the old fashioned way - with your hands.
The best option is to have a special grinding machine. This can be either a special belt or eccentric machine, or a standard “grinder” with an attachment in the form of a round disk, to which special sandpaper circles are attached. A surface grinder will help to process not too large areas of the surface. Its performance is higher than that of a standard drill, but it will be tiring to work in large spaces.
Leveling with putty
Not all ceilings are perfectly level. Especially if you had to clean the surface with a hammer drill. All kinds of scratches, depressions, joints between plates require mandatory alignment. Starting putty is intended for this. To start puttying, you will need:
- starting putty;
- water and container;
- spatulas 40 cm and 10 cm;
- serpyanka ribbon;
- ladder.
The putty solution is mixed according to the instructions on the package, allowed to stand for a while and stirred well again. If the preparation of the ceiling for puttying is done efficiently, further work will go faster. Leveling begins at the joints: using a narrow spatula, apply putty to the seam and spread with short horizontal movements. Excess mortar on the sides of the seam is immediately removed with a spatula so that the putty remains only inside the joints. After this, the seams are covered with sickle tape and putty is applied again. Carefully level the solution with a spatula, remove excess and leave to dry.
Second hand grinding option
You can use almost the same tool for manually sanding the ceiling, the only difference being that instead of a mesh, a special emery cloth is attached to the handle. It will allow you to get a no less smooth, and in most cases, a more even plane.
By changing the grain size of the sandpaper used, you can change the degree of removal of the plaster layer. Coarser grains are used for the starting layer of finishing, and less grainy sandpapers are used for finishing putty. This will allow you to avoid the risk of removing too much and thereby damaging the finished surface.
In addition, cloth-based emery has another advantage - it wears out less. This means that it will have to be changed much less often than a metal mesh. It is also easier to fasten, so, in general, it is more convenient to use sandpaper.
Work technology
Since sanding the ceiling after puttying has always been considered the most unpleasant type of such work, it is worth preparing for a long and not the most pleasant pastime. First of all, this is due to the fact that all the dust will fall directly on your head, face and shoulders. That is why, under no circumstances should you neglect protective devices such as glasses and a respirator - dust is not only unpleasant, but also dangerous, as it can get into the lungs and cause various diseases.
The process itself is quite simple, if not primitive - with spiral movements with slight pressure you have to “wipe” the entire surface of the ceiling. The effort should always be the same and therefore, if signs of fatigue appear, it is better to take a short break.
If you work with a special machine, the process will speed up, but most people prefer to work with their hands, without using equipment. This is due to the availability of the tool and the ease of performing the work.
Devices for manual sanding are also simple: a small platform with a holder in which you can attach a sanding mesh or sandpaper will be the most convenient option. At the same time, the mesh is not so clogged with dust, and sandpaper is cheaper. You can get by with a simple wooden block, to which a mesh or sandpaper is also attached. However, working with this type of device is more difficult and not so convenient.
Advantages and disadvantages of mechanization
Before purchasing a device, you need to familiarize yourself with its positive aspects and limitations when using it. The advantages of construction equipment include:
- reduction of work completion time;
- ease and convenience of operation;
- high quality repairs.
The disadvantages include:
- additional financial costs for purchasing the device;
- restriction of the use of certain types of grinding machines;
- the irrationality of using a station for mixing mortar during repairs in small rooms.
Equipment Features
A putty sander is a more convenient way to work. Using the mechanism, you can quickly and efficiently clean the surface for applying other finishing materials. Based on power supply, equipment is divided into:
During operation, pneumatic models are more comfortable due to their low weight, small size and affordable price. The operating principle is based on the participation of a compressor in the process. The device creates a stream of compressed air, which, under pressure, starts the mechanism. However, the compressor unit itself is much more expensive than the grinder itself. Therefore, if large areas have to be processed, this option is not economically justified. Currently, they are more often used in auto repair shops.
Electric cars are heavier. Their price is higher than pneumatic analogues. However, many craftsmen prefer such mechanisms, taking into account the availability of the electrical network in every home. The only disadvantages are the large dimensions and heavy weight. But they are more convenient for performing repairs in a residential area.
About abrasive mesh and sandpaper
Good results are obtained by using a special grinding machine, but are often limited to the manual method. The second method, if the ceiling needs to be grouted after puttying, is what professionals resort to most often, since this is the easiest option to remove roughness in areas that are difficult to access. The choice of machine polishing is logical if you need to process a large area. But even after such work, there may be a need for manual processing - anyway, during inspection, tubercles of different sizes are found.
Before purchasing material, inspect the treatment surface. Then you will understand how to sand the ceiling after puttying without interruptions. If it seems difficult and uneven, more coarse mesh will be needed.
Let's see what you can use to sand the ceiling for painting.
Abrasive mesh
Grinding mesh is a material with many advantages. Dust does not clog the cells that make it up as much as sandpaper. The removed putty passes through it. If it is worn out, it is easy to understand by its appearance, and then it is better to simply replace it. The sanding mesh is waterproof.
What tools and materials are suitable for sanding walls?
- Bar. It can be used if the wall surface is small.
- Sander. Ideal option for large areas. If the surface is not only large, but also complex, it is better to use an eccentric sander.
- Sandpaper or sanding mesh. Experienced professionals advise using the second option. The mesh is more expensive, but it will have to be changed much less often. The pores of this material are not clogged with dust and it works more efficiently.
Source
What determines the cost of grinding services?
Sanding timber walls inside the house is an important step, the execution of which is logical to entrust to professionals. The cost of services varies depending on several parameters, including:
- Scope of work
(wall surface area). Some construction organizations offer discounts on sanding if the building is large. Work can last 1-2 weeks. - Type of wood
. The harder the wood, the more difficult it is to process and the work will cost more.