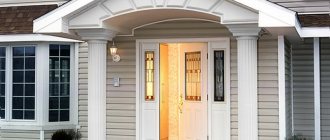
A beautiful and complete interior is obtained if you correctly design the slopes on the balcony for window openings and the balcony block. For finishing, plasterboard, plaster, plastic and sandwich panels are used. The amount of work is relatively small. To save on the services of a specialist, you can do it yourself, following the step-by-step instructions below.
Why do you need finishing slopes?
The main purpose of the slopes is to protect window blocks from the onslaught of wind, rain, sun rays, and temperature changes:
- Streams of scorching sun will gradually lead to a decrease in the insulating properties of the sealant and fasteners.
- As water gets into the seams of the structure, it will reduce the thermal insulation properties of the polyurethane foam.
- Low temperatures in winter can cause mechanical damage to plastic windows as the foam expands or contracts.
Polyurethane foam must be protected from external influences
Slope finishing:
- will hide unsightly seams with protruding foam;
- will not allow condensation to accumulate;
- will prevent potholes and cracks from increasing in size under the influence of unfavorable climate conditions;
- will preserve the integrity of doors and windows for a long time, increasing their service life.
Reference! It is enough for the humidity level inside the balcony to increase by only 5-6% for the heat-saving qualities of the polyurethane foam to decrease by 2 times. When installing windows, defects often remain, cracks and chips form on the walls of the opening. Without finishing the slopes, defects can only intensify, causing heat loss or distortions of the window frame.
Plastering slopes
Plaster is a universal type of finishing for any external slopes. The surface of the protective layer of the seam (at the junction of the window structure and the opening) is obtained by applying one or several layers of cement mortar.
The advantages of this option: low cost, durable and waterproof surface. There are more disadvantages: the slope turns out to be “cold”, the event is dusty, it takes a long time to complete, the working mixture and the plastic frame have different coefficients of thermal expansion (therefore, a crack usually forms along the line of their joining).
On a note! You can leave a gap where the plastered surface meets the frame and fill it with elastic sealant. When temperature fluctuations occur, the integrity of such a joint is rarely compromised.
Finishing external slopes with plaster followed by painting
How to cover the foam on the balcony from the outside? Plaster is the easiest option for leveling and improving slopes. The work uses a dry gypsum mixture by diluting it with water and thoroughly mixing it using a construction mixer. First, a layer of primer is applied to the seams, namely the base at an angle of 45 degrees.
Then the prepared solution is applied to the external slopes along the entire opening with a small spatula. Just wait for it to dry.
After:
- eliminate irregularities, sand the seams with sandpaper;
- Apply a small layer of topcoat.
Attention! To finish, level the top layer, and eliminate any remaining cracks and irregularities, you can use the same plaster solution, only in a more liquid state. Lastly, the slopes are carefully painted with water-based paint (read more in the article “how to paint a balcony”), preventing particles from getting on the glass and windows. When plastering, the solution must not be allowed to fall on the internal slopes as a finishing material. Otherwise, it will simply quickly deteriorate. It is better to temporarily cover the windows with masking tape (film) when working.
The standard thickness of the plaster layer is 2.5 cm, but it is applied twice. First, a layer of a mixture of sand and cement (2x1). Then, after drying and applying primer, apply the second coat. After it dries, you can prime it, apply the finishing putty with a spatula, spreading it evenly to correct unevenness. Ideally, you should get a flat surface with a groove of 3-5 cm between the frame and the slope, filled with silicone plastic sealant. It will protect the plaster from damage and will withstand the expansion of plastic.
At the final stage, you can paint the installed slopes with acrylic paints or solvent-based enamel. The main thing is to carry out all the work carefully so that the result is pleasing to the eye.
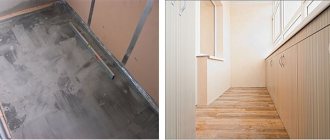
How to prepare openings for finishing
Regardless of which finishing option you choose, the work surface must be carefully prepared. It should be clean, dry, even. Otherwise, the material used will not adhere well to the wall and your efforts will be in vain.
Before starting installation, be sure to cover the window glass, window sill and floor to protect them from damage and dirt. Thick plastic film, newspapers, tarpaulins and other similar materials are suitable for this.
So what needs to be done?
- Use a utility knife to cut off excess foam.
- Remove old finishing material and crumbling pieces of mortar. You will need a hammer drill with appropriate attachments or a chisel and hammer.
- Remove dirt. Oil stains can be removed by applying clay to them. As it dries, it absorbs fat and is then cleaned off along with it. Regular dirt is removed with a wire brush.
- Dust the work surface using a dry brush and vacuum cleaner.
- Level the slopes. This can be done in several ways. Their choice depends on the extent of damage to the wall.
If you notice defects in the form of small chips and cracks, they can be spot-covered with plaster.
If the damage is much more serious or after setting the level, uneven slopes are discovered, you need to apply a full leveling layer of mortar. To securely fix it and prevent cracking, use a reinforcing mesh. It is installed in one of the following ways:
- using fasteners;
- on a spot-applied solution;
- embedded in a thin layer of not completely dry plaster applied over the entire surface of the slope.
The principle of laying reinforcing mesh
>
Then another layer of solution is placed on the grate. Level it, let it dry, sand it with sandpaper or a grater, and then prime it. In this case, the final coating can be applied no earlier than two days later.
The use of plasterboard for finishing window slopes
Drywall as a sheet material has many advantages when designing openings:
- cheapness;
- ease of installation;
- undemanding to additional leveling of the coating;
- suitability for creating relief structures;
- flexibility for many types of finishing;
- having a low level of flammability;
- environmental cleanliness;
- durability;
- providing energy-saving and decorative functions;
- possibility of painting the top layer, finishing with colored stone.
When choosing, you should take into account the degree of resistance of drywall to moisture and temperature changes. Although, the material is not suitable if the balcony is open or not insulated. When finishing, its performance will quickly decrease. Exposure to the sun's rays can cause swelling and deformation. If the air humidity exceeds 75%, the strength characteristics will be reduced.
Selection of finishing material
To make good internal slopes for plastic windows, you need to choose a suitable material taking into account its performance characteristics. It is very important that the base for internal slopes on windows is moisture resistant. This requirement is due to the difference in temperature outside and at home, which causes condensation to form. If the material does not have this parameter, the internal slopes on the windows will not retain their attractiveness for very long. They will quickly become unusable and will have to be redone.
Correct installation of plasterboard slopes (video)
Using drywall you can quickly and effortlessly level the surface. The material will maintain a comfortable microclimate in the room and will allow, if desired, to arrange complex and voluminous structures.
Stages of work:
- Rough the base. Remove old plaster.
- Apply a coat of primer and let dry.
- Draw a line along the contour of the balcony window with a level or plumb line.
- Using a screwdriver, screw the U-shaped plastic strip closer to the edge of the outlined line.
- Using a ruler, measure the width and distance from the bottom to the top corner of the window.
- Cut blanks from drywall.
- Treat the surface with a layer of primer or glue (acrylic, silicone sealant).
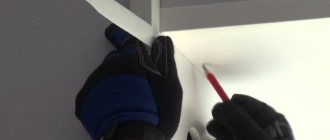
- Set the desired angle using a square, lightly pressing the segment against the base to indicate the exact size.
- Mark points for fasteners at the top of the slope.
- Screw the profile to the window block so that the upper part of the plaster slightly extends into the frame.
- Cover all protruding parts with plasterboard.
Reference! Finishing is indispensable when cold bridges appear. This happens immediately after installation of aluminum and plastic window blocks.
Plasterboard finishing
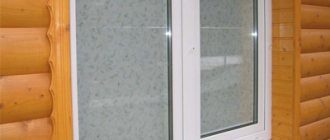
To obtain a perfectly flat and smooth surface of wide slopes, sheets of moisture-resistant plasterboard are used. But the loggia (or balcony) where the window faces must still have glazing.
Benefits of drywall
The use of plasterboard sheets is explained by the following advantages of the material:
- environmental friendliness;
- low price;
- simple installation;
- the ideality of the resulting finishing surface;
- the possibility of placing thermal insulation under drywall;
- durability of the finish with minimal maintenance.
Installation methods
After certain preparatory measures, plasterboard blanks adjusted to size are attached to a frame made of standard metal profiles or mounted using an adhesive method. The second option requires compliance with the angles of inclination of the future slope, accurate measurements and careful adjustment of parts. Without some skill, it is easy to make any mistakes.
Advantages of adhesive installation: a minimum of necessary tools and additional materials are required, preparation of the slope for finishing is simplified, and the work is performed at high speed. Any method of installing drywall is completed by preparing the corners, joints and fastener locations for puttying, the puttying process itself, and then the final touch - painting the finished slope.
Finishing with plasterboard on the frame
Slopes on a balcony made of plastic panels
Unpretentious PVC panels are suitable for installing slope walls both inside and outside the room. They create a holistic, respectable look for the balcony block. Thanks to the many textures, types, colors, the decoration will definitely begin to be combined with the design of the main interior of the loggia.
Panels:
- externally aesthetic, well-groomed;
- will serve as a continuation of the frame structure;
- resistant to moisture, ultraviolet radiation, high temperatures;
- can be used in different colors for the most accurate matching to the interior;
- do not require additional finishing with other materials when creating a final coating;
- suitable for installation in cold glazing of balconies and loggias;
- durable;
- easy to care for.
Basic installation steps:
- remove the old layer of plaster from the working surface according to the dimensions of the plastic parts;
- trim the balcony window with wooden slats around the perimeter;
- screw the latch profile into which the panels will be tucked;
- make a frame from a metal profile, which will become the connecting link between the wall decoration elements;
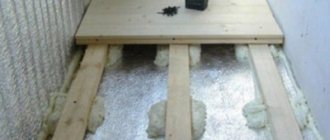
- lay a layer of foam plastic with mineral wool, arranging it like a “thermos” before attaching the plastic to the frame;
- insert the plastic panel using the F shape at the corners of the profile;
- cover the frame with panels, leaving a small gap at the corners with the joining points to avoid thermal expansion;
- cover the joints with special corners.
Attention! For additional insulation, you can pre-lay a layer of mineral wool between the panel and the wall. There is no need to use a lot of cotton wool, otherwise the plastic may swell. If the joints are unsightly and sloppy, then to correct the situation they are coated with white silicone.
Plastering method
The design of window slopes from the inside by plastering is possible provided that the surface is perfectly flat. The maximum permissible thickness of the plaster mass is 2 centimeters. Otherwise, the window slopes will quickly crack and become unusable.
Gypsum putties and plasters cannot be used for exterior finishing of window slopes, since these materials are not resistant to moisture. When organizing internal slopes, it is necessary to ensure good heating and ventilation of the window opening, otherwise there is a high probability of condensation.
Construction stores today offer a large selection of different ready-made plasters. However, if desired, you can prepare such a mixture yourself. To do this, you will need M-400 cement and sifted sand, which must be mixed in a ratio of 1:3. To reduce the amount of water used and speed up the setting of the mixture, you can add a little liquid soap or plasticizer to the solution (one tablespoon per bucket of the finished solution will be enough).
When starting the final finishing, it is better to give preference to white cement putty or acrylic facade putty, which will avoid the base showing through even with some destruction of the paint layer.
Advantages of cladding slopes with sandwich panels
Sandwich panels are rigid structures made of 3 layers with already laid insulation. The downside is the high cost. If the windows are poorly sealed, the material will quickly begin to peel. The advantage is that there is no need for insulation due to the manufacture of products from 2 pieces of plastic with insulation laid between the layers.
The best method for arranging external slopes is panels made of gypsum metal, but with a plastic finish. Composite models with wood elements are also on sale, although they are expensive.
Useful video on the topic
All the subtleties from the pros:
>
Master class from Alexey Zemskov:
One way to install slopes on a loggia:
Installation of window sills and slopes made of PVC sandwich panels:
The technologies for covering door and window openings with plasterboard and plastic are similar. Once you use one material, you can work with another. In a similar way, it is not difficult to decorate slopes even with the remains of parquet or cork flooring.
YOU MAY ALSO BE INTERESTED
Slopes made of sandwich panels: installation stages
For arrangement you will need:
- wooden slats;
- plastic F-shaped profile (7 mm thick);
- polyurethane foam;
- insulation min. cotton wool;
- U-shaped starting strip made of plastic;
- drill for self-tapping screws;
- roulette;
- putty knife;
- silicone sealant;
- cement mortar;
- level;
- long and short self-tapping screws (95 and 4.5 mm);
- construction stapler.
Installation steps:
- Remove particles of old plaster or wallpaper.
- Treat areas with an antifungal compound.
- Fill with cement the holes on the street side left after installing the metal-plastic window.
- Install wooden slats along the sections of window openings at the top and sides.
- Attach with screws without tightening completely. Insert them into the pre-drilled holes.
- Fix the slats around the perimeter of the balcony opening. Check their equal position with a level.
- Tighten with screws. Attach a U-shaped strip parallel to the edge of the window from the outside using self-tapping screws.
- Cut off protrusions if they remain at the joints. A painting knife can help.
- Mount the F-shaped profile (which will serve as a decorative element), installing the groove opposite the groove of the U-shaped strip. In this case, part of the F-shaped profile will be located slightly above the window. A little overlap.
- Trim the excess protruding F-strips with tin snips as soon as they fit exactly.
- Attach the end of the F-profile to the slats that are located closer to them.
- Seal the joints with sealant if unsightly seams or defects remain after installation.
Reference! To seal and seal seams, you can use Cosmofen (liquid plastic).
Installation of sandwich panels is allowed using a slightly different technology. For example, sections of sandwich panels are immediately attached after installing the starting profile. Their opposite edges are attached diagonally to the slats. Then the F-profiles are fixed and the joints are sealed with sealant. The main thing to get smooth, beautiful slopes is to start working from the top element. Leave the plastic structure alone for 16 hours without removing the protective film from the window.
If the panels, when inserted between 2 starting profiles, do not coincide with the width of the slope, then they can be trimmed with a stationery or construction knife. Secure the joints of the side strips and the top jumper with a special plastic corner. You can disguise wooden slats with narrow trim of identical material.
How to sheathe slopes with plasterboard
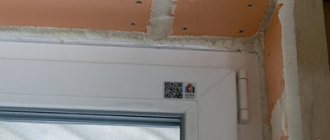
There are several options for finishing slopes on the balcony with plasterboard sheets. In any case, work with this material should begin with vapor barrier of the visible layer of polyurethane foam. A special tape is used for this.
Adhesive-based vapor barrier tape
Frame finishing method
Installation of a metal frame is necessary if you are working with large openings or similarly covering an entire wall.
The work is carried out as follows:
- Dowels are used to secure the U-profile guides perpendicular to the floor. This is done on the outer and inner corners of the slopes. In some cases, one of the profiles is fixed directly to the plastic frame.
- For structural rigidity, horizontal C-profiles are attached between the vertical ones.
- The finished frame is sheathed with sheets of moisture-resistant plasterboard, fixing them with self-tapping screws. It is better to start work from the side elements.
- All joints are first puttied and then coated with silicone sealant.
- After all the finishing work, the outer corners are masked with a plastic corner, which is attached with glue.
You can additionally insulate the slopes with mineral wool or polystyrene foam, placing them in the cells of the frame.
Metal frame for covering a window or doorway
>
Glue method for finishing slopes
It is advisable to attach drywall with glue only on slopes that are small in width and not in doorways. The glue does not harden instantly, so the gypsum board element may move from its specified position during installation. It is much easier to fix this with a small coverage area.
There are two options for attaching drywall with glue - behind the frame and directly on it. Installation on the frame is carried out in cases where the distance between it and the slope is too small.
When attaching the sheathing to the frame structure, work begins from the upper wall of the opening and perform the following actions:
- Using a knife, make a recess along the perimeter of the frame corresponding to the thickness of the plasterboard blank.
- Insert it into the resulting gap.
- For more reliable fixation and improved quality of thermal insulation, the place where the gypsum board is fixed is foamed (from the inside).
- Insulation is placed in the resulting space between the wall and the drywall. They fill the gap approximately ⅔.
- The edge of the slope is adjusted to the outer corner of the opening and fixed with drywall adhesive.
Installation of gypsum boards outside the perimeter of the frame
If you want to sheathe gypsum boards and balcony walls, the slope must be level with the sheathing installed on them.
The material is fastened to a plastic frame using an L-shaped profile. It is fixed to the window structure with self-tapping screws and coated inside with drywall adhesive. Then the workpiece is inserted there and all actions are performed by analogy with the previous installation method.
Scheme for installing drywall on a window frame
If with the frame method it is recommended to start work from the side walls of the opening, then with the glue method - from the top wall.
How to make neat slopes with your own hands
You can decorate it yourself using different materials, using several technologies.
The most affordable ones to make the facade beautiful:
- drywall;
- putty;
- vinyl or wooden lining (read more in the article “lining a balcony with lining“);
- clinker tiles.
The material must have increased thermal insulation qualities that are resistant to natural disasters. It is also important to add decorativeness to the cultivated facade.
In general, the methods of external and internal cladding are similar. They differ only in the degree of weather resistance of the materials used and the type of work. When considering the option of plastering the outside, you should first prepare equipment, purchase materials, and carry out consistent cladding. This is important so that after application to the wall the solution does not quickly begin to peel off or crack.
The usual composition for plaster is cement + sand (3x1). To increase the thermal insulation properties, it is recommended to add facade plaster or bulk insulation (perlite, plasticizer, fiber, vermiculite) to the composition.
Attention! It is worth considering that facing slopes does not require a large amount of material due to the small area. This means that you can buy a multifunctional ready-made composition for plastering or prepare your own balancing homogeneous composition of fine consistency with impeccable adhesion to work areas.
First of all, you need to clean the work surface. Otherwise, the new finishing material will quickly crack or crumble. If the base is concrete, then notches can be applied to increase adhesive properties. On top are slopes cleared of dust.
Next steps:
- Install the ebb under the window frame and secure it to the bottom with self-tapping screws. So drops of water, as they flow under the window sill, will immediately fall onto the inclined plane.
- Cover the balcony window with polyethylene.
- Prime all cleaned areas with a wide brush. Impregnate the surfaces to increase the adhesive properties of the materials used and prevent the plaster composition from falling off in the future.
- Attach a perforated metal corner (you can take plastic) to the edge of the window opening from the street. Plant on a quick-drying plaster mixture.
- Wait for the solution to dry.
- Apply a wooden strip to the outer corner of the opening, joining the window block to the wall to determine the thickness of the plaster layer used.
- Make a “grill” to level the walls at the required angle. This way the layer of plaster in certain places will be of the optimal size. Or take a piece of flat plywood (150 mm wide, 50 mm long). Make a cutout on the end side so that there is no movement after applying the plaster; the best thickness was set along the line of the joint with the window.
- Make a small portion of plaster mortar. Beat with a construction mixer.
- Apply a layer of 10-12 mm to part of the slope horizontally. Spread evenly with a trowel or spatula. Level the solution using a spoon.
- Wait until it sets completely.
- Apply the solution to the wall from the bottom, starting from low tide. You can sketch it, then level it with chalk. So apply the solution to the very top. Align.
- Form the joints of the vertical and horizontal surfaces of the slopes with the solution using an angled spatula.
- Wait for the plaster layer to dry. Smooth the surface with putty.
- Apply a layer of decorative plaster with shallow relief as a finishing touch to hide the slightest imperfections.
- Treat with a primer after leveling the base layer of plaster. Let dry.
- Paint the surface.
Instead of putty or plaster, you can use polymer imitation or artificial stone.
Advantages and disadvantages of various solutions
When choosing materials, be guided by their performance properties, appearance, price, and ease of installation. Performance properties are especially important for finishing a window-door unit on an open or glazed, but not insulated, balcony.
Using plaster
Plastering walls in window openings is a traditional solution that is rapidly losing its popularity. The reasons lie in the shortcomings of the material.
- Applying the solution requires careful leveling of the working surface.
- The finished coating does not provide additional heat and sound insulation of the room.
- The work process is labor-intensive and “dirty”.
- In order for the slopes to look organically in the interior of the balcony and harmonize with the finished coating of the walls, they will have to be painted.
>
As for the advantages of this solution, there are not many of them:
- Firstly, this is the same possibility of painting the final coating. Yes, this process requires additional costs and effort, but it allows you to keep your openings clean and looking fresh for many years.
- Secondly, the variety of decorative compositions. The presence of fractions of different sizes in them will make the working surface textured and original.
- Thirdly, the affordable price for finishing materials.
Plastered window opening ready for painting
If the balcony is not glazed or is not well insulated, opt for facade plaster. It is more resistant to temperature changes, moisture and UV rays than analogues for interior work.
Choose plaster if you want to save money, plan to thoroughly improve your balcony, or want to decorate the walls with the same material. Then the time and dirt spent will fit into the overall scope of work. Otherwise, consider other options.
You can protect yourself from splashes of solution using gloves and a work suit
Drywall for balcony block slopes
Drywall is a popular solution for decorating window and door openings. This is due to a number of reasons:
- simplicity, “cleanliness” of installation;
- low cost of material;
- the ability to complete all work in one day;
- good thermal insulation properties;
- no need to level the coating;
- a variety of options for additional finishing of gypsum boards - painting, finishing with artificial stone, etc.
>
The disadvantages of plasterboard sheets include:
- Low strength characteristics.
- Susceptibility to negative effects of moisture. Already at an air humidity of 75% it swells and becomes deformed.
- Loss of performance properties due to regular exposure to direct sunlight.
Taking into account how drywall reacts to external influences, it is not recommended to use it on an open and insufficiently insulated balcony.
Plastic for decorating slopes on the balcony
PVC slopes are an ideal option if you have plastic windows and a balcony door made of the same material. They seem to continue the frame structure, which looks natural and attractive. Moreover, you can cover the entire balcony with plastic.
Covering the opening and walls in the same style
Advantages:
- Speed, ease of installation.
- Minimal amount of dirt during installation.
- Plastic panels are produced in various colors. This allows you to match them to the interior as accurately as possible.
- There is no need to use additional finishing material to create a fine finish. Plastic panels are aesthetically pleasing in themselves.
- They are resistant to moisture, UV rays, and temperature changes, so they can be installed on any balcony.
- Easy to care for.
- Durability.
Slopes are made from ordinary plastic panels, under which a layer of insulation is laid, or from sandwich panels. The latter are characterized by increased rigidity and are a three-layer structure: two layers are rigid PVC plates, the third is insulation laid between them. Finishing with such panels is the most expensive.
Sandwich panels are available in a wide range for windows of various colors
How to calculate the required number of plastic panels
First of all, it is important to calculate the perimeter of the base for sheathing. Then minus the perimeter of windows and doors from the resulting number. Next, divide the difference by the perimeter of one element.
Example: it is necessary to finish the external walls with PVC. Height - 2.5 m. The building is equipped with a door and 4 windows. The dimensions of the material for the window will be 1.8x1.2 m, the door - 2.2x0.9 m. If plastic panels of 250x30 cm are used in the work, then we will start by calculating the total area of the walls (6+6+8+8) * 2.5 = 70 m2. Let's denote the area of doors and windows - 1.8*1.2*4+2.2*0.9 = 8.64+1.98 = 10.62 m2. Next, let’s find out the area that needs sheathing, i.e. subtract S walls from S doors, windows - 70-10.62 = 59.38 m2.
The area of one panel will be 0.75 m2. A total of 80 panels will be needed. It is better to purchase facing material with a reserve of 10% more than the total quantity. There will definitely be waste after cutting or damage to the material. If, according to calculations, there are 80 PVC panels, then it is worth purchasing 88-90 pieces.
Do-it-yourself installation of a balcony block made of PVC structures
A standard balcony block consists of a door and a window. Its functions and appearance depend on installation. Correct installation of a balcony block means proper insulation and an aesthetic appearance. Our instructions and useful tips will help you cope with this difficult work on your own. And to save time and effort, you can always turn to professionals.
Preparatory work
You need to prepare the opening for installation of the purchased structure and unpack the new block.
How and with what to remove polyurethane foam from a plastic window
The foam adheres firmly to the plastic profile of the window frame and the glass unit. Of course, it’s better to clean it before it hardens. For example, by soaking a cloth in paint thinner (acetone). You can use special solutions that are used to wash mounting guns. To help - Cosmofen, Macroflex.
Experts recommend testing the products first by wiping a small area of the window frame and waiting a few minutes. Will there be any damage to the plastic? If the foam has already hardened, then you should use a solvent to soften the material. Or try to wipe it off with a piece of plastic without damaging the base. You can rub with vegetable oil, Dimexide (a preparation for joints).
DIY window slopes: step-by-step instructions
Owners of apartments or houses who have installed new windows quite rightly want to tidy up the surfaces around them. Very often this simply needs to be done because when installing new window systems, the old slopes are severely damaged and cannot be “restored”, or they come close to the window sash canopies, and this makes it difficult to open. In addition, slopes are finished in order to enhance the sound and heat insulation of window openings by covering the mounting foam that fills the gaps between the wall and the window block when installing it. Very often, for this purpose, a layer of insulation is laid between the finishing material and the wall.
DIY window slopes
Slopes on windows with your own hands can be made neat and functional in several ways and using various finishing, insulating or combined materials that combine both qualities. To figure out which option will be easier to install and more suitable for a particular case, you need to consider the most popular of them.
What materials are most often used for installing slopes?
There are three most commonly used methods of giving slopes an aesthetic appearance, each of them is good in its own way and can be used in combination with insulating material. So, PVC panels can be installed on window slopes, plasterboard can be glued or fixed to the sheathing, or the surface can be leveled with a plaster and putty mixture.
Slopes made of PVC panels
For finishing using this technology, plastic lining and auxiliary fittings are used. They help to hide the edges of the panels at the junctions of horizontal and vertical surfaces, as well as at the lines where they join the window frame and at the outer corners of the slopes.
Slopes made of plastic panels look very nice
In addition to the usual PVC lining, sandwich panels specially manufactured for this purpose are used for cladding, which consist of layers of plastic and foamed polystyrene. This material will facilitate installation, since you will not have to separately adjust and install the insulating material. In addition, this approach also often allows you to do without some elements of fittings.
Sandwich panels perform both decorative and insulating functions
Like regular lining, sandwich panels are great for decorating slopes around plastic windows, especially since, if desired, you can choose the desired PVC color that will be in full harmony with the shade of the window frame.
It is quite possible to install plastic slopes yourself, without resorting to the help of craftsmen - you just need to study the installation instructions and scrupulously follow them during the work.
Plastered slopes
This finishing method can be called traditional. High-quality surfaces will last a long time without losing their neat appearance. However, it should be noted that without a layer of insulating material, plaster cannot become an effective barrier to the cold coming from the window opening. The disadvantages of this method include the labor intensity and duration of arrangement, since the solution is applied in several layers, each of which must dry well. In addition, plastering work requires certain experience in its implementation, and without it, it is quite possible to ruin the surface, wasting time and money.
The old proven method of plastering slopes does not lose its relevance
The process of finishing slopes with plaster mixtures is quite “dirty”, and since it takes a lot of time (sometimes it takes from one and a half to two weeks), the room where the work is being carried out will need to be cleaned daily or not used at all.
Prices for popular types of plaster
Plaster
Plasterboard slopes
Often, apartment and house owners prefer to decorate window slopes with plasterboard. This material is easy to install, it can be used together with insulation, the sheathing is quite durable and perfectly levels surfaces. In essence, drywall is dry plaster, but its installation is much faster than the “wet” version. This method does not cause large pollution in the room during work and does not require much experience to perform it. It is enough to follow the already tested instructions to carry out the finishing carefully and correctly.
Drywall slopes are very convenient for installation work.
Today, several types of drywall are produced, and one of them (GKLV, greenish in color) can withstand high humidity - it should be given preference for the design of slopes. Difficulties during the installation process can be caused not by the installation of the material itself, but by its subsequent finishing for applying a decorative coating - this is a primer and putty. Without these works, “dry plaster” can quickly become unusable, since it has a rather fragile structural structure and can be used for a long time only when covering the cuts and finishing the surfaces.
Do you want to make window slopes from plasterboard?
The installation process is described in detail in the article on our portal “ Do-it-yourself plasterboard slopes ”, which can be easily accessed by following the link. There, in the publication, questions about the varieties and performance qualities of this material are well covered.
Tools and materials for installing slopes
To work on putting the slopes in order, depending on the chosen option, various materials will be required. The list of tools varies slightly - they will be needed not only for installation work, but also for preparatory activities.
Tools for work
To install any of the selected materials, construction tools are required.
Tools required for installation of slopes
A. If plastering work is ahead, then you need to prepare:
- Spatulas for applying and leveling solutions.
- Plaster Trowel or Trowel – These are also used to apply plaster or putty mortar to the wall.
- Corner aligner - it will help you quickly and accurately correct the internal and external corners, which always cause the most difficulty in aligning.
- Grater - used for leveling and smoothing plastered or puttied surfaces.
- Falcon - it is convenient to use for bringing the solution to the surfaces to be finished during work.
- Plaster trowel – this professional tool is designed for applying and leveling mixtures.
- An electric drill with a mixer attachment is required for mixing solutions.
- Mixing container.
- A metal profile or wooden strip is necessary to create guides.
B. To install PVC panels, you need to have on hand:
- Sharp construction knife.
- Angle, ruler and tape measure for measuring and adjusting panel blanks.
- A construction syringe for working with sealant or a gun for polyurethane foam.
B. Some tools are needed to install any of the materials listed above:
- Wide brush for applying primer.
- A building level that will help control the alignment of surfaces ideally in vertical and horizontal planes.
- Metal scissors for cutting reinforcing corners or profiles.
Separately, it is necessary to say about the tools intended for preliminary preparation of slope surfaces:
A hatchet or a special chisel attachment for a hammer drill - these tools will be required in cases where the slopes are made carelessly or are located in such a way that they do not allow the window sash to be opened completely, and they will simply have to be beaten off.
A construction hairdryer - if you can limit yourself to removing the old paint coating.
A spatula is required if you only need to clean the surface of the slopes from old plaster, paint or wallpaper.
Necessary materials
A. If plastic slopes are chosen for installation, the following materials will need to be purchased:
- Plastic panels (or lining), the number of which is calculated according to the parameters of the slope. The panels will be needed for installation on the sides and ceiling of the window opening, which means that in order to find out the exact amount of material, you need to measure the height, width of the slopes and thickness of the walls. Typically panels are purchased with a 10÷15% reserve.
- Starting plastic rail, U-shaped.
Start profile
- A rail having an F-shape (F-profile).
F-profile
- Profiles for internal corners installed at panel joints.
Slats for forming an internal corner
- Thermal insulation material - polystyrene foam or mineral wool of the required thickness and size. If already insulated sandwich panels are used, then you can do without additional thermal insulation.
- Wooden or plywood slats with a thickness of 100 ÷ 120 mm.
- Self-tapping screws of the required length.
- White silicone for sealing gaps between panels.
- Polyurethane foam - it is better to use “professional” foam in tubes, rather than cheap ones in aerosol cans..
- Staples.
- Primer composition.
To install PVC sandwich panels, you will need the same materials, except for the U-shaped and corner strips. An F-shaped strip may be required to decorate the outer corner, but you can do without it by using a putty mixture to decorate it. Which corner finishing option to choose depends entirely on the preferences of the homeowner.
B. To finish slopes with plaster, the following materials will be required:
- Putty-plaster mixture.
Dry building mixture for filling and plastering work
- Finishing putty.
Putty for finishing slopes
- Primer antifungal composition.
It is very important to carry out antifungal treatment of slope surfaces
- Perforated masking profile for strengthening external corners.
Perforated profile makes it easier to remove corners
- Finishing decorative material: water-based paint, wallpaper or even ceramic tiles - according to the preference of the owners.
Prices for popular types of antiseptics
Antiseptics
Preparation of slope surfaces
After everything you need has been purchased and prepared, you can proceed to preparing surfaces for installing finishing materials. This process can be carried out in different ways.
- If the window is installed in such a way that there is enough space on the slopes around it to install finishing with insulation, then it is often enough just to remove the old paint, whitewash or wallpaper from these surfaces.
Whitewash or wallpaper from the walls around the window can be easily removed if you first soak them by soaking them several times with water.
Removing old paint using a spatula and a hair dryer
Oil-based or organic-based paint is usually removed with a spatula by heating the surface with a hair dryer.
Cleaned slopes must be primed with an antiseptic primer to avoid the appearance of mold stains under the finishing, which can not only ruin the walls and finishing, but also introduce an unpleasant odor and a very unhealthy atmosphere into the living quarters. The fact is that the fungus can be dangerous to the health of residents, so this stage of work should not be neglected.
Mandatory priming of the base surface of the slopes
The primer is most often applied in several layers, each time after the previous one has completely dried. Not only smooth surfaces are processed, but also hard-to-reach corners - for this you need to use a narrow brush.
- Another, more complex preparation option includes the complete dismantling of the plaster layer applied to the slopes.
Dismantling old slope finishing
This method is used in cases where there is a very small distance left between the window frame and the slope, which does not allow the window to be fully opened. Another situation where this drastic measure cannot be avoided is the impossibility of installing slope insulation or even ordinary plastic panels.
To quickly remove a layer of plaster, a hammer drill with a special attachment called a chisel-scapula is used. It lifts well all the layers applied to the wall, and they are removed in fairly large pieces.
Next, you need to sweep away dust and particles of wall and plaster from the cleaned slopes - this process is carried out using a soft brush or wide brush. Well, after this the wall must be primed with the same antifungal compound.
Slope finishing
To make it easy to install a particular material on slopes, it is necessary to consider each option step by step.
Finishing work begins after the primer applied to the wall is well absorbed and completely dry.
Finishing slopes with plaster without insulation
The process of plastering surfaces around the window is as follows:
| Illustration | Brief description of the operation performed |
| The first step is to install guides made of a metal profile or wooden slats around the window niche. It should be noted that a metal guide is preferable, as it has lower adhesion than wood - it will be easier to remove. The guides are aligned to the building level and secured to the wall using dowels. The profile should protrude beyond the corner of the window opening to the thickness of the future plaster layer. | |
| Another guide from a perforated corner is placed near the window frame. It is oriented towards the profile installed around the opening, since the sketched plaster will be aligned along the plane specified by these two guides. The corner is installed on gypsum-based putty, as it dries quite quickly. | |
| The next step is to pour the plaster mixture onto the wall. Sometimes it is replaced with ordinary cement mortar, which is mixed from cement and well-sifted sand, that is, in no case should it be interspersed with small pebbles. The task of this stage is to make the outer corner smooth and create the necessary plaster layer. | |
| The same work is carried out on the ceiling part of the slope. | |
| After the mortar is thrown onto the slope, it needs to be leveled using a rule, a trowel or a level lath. This layer is leveled, so to speak, roughly, the main thing is that the solution fills all the voids and the edge of the slope, approximately forming an even angle. Leveling should be carried out after the solution has set. The process is carried out from below, from the window sill. The rule is installed on the guides and carefully rises up, leveling the scattered solution, the excess of which is immediately removed. Having completed this work, the slopes are left to dry completely. | |
| Next, the external guides are removed from the dried slopes, and perforated painting corners are installed on the formed corners using gypsum putty, which will reliably strengthen the edges of the slopes. Having installed them along the entire height and width of the opening, you need to wait until the gypsum composition dries completely - this process will take about half an hour. | |
| When the putty has dried and the corner is securely attached to the wall and slope, another layer of plaster is applied to their surface, which should be the same height as the installed painting corner. It is leveled in the same way, starting from the window sill, using a rule that goes up to the ceiling plane. From the outside, the edge of the corner is compared with the wall with a solution that is applied with a spatula. Internal corners are formed with a corner spatula, which grasps two planes and the joint between them at once. The leveled slopes are left until completely dry and then primed. | |
| The last layer consists of finishing putty, and is applied with a thickness of no more than 1-1.5 mm. | |
| The work is carried out with a wide spatula, with light pressure on it, movements from the window frame towards the room. If marks from the edges of the tool remain on the surface, they must be carefully smoothed out. | |
| The last stage is the final smoothing of the surface using grout. The process is carried out in a circular motion counterclockwise. After such sanding, before painting, it is recommended to prime the slopes again. The primer will not allow the paint to be absorbed into the putty, so the painting will be even. |
For clarity, here is a detailed video instruction on plastering window slopes.
Video: how to properly plaster window slopes
Finishing slopes with plaster with insulation
In this finishing option, some stages are similar to the first method, but it also has its own characteristics, so it is worth considering separately.
| Illustration | Brief description of the operation performed |
| The insulation is mounted on a primed, flat surface. Therefore, if, after chipping the old plaster, chips and potholes are found, they will need to be leveled with a putty or plaster mixture using a wide spatula. After the repair layer and primer have dried, they proceed to gluing polystyrene foam panels, which should have a thickness of no more than 15 mm. | |
| The material is fixed to mounting foam, which is best applied directly to the insulation, or to mounting adhesive like “liquid nails.” The part coated with strips of glue is pressed tightly against the slopes. The foam is installed first on the side walls, and then on the ceiling part of the slopes. If necessary, the joints between the foam sheets are additionally filled with foam. | |
| If the slopes are wide enough, then the insulating panels are additionally fixed to the wall using “fungi” fasteners. To do this, using a hammer drill, holes are drilled in the wall directly through polystyrene foam, into which dowels called “fungi” are inserted. Then special expansion nails are installed and driven into them. Using this fastening, you need to take into account the thickness of the insulation, since the fungus should be recessed into the wall by 50 ÷ 60 mm, and its cap should be level with the surface of the foam or be slightly recessed into it, by 1 - 1.5 mm. | |
| Having glued the foam, which will level the surfaces and corners, we proceed to reinforcing its surface - only in this case will the finish last a long time. Corners with reinforcing fiberglass mesh are mounted on the outer corners using glue or gypsum-based putty. The glue is applied with a spatula to the edge of the slope, then the corner is pressed onto it, and the excess adhesive that protrudes through the holes is immediately removed. | |
| On the outside, the corner is also glued with glue or putty. You can also use cement-based glue, but if you need the surface to be treated to dry quickly, it is recommended to use a gypsum composition. The mesh is pressed into the applied composition using a spatula, and its excess is leveled or removed. | |
| Next, the mesh is attached to all foam surfaces. It can be glued to an already applied thin layer of putty or attached to buttons, and the solution can then be applied on top of the mesh, leveling it. This layer will become a preparatory layer for the finishing putty, which is applied to the dried surface. The final leveling layer and other work are performed in the same way as in the first option. |
Video: how to level plastered slopes with putty
Find out several affordable ways to finish window slopes from the outside from our new article.
Installation of plastic slopes
PVC panels can be divided into two types - regular and sandwich panels, which have insulation in their multilayer structure. Their installation is most often identical and is carried out using fittings, however, sandwich panels can sometimes be joined using sealant, and glued to the walls using polyurethane foam or “liquid nails”.
| Illustration | Brief description of the operation performed |
| Finishing slopes with plastic panels begins with fixing a wooden strip around the perimeter inside the window opening, on the slopes, excluding the window sill. This element will strengthen the corner and allow you to easily install fitting profiles on it. If the window opening is wider than the frames being installed, then a wooden beam can also be fixed between the frame and the slope. It is usually installed during foaming of the gaps between the wall and the frame during the installation of the window system itself. In this case, the thickness of the slats fixed along the outer edge is selected depending on the cross-sectional size of the first beam. | |
| Next, the installation location of the starting profile is determined. If a wooden beam is installed between the frame and the wall, then the profile is pressed against the frame and secured with a stapler and brackets to the wooden beam. This is the operation shown in the photo. | |
| If the beam was not installed, then the profile is attached directly to the frame, along a line determined using a building level, resting on an external rail. The profile is fixed on the side and top edges of the frame. At the junction of the walls and ceiling of the slope, an angular profile is installed, in which there are two gaps for installing plastic panels in them. The fixed starting and corner profiles are clearly visible in the photo. | |
| The next step is to attach an F-shaped profile along the outer side of the slopes, reaching the surface of the wall, which will serve not only as a panel holder, but also as a platband. The profile is fixed to a wooden strip installed along the outer edge of the slopes. | |
| At the corners, the F-profile is cut at an angle of 45 degrees and connected at a right angle. In order for the cut to be perfect and the profile not to be damaged, it is necessary to use a miter box when cutting blanks. | |
| Next, measurements are taken from the slopes, and parts of the required size are cut out of plastic panels. After this, they are installed in the grooves of the profile - to do this, they can be bent a little. | |
| In some cases, after bending the profile shelves, their edges “do not want” to completely return to their original place, and gaps form. To restore them to their original condition, you can apply silicone sealant in these places, and then temporarily fix the assembly with masking tape, which is glued to the surface of the plastic panel. | |
| Another option for installing conventional PVC panels on slopes can be a method using insulation, which is laid between the slope wall and the finishing material. Installation is carried out in the same way as described above, but in this case a certain space is left for the insulation. 1 - attaching the starting U-shaped rail to the window frame or wooden beam; 2 - installation of a wooden batten on the outer edge of the slope; 3 - attaching the J-profile to a wooden batten - this profile will serve to secure the platband at the completion of the work; 4 - installation of insulating material between the wall and the PVC panel; 5 — installation of a regular or sandwich panel in the starting profile; 6 - installation of the CL profile, which snaps onto the protruding part of the J profile. Additionally, it can be glued to the wall and panel using white silicone or sealant. It should be noted that if sandwich panels are used in this option, then instead of insulating material, polyurethane foam can be used to fill the cavities between the finishing and the wall. |
Video: installation of plastic window slopes
Sandwich panels can be installed on the surface of slopes in another way without the use of fitting profiles, but using polyurethane foam, sealant or liquid nails. The gaps between the planes, in this case, are sealed with white silicone.
Installing sandwich panels directly on slope walls is quite simple, but an important condition for it is a more or less flat surface, so before installing the finishing material, it needs to be leveled and dried.
Further, the work is carried out as follows:
- Dimensions are taken from the slopes and sandwich panels are cut along them.
Cutting a plastic sandwich panel using a jigsaw
- Then one of the selected adhesives is applied to them, and the panel is pressed against the surface of the slope.
If polyurethane foam is used for installation, the ceiling panel of the window opening is glued first.
The ceiling plane is sprayed with water from a spray bottle - this will increase the adhesion of the surfaces.
Then the foam is applied along the perimeter of the glued part in a thin strip, since it tends to expand quite strongly, and with a large amount of it, the foam can squeeze the finishing material from the wall.
- Having pressed the material to the surface, you need to hold it for 5 ÷ 7 minutes, and then install supports and leave until it dries completely and the foam expands. The support can be made from a planed board, which is pressed against the panel, which is supported with bars, placing them on the window sill.
- After this, the side panels of the slopes are mounted in the same way.
Installing a side sandwich panel
- Then, if there are unfilled gaps between the slope wall and the finishing, they are additionally foamed. When the foam dries and expands, its protruding excess is cut off with a sharp stationery knife.
All panels are installed on polyurethane foam
- Next, the joints between the wall and the finishing material should be closed with a special profile, which is called a platband. It is made in the form of a corner and can have different widths, which allows them to cover the unsightliness of a joint even of large width. The casing is glued to the “liquid nails” and held in place while they dry using masking tape.
- If for some reason small gaps have formed between the panels, they are carefully filled with white silicone, which after drying will be almost invisible.
The installation is completed by the installation of platbands.
It should be noted that there are other ways of performing work on finishing slopes, which are somewhat different from those described above, but the principle of their implementation is unchanged.
— First, you need to decide in advance on the choice of material, whether it will be insulated initially or this process will be carried out during the installation process.
— Secondly, choose the material for insulation and for fixing all the parts.
— Third, decide which installation method will be preferable: with or without the use of fitting profiles.
Having decided on all the criteria, you can take measurements and purchase everything you need for work.
Making slopes on windows yourself is not so difficult if you approach this process with extreme care, take accurate measurements, and select all the necessary components correctly.
Is it possible to install a plastic window with double-glazed windows yourself?
Installation of slopes is the final stage of installing a window system. In order for the windows to be truly insulated according to all the rules, it is necessary to take into account many nuances even during the installation of the frames.
How to properly install a plastic window is in the corresponding publication on our portal.