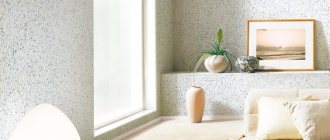
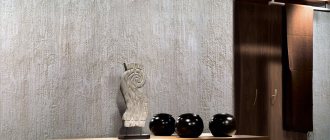
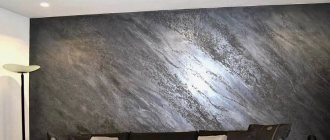
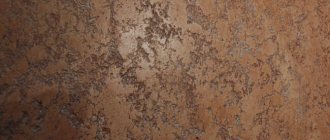
To enhance the style of an apartment's interior, different types of finishing are used. Decorative plaster World Map looks the most attractive. There are many ways to apply it to surfaces, let’s look at the main ones.
The article describes in detail the types of this finishing with examples in the interior, it also provides recommendations for doing the work yourself, including what tools to prepare, how to treat the surface for coating, and the application technique itself is presented.
Types and composition
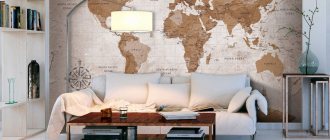
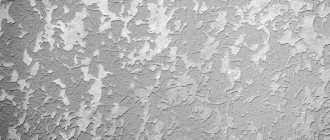
Decorative plaster world map has a special textured basis. This material contains a lime mixture, sand, marble chips (not as large as marble plaster) and a number of other components. After application, the outlines of continents, islands, seas and oceans appear on the wall.
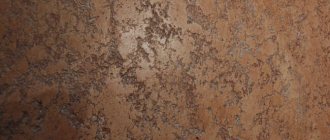
When textured plaster is used, the emphasis during work is on the texture, and in the case of using a structural material, on the pattern. In both cases, the color palette is distinguished by soft transitions of tones and a variety of surfaces.
Basically, as a textured decorative plaster, the map of the world is made on a silicate base with additives in the form of fine-grained quartz and other fillers. Components present in the solution:
- linseed oils;
- slaked lime;
- marble dust;
- sand.
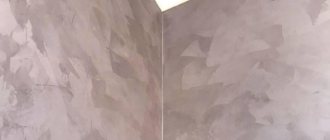
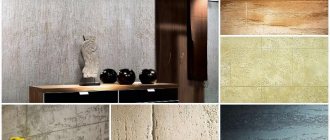
The semi-relief coating that decorative plaster creates looks great in the interior and creates a unique style. This type of facing material is also called travertino; this material imitates the natural stone travertine; it can also be used to create world map or marra plaster.
Travertine or Tibur stone is calcareous tuff. This rock is formed by calcium carbonate. Can be processed and sanded. One of the most famous structures built using this material is the Colosseum. The imitation of this natural stone is even more adapted to harsh environmental conditions than travertine itself.
It is also necessary to mention that by a world map, many understand a bas-relief made in the form of a real image of continents and islands on the wall of a room. We talk about this option in detail at the very end of the article.
How to make it yourself
Applying textured travertine plaster world map is carried out in compliance with the following steps:
- surface preparation;
- applying the background;
- drawing a map;
- finishing.
What materials are required
What materials will be needed depends on the design project and the type of surfaces to be processed.
Basic materials for work:
- plaster mixtures;
- primer;
- wax or varnish;
- tints to change the color of the solution.
You can use themed ready-made plaster kits. When choosing, it is important to take into account the quality of the manufacturer’s materials, the composition of the building mixture, and the type of surface (concrete, brickwork, wood).
Important technical parameters of plaster:
- temperature conditions for work;
- drying time of the layer;
- shelf life of the composition;
- durability.
To make your own base for wall decoration you will need:
- lime mixture;
- marble chips or travertine;
- sifted river sand;
- linseed oil;
- silicate additives.
The ingredients of the composition depend on the requirements for the material, which can be intended for a textured coating, applying a mixture with a mother-of-pearl effect, etc.
Required tools for application
The work will require the following tools:
- Venetian trowel;
- Master OK;
- foam roller;
- sheets of sandpaper;
- sponge;
- spatulas;
- palette knives;
- brushes of different shapes and sizes;
- ladder;
- covering cloth or masking tape to protect interior parts;
- container for mixing the composition.
Work on applying plaster is carried out in accordance with safety regulations in protective clothing, a respirator, and gloves.
Surface preparation
Before decorating the wall, you need to prepare the surface. The wall is cleaned of dirt, dust, unnecessary parts, and wiped with a soft sponge or cloth. The cleaned surface is checked for defects. If there are any bends or dents, the defects must be repaired using a primer and dried. Then the wall is examined with a laser level for quality and absence of protrusions. Several primer layers can be applied to the concrete surface.
Application technique
For the application technique using plaster, medium and coarse grit solutions are used. The composition is applied in 2 layers, the thickness of the coating depends on the fraction of the material and can be 1.5-2 mm. The application technique does not require careful leveling; roughness on the floors is possible, but the layers must be distributed evenly, without joints.
Applying the first layer
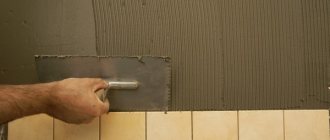
The first layer of plaster is applied with a white solution. The thickness of the coating is 1.4-2 mm. The solution is applied to a trowel and rubbed over the surface in a vertical or horizontal direction. Joints between layers are not allowed.
The first layer can be treated with a fine-pile roller to enhance the decorative effect. The base with a granular structure looks complete, aesthetic, and does not require additional grinding of the composition. The dried layer will need to be sanded with fine-grained sandpaper.
The first layer will require about 1.6-1.8 kg to cover an area of 1 m².
Second layer
The second layer is applied to elements of the world map. The plaster solution is applied with a trowel and rubbed over the surface to create islands and continents. For subsequent application of the material, the trowel is cleaned so that no dried lumps remain on the surface.
To apply the second layer, you can use a sponge; in this case, the image will be more voluminous. The effect of completeness is given to the layer by spraying from a spray bottle. Then the solution is ground using a trowel.
Creation
Decorative coating in the form of a card is carried out as follows:
- A small amount of plaster mortar is applied to the trowel, pressing, and the tool is passed along the surface to fix the applied layers. The areas will become more textured.
- An unusual effect is achieved using small and medium brushes. The tip of the brush is moistened in the solution, and it is passed along the wall to emphasize the relief.
- To give the surface heterogeneity across the material, apply a cloth.
Finish painting
To perform the final coating, depending on the design of the room, glaze, metallized paint compositions, varnishes and products with pearlescent particles are applied. The final finishing is also done with wax or varnish. The coating is applied after the base layers of plaster have dried. The shade is selected depending on the finished image and the style of the room.
The wax composition is applied with a damp sponge, the product is rubbed over the surface of the wall in an even layer. When performing circular movements when rubbing the composition, a shimmering effect is created.
The varnish is applied to the finished plastered surface using a foam roller. The drawing of a world map when using varnish is most expressive. Uneven areas are covered with an additional layer of varnish or primer. Materials dry quickly, so work must be done quickly.
Advantages and disadvantages of the material
Let's try to figure out what positive and negative aspects are included in the mixture in question.
The advantages of the decorative material called world map include:
- environmental friendliness;
- possibility of masking defects;
- economical consumption;
- the possibility of quick restoration of individual areas;
- resistance to mechanical stress;
- resistance to temperature changes and humidity;
- immunity to the influence of UV rays and mold;
- breadth of color palette;
- vapor permeability;
- the material is non-flammable;
- Duration of operation while maintaining quality.
Caring for such a decorative finish as a world map made of plaster on the wall involves periodic wet cleaning. It may be necessary to renew the finishing wax or varnish layer after many years of use.
DIY bas-relief on the wall
Using plaster you can reproduce a bas-relief with a map. Standard gypsum-based mixtures will be required. Gypsum plaster has less shrinkage when drying. The bas-relief is created according to a drawn sketch or using a stencil.
Work on creating a bas-relief is carried out in compliance with the following steps:
- The wall is leveled and primed using a deep penetration primer.
- A sketch of the bas-relief is being made.
- The surface of the wall is drawn into squares, then the image is transferred.
- A plaster mixture is applied to create islands and continents. Gypsum is applied in small portions, because the material dries quickly.
- When making a three-dimensional image, you can fix on the surface reinforcement from dowels and screws in several areas of the world map.
- The composition is applied in several stages: first, the relief of the continent is reproduced, after drying, mountains, canyons, and river beds are formed using special tools.
- At the final stage, the finishing composition is applied.
- After the layers have dried, sanding is performed.
Tools used
The process of applying a structural coating with your own hands is not easy. Moreover, if this is decorative plaster, a map of the world, not everyone can decorate the wall with their own hands.
First you need to stock up on tools:
- Special Venetian trowel;
- Stainless steel trowel;
- Soft foam roller;
- Sponge;
- Sandpaper;
- Brushes.
Don't forget about accessories:
- Workwear;
- Covering material;
- Gloves and goggles for eye protection;
- Respirator - against dust when preparing walls;
- Stepladder if necessary
- Bucket for mixture
The sizes of the tools depend on the volume of work.
The first layer is applied with a large trowel. A medium-sized tool is used to create a texture, and a small tool is used to create a pattern.
Advice from the experts
When making your own mixture, it is important to maintain the proportions. A gypsum base is used to strengthen the surface depicting the world map. A cement additive is necessary when performing work in a room with high air humidity (bathroom, kitchen).
The wall is primed in 2-3 layers. The deep penetration primer dries in 12 hours. When using travertine effect plaster, application is carried out in 1 layer.
To increase adhesion, the wall is primed using quartz fine-grained sand. The base is applied with a foam roller. The coating is applied in stages; the surface can be divided into squares and gradually filled in.
Preliminary surface preparation
The appearance of such a decorative coating as travertine plaster depends on the quality of wall preparation. In the technology section you will learn that the world map coating can be applied in two ways . Each of them requires a different level of preparation. If you use the first even layer of coating, you can count on hiding minor wall defects. It is this option that we will consider in more detail. First, the surface is cleaned of remnants of the previous composition. The main thing in this process is the elimination of large roughness; minor defects will be masked by the new coating.
Step-by-step surface preparation:
- Reveal flaws hidden under the finish.
- Decide if additional processing is needed. This can only be done by reaching the base on which travertine plaster or a world map in the form of a bas-relief will be laid in the future.
- For significant defects, you can use a cement-sand mixture for leveling.
- For minor defects, use a reinforcing mesh that is attached to the wall with a special cement adhesive.
- If an even layer of travertine is not applied, putty the surface
- Degrease using household chemical solutions. For example, water with detergent.
- Remove dust.
To remove the old coating use:
- Spatulas
- Hammer
- Grinder
- Special steel graters
During the removal stage, be sure to take care of eye and respiratory protection.
When there is moisture in the room, it is advisable to treat the walls with an antifungal agent and only after that the primer is applied.
Finishing
After applying two working layers, it is time for finishing. It's time to give the wall art some color. Metallic paint is suitable for finishing. Wax or varnish finishing is often used. Wax can be applied with an ordinary slightly moistened sponge. You need to put wax on a sponge and rub it over the entire surface. To obtain an unusual shimmer, the wax is rubbed in different directions in a circular motion. After applying the wax, the work can be considered complete. Similar actions and operating procedures are provided with varnish. Some people paint the finished surface using a foam roller. It is believed that the drawing in this case is more expressive.
Decorative plaster world map application technology
The coating technique is simple, but requires skill.
There are two main ways:
- The first method differs from the second in that it is necessary to apply the first even layer using the same mixture.
- The second method is that the first even layer is not applied at all, which requires more thorough preparation of the surface and its painting.
Decoration
The final finishing is done by painting, varnishing or waxing. Finishing materials additionally strengthen the surface of the plaster coating and give it the ability to be cleaned by washing. Paint and varnish materials must be compatible with plastering materials. To reduce the consumption of paints and varnishes, plastered surfaces are additionally primed.
Painting plastered relief walls
The relief creates additional features for the work. Textured plaster is painted so that during the first application the staining material gets into all the recesses. This is done with a brush, roller, sponge or spray gun. Excess material is shaded to prevent streaks from forming. A second coat of paint of a different color is usually needed to highlight the convex parts of the relief.
The paint used for textured plaster can be tinted before use. When choosing a color, experts advise adding literally a drop of black. This will bring the overall tone of the painted surface closer to its natural color, which is less irritating to the eyes.
There are several techniques for decorating plaster finishes in two colors. You can read about how to paint a textured coating in various ways in a separate article.
Material consumption
The total consumption depends on the number and thickness of layers. Both textured and structural plaster are applied in a layer whose thickness is equal to the size of the quartz or other filler. Therefore, if the inclusion size in the mixture is 1.7 mm, the consumption will be about 1.7 kg per 1 m².
Standard packaging - 25 kg. It is enough to treat a wall of 10 -15 m². When the actual area is slightly larger, the volume can be increased by adding water, but only in the proportions recommended by the manufacturer. Our decorative plaster calculator will help you with the calculations.
If you achieve a dense, saturated structure, the consumption will increase by 10-30% of that specified by the manufacturer.
Interesting video
This master class shows how to make a Grotto from ordinary Rotband type plaster.
In the next video, the master uses professional decorative plaster. The “islands” are waxed and polished to a shine.
In this simple way you can perform Grotto yourself. Share your experience and ask your questions in the comments below, I will answer everyone.
Previous
Decorative plasterHow to make a stencil for plaster and apply a pattern to the wall
Next
Decorative plasterMarmorino plaster: all the subtleties of creating an Italian classic!
Application
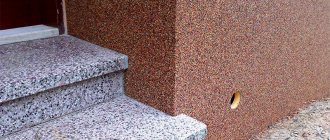
This application technique can be combined with timeless antiquity, luxurious classic interiors and even modern high-tech style. Everything, of course, is individual and depends on the chosen design. The list of premises where the world map is used is quite wide. For example, living rooms, dining rooms, children's rooms, bedrooms, offices, billiard rooms, staircases, halls, hallways, etc. This type of finishing is also in demand in commercial premises, such as cafes, restaurants, hotels, cinemas, and representative offices. Moreover, its popularity is only growing every year. And yes, there are reasons. Can be used for interior and exterior work due to the durability of the coating and technical characteristics.
