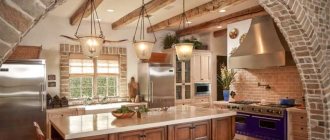
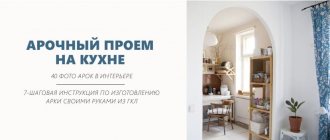
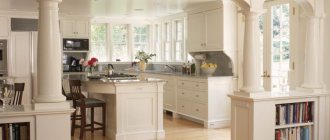
An arch to the kitchen instead of a door is a popular design technique, actively used not only to improve the aesthetics of the room, but also to functionally divide the space between rooms. An opening designed in this way looks light and unobtrusive - and fully meets all modern interior standards. A large collection of photos from real apartments will help you choose exactly the most suitable arch for the kitchen and do without a door that takes up a lot of usable space. In addition, we talk in detail about how to do the design yourself. It's quite simple, but even basic algorithms have their pitfalls, don't they?
All the advantages of the solution
- expansion of space - especially important for small kitchens;
- enhancing the decorative potential of the room - arches look interesting and stylish;
- additional light source - often an LED strip is built into this element and makes the lighting in the room more rhythmic and interesting;
- general improvement of the interior - a neat arch between the kitchen and the corridor allows you to make the latter more aesthetically pleasing and cozy due to greater penetration of natural and artificial light;
- functional zoning - especially if the kitchen is combined with another room;
- improved ventilation - air circulates throughout the apartment or house without obstructions.
Tips for use
In order not to spoil the repair, to eliminate additional expenses on finishing and building materials, you need to take into account some nuances:
- Drywall does not like moisture; too much moisture can cause it to fall apart.
- Complete drying of the finishing material takes at least 12 hours.
- To prevent rust stains from appearing on the surface over time, it is better to use galvanized screws or stainless steel fasteners for fastening.
- To prevent the plaster from spilling out, it is necessary to screw in the screws to a clearly indicated depth.
The finishing material must be selected and used strictly for its intended purpose. For example, for multi-level ceilings and curved structures, arched material is used, which can be given any shape, and for walls, a more dense wall material with a number of additional advantages is suitable. Sheets must be used within a few days of purchase.
For methods you can use to bend drywall, see the video below.
Nuances you need to know about
Since after the arch is designed, the space between the kitchen and the adjacent room is united, following the laws of physics, cooking smells may well spread throughout the apartment. This is why it is very important to install a hood in the kitchen before installation: it must purify the air before it moves to other rooms.
There are also other nuances:
- the arch is not recommended to be installed in apartments equipped with gas stoves;
- due to the open space, there is a problem of constant noise, which is especially important if there are small children at home;
- the transition between rooms requires decent lighting so that all decorative details are emphasized and the overall impression is enhanced;
- if you have low ceilings (less than 2.5 meters), you should think about installing a regular door, since the arch in this case risks turning from a potentially beautiful interior decor into an overly intrusive accent;
- The smaller the apartment, the less noticeable the opening should be designed so as not to get the effect of narrowing the space, as often happens with Khrushchev-era buildings.
Final processing of the plasterboard semi-arch
To begin with, the joints of the drywall sheets should be covered with reinforcing tape. It is attached to a primer and immediately sealed on top with putty on drywall. The edges of the arch and the finished opening are trimmed with protective corners. For straight lines, you can use plastic corners, and the arc itself can be finished with aluminum.
They should be attached using liquid nails or putty, carefully adhering to the surface. You can even “plant” the corners on self-tapping screws in some places for reliability.
After installing the corners, the entire surface of the semi-arch must be primed and then covered with putty in several layers. After this, finishing work continues in the same way as with ordinary walls: stripping, sanding and coating with paint, wallpaper or other types of finishes.
Materials for decoration
If you decide to decorate an arch in the kitchen, it makes sense to take a closer look at the materials from which it is most often made.
Plastic
Options from the “cheap and cheerful” category. Perhaps it is even more the first than the second, since such arches are difficult to adjust to a specific size, and they look extremely modest in space, and often even spread an unpleasant plastic smell.
The only plus is that they are not afraid of moisture and provide a very long period of comfortable use.
Tree
Ideal material if you live in a private house. Especially if it is also made of wood.
Supports the trend towards environmental friendliness and offers a very impressive and expensive appearance.
They realize themselves best in classic interiors, tailored to country or Provence.
Stone
Another eco-friendly material that, like wood, fits perfectly into rooms with a traditional design.
Such an opening will have an impressive appearance, but requires good support from the supporting structure and adjacent walls, since the stone itself is very heavy.
The project will cost a lot - natural materials are always at a premium.
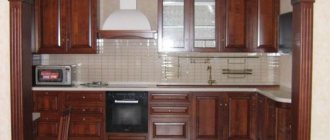
Drywall
Perhaps the most common option, which is captivating because you can easily give such an arched structure almost any shape.
In addition, drywall is very light and puts virtually no pressure on the opening as a whole. Unlike the stone and wood mentioned above.
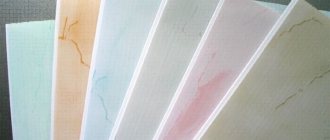
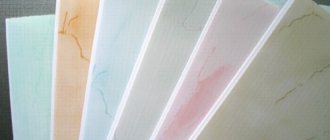
Decorative finishing
The most interesting stage is the decorative design of the arch. For this you can use various materials. The most popular ways to do it yourself:
- wallpapering;
- painting;
- textured or colored plaster;
- MDF boards;
- tile or mosaic.
The easiest option is painting. At home, it is best to use water-based mixtures; you can also use wallpaper instead of paint; plaster is an ideal kitchen solution. You can use a solid color or a textured mixture, it all depends on your wishes. In addition to this finish, you can use artificial stone.
The classic interior of an arch is considered white, but you can choose a contrasting shade or tone that matches the walls.
How to make it yourself
In order to make a plasterboard arch with your own hands in the kitchen, the opening must first be well prepared:
- carry out redevelopment in accordance with the choice of the desired shape of the arched structure;
- expand as much as possible in height and width - relevant only for structures that are not load-bearing;
- make all the necessary measurements to select the required fragments.
Sheathing the opening with plasterboard is preceded by the installation of the arched frame. For this purpose, guide profiles made of aluminum are used. To calculate their length, you need to double the height of the doorway and add its width.
Everything further is a matter of technology:
- we make small cuts on the profiles using a hacksaw - preferably at regular intervals, so that you can bend it into a U shape;
- we fix it to the slopes using standard fasteners along the entire perimeter of the opening;
- we cut out 2 parts of the aluminum profile and for their optimal bending we make the same cuts every 10 centimeters;
- We install it in an arc and secure it with self-tapping screws.
That's it, the frame is ready. All that remains is to carry out the sheathing.
To do this, we take the prepared fragments from the plasterboard and make cuts on the inside at the same interval as on the profile - 10 cm. Next, we lay the sheet on the frame, fix it, and fill the voids formed after bending the sheet with gypsum-based putty.
When it dries, the opening will have a smooth and beautiful appearance. All that remains is to do the finishing touches, but this is a matter of your sense of taste and general priorities in the interior.
Assembling the frame base
The cut and prepared guides must be secured within the doorway. A tape is laid to seal the distance between the wall and the profiles.
Sequence of actions for assembling the frame:
- A short stand is inserted in the center on both sides, which is secured “metal to metal” with self-tapping screws;
- The arcs are attached so that they are in the same plane;
- Additional racks are being installed. There should be four of them in total. Their edges are trimmed in the direction of the arc;
- It is necessary to cut and secure the strips from the rack profile. They will be cross-links for the main arcs.
Arch shapes
Let’s say right away that there are dozens of them - and every year brings new design trends in the niche of kitchen design with an arch, already expanding the range of possible options.
However, when choosing a specific shape, you should proceed not only from aesthetic considerations - it is also worth taking into account the features of your room, so that the load is evenly distributed and there is no need to integrate additional retaining elements into the opening.
Square arches
Owners of small apartments with low ceilings should definitely take note of just such arches.
In fact, this design simply borders the doorway with the letter P, but through inventive artistic decoration you can achieve the effect of visually expanding the space.
In the photo you can see just the case when a square arch into the kitchen instead of a door makes the room more spacious.
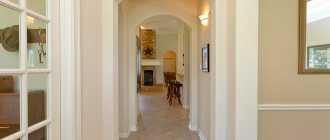
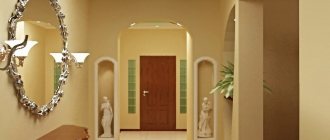
Semicircular (Roman)
This is probably the classic version of the arch that can most often be seen between the kitchen and the corridor.
It received its name in brackets due to the fact that it was in Rome that such semicircular vaults were first used instead of doors.
Why, in fact, are semicircular arches most in demand today? It's simple: they perfectly match the layout features of most modern apartments. They also allow you to evenly distribute the load and make the opening completely safe and convenient for use for many years to come.
Ellipsoidal
If you take the arch from the photo above and stretch it a little in length, you can get just ellipsoidal structures, which have become widespread mainly in private homes, where there are no problems with usable space and there is room for creative design ideas to unfold.
Don't know how to decorate a wide opening? Take action, this is the kind of arch that will organically fit into your space and solve all your issues.
Curly
Complex design with a large number of carved elements and details.
As a rule, it ignores the laws of symmetry and skillfully weaves into the space, becoming its accent decorative element.
Many of these figures are of a fantasy nature. Look at what ideas have been brought to life - and come up with something of your own, if you are drawn to just such a model, divorced from any strict guidelines.
Semi-arches
An interesting solution that combines straight lines with characteristic roundness on one doorway.
This not only makes the interior more interesting, but also helps make the narrow passage from the kitchen to the hallway wider and more comfortable.
Portals
They are shaped like portals, hence the name.
They are completely universal:
- fit into kitchens of different sizes;
- great companions with both minimalist and traditional interiors;
- are quickly installed and do not put stress on the walls even in problem areas.
Plus, you can create beautiful lighting. And then the portal will come to life!
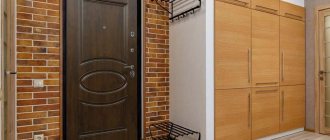
Design features for door installation
If you plan to install a door (hinged or sliding) in an arched opening, it is necessary to use a more powerful profile or selectively strengthen the installation sites of door hinges (sliding mechanism. Since standard door leaves have a rectangular shape, a square arch is usually used for their installation; build such a structure with your own hands simpler than arched.
The illustration shows the reinforcement of a future square arch with timber.
Installation of the frame and fastening of the side elements
First, we secure the metal profile guide at the top of the opening with dowels. Then the same guides are fastened on the sides - from the top corner to the end of the arched curve.
The side guides must be the same in length, otherwise the arch will turn out crooked.
Next we move on to making the arc-shaped profile. In a regular metal profile, cuts are made and it is bent. You will need two arc-shaped parts. To maximize the accuracy of the frame, we try it on to the previously made side parts. To fasten the profile with vertical guides, dowels are used, and with plasterboard, self-tapping screws are used.
Next, the side arc-shaped parts are attached to the frame with self-tapping screws. Now it's the turn of the curved element.
Wallpaper
Learn how to wallpaper an arch below. This option for finishing the arch is the most affordable for the consumer. Another benefit is the wide range of prints and designs available, making wallpaper perhaps the most creative finishing option for your arch. In this case, you can choose one wallpaper for the arch and another for the rest of the room to highlight it, but the main thing here is not to overdo it with highlighting the structure, that is, you cannot choose minimalist wallpaper for the room and, for example, photo wallpaper with a picture of the sea. This means that one should smoothly flow into the other, i.e. the wallpaper can be different, but with the same design style.
Advice for installing wallpaper on an arch. When decorating the outer part of the arch with wallpaper, you should slightly bend the wallpaper inward and, stepping back from the corner literally a millimeter, cut off the unnecessary piece. Having done this on both outer sides, you should stick the wallpaper on the inside of the arch. If you do everything following this advice, then the joints on the wallpaper will look a little more natural, because there won’t be that random white stripe between the sheets of wallpaper.
It is very important to level the surface on which the wallpaper will be pasted in order to achieve an aesthetic appearance of the wallpaper pattern. This is done with ordinary putty.
To save mortar, you can only putty the joints of plasterboard plates, since the rest of this material is often perfectly smooth.
Let's talk about the disadvantages. Yes, we have washable wallpaper, thick wallpaper with a supposedly long lifespan, but this does not change the fact that the period of operation of any wallpaper, no matter how much it is praised by the manufacturer or seller, is still short. Often, it lasts about 2-4 years with careful use and proper care.