/Repair/Walls/
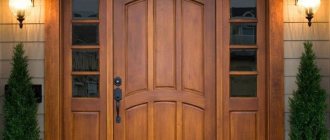
Open openings instead of a door are a great way to visually enlarge a small kitchen, combining it with an entrance hall/living room/balcony, but maintaining the separation of zones. To improve the appearance of a U-shaped opening, you can make it arched.
Attention: most redevelopment options involving changes in the size or configuration of openings must be approved by the housing supervision authorities.
Advantages and disadvantages
Before installing an arch as a kitchen opening, all the pros and cons are weighed.
Installation advantages:
- the presence of a door hides up to 20 cm from the kitchen area;
Without a door, the usable area increases
- there is no door leaf, which means there is no air stagnation in the kitchen. Now it is much easier and faster to ventilate;
- the kitchen itself and the adjacent room with an arch look lighter and more spacious, creating the effect of a single space;
- in a studio apartment, with the help of arched openings, the room can be divided into zones;
- the design of the arch will decorate the interior.
Installation disadvantages:
- in most cases you have to completely get rid of the doorway, so be prepared for dusty repair work;
- due to the absence of a door, all sounds coming from the kitchen will be heard - the sound of water, the hum of the hood, the operation of electrical appliances;
- food smells will also join the extraneous noise. Although this problem can be solved with the help of a powerful hood.
Gallery
Did you like the article? Subscribe to our Yandex.Zen channel
Great article 0
The nuances of designing an arch in the kitchen
- The arch looks harmonious if it is made in the same style as the kitchen and is combined with kitchen furniture or a countertop. Or elements of arched decor are repeated in the decoration of the walls of the kitchen or in the adjacent room.
- With the help of an arched opening, a small-sized 5–6-meter kitchen in a Khrushchev-era building is often combined with a loggia or balcony. Part of the wall that once served as a window sill can be designed as a bar counter. Or install shelves in the arch where kitchen accessories will be stored.
Arched opening with shelves for storing kitchen utensils
- When designing an arch in a small kitchen, you should avoid ornate decoration details - stucco molding, columns or decorative elements made of plasterboard.
- The installation of shelves and niches in the arch is possible for a spacious kitchen. If the ceiling height allows, a compact mezzanine can be installed above the arched vault.
Mini library
With shelves
With mezzanines
- Sometimes niches are decorated with stained glass. Light streaming through colored glass creates a magical atmosphere.
- A round or rectangular transom at the top of the arch looks no less impressive than stained glass. It can be made of transparent or frosted glass with or without a pattern, with a smooth or embossed surface.
A transom decorates the vault
- In a wide opening, several interconnected arches are sometimes installed. Arched elements can also be repeated in kitchen window openings, if we are talking about a country house. This will give the entire interior a holistic, finished look.
- When constructing an arch between the kitchen and the corridor, it is necessary to consider lighting. Lighting fixtures in adjacent rooms should be compatible with each other. For additional lighting and visual expansion of the corridor, lamps can be mounted directly into the arch.
With spotlight
Built-in lighting
Plaster finishing
This option is the cheapest and has a number of advantages.
Firstly, you can do without builders and do the finishing yourself.
Secondly, lighting can be installed in the plaster arch if desired.
Thirdly, due to the plasticity of the material, it is possible to imitate any other type of finish.
Types and shapes of kitchen arches
The shape of the arch is no less important than the design. It determines how bright and spacious the kitchen will end up.
Frequently used forms
Classic or semicircular
The most common form is with a symmetrically curved arch. The radius of the semicircle is equal to ½ the width of the doorway. Suitable for any interior. It looks harmonious both in a small kitchen with access to a cramped corridor, and in a studio or spacious apartment combined with a living room. A semicircular vault stretched upward will visually increase the height of the ceiling.
The classic arch can be installed directly on the doorway without dismantling it. And also mounted in a supporting structure or wall of a panel house. During installation, you will not have to widen the doorway and additionally strengthen it with channels or metal corners. During installation, the load is evenly distributed across the supports.
In a small kitchen
Between the kitchen and living room
Romance or Slavic
It has a rectangular shape, the vault is parallel to the floor with rounded corners that are symmetrical to each other. Suitable for designing wide openings with low ceilings. Such an arch will add light to a small-sized kitchen, while a large one in a palace style will add monumentality.
Form "romance"
Portal or rectangular
Simple and concise in form. It does not require the design of arched corners, which is why it is easier to install than arches with a curved vault. Combines with doorways in an apartment where there are standard interior doors. Suitable for kitchens of any size. Looks good in a simple interior, where symmetry is observed in every detail, and the decor lacks smooth lines and transitions.
Rectangular portal
English, archery or modern
It is similar to the classic one, but unlike the latter, it is used only for wide openings in large kitchens combined with a living room or dining room.
Luchkovaya between the kitchen and living room
It looks good even in rooms with a standard ceiling height of 2.45–2.5 m. The arc of the arch has a smoothed, less often pronounced bend and is interrupted by sharp corners at the base. The radius of the arch here never exceeds ½ the width of the portal. Sometimes such an arched opening is decorated with columns.
English with columns
Ellipse or Turkish
Very similar to the English one, but with a larger radius of curvature at the corners. Universal, as it will suit kitchens of any size and any ceiling height equally well. It will look harmonious even between rooms with different purposes, where previously there was no passage at all, for example, between the kitchen and the pantry.
The “modern” arch (left) and the “ellipse” (right) have clear similarities
Turkish
Half-ellipse or half-arch
Combines two forms at the same time. On one side, its vault repeats a rectangular arch, on the other, a semicircular or arched one. The depth of the rounding is not of fundamental importance here. An excellent option for small kitchens with low ceilings in Brezhnev or Khrushchev buildings. The semi-arch itself takes up minimal space. It visually widens the opening in the wall, makes it higher, and makes the kitchen more spacious and brighter.
Attention! The load between the supports of such an arch is distributed unevenly, so the opening needs to be strengthened.
Trapezoid
A rectangular arch with beveled corners visually increases the height of the ceilings. It looks advantageous in the kitchen of a large private house, and a small one will narrow the space even more.
Lancet or Gothic
An arched opening with a pointed vault and side arched supports is suitable for kitchens with low ceilings, visually raising them. May have a pointed or cropped top. It is harmonious next to the same arch or in rooms where the arch elongated to the end is repeated in interior elements, for example, window openings or furniture.
The pointed shape is repeated in the window openings
Moorish
Reminds me of a horseshoe. Its sides begin to round off from the floor. Its installation requires a fairly wide opening. By softening the space, the arch visually makes it lower. This option is suitable for kitchens in Stalinist buildings with high ceilings or private houses.
Wide Moorish
Eastern
The eastern arch is shaped like a triangle with sloping sides or a symmetrical semicircle. The side posts can be either straight or kinked. The base of the dome is often decorated with additional openwork elements, due to which the entire structure takes on an elegant look. Emphasizes the Mediterranean flavor of the kitchen. It differs from others by the presence of a dome with a pointed or rounded end in the upper part of the arch.
Interior in the spirit of the East
Rounded dome at the top of the vault
Carved dome of the eastern arch
Irregular shape
Asymmetrical arched openings, combining rounded and straight lines, look unusual and elegant. But only if they are made in the same style with the interior of the kitchen and adjacent room. They can combine several types of arches at the same time. Often complemented by niches, shelves, windows, and a bar counter.
Asymmetrical opening with shelves
Irregular arch with bar counter
Masonry
Such an arch looks rich, presentable and evokes associations with medieval castles. This type of masonry is very difficult to perform, so it is better to hire a specialist.
A stone arch will not be cheap, but will last for many years.
How to trim and decorate an arch
At the design stage, it is also necessary to think about what the future arch to the kitchen will be made of and how exactly it will be decorated.
Decorating an arched opening with decorative plaster and hand painting
Drywall
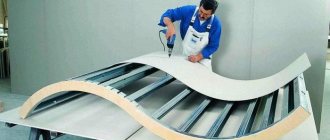
Making a kitchen arch from inexpensive plasterboard is the most popular way to decorate a doorway. Although this material is not considered very durable. But it bends perfectly and easily takes the desired shape. And small flaws during the work process can be easily hidden under the finishing touch.
The top of the plasterboard structure is covered with decorative plaster, covered with artificial stone, painted or covered with wallpaper. If the width of the opening allows, then beautiful figured shelves and niches are often created from plasterboard as additional decor.
Plaster
Decorative plaster is mainly used for finishing classic, rectangular and plasterboard arches. The surface can be made smooth or a relief can be formed over the newly applied plaster using a sponge, trowel and spatula.
Tree
A wooden arch can be made from different types of wood. Solid oak is considered the most representative and durable.
Ash is inferior in strength, but is easier to grind and carve. Pine and linden are less durable, but cheaper than noble woods. And tinting will help create an imitation of the color and texture of expensive wood. You can save even more if you purchase a ready-made structure made from solid wood, chipboard or MDF. It comes complete with trims and decorative elements to decorate corners and joints.
Finished arched structure made of MDF
Stone, brick
An arch in the kitchen made of stone or brick will strengthen and visually expand the opening. Natural (natural) material is durable, but expensive.
Attention! To decorate an arch with stone, an opening must be cut out in the main wall. For arches in frame partitions, this finishing material is too heavy.
Brickwork arch in kitchen interior
Its cheaper analogue is a decorative stone made of gypsum. This is a relatively lightweight material that can be used to decorate thin structures, such as plasterboard. You can imitate brickwork using decorative bricks. Compared to natural material, it is cheaper and lighter. The thickness of one brick is from 5 to 20 mm.
Artificial brick
Decorative stone
Mosaic
This finishing material is moisture resistant, does not burn, is durable and practical. It does not deform, is not susceptible to scratches and does not absorb dirt. Mosaic differs in texture, color and shape (it can be square, rectangular, diamond-shaped, polygonal, round, oval). The size of one tile is from 1×1 to 5×5 cm. To decorate the arch, ceramic, glass, plastic mosaics or those made of smalt and natural stone can be used. To decorate the ornament, it is possible to use small-format metal tiles.
Plastic
Stronger than drywall, but a little more expensive. Plastic is moisture resistant and resistant to temperature changes. Fire-resistant - when exposed to open fire, the material only melts. Depending on the shape, texture and coloring, plastic can imitate almost any material, for example, brickwork or wood.
PVC arch with wood imitation
Square arched opening made of plastic
Moldings and stucco
Moldings are decorative strips of different widths, radii, colors and reliefs. Made from wood, plastic or metal. Stucco molding made from gypsum is increasingly being replaced by flexible and lightweight polyurethane. At the same time, in appearance it is practically indistinguishable from the original - both graceful curves and the characteristic white color of plaster are preserved. Using water-based paint, the decor can be given any other shade if required by the design project. A kitchen with an arch decorated with moldings and stucco has a more complete, elegant look.
Portal decorated with moldings Arched doorway with stucco molding
Finishing work
The arched structure is completely ready and finishing work can begin. It is the finishing that will give the arch an architectural appearance. A perforated corner is secured to all ends of the bend with a stapler, the entire structure is primed and left to dry for half an hour. The dried arch is puttied and left to dry until the putty is completely dry. If the decision is made to paint the arch, the putty will have to be sanded with sandpaper or a sanding mesh. No sanding is required for wallpapering.
How to close the arch
If there is a need to partially or completely close the arched opening, you can use:
- classic fabric curtains. Of course, they cannot replace the door and are used more as decoration.
Usually the opening is not completely curtained, draping the curtains using braid, tiebacks or decorative magnets. The disadvantage of this decoration is that the fabric collects kitchen grease and dust;
- roller or Roman blinds, which look beautiful in combination with small arches of the correct shape. When folded, they are collected into a compact roll;
- thread curtains of various densities, colors and decorated with rhinestones;
- curtains made of wooden, plastic or glass beads. Thanks to the variety of shapes, colors and materials from which a beaded curtain can be made, it can transform an arch made in any style. It is much easier to remove dirt from such decor than from fabric curtains;
- wooden or plastic blinds that fold like an accordion and are almost invisible when folded. They can be extended both horizontally and vertically. Depending on the mechanism, they visually expand the kitchen or increase the height of the ceilings.
Decorating with a curtain made of beads
Plastic blinds
Leveling the surface
Of course, the best way to do it yourself is with putty. First, the wall and arch are primed, after which you can begin applying putty. Regardless of how the opening is formed, this stage is mandatory for all options; putty allows you to smooth out minor defects and eliminate differences between the arch and the wall.
In the case of drywall, you can immediately use finishing putty instead of the original mixture. The self-tapping screws are specially slightly recessed, so they can be easily hidden at this stage of work. To achieve a perfect result, be sure to wipe the putty after it dries.
How to make an arch for the kitchen with your own hands
You can make a semicircular arch for the kitchen yourself. For the first design experience, drywall is best suited. The flexible material is easy to bend according to a template, it is easy to process and cut, and is easily mounted on a frame. Let's look at a step-by-step plan for constructing an arched opening made of plasterboard.
Required tool:
- screwdriver;
- perforator;
- jigsaw;
- screwdriver;
- metal scissors;
- level;
- sandpaper;
- whatman;
- compass;
- Ruler and pencil.
Consumables:
- plasterboard with a thickness of no more than 12.5–13 mm;
- metallic profile;
- screws, dowels;
- primer and putty.
The door and frame are first dismantled. If necessary, expand the doorway.
Attention! If the wall thickness is less than 20 cm, then increasing the opening in it is prohibited.
- Prepare the arch frame from a metal profile, dividing the latter into three parts. The first part is equal to the width of the arched opening, and the other two are equal to its height.
- Fasten the profile at the highest point of the opening and along the walls on both sides. The frame is installed with an indentation equal to the thickness of the plasterboard sheet. The pitch of the screws when fastening is 10–12 cm.
Fastening a metal profile to the wall
- Draw on whatman paper and cut out a template for the future arch, so that you can then prepare the plasterboard parts according to the model.
Drywall parts are cut out according to a template with verified dimensions
- The next step is the installation of plasterboard parts to the metal frame.
Installation of drywall to the profile
- When the front part of the arch is mounted, take care of the end. Use a metal profile to construct a base to which the drywall will subsequently be attached. To do this, measure the profile of the required length. When calculating, take into account the bends of the arch. Then make cuts along the edge of the profile at intervals of 2–5 cm, depending on how deep the deflection is.
Preparing a base from a metal profile
- Attach the end sheet of drywall to the resulting base, carefully bending it at the desired angle.
Fastening the plasterboard sheet at the end of the opening
- The rough work is completed. All that remains is to putty the plasterboard structure, sand the surface with sandpaper and apply a decorative coating.
Finishing
Installation of a dry gypsum board structure
The method of fastening dry gypsum plasterboard requires the use of a sheet with a thickness of 6-9 mm for an arch with a radius of 1-2 m. For structures with a radius of more than 2.75 m, sheets with a thickness of 12 mm are used.
The installation procedure for the arch is similar to the previous one. It differs only in the method of sewing the inner strip, which does not require sharp bends:
- The back side of the profile is not completely cut with a knife;
- The profile is laid in a cut strip on plasterboard strips and all the cavities that appear are filled with putty;
- 12 hours after the putty has hardened, the strips are attached to the frame.
Brickwork
This arch looks original and brutal. As with masonry, it's best to trust a professional and not try to install it yourself.