The purpose of the arch in the interior
Kitchens with an arch in interior design successfully replace the doorway and door leaf. With a small investment, you can build a magnificent structure and yourself in the house.
The experts on our site will tell you how to make an arch in the kitchen, what tools and materials you will need, and you can also familiarize yourself with a selection of ready-made projects for building an arch. Our options refute the opinion that such openings are appropriate only in large rooms with high ceilings
How to make an arched opening with your own hands in 7 steps from plasterboard
To make a plasterboard arch with your own hands you will need 1-2 free days and the following materials.
Tools:
- Screwdriver or screwdriver;
- Hammer;
- Scissors/metal hacksaw or grinder – will be needed to give the profiles a rounded shape;
- Jigsaw or hacksaw – needed for cutting drywall;
- Needle roller;
- Nylon cord/wooden ruler and pencil or engineering compass - for drawing a vault template of the correct shape using the compass principle.
Materials:
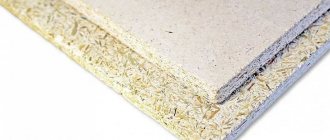
- GKL 12.5 mm - for both sides of the arch frame;
- A strip of arched plasterboard (6.5 mm) or regular (12.5 mm or 9 mm) - for the end of the arch;
- Metal starting profiles UD27 and, if necessary, strengthen the arch body with profile CD 60;
- Self-tapping screws with dowels;
- Everything you need for puttying: serpyanka, finishing gypsum putty, primer, etc.
So that making an arch does not seem complicated to you, we have divided the entire process into 7 steps.
- Carefully dismantle the old door and its frame. If necessary, increase the height/width of the opening using a hand-held diamond saw or a wall saw if the partition thickness is thicker than 20 cm.
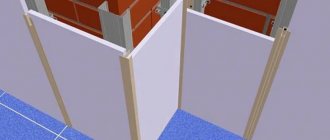
- We attach the profile frame to the doorway using self-tapping screws and anchor dowels (included in the kit). To do this, first cut the profile (UD 27) with a metal knife into three parts of the following dimensions: 1 part = opening width, 2 parts = arch height. We attach the long profile to the “ceiling” of the niche, and the short ones to the walls as shown in the photo. Then we repeat the same steps for the other side.
- Profiles must be mounted with a distance from the edge of the wall/ceiling equal to the thickness of the plasterboard;
- The fastening step is 10 cm.
- Let's start making the arch body from plasterboard. To do this, you need to draw a life-size template on whatman paper and then cut out the arch body using it. The second method is to first cut out a rectangle of the required width and height from the plasterboard, and then draw an arc directly along it using the principle of a compass - using a pencil and a cord/strap as shown in the photo below. We cut off the excess and trace the resulting part as a pattern on the second sheet of drywall. The two halves of the vault are ready.
Drawing an arc using the compass principle
- The easiest way to cut out the gypsum board is with a jigsaw, but if you don’t have one, a hacksaw or drywall saw will help.
Blank for an arch made of gypsum plasterboard
- Now it’s time to mount the two parts of the arch to the frame using self-tapping screws, recessing them flush (in level) with the drywall in 10 cm increments.
- After installation, make sure that both parts are installed level and level with each other. If necessary, their levels can be leveled using a drywall plane.
- Next we need to make and secure the end strip. We will cut out the end later, but for now we will make the basis for its installation from the same profiles. To do this, they need to be made flexible so that they can take the shape of an arc. We measure the required length of the guides, and then cut their sides in increments of 2-5 cm, depending on the steepness of the bend.
Preparing the profile for fastening to the arch
Now we screw the resulting arched profiles from the inside to the arch body.
- If the arch is deep (more than 60 cm), then at this stage you need to additionally install jumpers inside it to make the arch strong and rigid. Jumpers can be made from CD-60 rack profile and even foam “bars”;
- If the opening walls are too narrow, then the end strip is secured with glue.
- Finally, we cut out the end strip to the required length and width.
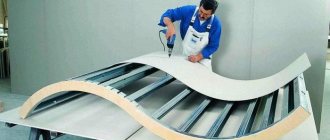
- If you bought flexible arched drywall, then you will just need to attach it to the profiles, carefully giving it the desired bend right during the installation process;
- Regular drywall needs to be processed: first, lightly run a needle roller on the marked side (!) along the entire length of the strip, wet it evenly with water using a brush or sponge, and then place the strip so that it can bend under its own weight and take on a rounded shape. This process can last 2-12 hours, you need to wait until the drywall becomes dry in appearance, but more flexible. Of course, you need to test the strip for flexibility carefully.
You need to attach the end strip to the arch in the same way as you attached the parts earlier, that is, recessing the screws into the level with the drywall and observing a step of 10 cm.
- Well, that's all, all that remains is to finish the arch - putty it, and then paint it, plaster it with decorative plaster, cover it with wallpaper, frame it with a finished arch made of MDF/wood, or cover it with natural/artificial stone, brick, mosaic.
More information on how to properly putty a plasterboard arch with your own hands can be seen in this video instruction:
Advantages of arched structures
Arched structures have the following advantages and functions:
- Increasing space by combining rooms. Through passages allow you to visually expand the room and reduce the number of lighting fixtures;
- Creating a unique environment taking into account the characteristics of the room, the ability to see what is happening in the next room (children playing, receiving guests, watching TV shows);
- An excellent alternative to the usual doors, screens, partitions when zoning a large room, the ability to separate a children's room, a work area, a dressing room, while maintaining the style of the rooms;
- Using a design with shelves for storing items; electrical wiring and telephone cables can be hidden in the box;
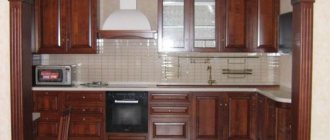
- A kitchen design with an arch is beautiful, elegant, and allows you to quickly and inexpensively update your interior. Having a wide variety, it fits organically into any style;
- A large selection of types and types of arched structures using various materials. A cost-effective solution if you make the arch yourself;
- Combining an arch with an interior partition, arranging a doorway, combining it with sports equipment (height gauge, crossbar, wall bars, back massager), using it as a serving table or bar counter.
What furniture to choose
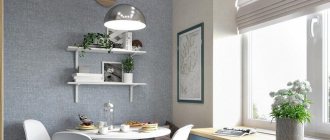
You are unlikely to be able to gather guests in the kitchen in a Khrushchev-era building. The living room is better suited for this. And a good-quality dining table definitely doesn’t fit here in terms of dimensions. Therefore, you will have to settle on a small table and two chairs.
A model with a round or oval tabletop is most suitable. It is advisable to choose a light color; the choice in favor of tempered glass is also justified. Many designers recommend a transforming table that folds quickly and takes up minimal space.
A good alternative is a bar counter. It's easy to push chairs under it. The rack will be an additional storage space, and in combined rooms it will perfectly cope with the role of a partition.
The structure can be a continuation of the window sill, work surface, or in contact with a free wall. It is made in the same color as the set or tabletop, sometimes a contrasting tone is selected. The logical conclusion is high bar stools, hard or soft, with or without a back, but not bulky or lightweight.
Which is better, a door or an arch?
If we compare an arch and a regular door, then the arched ceiling will take the leading position as a newer, elegant, functional design that saves space, especially if it is located in a narrow corridor where it is not possible to open the door wide. Has more functionality.
An arch in a modern kitchen interior carries aesthetic and stylistic directions, preserves the purpose of the room, improves its parameters, and adds light. But the choice remains with the owners, their preferences, living conditions and room layout.
Functional cabinets
For a small kitchen it is better to choose custom-made furniture. In this way, it is possible to take into account all the features of the room and make the most of every centimeter.
The absence of wall cabinets undoubtedly creates a feeling of lightness. But when there is a shortage of usable space, such a solution is not appropriate: there will be nowhere to place all the utensils necessary for the kitchen. It is reasonable, on the contrary, to increase the height (and therefore the capacity) of the top row of cabinets and use the space right under the ceiling.
Avoiding hinged doors also saves space. They can be replaced with folding, tilting or lifting doors, which are fixed at a level convenient for you. Inside the cabinets, make shelves of different heights to avoid restrictions when placing cans, bottles, and bulky boxes. A narrow, impractical niche will be filled with a built-in pencil case with a retractable design.
The lower cabinets are equipped with drawers. And in order to organize their internal contents, it is worth considering a system of separators.
Features of arched passages
Some have concerns about the construction of such structures:
- Possibility of drafts;
- Smells from the kitchen will move throughout the apartment. You will need to install a powerful hood in the kitchen;
- Violation of the strength and durability of wall structures, panel ceilings;
- Arched structures are not allowed at the junction of the kitchen and the nursery or bedroom.
- The arch between the room and the hall in small houses does not look aesthetically pleasing, is ineffective and has no direct purpose;
Types of arches
After you have decided how to design the opening, you need to choose the design of the arch and the material from which it will be built. There are several types of arches for the kitchen, the design of which will determine the type of room.
What shape to choose a kitchen set
Due to serious space limitations, luxury projects will have to be abandoned. Compactness and rationalism are at the forefront. It would be quite appropriate to have a set with a linear layout, when all the appliances and cabinets are against the longest wall.
However, if there are a lot of household appliances in the kitchen, arranging them in one row will be problematic.
In this case you need to choose:
L-shaped set , located along two adjacent walls. The corner is also involved - a sink is usually installed in it. And two working surfaces will not be superfluous.
The U-shaped layout is not a very good solution for a small kitchen. It will solve storage issues, but will take up all three walls and leave no room at all even for a tiny dining table.
In principle, any color of the headset is possible. But the most advantageous option would be furniture in light shades using mirror and glossy elements.
Grace of figured arches
Figured arches are distinguished by a large selection of elements in the upper part. Here you can discern oriental motifs with cone-shaped spiers, smooth, rounded lines in the rococo style, and practical, functional curves of modern and high-tech.
In the photo of the arch in the interior of a modern kitchen, you can choose the bend you like and print the template from the website.
It is better to entrust repair work on the construction of arched boxes to professional builders, who will take the necessary measurements, determine the feasibility and feasibility of such a design, and help you choose high-quality material.
Classic Slavic style
The most common type of arch is a rectangular arch with rounded corners. Used when transitioning from the kitchen to the dining room or living room. It adds elegance to the design of the room. If necessary, it can be easily complemented with decorative details and shelves.
Note!
Kitchen in minimalist style: new designs for minimalist kitchens. Choice of colors, furniture and additional decor + 120 photosKitchen in the Art Deco style - TOP-190 photos of kitchen interiors in the Art Deco style + DIY stylish furnishing ideas
Kitchen in the loft style: TOP-180 photos of kitchen design in the loft style, design features of the style with examples of interiors