Drywall has long become a very popular material. Currently, it is widely used in construction. This popularity is largely due to the fact that no special, specific tool for drywall is required. Any craftsman has most of what he needs: a tape measure, a screwdriver, a drill, an angle grinder, etc. There are not many tools that are used exclusively when working with plasterboard and nowhere else. However, overall the list turns out to be impressive. So, what does a master need to carry out all stages of work?
Puttying seams
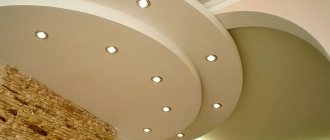
Few people would like the prospect of living among bare walls made of nondescript gray or green plasterboard.
Therefore, after installation it must be prepared for subsequent finishing. If the owner of the premises is going to paint the walls or glue wallpaper on them, he will have to take a close look at the joints. To do this, you need to buy a primer, as well as gypsum putty and reinforcing mesh (serpyanka). Before you start work, you should make sure that all the screws with which the plasterboard was attached to the profiles are driven flush, and the sheets themselves are absolutely securely fastened. Places of non-original (cut) seams are treated with a primer. Some craftsmen additionally expand the joints, but this leads to an increase in the consumption of gypsum putty mixture. Next, prepare the solution, after which it is carefully applied using a spatula along the seam line and onto the screw heads. When sealing non-original joints, it is necessary to use reinforcing mesh. It is applied to the freshly smoothed solution using a spatula.
Right outer corners are closed using a special perforated corner, which is secured with mortar. The latter, regardless of its location - at a joint, a screw head or a corner seam - must be smoothed out and completely cover the metal. Laying the mortar in “waves” and “steps” is not allowed. After processing the joints, the entire surface of the plasterboard wall or ceiling is puttyed, or a special glue is applied onto which the wallpaper chosen by the owner of the room is glued.
If the technology for installing the frame, its sheathing and puttying of drywall has been followed, the walls or ceiling made from it will be visually indistinguishable from ordinary ones. Upon completion of the finishing cycle of finishing work, the owner of the premises will only have to enjoy the beauty of the new interior.
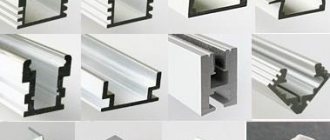
How to count the number of profiles
Knowing what type and type of profiles there are for drywall, their dimensions are not enough. It is necessary to calculate the quantity of each type. It will be easier to calculate if you draw a frame plan on a piece of paper, sign the names of the profiles, and put down the dimensions. This will not take much time, but will help you determine the quantity more accurately.
You need to have a clear idea of what the frame will look like
Calculation of the number of guides for one wall
If the walls are very uneven, you can level them using drywall. A parallel wall is erected, but set strictly according to the level. In this case, the calculation of the number of profiles for drywall will be as follows:
- Guides - PN. They are mounted around the perimeter. To find the footage of guide profiles for wall cladding, measure its length and height, add and multiply by 2. If there are windows/doors on the wall, the guide profile is mounted around the perimeter of these openings. To the resulting figure we add double the height of the opening and its width.
- Rack profiles for gypsum boards - SP. As already said, they are placed in increments of 60 cm. Moreover, the outer opening cannot be more than 60 cm. Even if 10 cm remains, an additional stand is installed. First, we count the number of racks: divide the length of the room by 60 cm, add one more - a corner one. For example, the length of the room is 4.75 meters. 475 cm / 60 cm = 7.91 pcs - this will be 8 racks + 1 corner, total - 9 pcs. Next, we look for the footage - multiply the found figure by the height of the room. We get the required length for the racks: 9 m * 3.2 m = 28.8 m.
- Jumpers. Rack profiles are used. They are placed in increments of 60-80 cm, but at the same time, the vertical joints of the plasterboard sheets should also fall on such a partition. Here you will have to count depending on the chosen step, and then add the found figure to the one calculated in the previous paragraph.
If all the walls in a room are covered with plasterboard, a similar calculation is carried out for each wall, then the results are summed up.
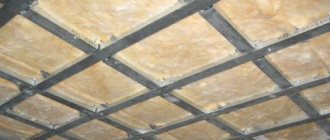
Number of profiles for plasterboard for suspended ceilings - PP and PNP
The calculation here is a little simpler: the frame is assembled “in a cage”, so it’s easier to calculate it. Otherwise the approach is the same as described above. So we think:
- The footage of PP profiles for suspended ceilings is equal to the perimeter of the ceiling. We measure the length and width of the room, add and multiply by 2. This will be the desired figure. For example: a suspended ceiling will be made in a room measuring 3*4 meters. Calculation of the footage of PP profiles: 3m + 4 m = 7 m, 7 m * 2 = 14 m. For this room you will need 14 meters of PP profile.
- PNP profile footage. It is better to place load-bearing profiles along a short wall. In this case, divide the size of the longer wall by 60 cm: 400 cm / 60 cm = 6.66 pcs, round up - 7 pcs. There is no need to add a corner post, since there will be a guide profile around the perimeter and the posts are tucked into it. The carriers from the PNP profile are located along the short side (in this example it is 3 meters), that is, the required length of this type of profile is 7 pieces * 3 m = 21 meters.
- Next, we count the number of PP profiles for partitions - 60 cm long sections that are installed between two adjacent load-bearing profiles. In this case, the partitions will be located along the long wall. Therefore, we consider this: 300 cm / 60 cm = 5 pcs, and the total length will be 5 pcs * 4 m = 20 m.
In total, for a suspended ceiling in a room measuring 3*4 meters you will need 14 m + 20 m = 34 m of PP profile, 21 meter of PNP profile.
Gas nailer - recommendations for choosing
Many craftsmen are wondering what type of nailers to choose - drum or magazine nailers. Again, both methods have advantages and disadvantages. So, the drum holds a much larger number of nails (up to 300), which in turn makes the unit very heavy. A nailer with a magazine is much more compact and suitable for small jobs.
You can adjust the driving depth in different models using different devices - from a wheel to moving the spout. However, not all instruments have such a function, although it is extremely necessary for sheathing models. The shot does not always occur by pressing the trigger; sometimes this is possible by pressing the toes of the tool, or a combined option is offered. In shell models, the ability to make serial and single shots will also be relevant.
Do not forget that a nailer is a rather traumatic tool, so the more protective functions it has, the calmer you will be about the safety of materials from accidental or repeated shooting. Take care of the convenience of removing a stuck nail - there are even special tools for this.
- Author: Mikhail Malofeev
Rate this article:
- 5
- 4
- 3
- 2
- 1
(1 vote, average: 4 out of 5)
Share with your friends!
Choosing drywall
Types of drywall, scope of application and their color markings.
Today there are 2 types of plasterboard sheets:
- GKL. They are ordinary plasterboard sheets for wall installation.
- GKLV. It is a moisture-resistant plasterboard, which is used in rooms where there is high humidity (bathroom, etc.).
- GKLVO. These are moisture-resistant and fire-resistant sheets, and the duration of exposure to fire depends on the manufacturer and brand of drywall.
The most common are:
- plasterboard, which has sheet dimensions of 2.5x1.2x0.125 meters;
- a rack profile with guides and dimensions of 2.8x2.7 cm and an arched one, used for constructing plasterboard arches.
To install plasterboard sheets with your own hands, you need the following tools:
Tools for installing drywall.
- Hammer. It is recommended to use a light and not very powerful tool (no more than 1 kW) and with an impact force of up to 5 kJ. It is preferable that there is a triple mode between switching (breaker, impact and drilling mode). Using this tool, you can not only drill the necessary holes, but also, using special attachments, you can make various mixtures for installation or putty work for cladding.
- Drill. It must be light weight, variable speed, since the construction of wall and partition profiles is based on a metal base.
- Screwdriver. For home use, you can get by with a small electric screwdriver or small electric drill. Frequent and professional use requires a high-quality screwdriver. The speed, quality and ease of work when installing walls, partitions and elements between them will depend on the characteristics and the chosen brand.
- Grinder or angle grinder for cladding. A lightweight and convenient small tool is required. You can purchase any inexpensive model.
- Electric jigsaw. Using it, you can cut out various intricate details from plasterboard; it is necessary when installing plasterboard sheets on a wooden profile. It is better to choose a convenient tool.
- Roulette. Needed almost everywhere. The most convenient and optimal sizes are a width of 1.9 to 2.5 cm and a length of 5 m. We recommend tape measures with a two-component or cut-off body, with a magnetic tuck.
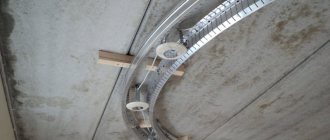
- Metal scissors. Needed for cutting metal profiles. They must be of good quality, since the main part of the installation of a metal profile frame is carried out with their help. First of all, this applies to the installation of an ellipsoidal or round ceiling. Scissors have three types: straight, right and left, depending on their purpose and owner.
- Hammer. Should weigh about 300 g, have a durable and lightweight handle. The use of a carpenter's hammer is recommended.
- Drywall knife. Must have a segmented blade, preferably with a standard width of 1.8 cm. Drywall knives have retractable and screw blade stops or a locking system. It is recommended to purchase a knife that has a metal body and a metal rubberized handle, which makes it easier and more convenient to use.
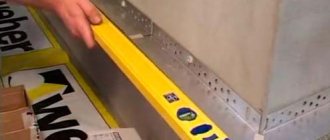
- Level. Determines the quality and accuracy of work. When working with plasterboard sheets, various levels and hydraulic levels are usually used. It is recommended to purchase levels with a magnet or side magnetic tape, which will make it easier to install metal structures. If there is a considerable amount of work to be done in large rooms, it is recommended to purchase a laser level. The best option is to have a self-leveling laser level that has four functions (diagonal, horizontal, rotation and angle 45°C, 90°C).
We advise you to study - Bedroom design in the Scandinavian style - elegant and simple at the same time...
Having a mounting belt, riveting pliers, a plumb line, a rule and a drywall plane will not hurt. Related tools include a tapping cord, a square, construction pencils and markers for marking, a cutter for fixing a metal structure, and many other tools that may be needed for specific work in a particular room.
https://youtube.com/watch?v=Xax0g8JeZeg
Measuring tools for marking and dimensional control
High-quality installation of gypsum boards requires precise markings and preliminary measurement of the material. Classic tools include a tape measure, a level, and a plumb line. However, there are also many modern devices that can significantly speed up the process and achieve better results. Let's consider what devices are used by experienced craftsmen today.
Roulette
This is a well-known measuring instrument, the body of which is made of plastic or metal, and inside there is a measuring tape. Most often, tape measures 3 m long are used. However, to perform various long measurements, it is better to have a five-meter tape measure.
Level
This tool, used for working with drywall, allows you to control the slope of any vertical or horizontal surface. The product consists of a metal case with an ampoule built into it (there may be several of them), which is filled with an alcohol-containing liquid that has a certain color. The angle of the base or structural element is determined by the air bubble inside. With a perfectly flat surface relative to the ground, it should occupy a middle position, without going beyond the existing marks.
Modern manufacturers offer a variety of level models of various sizes. Their differences may lie in the number of built-in tubular indicators, as well as their location. Some products are equipped with magnets, which is convenient when aligning elements of metal structures. Particularly popular are devices with laser pointers, which allow marking to be made as quickly as possible.
Metrostat 300
A sliding tool equipped with a measuring scale and a bubble level, the length of which can reach 3 m. With its help, you can control the horizontal and vertical position of the structure. In addition, there is a special nozzle designed to hold the plasterboard in a vertical position during installation work.
Hydraulic level
Makes it possible to break down horizontal planes, as well as transfer marks from one surface to another. The hydraulic level is mainly used when working with suspended ceilings. The marking lines are determined using a hose, the length of which is usually at least 10 m.
Line laser level
With modern measuring technology, almost perfect results can be achieved. One of the devices widely used in working with drywall is a linear laser level (plane builder), which allows, using mutually perpendicular beams, to construct projections both vertically and horizontally, which makes it possible to perform high-quality markings of absolutely any plane.
Laser rotary level
This device, operating in different modes, allows you to set vertical, horizontal and inclined planes. The laser beam in such devices constantly rotates around its axis. Thus, it is capable of projecting a plane at 3600. These devices are convenient to use when working in large rooms.
Square
This tool is used primarily for marking corners. Structurally, the device is quite simple and consists of a ruler of a certain length, mounted in a metal base. It can also be used to control the rectangularity of certain elements.
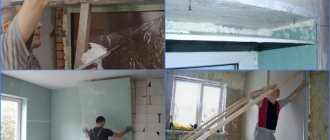
Drywall installation - what you need to know
Installation of drywall is carried out in several ways:
- Apply strong special glue to leveled surfaces. Next, you will need a finishing finish, for example, dry plaster. It is not recommended to use it to make wood surfaces even.
- On a pre-prepared frame. With a similar installation, it can also be used for wooden floors. The frame can be made of either metal or wood.
Wooden bases are cheaper, since only blocks of wood are required for execution. Metal ones are made from galvanized profiles, special hangers, and connecting elements. This is a more reliable and durable option.
Before starting installation, you should familiarize yourself with several rules:
- The joints of the sheets are placed strictly on the frame and fixed with self-tapping screws.
- The seams must be taped with joining tape.
- External corners are closed with special corners.
- Interior partitions are mounted in two parallel layers.
Manufacturers
Today the market is filled with a large number of manufacturers of construction tools. One of them is the Polish manufacturer Topex. This brand produces hand tools of fairly good quality and for relatively little money. Consumers are well familiar with this company.
The products of this brand are largely intended for non-professional use, but specialists often purchase them as well.
Another manufacturer of hand tools is the Canadian company Fit. This company has existed on the Russian market since 1999. During this time, it has established itself as a manufacturer of high-quality, reliable and inexpensive tools. Also among Fit products you can find consumables for power tools.
Since 2003, hand tools and equipment produced by the German company Matrix have appeared on the domestic market. The factories where these products are manufactured are located in China and Taiwan.
On the shelves you can find a large assortment of instruments made in Russia. Tools manufactured by domestic companies are not inferior in quality to imported ones, and the price can be several times lower. Among the Russian manufacturers are SMI LLC, Novosibirsk Instrumental OJSC, Metallist, SibrTech and others.
Among manufacturers of power tools intended for home use, .
Bosh tools have long proven themselves in the market. This company's product range includes more expensive professional tools. A distinctive feature of this instrument is the design of the body in blue. If the instrument is presented in green colors, it is intended for home use. Both types of equipment from this manufacturer are distinguished by high quality and reliability.
Interskol is a Russian manufacturer of power tools. The products of this brand are not only popular in their homeland, but are also exported abroad. The company appeared on the market 15 years ago and during this time has achieved good results. It is one of the top ten power tool manufacturers and has received international recognition.
A significant advantage of the company is the presence of a large number of service centers throughout Russia.
Gas nail gun – advantages
The gas-powered unit has a number of significant advantages over other models powered by pneumatic, powder or electric drives. Obvious advantages are the complete autonomy of the unit from external energy sources. In this regard, only cordless nailers can “compete” with gas models, but they are not enough for such a large number of shots, and the shot force is only sufficient for small fasteners and soft substrates, such as wood, plastic and drywall. The ergonomics of a gas nailer also benefits because it is not tied to an energy source by any hoses or wires, like a pneumatic gun or electric models. This is why roofers prefer gas-powered tools.
Tool used when working with plasterboard without electricity
A tool used when working with plasterboard without electricity.
- An important tool for installing drywall is a bit. Very often, when working with plasterboard, a pinch occurs when screwing in a self-tapping screw. If the self-tapping screw goes through with its head, then the panel does not press. To prevent this from happening, you should purchase a bit with a limiter. Thanks to it, you will increase the speed and quality of installation work.
- Pliers are a necessary thing when working with plasterboard.
- Metal scissors. It is best to have two scissors. With long jaws - in order to cut the profile in accessible places, with curved short jaws - for those cases when it is difficult to get there first.
- A cutter is a device that makes holes in a profile.
- Pliers – connect profiles without the use of hardware fasteners.
- A needle roller is necessary so that you can bend a sheet of drywall (for making arches and other smooth boundaries). You only need to go over it on one side of the sheet. Next, use a brush to moisten it with water. Water passes into the gypsum board through the holes and it can be bent.
- Grab – used if you need to move the sheet alone.
- Cord - necessary in order to beat a number of profiles into one plane.
- Building level. You will need two of them, 1 m and 2 m long. It is advisable that there is a magnetic strip on it, then you do not need to hold it with your hands.
- A cutter is a necessary tool for professional work; it allows you to cut drywall into equal parts. Saves time. A disc cutter is indispensable if you need to cut narrow strips from a gypsum board sheet (as for slopes). No pre-marking required, it can cut on both sides at the same time. After cutting, a smooth end remains, which does not require further processing with a plane.
- Rasp - removes excess drywall at the edges of the sheet.
- Edge plane - chamfers the transverse edges of drywall. This increases the seam area. You can’t do without it, since proper processing of the edge of the sheet is necessary for subsequent high-quality puttying of drywall seams. It can be replaced with a painting knife.
- Small end plane - designed for processing the ends of gypsum boards. A very convenient and effective tool for adjusting and aligning the edges of drywall. Allows you to quickly replace worn blades. With its help, you can achieve the tightest fit of the ends of the main body to each other.
- Using a lift or spacer alone, you can easily lift a sheet of drywall to the ceiling or wall.
- A lever will be needed to raise the gypsum board from the floor level.
- Roulette. It is best to choose a longer model with magnets.
- Use a square to measure the required angles.
- A small hacksaw will be needed for curved cuts of HA.
- Knife – necessary for cutting and processing drywall. You will need a painting knife or a special one for working with plasterboard. The knife has a metal-reinforced blade that can be retracted when not needed. Replacement blades are sold separately. Using a knife, we cut the plasterboard on one side, break it and cut it off on the other side.
- You will need a hammer to hammer in the dowel nails.
- A dial saw is needed to make round holes of various diameters: for sockets, switches, for lamps. Sometimes she is mistakenly called a ballerina.
- A handle is a device used to carry two sheets of paper at once by two people.
- The knife-saw is used for shaped cutting of drywall, for example, to cut a hole for a socket or pipe. The principle of operation is quite simple: a hole is carefully made and cutting begins.
We advise you to study - Convector or infrared heater - which is better to use
This list of necessary tools can be expanded, or significantly reduced. It all depends on whether installation of gypsum boards is your professional occupation or whether there is simply a need to make home repairs.
Pros and cons of using cutters
This type of instrument is not very popular yet. It’s difficult to name the reasons, because the thing is really good. Especially for those who install plasterboard systems, and for home craftsmen, this is also a necessary thing. What are the advantages:
- Fast and reliable connection of profiles. The speed of installation of the frame under drywall increases significantly. The principle of operation is simple: insert the parts to be connected between the jaws, squeeze the handles, move, repeat. And so on as many times as required. Punch for drywall profile. This is also what this instrument is called.
- No need to use fasteners. This saves time and money.
- The tool is hand-held, so no electricity is needed. You can work on any objects.
- There is no protrusion at the junction of the profiles. When mounted with rivets or self-tapping screws, the head protrudes above the surface of the profile. Self-tapping screws have more, rivets have less. This prevents the sheet of drywall from laying flat without bending. When using a cutter, the bends remain on the “wrong” side of the profile. The front is obtained without protrusions. The sheet lays flat, which reduces the time for putty and its consumption.
For installing drywall, the absence of protrusions is definitely a plus
Few of those who have tried to work as a cutter return to self-tapping screws. Although, I must say, there are some. Sometimes in difficult places, the connection is “grabbed” with a self-tapping screw, then a cutter is used, and the self-tapping screw is unscrewed. But these are those who like to play it safe. With some work skill, additional fixation is not required.
Flaws
Now about the cons. Using a plasterboard profile cutter really saves time. But the tool is manual and requires the application of muscle force. With large volumes of installation, namely structures made from profiles, fatigue quickly accumulates. And by the end of the working day, the speed of work drops. The better the tool, the less effort is required, but it is still needed. And this is a minus.
The second drawback is the difficulty of disassembling. To separate the two profiles, you need to bend the metal petals. It takes more time than when unscrewing screws. But less than when removing rivets. It seems that these are all the difficulties and disadvantages of working with a cutter.
Not everywhere you can crawl up and make a cut. Then you have to use screws and a screwdriver
There is another drawback, which is due to the shape of the working part. Some components - jumpers, clamps - are simply impossible to “reach” with a cutter. The punch won't fit in there. There are models with very large “windows”, but they are not very good for regular connections. For professionals, having several different models is normal, but for home use it is clearly overkill.
Self-tapping screws or notches
It has already been said that when using cutters the sheet lies flatter. And this is a clear plus in favor of the expanded connection. The second unconditional plus is saving time. The third is the lack of consumables.
The disadvantages of joining GK profiles with a cutter include insufficient fastening strength. Self-tapping screws are more reliable. Perhaps, but the strength of the frame is needed only until it is sheathed with gypsum boards. And it will be enough, even if you make only one fastener for each connection. But it’s up to you to decide which is better - a cutter or self-tapping screws.
What is a sheet metal cutter?
A cutter or punching pliers is a hand-held tool for joining sheet metal products. The connection occurs due to the formation of a through hole in the parts being connected. The parts to be connected are fixed by bending the resulting metal petals. That is, to connect sheet metal products using a cutter, no fasteners or additional actions are required.
We placed the working part of the tool in the right place and pressed the handles. The metal breaks through, its pieces bend. All. Due to the fact that the metal is “pierced”, another name for this tool came to be - a profile punch. The same tool can be found under the name “pliers for connecting HA profiles.” This is exactly how some manufacturers position it. There are other names - perforation, profile hole punch. This is already from the jargon of builders and home craftsmen.
Metal profile cutter: roller type device
Externally, a cutter is the same pliers, but with long handles and an unusual structure of the working part. Like regular ticks, they have two jaws, but they are different in shape. On one side there is a stop, on the other there is a punch. A punch is a protruding part that makes a hole in metal. The stop is a thickened part with a hole into which the punch fits.
Photo of how the cutter works. He makes a through hole in the parts to be connected and bends the metal petals
The shape of the working part is designed so that the metal petals that are formed when making a hole are slightly bent. This ensures reliable fixation of the products relative to each other. The hole shape is usually rectangular, but can be square or round. Rectangular is preferable because it gives a more “rigid” connection.
Types and designs
The assortment of cutters in our stores is not so large, but in large construction stores you can see about a dozen different models. What are they? First, there are models for sheet metal (pictured below). They have a very small gap in the working part, which is also called a “window”. For sheet metal cutters, this window is only about a centimeter wide. Any metal will fit there, but the profile for drywall is only a guide (PN) or rack-mount (PS) with small shelves. And then there may be problems.
A cutter for a metal profile should have a larger “window” in the working part
If we talk about models for connecting drywall, they have a larger “window”. It is made in the form of a square, rectangle or with rounded corners. The larger the window, the easier it will be to fasten rack profiles with any shelf width. But then the size of the “head” increases, which is not always convenient. Professionals simply have several different tools, and for repairs and household use they choose something in between.
This is already a tool for professionals - with holes of different sizes and shapes
There are also different shapes of holes: rectangular, round, square. They come in different sizes. The thicker the metal, the larger the punch (or bit) required. There are models with replaceable punches, and there are rotary ones. For rotary or revolving ones (pictured above), the attachment is changed by turning a wheel with bits of different shapes and sizes. If you plan to work with sheet metal often, this is a good thing. For occasional use, such luxury is unnecessary.
We advise you to study - White color in the interior of various rooms
You can fasten profiles near the ceiling and floor with a regular tool, but it is more convenient to work with a special
There is also a cutter for metal profiles for convenient fastening of profiles under the ceiling or near the floor. Their handles are not a continuation of the working part, but are installed at an angle. Some (Ultra Profil EDMA) are at an angle of 90°, others are at 45°. This tool further speeds up the work when creating frames for suspended ceilings.
One-handed and two-handed and principle of operation
It is also worth remembering that there are one-handed and two-handed models. One-handed ones have a return spring that opens the handles after the tension is removed.
Working one-handed is far from easy. Especially on good profiles made of normal metal. So often one-handed ones are still operated with two hands. In this case, the procedure for working with the cutter for KG profiles is as follows:
How the cutter works: it pierces both profiles, bends the edges inward
- We set profiles by level.
- With your left hand we fix them in the desired position.
- Tool on the right. We bring its working part to the desired point, compress it until the bit hits the metal.
- We remove our left hand (the profiles are “held” by the cutter), and squeeze the handles with both hands.
Two-handed work is different in that the handles are at such a distance that you can’t even grab them with one hand. Well, they are also designed to connect thicker metal.
Disadvantages of installing a profile using a cutter
With all the advantages, there are also disadvantages. Many professional models have a high cost, so not all builders decide to purchase them so as not to increase costs. If used frequently or/and incorrectly, the device fails—the return spring breaks. This will require expensive and time-consuming repairs.
The scope of application of the cutter is limited to connecting metal profiles to each other. It is better to work with the tool while wearing gloves to protect your hands from calluses.
What tool do you use to fasten the gypsum board profile?
Self-tapping screws
Cutter
Types of batteries
Types and characteristics of batteries.
- Nickel-cadmium - used in household tools, designed for approximately 1000 charges. The disadvantage is the gradual decrease in capacity when charging an incompletely discharged battery (memory effect).
- Nickel-metal hydride - also used in household tools, designed for 500 charges, and have a memory effect. The last drawback can be eliminated by having a spare battery.
- Lithium-ion – do not have a memory effect; are considered more environmentally friendly, as they do not contain cadmium, which is harmful to humans; do not tolerate negative temperatures well.
There are also screwdrivers that can operate from the mains. However, their use when installing gypsum boards is not very convenient, since the work area is limited by the length of the cord and such a tool is heavier
However, if there is a lot of work, you can pay attention to such models
It is important that the tool you choose fits comfortably in your hand. A handle located at the center of gravity of the screwdriver is usually more convenient than a pistol-type handle
A handle located at the center of gravity of the screwdriver is usually more convenient than a pistol-type handle.
A screwdriver can be replaced with a drill. However, it is heavier and therefore not as comfortable to work with. In addition, the drill does not have a limiter.
Grinding tools
Grinding grater
The product in the form of a plate equipped with special clamps for replacing the mesh is used in the process of dry grinding of plasterboard sheets and seams treated with a putty mixture.
Grater with extendable handle
Here, in addition to the clamps, there is a handle, which is secured in a hinged manner. The tool is designed primarily for working in hard-to-reach places. If necessary, the handle can be extended independently, thus increasing the range of action. This will allow the technician to be away from the area with the most dust generation.
Vibratory grinders
These devices allow you to speed up the surface cleaning process, which is due to a fairly high vibration frequency. In addition, such devices are capable of absorbing dust that accumulates in a special dust collector.
If you notice an error, a non-working video or link, please select a piece of text and press Ctrl+Enter .
0
Mistakes when working with drywall
In any type of construction work, strict adherence to technology is important. It is the latter that guarantees the quality and durability of the construction or repair result.
Unfortunately, quite often inexperienced craftsmen make serious mistakes when working with drywall, which ultimately lead to the most disastrous consequences. What exactly should be avoided when creating plasterboard structures in the interior?
- Violation of the installation technology of the profile structure
Perhaps the most common mistake when installing a frame under drywall is the discrepancy between the profiles used and their purpose. DC profiles cannot be installed instead of UW type profiles, etc. The same applies to fastenings and any other structural elements. Also, during installation, it is necessary to carefully monitor the quality of fastening of guides, transverse and, in particular, reinforcing profiles.
- Application of unforeseen profile cutting technologies
When installing a frame under drywall, the length of the metal profiles used will have to be adjusted one way or another. Under no circumstances should this be done using a circular saw. At high rotation speeds of the cutting disc, the profile will heat up and the galvanization at the cut site will burn out. In the future, this area will be susceptible to corrosion, which can ultimately lead to weakening and even destruction of the structure.
- Extension of profile walls
When the walls of a metal profile are unbent, its load-bearing capacity decreases, which leads to a violation of the integrity of the structure during cladding or, what is much worse, after finishing work is completed.
- Installation of gypsum boards with the back side facing out
The biggest mistake when creating plasterboard structures is to use the back side of the sheet instead of the front side. If the gypsum board is wall-based, this will lead to unevenness and mismatched edges when adjacent sheets meet. In the case of moisture-resistant drywall, the front part, specially protected from moisture and temperature changes, will not be able to perform its functions, which will lead to swelling of the gypsum and inevitable destruction of the structure in the future.
- Refusal of suspensions and deliberate weakening of the frame
When finishing complex surfaces, difficulties often arise with fixing the profile system
It is very important to understand that with the weight of one standard sheet being 30 kg and the installation of the frame being insufficiently reliable, the latter will soon fail. This can happen literally after finishing the drywall, that is, with the addition of additional weight of finishing materials
- Violation of the frame diagram
If the pitch of the profiles is chaotic, with too wide or, conversely, too narrow indentations from the walls and from each other, this will cause serious problems during installation and further operation of the structure. The latter can simply sag and the drywall can crack, which is unacceptable. In addition, more work will need to be done, of course, with additional material costs.
- Fastening gypsum boards “in a row”
The list of the most popular mistakes when installing drywall is installing sheets in one row. The result of this is unevenness at the joints that cannot be eliminated during finishing and the occurrence of seam cracks. To avoid this, it is strongly recommended to install the gypsum boards in a staggered manner.
Video: Cordless drywall screwdriver DWC 18-4500 | DWC 18-2500 – Festool
8. Hand sanding blocks / sanding pads MIRKA
Article: KIT01HANDYSet of Handy MIRKA hand block with hose and Abranet abrasive material | Article: 8391200111Manual sanding block Mirka Handy 80 x 230 mm 55 holes Velcro MIRKA | Discount: 16% Article: 8391500111-AM Mirka set: Hand sanding block 70 x 198 mm + Abranet Ace 70 x 420 mm P120 1 pack of 50 pcs |
| Discount: 13% Article: 8391155111-AM Mirka set: Hand sanding block 70 x 400 mm + Abranet Ace 70 x 420 mm P120 1 pack 50 pcs | Article: 8391150111Manual flexible sanding block Premium 70 x 400 mm 53 holes Velcro MIRKA | Article: 8391155111Premium hand sanding block 70 x 400 mm 53 holes Velcro MIRKA |
Article: 8391700111Premium hand sanding block 115 x 230 mm 32 holes Velcro MIRKA | Article: 8391500111Premium hand sanding block 70 x 198 mm 22 holes Velcro MIRKA | Article: 8391400111Hand sanding block Premium 70x125mm 13 holes Velcro MIRKA |
Article: 8391702011Hand sanding block with dust extraction 115 x 230 mm 36 holes MIRKA | Article: 8391502011Hand sanding block with dust extraction 70 x 198 mm 22 holes MIRKA | Article: 8391520111Hand block set Premium 40 holes 70 x 198 mm MIRKA |
Ideal for sanding corners as the abrasive is only attached to the base of the block
9. Brushless sander for walls and ceilings Mirka DEROS
Article: MID6802022Electric grinder 220V Mirka DEROS 680CV 150mm orbit 8.0 MID6802022 | Article: MID6252022Electric rotary orbital sander MIRKA DEROS 625CV 150mm, orbit 2.5mm MID6252022Reviews (1) | Article: MID5502022Electric rotary orbital sander Mirka DEROS 550CV disc 125 mm orbit 5.0Reviews (1) |
Article: MID6502022Electric rotary orbital sander Mirka DEROS 650CV disc 150 mm orbital stroke 5.0 MID6502022Reviews (2) | Article: MID5650202CAElectric rotary orbital sander Mirka DEROS 5650CV disc 125-150 mm orbit 5.0 mm IN CASE MID5650202CA HIT!Reviews (6) |
View all delivery options for the Mirka Deros grinder in our catalog.
MIRKA DEROS 5650CV – electric rotary orbital sander 220V. The most compact, ergonomic and powerful machine in its class. Brushless motor – low maintenance. Without external power supply. Lower vibration level compared to analogues. 2 in 1 solution: 125mm and 150mm soles included.
- Vertical surfaces, plaster walls, interior decoration: easy to move, no external power supply, two-handed grip is convenient for intensive sanding, for example, removing a thick layer of paint, low profile body gives unrivaled control over the process.
Bestseller !
10. Festool construction vacuum cleaner (with auto-shaking and self-cleaning filter, etc.)
Article: 574947Dust extractor Festool CLEANTEC CTL 26 E 574947Reviews (2) | Article: 574978Festool CLEANTEC CTM 26 E AC dust extractor with Autoclean systemReviews (1) | Article: 575286 |
How to choose the most durable components for gypsum boards
Due to its characteristics, gypsum plasterboard (GKL) has gained great popularity as a finishing material. It is used for wall cladding and when creating interior partitions.
Types of gypsum boards:
- Ordinary. It is used in rooms with normal temperatures and humidity.
- Moisture-resistant and water-resistant (GKLV). Designed for rooms with high humidity. Fungus and mold do not form on it.
- Fire resistant (GKLO). Necessary for areas where there is a high risk of fire. It is not used in everyday life, since the conventional version (gypsum plasterboard) meets all fire requirements.
The components for this material are selected very carefully. They must be durable and reliable.
Products of poor quality may cause structural failure. In terms of performance, the best solution would be galvanized steel fasteners. Such parts have good resistance to loads, corrosion and have a low price.