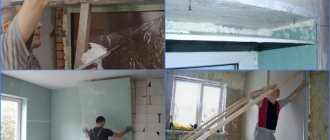
Modern LED lamps, including those in the form of strips, have a number of significant advantages: they allow for a directed flow of light, are characterized by a long period of use and low level of electrical energy consumption. The LED strip is installed on a special profile. How to choose and install an aluminum profile for an LED strip yourself, as well as install the strip itself, read on.
Types of profiles for mounting LED strip
Do-it-yourself profile for LED strip - can it be made and how?
Due to the availability of LED strips, their good technical characteristics in terms of energy saving, as well as the possibility of creating an individual style using them, the issue of making a profile for their installation is quite relevant for many users.
The main conditions for successfully making a profile with your own hands are: availability of free time, the ability to think creatively, and the ability to work with hand tools. To make a profile yourself, basic skills in working with hand tools are sufficient.
Firstly, for the manufacture of a profile that serves as the basis for the subsequent installation of LED strips, electrical cable channels, which are widely represented on the electrical products market, can be used. In this case, the cable channel is mounted as when laying electrical and low-current wires, and the LED strip is placed in its internal space. In this case, there is no need to install the cable channel cover, and you can use decorative film as a diffuser or do without it altogether. Another option is to use an electrical or decorative baseboard, equipped with a channel for laying wires and cables.
Using plastic frames for steps for mounting LED light sources
The installation of such elements is carried out in accordance with their intended purpose, and the LED strip is laid in the internal space of the channel existing on the baseboard.
With a detachable design of the product, the removable part is removed, and the diffuser, as in the case of using an electrical cable channel, can be a decorative film or other transparent material fixed to the surface of the baseboard. In the case of using one-piece products, it is necessary to make a cut on the outer surface of the plinth, thereby ensuring the penetration of light emitted by the source into the interior space of the room, as well as ensuring the removal of heat generated by the LEDs during operation.
Using a construction plastic profile for mounting LED strip
When it is necessary to illuminate the steps of a staircase or other building structures on which special elements that have voids (slots, cracks, etc.) must be installed, then LED strips can also be installed in these places. In this case, it may be necessary to expand the existing voids, after which they can be used as profiles for mounting lighting and decorative elements. When illuminating the corners of building structures or pieces of furniture and interior design, plastic or aluminum building profiles, which are used for finishing work, can be used to mount the LED strip. In this case, they are mounted in the place of intended placement using fastening elements suitable for these purposes. An LED strip is used that has an adhesive base, with which it is attached to the building profile used.
Thanks to the adhesive base, the LED strip can be attached directly to the surface of building structures and decorative elements
Related article:
Places of application
The use of profiles allows you to fully equip a room with LED lighting both outside and inside. In this case, the replacement of previous light sources will be absolutely complete. The profile will protect lighting elements from the effects of various unfavorable factors and will perfectly complement any design thanks to variable mounting methods.
For main lighting
Places of application:
- apartments, houses, offices;
- entrances, street areas;
- industrial premises.
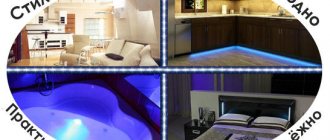
For decorative lighting
The compact, fairly flexible and almost inconspicuous profile allows you to develop your design imagination. The decorative and at the same time practically significant role of LED lighting is suitable for a variety of places:
- on roads and sidewalks;
- locally in kitchens for dining tables, cabinets, sinks, hoods;
- inside chests of drawers, bookcases, sideboards;
- for illuminating paintings, vases, shelves, paintings and other interior items;
- in the bathroom, bathhouse, sauna, swimming pool;
- for ceilings and floors (recessed lighting);
- in the windows of jewelry stores.
Standards for diode strip differences
- The first is a semiconductor mounted on a substrate. Model with SMD-3528 LEDs. There are a pair of pins made on the 1st chip.
- The second is LED, the assembly is based on LEDs. Model SMD-5050, made with three crystals with 6 pins each.
Any type of tape can be installed with your own hands without the help of specialists. When choosing a diode strip, consider the number of devices per 1 linear meter.
- The SMD-3528 model has a version 60 with a consumption of 4 - 8 W; 120 – consumption 7 W; 240 – consumption 16 W.
- Model SMD-5050 has dimensional LEDs, produced: 30 – consumption 7 W; 60 – consumption 14 W; 120 – consumption 25 W.
When choosing a tape, you should take into account the adverse effects of the environment. There is quite a wide selection of different types of LED protection on the market.
- Type IP 33, applicable only where there is no presence of moisture. These options are open and leaky. Often used for lighting in organizations.
- Type IP 65, has wide application. The presence of a one-sided assembly, impenetrable from the electronic component side, sealed with a silicone compound.
- Types IP 67 and IP 68 are applicable in rooms with high humidity, such as bathrooms, saunas, kitchens. The tapes are double-sided, impenetrable, and are encased in transparent plastic.
DIY iron
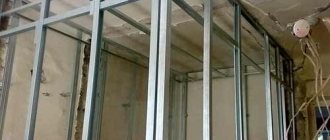
Construction for plasterboard and ceilings
Often, when you make lighting in an uninhabited room, such as a pantry, bathhouse, garage, you do not need high-quality installation. A high-quality appearance is not always required; even if it looks 30% worse in appearance, it will be 10 times cheaper. In this case, an affordable alternative to an aluminum profile for LED strips can be a construction profile, made of iron or aluminum. Just choose a smooth one without perforation and not corrugated. Iron comes in different sizes and metal thicknesses, and is also galvanized and does not rust. When the price of an aluminum LED profile for average power is 400 rubles. for 1 m., construction costs 15-20 rubles. It turns out 20 times cheaper.
The quality of thermal conductivity of iron is of course worse, but when installing diode strips of medium power it will be sufficient. It doesn't look like anodized aluminum, but no one will look at it anyway. And in a week you yourself will not pay attention to it.
Dimensions
The aluminum box designed to hold the LED strip can have different sizes. There are both wide and narrow designs with different structures.
The size of the aluminum profile is adjusted to the dimensional parameters of the light source itself. Thus, LED strips are produced with a width from 8 to 13 mm, a thickness from 2.2 to 5.5 m. The length can be 5 meters. If it comes to side glow tapes, then the parameters will be slightly different. The width will be 6.6 mm and the height will be 12.7 mm. Therefore, the average size reaches about 2 or 3 meters. However, the most common profiles are with a length of 1.5 to 5.5 m. The width of the boxes varies between 10-100 mm, and the thickness - 5-50 mm.
On sale you can find a variety of aluminum boxes with different dimensional values. For example, designs with parameters 35x35 or 60x60 are often found. The dimensions can be completely different - different manufacturers produce a variety of aluminum structures.
Types of profiles for LED strip by type of installation and shape
Overlay profile
The overlay profile is easy to install; to install it, just fix the clips (Fig. 7) or the mounting plate, as in Fig. 8.
| Rice. 7. The overhead LED profile is installed on clips |
| Rice. 8. The LED strip overlay profile is installed on the mounting plate. By the way, the diagram shows all the stages of profile installation |
Mortise profile
In the mortise profile version, it is installed in a pre-made groove. There are usually ribs protruding from the sides of the profile, which allow it to be fixed in the groove without the use of glue.
| Rice. 9. Example of a mortise profile for an LED strip |
| Rice. 10. LED profile installation diagram |
Separately, it is worth noting the aluminum mortise profile with double-sided lighting under the article number KB 94 from the manufacturer Modus (Fig. 11). The profile is installed using a harpoon at the end of the bottom of the upper cabinet and allows you to open the facades without handles. But the main highlight of this profile is that the LED strip can be installed in the profile on both sides and, as a result, we have lighting inside the cabinet and lighting of the kitchen work surface outside.
| Rice. 11. Mortise profile for double-sided lighting of upper cabinets |
| Rice. 12. Kitchen cabinet lighting using a mortise profile for double-sided lighting |
Corner profile
The corner profile is a type of overhead profile. The angle can be in the shape of a trapezoid or a rectangle.
| Rice. 13. Overhead corner LED profile |
| Rice. 14. Installation diagram of the corner LED profile |
| Rice. 15. In the photo on the left is a corner LED profile of a trapezoidal shape, and on the right is a rectangular one |
Read further:
|
Recessed design for LED lamps
This type of profile is mainly used in furniture production (kitchen and cabinet lighting). They are presented in the form of an aluminum structure made of silver or gold. The length of the element is 1-2 meters.
The recessed structure is often equipped with light filters designed to diffuse the bright light from the LED lighting installed inside.
The external attractive appearance of the profile gives some zest to the furniture. And this option will help breathe new life into old products.
Is it possible to replace a chandelier installed on a suspended ceiling?
The reason for replacing a chandelier may be a breakdown or simply a desire to change it to a more modern option. You can change a chandelier without special knowledge in the field of electrical engineering. But work should be carried out only with the electricity turned off and carefully so as not to damage the structure of the device. If the size of the cap of the new chandelier is larger, then there will be no problems with replacement. If it is smaller, then it is necessary to make a decorative overlay to cover the gap.
It is easiest to remove a chandelier from a suspended ceiling mounted on a hook. After all, besides it, there are no additional fastenings. To do this, you need to slide the protective screen, insert your hand into the hole and remove the chandelier from the hook, having first disconnected the wires. No outside help is required.
After this, remove the cap, secured with a locking screw, under which the fastening system is hidden. To remove the chandelier, simply unscrew the four screws after disconnecting the wires.
As you can see, installing a chandelier in a suspended ceiling, dismantling it and replacing it is not difficult if you do everything in accordance with the instructions
It is important to choose the right mount in accordance with the type of chandelier and its weight
Beautiful examples in the interior
LED lighting paired with a suspended ceiling can create a unique atmosphere and make your interior unique. You can realize your own ideas and surprise your guests.
Such lighting looks beautiful in a children's room. The tape plays not only a decorative, but also a practical role. Since most babies are afraid to fall asleep in the dark, you can leave a “starry sky” on the ceiling, which will protect your child.
The lighting inside the ceiling is beautiful and unusual. Choose original combinations that will draw unusual patterns or even pictures above you. Such designs should be invisible in the main lighting and look impressive in the evening.
Many people choose soaring ceilings. This solution creates the illusion that the ceiling is weightless and floating above you. Rooms decorated in a similar style have an airy feel and immerse you in an atmosphere of mystery.
Installing lighting in a plasterboard niche is a common option that will never lose its position. Lighting creates a unique effect that all your guests can appreciate.
For multi-level structures, LED lighting is considered the best option.
To learn how to properly install an LED strip, see the following video.
How to correctly install LED strips on plasterboard ceilings: recommendations
Keep in mind that when illuminating a large area, it is irrational to mount a long strip of LEDs on a plasterboard box. This is explained by the rapid failure of diodes located close to the power supply, since they absorb a large amount of voltage. It directly depends on the correctness of the calculations and measurements of the section of the plasterboard box in which the lighting device with LEDs is installed.
To do this, first calculate the area of the room. After this action is completed, the resulting parameter is multiplied by the power consumption of the meter of tape. Plasterboard ceilings are widely used.
They have earned popularity due to the ease of installation of the structure and attractive appearance. And with such ceilings, various types of lighting fixtures are used. Let's look at how to install an LED strip on a plasterboard ceiling yourself. This is a good alternative to tapes. They come in different colors and are between 13 and 15 centimeters thick.
Unlike strips, LEDs are mounted on a profile or strip. On the market they are offered as separate elements or built-in, for example, for suspended ceilings. Such elements, when attached to a profile, can solve the problem of low ceilings. These models are equipped with a device for adjusting the light saturation, which makes it possible to select the most comfortable brightness level.
In the manufacture of tape for plasterboard ceilings, two types of diodes are used: 3528 and 5060. The latter are used as independent light sources and are characterized by more powerful light compared to the former. Often, for ceilings with plasterboard boxes, multi-colored LED strips are used, which are equipped with four outputs.
When connected, one wire goes to ground, and the other three – each to its own color.
Popular power supply models for connecting LED strips
Modern industry offers consumers a wide selection of power supplies for connecting LED strips. The power supply for connecting groups of LEDs is selected taking into account the parameters of the voltage required for the backlight to operate (12 or 24 V, respectively), the required power and the place of operation.
Model PV-15.
The lowest-power switching power supply for a 12V LED strip with a power of 15 W is used to connect a strip designed for a voltage of 12 volts. It has a waterproof aluminum case and a built-in surge protector that protects against voltage surges. The estimated operating time exceeds 200 thousand hours. The best option for outdoor placement. The price of the product is 560 rubles. a piece.
Model PV-40.
Model LV-50.
The design feature is a sealed plastic case. The switching power supply has protection against voltage surges and short circuits in the network and is intended for use in outdoor conditions.
The built-in surge filter ensures stable operation of the unit in Russian electrical networks. Operates at temperatures from minus 25 to plus 40 degrees Celsius. Operating time – more than 200 thousand hours. The price of the product is 1050 rubles.
Model LPV-100.
Medium power switching power supply – 100 W. Designed for connecting tapes with a voltage of 24/12 volts, has a sealed design and an aluminum housing. The product is characterized by protection against overvoltage, overload, short circuit. Ideal for stable operation in Russian electrical networks. The estimated period of operation is more than 200 thousand hours. LPV-100 is a high-quality power supply for LED strip, the price of which does not exceed 2250 rubles.
Model SUN-400.
A high power switching type power supply is an excellent solution for ensuring the operation of LED strips. Has protection against short circuits and voltage surges. The cooling principle is free air convection. Provides operation of tapes designed for 24/12 volt voltage in enclosed spaces, power - 400 W. Successfully passed performance tests in Russian electrical networks. The price of the product is 3600 rubles.
Types and purposes of profiles according to installation method
Today, experts distinguish only three types of profiles that can be used for mounting LED products. Directly based on the installation method, contours can be divided into the following interesting types:
- corner;
- mortise or built-in;
- invoices.
As modern practice shows, corner profiles, which are made of aluminum, are sold complete with a special diffuser, which can be removed if necessary or desired. The diffuser is used to protect the eyes from too bright light emitted by LED-type products
While you are designing your project, it is very important to remember that using a diffuser can lose up to 40% of the light, although in most cases this figure does not exceed 25%
In turn, built-in profiles are very often used to implement certain design solutions. With their help, you can quite simply connect together parts of drywall or chipboard. Directly in the place where the profile was installed and the LED strip itself is installed. In some cases, it may protrude slightly above the surface of the profile, and in others (which is most common) it may be located in this recess and not go beyond the surface level.
If we talk about the mortise profile for the LED strip, then the distinctive feature of such a product is that it has an edge that can easily cover all the uneven places, and they are very often present at the edges of the groove. Using a mortise profile, you can illuminate the room in such a way that the LEDs do not stick out from a flat surface. It is very easy to use such products. It is enough to cut a recess in the chipboard or drywall, which would have the shape of a direct mortise element. Its depth should be such as to completely hide the LED product.
A recess is cut into the chipboard in the shape of the mortise element, which completely hides it. As a result, it turns out that the wall cabinet itself glows from below.
DIY aluminum profile for LED strip video
The overlay profile can be mounted on a wide variety of surfaces. An interesting fact is that it can be glued or attached using self-tapping screws. If the overlay profile is made of plastic, then it bends quite well. Thus, this type can be used without problems on any surface that is at least slightly curved. Quite often, an overhead circuit is used for mounting LED products in an arch or along its circumference.
General recommendations
Let's look at some useful tips for fixing the products in question.
- The aluminum frame must be fastened as firmly as possible. The reliability of the installed part will depend on the quality of fastening.
- Choose profiles that will fit harmoniously into the interior. If necessary, they can be repainted in black, white, blue, silver and any other harmonious color.
- Don't forget to install the end caps. Please check before purchasing if they are included with the box.
- Linear lamps will be an excellent solution for interior design in a modern style. If you don’t know what kind of lighting to choose for such situations, you should take a closer look at beautifully designed LED strips.
Work procedure
First, determine the reliable contact elements, since the tape should be cut only in this place.
That is why, before purchasing decor, make sure that it can be divided into pieces of the length you need. The ends of the cable that will be used for power supply are cleared of the coating - insulator to a length of 15 mm
This work should be done with caution, as the wires can be damaged. A knife with a well-sharpened blade is used for installation.
Only after the ends have been prepared can you proceed to assembling the chain.
Basically, the wires are marked in red, yellow (brown) colors.
The second type of wires is intended for connection with a plus, the first - with a minus. The wires can be connected to each other by installing clips or soldering. But whatever method you choose, make sure that they do not contact each other.
All connecting elements should be well insulated with insulating material. The first type of insulator can be purchased at one of the specialized stores. The advantage of this material is that it is practically invisible on the wire.
Nuances
Familiarize yourself with some of the nuances to avoid any difficulties.
- Before starting installation, calculate the entire cost of the work if you plan to invite specialists to carry out the work. This way you can be sure that the savings will be significant if you do everything yourself.
- After the protective layer is removed, gluing should be done quickly. Do not forget that before this you need to completely prepare the surface so that it is clean and without any defects.
- When cutting profile pieces, this must be done in specially marked places.
- When you connect the power supply, pay attention to the correct polarity. If you use a connector, then it has all the necessary symbols.
It doesn't matter which installation option you choose, as long as you follow the sequence. With the right approach, you will get gorgeous lighting under the ceiling covering
How to rotate an LED strip 90 degrees
It is necessary to avoid bending the tape with a radius of more than 5 cm, so it cannot simply be bent if it needs to be secured at an angle of 90 degrees. The board should be cut along the cutting line into two sections, glued together, and then the electrical contact should be restored.
One of the most convenient ways to connect when turning is a corner connector. It is made in the form of a corner element with latches at the ends or in the form of a connector with latches connected by wires. They can be 2, 4 and 5 pin. The first ones are used for single-color strips, the second ones for RGB, and the third ones for RGBW LED strips.
Before connecting two segments, you should clean the contact pads along the edges with a knife, and then install them into the adapter. Such a system is easy to assemble and disassemble, even if it is located in a hard-to-reach place. There is a drawback - the high cost of connectors.
The second installation option will avoid costs. You will need wires according to the number of contacts and a soldering iron. The wires must be stranded copper with a cross-section of 0.75-1 mm2. Installation instructions:
- Wires and contact pads are stripped, tinned and connected using a soldering iron in accordance with polarity.
- The flux is removed with a toothbrush moistened with alcohol.
- To prevent the connection from being exposed to moisture, protect it with hot glue or heat shrink tubing.
To use heat shrink tubing, it must be placed on the tape before soldering.
This connection method is cheap and reliable, but it cannot be disassembled quickly.
To install the LED strip yourself, just follow the detailed instructions. LED lighting is universal. The tape is often used to illuminate a plasterboard or stretch ceiling, but its scope of application is not limited to this.
How to fix an LED strip on a wall - Construction and repair
LED strip can be used in different ways. Depending on the features, installation is also carried out. LEDs are often used as lighting for sinks. The peculiarity is that it is prohibited to use 220 V lighting in such areas. At least closer than at a height of a couple of meters.
Due to this, normal light cannot be installed under the second level of the set hung on the walls of the kitchen. And LEDs are powered by 12 V, which automatically puts them in the highest class of electrical safety. These devices can already be used even for lighting a jacuzzi.
But today we will show you how to install an LED strip on the ceiling.
Where to install LED strip on a suspended ceiling
More often, PVC ceilings are equipped with lighting. The mentioned subtype of polymer is thin and durable. It is enough to look at how roughly the edge of the canvas is pushed into the clip during installation to understand this truth. In addition, PVC on the ceiling is usually heat-shrinkable:
A hair dryer is used to smooth out minor defects.
With great care, the master guides along the border to rid the eye of unevenness. Due to the complex procedure performed, the PVC ceiling cannot be dismantled.
This means that you will not be able to access the LED strip located above the canvas.
Consequently, ceiling lighting is used in selected cases
This means that you will not be able to access the LED strip located above the canvas. Consequently, ceiling lighting is used in selected cases.
Ceiling lighting options
Armstrong ceiling
It is allowed to be equipped with transparent plastic plates. Lamps are often placed above these. All this is beautifully furnished, transparent tiles form inclusions, or a pattern is created, depending on the designer’s imagination. In our case, the rafters for installing the slabs can be used as a frame supporting the LED strip. You may have to cut it into pieces, we’ll tell you the technology later.
PVC ceilings
They are not always placed on clips. Sometimes it is possible to cut out the canvas and attach a harpoon around the perimeter. The ceiling is attached to a special profile (for the previous case, a similar one is used - “clothespin”), into which it is hammered around the perimeter. As a result, the structure is removable, and the tension is obtained due to the strong joining of the harpoon. It closes at the bottom with a narrow decorative profile.
The system for installing a PVC ceiling on a glazing bead differs in that a specially shaped plastic board is hammered into the starting profile around the perimeter. You will have to work together, but you can flexibly adjust the tension of the ceiling.
Installation recommendations
The three listed systems - in addition to the extravagant ones - are suitable for symbiosis with LED strips. In this case, the lighting is pulled higher and usually goes along the perimeter.
For Armstrong ceilings, the guide profile (let's call it stringers) is made of aluminum, and for PVC sheets, mainly plastic is used. But some craftsmen make an exception to the rule: they attach a flexible edging along the perimeter of the canvas and push it between the wall and the guide.
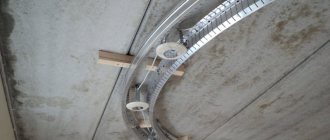
The LED strip is installed along the inner edge of the profile, the backlight is located above the ceiling (see figure).
Installation diagram
The profile is usually attached to the wall with dowels and nails, not reaching the ceiling. Lighting is installed in the resulting space. An LED strip is glued to the end of the profile. Usually supplied on the reverse side with anti-adhesive tape. You need to carefully remove the protective layer, and there will be glue underneath. The installation method varies, aluminum will serve as an excellent radiator for our lighting, removing heat. A nuance noted:
If trouble happens, seal the hole with masking tape, and to strengthen it on the profile, use a glue gun (a heated muzzle with a trigger and cartridges made of abietine resin and vinyl acetate). A similar thing is done at the junctions of two LED strips. In the indicated location there are contact pads for the wires of the adapter or power supply.
The conductive layer will need to be sealed with masking tape (only if necessary), and then use a glue gun.
Please note that you do not need to solder the LED strip at the joints if you are simply assembling a continuation of the branch. In this place of the LED strip there are contact pads. They are needed to connect the power supply
They are needed to connect the power supply.
Usually a small cable with a connector is soldered into which the cable is connected, but it is permissible directly, large voltages are not expected. To connect LED strips to each other, simply insert one into the other. The contact density is checked simply - you have to ring the entire section.
Types and types
Before connecting the LED strip, you should understand their types and markings. This way you won’t make a mistake when choosing a power supply and will accurately calculate the required glow intensity, tape length and other parameters.
The most popular in interior lighting are strips made of single-color—monochrome—crystals. The constant change of colors is too stressful and does not allow you to relax. This is illumination, not lighting
Therefore, universal tapes are used to create advertising, illuminate cars - where it is necessary to attract attention. When decorating interiors, SMD tapes are mainly used
Degree of protection
Since the scope of application is wide, the degree of protection varies. For dry rooms, regular open ones are available - without a protective coating. There are waterproof ones - they can be used in damp areas - in bathrooms, for example. They are filled with a layer of varnish. There is another option - moisture resistant. They are sealed in a sealed housing and can be mounted directly in the water - in an aquarium, pond or pool. They can also be used for outdoor lighting.
Sealed tapes for illuminating aquariums, swimming pools or decorative ponds
For exterior car styling, LED strips placed in a transparent polymer tube are most often used. It protects not only from moisture, but also from mechanical damage, but their cost is also higher.
LED sizes, brightness and density
Let's figure out the sizes. If you take several strips, you can see that they are made of LEDs of different sizes. In addition, they are sometimes located tightly next to each other, in some - at a fairly decent distance, and there are also strips with LEDs in two lines.
Most popular LED sizes
It is not difficult to distinguish the sizes of elements externally, but how can you tell by the markings? Dimensions are displayed in numbers that appear after the letters indicating the type of LED. For example, LED-R-SMD3528 (red) and LED-RGB3528 (universal) are assembled from elements measuring 3.5 * 2.8 mm, LED-G-SMD5050 (green) and LED-RGB5050 (universal) - 5.0 * 5.0 mm.
These are the two most common types, although there are larger ones - 56 * 30 mm, and smaller ones - 20 * 20 mm.
The larger the crystal size, the greater the light intensity they produce. For monochrome crystals the indicators are as follows:
- size 3.2 * 2.8 mm produces a luminous flux from 0.6 to 2.2 lm;
- size 5.0*5.0 mm - from 2 to 8 lm.
Universal LEDs of the same size have lower intensity: three small crystals of different colors are sealed in one housing, and therefore the RGB glow intensity is lower:
- 3.2*2.8 mm produces 0.3 to 1.6 lm;
- size 5.0*5.0 mm - from 0.6 to 2.5 lm.
All values are given for crystals without protective coating. Any of them reduces the intensity of the glow and this must be taken into account when calculating the brightness of the glow.
Length calculation
Above we talked about each individual LED on the strip, and there are many of them on the strip and they are arranged with different densities, and accordingly they can produce a stream of light of different intensities. The minimum number of crystals per meter is 30 pieces, the highest density in one row is 120 pieces/m, in two rows—240 pieces/m.
Depending on the number of crystals, the total intensity of the glow and electrical power consumption change. For the convenience of calculating the required lighting intensity and electrical parameters, the technical data is summarized in a table.
Power table of LED strips with different LED densities
Using this table you can determine how long the lighting strip is needed. For example, you want to illuminate the room with a medium-intensity glow. Two 80 W incandescent lamps need to be replaced. It is necessary to organize a luminous flux of about 140 W (two 80 W lamps will never give 160 W).
If for these purposes you take SMD3528 with a number of LEDs of 120 pcs/m, you will need about 5 meters of tape (we take it with a margin of 20%), SMD5050 with an installation density of 60 pcs/m will require 4-4.5 meters.
In general, LED strips are sold by the meter. It comes from the factory in 5 m reels and a piece of that length is not always necessary. Therefore, it is possible to cut off the required amount: along the dotted lines with the image of scissors. Strictly along these lines you can cut.
Cut the LED strip with scissors strictly according to the markings
If the scissors are not drawn, then there must be a dotted line. Also, the cutting line can be determined by the presence of contact pads on both sides of the line.
LED difference
The LED itself consists of a housing in which emitting crystal chips are placed. The whole thing is filled with compound on top. The chips in cheap and expensive tapes are different.
What are the differences?
in size
In inexpensive tapes, they are smaller in size and, accordingly, produce a lower luminous flux.
conductive thread material
For high-quality ribbons they are gold. In standard versions they are made of alloys. Over time, under the influence of a phosphor or compound, the alloy threads are destroyed. Therefore, the service life of the LED itself is shorter.
quality of phosphor filling
For the elite class, it has less impact on the chips themselves and their contact does not affect the service life of the LED.
difference in chips
The so-called binning. This is when neighboring LEDs, due to different crystals, can shine with different fluxes and shades.
How can you see all this clearly in the store? Unfortunately, this cannot be done visually without applying voltage. But by turning on the tapes in parallel, one next to the other, you can see the difference.
The premium LED will appear to be slightly larger. Actually this is not true. Both may have SMD3528, but the high-quality version will simply have a larger chip. Because of this, this impression is created.
But it’s best to look not at the LEDs themselves, but at the surface illuminated by them. LEDs from different companies may have different scattering angles (according to the standard it should be 120 degrees). A chip with a smaller angle (90-100 degrees) will visually seem much brighter to you, although in fact this will not be the case.
Installation features
The installation method depends on the type of channel. Overhead or corner boxes are attached using special elements - screws, clips, double-sided tape, magnetic fasteners, glue. Installation of built-in types requires the preliminary creation of a groove corresponding to the dimensions of the housing. Fastening is done with glue or using self-tapping screws. Before starting installation, you should prepare the surface, mark it, cut the box to the required length (or prepare the required number of pieces, prepare an LED strip.
First, the box is installed with the diffuser removed. The required number of segments according to the markings are tightly attached end-to-end so that moisture and dust do not penetrate into the body cavity at the connection points. Then tape is glued to the bottom, all necessary connections are made and functionality is checked. If no errors are made, the diffuser is installed, the end caps are glued, and the backlight is put into operation.
Main conclusions
The box for the LED strip is a necessary and useful element that allows you to ensure working conditions and durability of the backlight. The choice of the optimal type of structure is determined by the characteristics of the surface being designed, its purpose and other specific qualities. There are various standard sizes and transparency options for diffusers and housings, allowing you to obtain appropriate visual effects and enhance the decorative value of the lighting. Installation of LED elements is simple and does not require special preparation. The main condition for a successful installation is high-quality preparation, as well as thoroughness and accuracy in performing the work.
Previous LEDsThe most powerful LED lamps Next LEDsCharacteristics, scope of application and installation of duralight