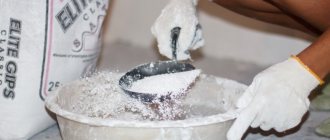
Life is full of examples when something grandiose, monumental holds or works thanks to small details that non-specialists are unlikely to know about. For example, in construction, when pouring screed, a technological gap is needed. Which of the home craftsmen knew about this before they climbed onto the World Wide Web in search of appropriate instructions. That's right - units.
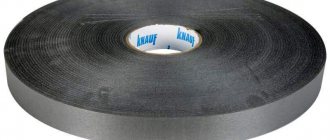
And why should they know - they are not professional builders. Although the “pros” often screw up: either they will forget about the problem, or they will deliberately ignore it in order to speed up the work. And those who knew previously used wooden slats or pieces of reinforcement (then removed), pieces of linoleum or bubble polyethylene from packaging to maintain the distance between the main wall and the screed. Manufacturers of building materials knew firsthand about the constantly emerging difficulties. The problem was solved simply: they began to produce a special damper tape for floor screed.
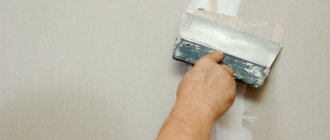
The editors of the StroyGuru portal decided to help all those who carry out repair and construction work at home with their own hands: tell what damper tape is, why it is needed, what varieties can be found on sale, how to choose the right one and attach it to the wall. Let's talk about manufacturers and prices.
What is it and why is it needed
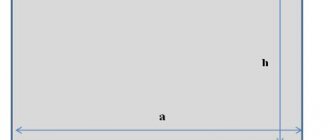
Hardened cement-sand mortar has one unpleasant property - it expands under the influence of temperature and humidity. The screed also has it. It “breathes” both in height and width. In this case, the linear dimensions in length/width vary within 0.5 mm per 1 m2, but not more than 1.0 cm in total.
But even an expansion of 2-3 mm is enough for the screed to either collapse itself or damage the wall. A layer of material that can dampen (extinguish) the breathing of cement stone saves from the destructive consequences.
The builders forgot about the damper tape.
Definition
The word damper came into the Russian language from Germany. There “Dämpfer” - muffler, shock absorber, from the verb “dämpfen” - to muffle. Therefore, in a general sense, a damper device is understood as anything capable of preventing vibrations that occur in machines, devices, systems or structures during their operation.
Taken in a narrow sense, a damper tape (sometimes called edge or compensation tape) is a specially made strip of elastic material that can compensate for the linear expansion of concrete and other building materials under the influence of moisture and temperature.
If this definition is translated into a simple language understandable to a non-specialist, then the tape should be understood as a voluminous, plastic material that can compress when the screed expands and recover when its size decreases, while constantly maintaining some gap between the wall and the expanding cement stone.
Functions
The main task of the damper tape is to ensure free expansion of the screed. Those. A plastic strip of material several millimeters thick, fixed along the perimeter of the walls, creates a technological compensation gap that allows maintaining the integrity of the surface layer of the poured base for the finishing floor covering.
In addition to the main function, there are a number of auxiliary tasks that are no less important for apartment owners:
- creation in certain areas of a restrictive barrier for the solution, a kind of formwork;
- organization of additional hydro- and thermal protection at the joints between the floor and walls;
- strengthening sound insulation in the most vulnerable areas of the house that transmit structural noise;
- absorption of microvibration of walls due to mechanisms operating in the building, such as forced ventilation or an elevator - are not transmitted to the floor, but through it to a person;
- In some cases, leveling the walls and the base of the floor, at the joints between them, under the screed.
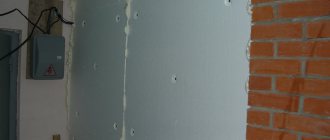
It is a mistake to think that the compensation layer is needed solely for the screed. The increased popularity of plasterboard walls and partitions has shown that gypsum plasterboard also expands and is destroyed without a special strip under the guide profile. This strip is called profile damper tape.
What is it for?
Since there is no mention of damper tape in SNiP, we can only talk about what this polyethylene strip is needed for as a recommendation. Therefore, the use of a compensator is desirable:
- when pouring cement-sand screed, wet and semi-dry;
- when filling expanded clay to level the floor (dry screed);
- when heating floor coverings made of tiles, porcelain stoneware, laminate, linoleum using water and cable “warm floor” systems;
- creating blind areas outside the building.
In large rooms, the compensating gap along the walls is not enough. It is placed in the middle of the screed at certain intervals using a T-shaped strip of polyethylene foam. You also need a damper tape for the self-leveling floor. Don't forget about the tape for the drywall profile.
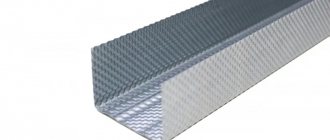
What is a sheet metal cutter?
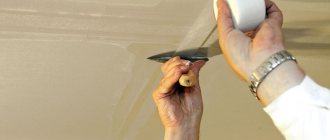
A cutter or punching pliers is a hand-held tool for joining sheet metal products. The connection occurs due to the formation of a through hole in the parts being connected. The parts to be connected are fixed by bending the resulting metal petals. That is, to connect sheet metal products using a cutter, no fasteners or additional actions are required.
We placed the working part of the tool in the right place and pressed the handles. The metal breaks through, its pieces bend. All. Due to the fact that the metal is “pierced”, another name for this tool came to be - a profile punch. The same tool can be found under the name “pliers for connecting HA profiles.” This is exactly how some manufacturers position it. There are other names - perforation, profile hole punch. This is already from the jargon of builders and home craftsmen.
Application of a cutter for a metal profile
Externally, a cutter is the same pliers, but with long handles and an unusual structure of the working part. Like regular ticks, they have two jaws, but they are different in shape. On one side there is a stop, on the other there is a punch. A punch is a protruding part that makes a hole in metal. The stop is a thickened part with a hole into which the punch fits.
Photo of how the cutter works
The shape of the working part is designed so that the metal petals that are formed when making a hole are slightly bent. This ensures reliable fixation of the products relative to each other. The hole shape is usually rectangular, but can be square or round. Rectangular is preferable because it gives a more “rigid” connection.
What is it made from?
Ideally, the damper edge tape should have the following characteristics:
- have a low thermal conductivity coefficient;
- have good plasticity, allowing volume to be restored after compression, which, however, is not important. After all, after the screed has set, the damper can be removed;
- do not be afraid of moisture, do not absorb it, so as not to create a favorable environment for the growth of mold and mildew;
- be light and easy to use.
All these qualities are fully manifested in tapes made of foamed polyethylene, which can be chemically cross-linked (PPE or HPPE) and non-cross-linked (NPE). Both materials have similar technical and operational indicators, which affects prices. They are almost equal.
On sale you can find tape made from densely woven polyester fibers, as well as from foamed synthetic rubber. The tape is sold in rolls of 10, 15, 20, 30, 50 and 100 m in length. It can be in the range of 3-10 mm in thickness, 8-15 cm in width. The widest, 150 mm, is a damper tape for warm floor.
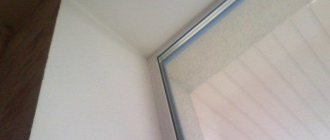
Installation of mortise profile
First, form a groove in the furniture or other material, according to the profile dimensions.
From the very edge, drill a hole-notch for the power wires.
Then glue the tape and insert the diffusion lens.
All that remains is to install the plug and drive the whole thing into the groove. If the groove is made end-to-end, you can use a rubber hammer.
Is it possible to do without it?
Some experts argue that expansion tape is only needed for floating screeds. If the CPR is poured directly onto a rigid base, for example, in a garage on a concrete floor slab, then you can do without a damper tape. It is not needed for self-leveling floors with a thin layer of self-leveling mixture.
Let's try to figure out whether a damping strip is needed in the listed cases. Let's start with the screed. Let's not theorize, but refer to accumulated experience. There is no need to go far - look at what is happening (or was happening) with the screed in houses built in the 80s of the last century: CPR was poured directly onto the floor slabs without a damper tape (it began to be widely used in the late 90s). After a few years, the layer of mortar crumbled, in most cases in the heating area. Fortunately, there is linoleum on top, which is not critical for the floor covering.
The argument about thin self-leveling floors is also unclear. For thick people it is necessary, for thin people it is not. Where is the logic? After all, linear expansion in length/width does not depend on the thickness of the concrete. It is always equal to 0.1 mm per 1 m of length when the temperature increases by 1oC. Let us especially emphasize - at +1oС.
Where you really don't need a damper tape:
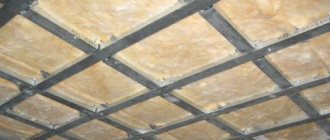
- frame houses. The walls there are not concrete or brick, and the screeds do not provide resistance to linear expansion;
- The thermal insulation is made with rolled materials extending onto the walls to the thickness of the CPS filling - they act as a shock absorber.
Conclusion: damper tape is always needed for hard walls. The owner of a house or apartment can refuse the compensation gap only at his own peril and risk.
As for the damper tape for the profile under plasterboard, in the bathroom when installing a false wall (box), it is required. When installing interior walls, it is advisable to lay. But nothing bad will happen if the owners refuse to use the compensator strip.
Kinds
Profiles are divided into 3 types:
- overhead – those that are placed on top of the surface or suspended from it
- corner - placed in the corner of a cabinet or ceiling and usually shines at an angle of 45 degrees to the surface
- mortise - have protrusions on the sides that cover irregularities and chips along the edges of the groove, where they are inserted
The groove is specially created on the surface, and the profile, after immersion in it, is obtained at the same level with this very surface.
Since the main function of the LED profile is heat removal, a very important parameter that you should pay attention to is its surface area.
Keep in mind that heat is dissipated not only from the bottom substrate, but also from the side edges.
The higher they are, the better. Therefore, when installing, be sure to maintain free air access to each side.
For example, when installing an overlay profile, at least one surface (bottom) is already insulated. Therefore, it is necessary to make special spacers on it.
These can be plastic or metal elements. It is best to use factory mounting clips for this.
The main thing is to ensure air passage under the substrate.
It is advisable to maintain the distance from the wall to the bottom surface at least 3 mm.
If you can’t do this, buy products with high sides - 15-20mm. Then it will be possible to fasten closely.
There are also profiles that come complete with a removable base. In them, the base is first attached to the surface, and the profile itself is inserted into it. The necessary gap is provided between them.
The rules for creating gaps also apply to the sides. They cannot be mounted, as they say, end-to-end with another surface.
In addition to better cooling, high sides have another advantage. Thanks to them, special connectors for connecting pieces of tape can be easily placed inside.
If the sides are low, you will have to remove the top closing cover from the connector. And insert the connector itself from the side, after grinding it down a little with a file.
Based on the above, it is best to use overhead profiles. In any case, other types will be closed from air on either side.
As soon as the mortise profile is inserted into the groove, three sides are immediately insulated. Only the area of the upper protruding side remains, and this will clearly not be enough.
It is recommended to choose models in which this area will be as wide as possible. Firstly, better cooling, and secondly, you don’t need to cut a groove in the furniture with millimeter precision. Make a mistake and the profile will simply fall through there.
In fact, mortise views perform only one function - decorative. For powerful LED strips, if there are no voids or gaps, it is better not to use them, maximum for strips up to 9.6 W/meter.
The same applies to corner models. When you put them in a corner, you immediately isolate it on both sides.
Therefore, it is not advisable to use such profiles specifically as a heat sink when working with bright and powerful LED strips SMD 5050, 5630, 5730.
Several types of aluminum profiles from Klus, their components and sizes:
PDSAlu-PowerAlu-WideEXHRPLS-LockPLS-GipPHSMic
Is it possible to replace it with something?
To save money, the damper tape can be replaced. Suitable for this:
- wooden slats;
- strip of plywood;
- trimmings of linoleum and polymer materials;
- Styrofoam;
- wooden strip wrapped in plastic film - allows you to remove the strip. Without film, wood is difficult to remove. In most cases, it remains and takes on the pressure of the screed.
There is a lot of criticism of these materials from experts. But it is baseless. After all, the damper can simply be removed and the gap closed with a plinth.
Pros and cons of using cutters
This type of instrument is not very popular yet. It’s difficult to name the reasons, because the thing is really good. Especially for those who install plasterboard systems, and for home craftsmen, this is also a necessary thing. What are the advantages:
- Fast and reliable connection of profiles. The speed of installation of the frame under drywall increases significantly. The principle of operation is simple: insert the parts to be connected between the jaws, squeeze the handles, move, repeat. And so on as many times as required. Punch for drywall profile. This is also what this instrument is called.
- No need to use fasteners. This saves time and money.
- The tool is hand-held, so no electricity is needed. You can work on any objects.
- There is no protrusion at the junction of the profiles. When mounted with rivets or self-tapping screws, the head protrudes above the surface of the profile. Self-tapping screws have more, rivets have less. This prevents the sheet of drywall from laying flat without bending. When using a cutter, the bends remain on the “wrong” side of the profile. The front is obtained without protrusions. The sheet lays flat, which reduces the time for putty and its consumption.
For installing drywall, the absence of protrusions is definitely a plus
Few of those who have tried to work as a cutter return to self-tapping screws. Although, I must say, there are some. Sometimes in difficult places, the connection is “grabbed” with a self-tapping screw, then a cutter is used, and the self-tapping screw is unscrewed. But these are those who like to play it safe. With some work skill, additional fixation is not required.
Flaws
Now about the cons. Using a plasterboard profile cutter really saves time. But the tool is manual and requires the application of muscle force. With large volumes of installation, namely structures made from profiles, fatigue quickly accumulates. And by the end of the working day, the speed of work drops. The better the tool, the less effort is required, but it is still needed. And this is a minus.
The second drawback is the difficulty of disassembling. To separate the two profiles, you need to bend the metal petals. It takes more time than when unscrewing screws. But less than when removing rivets. It seems that these are all the difficulties and disadvantages of working with a cutter.
Not everywhere you can crawl up and make a cut. Then you have to use screws and a screwdriver
There is another drawback, which is due to the shape of the working part. Some components - jumpers, clamps - are simply impossible to “reach” with a cutter. The punch won't fit in there. There are models with very large “windows”, but they are not very good for regular connections. For professionals, having several different models is normal, but for home use it is clearly overkill.
Self-tapping screws or notches
It has already been said that when using cutters the sheet lies flatter. And this is a clear plus in favor of the expanded connection. The second unconditional plus is saving time. The third is the lack of consumables.
The disadvantages of joining GK profiles with a cutter include insufficient fastening strength. Self-tapping screws are more reliable. Perhaps, but the strength of the frame is needed only until it is sheathed with gypsum boards. And it will be enough, even if you make only one fastener for each connection. But it’s up to you to decide which is better - a cutter or self-tapping screws.
Advantages and disadvantages
The damper tape has a number of significant advantages:
- durability - the service life is comparable to the service life of the screed;
- elasticity - volume and geometric dimensions are restored when the load is removed;
- good thermal insulation properties - thermal conductivity coefficient no more than 0.035 W/(m*K);
- ability to cut off structural noise;
- environmental safety - does not emit harmful substances when heated, is not an allergen;
- the material does not rot or decompose;
- low moisture absorption - picks up no more than 2% water per day;
- simple fastening;
- affordable price.
Among the disadvantages is flammability.
Stubs
End caps can be installed on each side of the profile. They also serve as a decorative element to give the lighting a finished look.
The plugs have holes for the wires to come out. If you want no wires to be visible on the mounted backlight, you can file the profile from the end and secretly bring out the power from the back side.
It turns out that using 4 components - a tape, a profile, a diffuser and plugs, you can independently assemble your own lamp of any size. It can be used on the ceiling, hung in the middle of the room on special hangers like factory models.
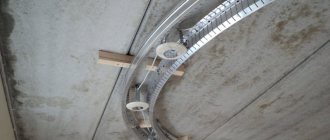
Only straight profiles are commercially available. If you need to make semicircular lighting on any arch or round ceiling, then there are two options:
- independently bend to the desired radius
- use low-power LED strip P=9.6 W/m max without profile
Classification of damper tapes
Damper tape can be classified according to two criteria:
- method of fastening;
- according to release form.
Mounting method. According to the method of fastening to the wall, there is a simple (sometimes called standard) tape and self-adhesive. Simple tapes can be fastened with all available means: hot-melt adhesive, double-sided tape, staples, self-tapping screws, piles of cement mortar. The “self-adhesive” has a strip of glue in the middle, covered with a film.
According to the form. There are 4 types of tape based on shape:
- regular;
- with a “skirt” (basque);
- L-shaped or with a notch in the middle;
- T-shaped.
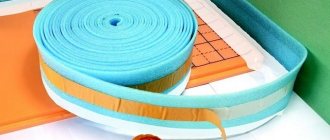
Regular strip. Conventional tape is a single strip of polyethylene foam. It can be standard or self-adhesive, different in width and height. Widely used in private construction: attached vertically to walls, pipes, columns, partitions.
Ribbon with peplum. The damper consists of two parts: a regular tape and a glued bottom, a “skirt,” made of polyethylene film 3-10 cm wide. The purpose of the basque is additional waterproofing of the joints between the base of the floor and the wall and preventing the solution from flowing under the bottom of the tape.
It is used when pouring screed in the bathroom and bathhouse (prevents water leakage near the walls) and installing cable “warm floors”. From the purpose it is already clear that the dense part is attached to the wall, and the plastic film is laid on the floor. It can be with or without an adhesive strip.
L-shaped. On a regular tape, only wider, manufacturers make a cut, which allows the strip to be bent. The wider part of the strip should be attached to the wall, the shorter part should be laid on the base of the floor, similar to a strip with a peplum. Prevents the CPR from getting under the lower edge of the damper.
T-shaped. The use of T-shaped expansion joints in private construction is limited. This is an inter-circuit damper tape that divides a large screed into parts when it is necessary to relieve stress in the concrete in the middle of the floor. Laying is carried out with a pouring area of more than 40 m2.
Types of reinforcing tapes
To strengthen the joints of plasterboard sheets, two types of tape products are often used:
- fiberglass;
- paper
Additionally, when finishing seams between drywall, the following tapes can be used:
- non-woven – reinforces corners;
- with metal strips – designed for reinforcing external corners;
- wide made of fiberglass - helps strengthen the junction of drywall and the wall, can have a width of 10 cm or more.
When choosing reinforcing tape, you must remember that it is recommended to use serpyanka for longitudinal seams, and paper tape for transverse seams. Source jurnalstroy.ru
Recommendations for selection
Damper tape is an ideal object for counterfeiting. A student can print (download and then print on a color printer) the insert. Cutting the tape itself from the roll backing is just as easy. Roll it up and seal it in cellophane - no problem. Therefore, when shopping for goods, you need to study some nuances.
- While at home, you need to decide on the width and thickness of the tape, as well as its appearance.
- The tape must be in undamaged packaging, box (packed by European manufacturers) or film. This will protect you from many troubles.
- If the packaging is damaged, the following steps should be taken:
- ask to see a certificate of conformity;
- check the density of the bay, especially a large one - they could rewind ten meters;
- make sure the strip is intact, and if there is a skirt, then that too. If there is damage, even at a discount, it is better to refuse the purchase.
- The self-adhesive tape should not have partial peeling of the protective strip - the glue has lost its properties.
- The thickness should be the same along the entire length, which is clearly visible on both sides of the bay.
- The cutting line must be perfect. Irregularities indicate a fake.
- Dirt on the surface is not allowed.
- Preference should be given to trusted manufacturers.
Installation of the overlay profile
Fastening is carried out in three ways:
- on double-sided tape
- on screws or dowels
- on glue
For installation with self-tapping screws you will need the following tools:
Use a tape measure to measure the distance at the fastening site.
Then use a hacksaw to cut off the required length of the profile.
At the base, drill several holes with a diameter of 3 mm for 3.5 mm screws.
Some types of plugs already have holes for fasteners. Therefore, before drilling the edges, check what kind of plugs you have.
The pitch between the holes is 100-200mm . Do not forget to countersink each hole under the screw head, otherwise the tape in these places will peel off.
Using screws, mount the base backing in place of the backlight.
Measure the required length of the LED strip according to the length of the substrate and cut according to the cutting marks.
Remove the protective layer of double-sided tape and glue the tape. Install the diffuser and plug.
After that, all that remains is to insert the profile into the base already fixed to the surface and connect the power wires to the block.
Popular options and prices
The list (not rating) of the most popular brands of damper tape includes:
- Kermi is a German company. Produces tape for “warm floors” 160 mm wide and 8 mm thick. It is wound into coils 25 m long. The price per roll starts from 500 rubles;
- Oventrop is another representative of Germany. It supplies the building materials market with L-shaped tape coated with glue (“self-adhesive”), 12-15 cm wide and 10 mm thick. It is wound into rolls of 25 and 50 m. You can buy the cheapest one for 20 rubles/m .;
- "Upolon" - to introduce Swedish industry. Produces universal, self-adhesive tape 10 mm thick and 150 mm wide. Sold in coils 50 m long at a price of 7,100 rubles. per roll;
- "Energofloor" is a brand of damper tape with a skirt. Supplied in length - 11 m, width - 10-15 cm, thickness - 10 mm at a price of 860 rubles. per roll;
- "Tilit Super" is a Russian manufacturer of peplum tape at a price of 1 m from 35 rubles. and more.
- "Teploflex";
- "Knauf" FE;
- "Valtec" etc.
How to choose a cutter for a metal profile
Perhaps the most difficult thing is choosing a specific cutter model. They are divided, as usual, into household and professional. The difference in price is more than noticeable. The cheapest and most acceptable quality ones can be purchased for about $10, normal ones from $20-30, and really good ones can cost $100 or more.
Profile cutter for drywall: which one to choose
What is the difference? In work resource and ease of use. This means that the more expensive ones use more durable and expensive metals, rubber and plastic for handles, etc. They have a more complex design of the working part; there is a mechanism that reduces the force required for connection. In general, there is something to pay for. But nevertheless, for periodic work, for the home, you can find quite good and functional specimens in the cheap segment.
The difference in the working part between a regular inexpensive cutter and a professional
When choosing a cutter for a profile from any category, look at the following parameters:
- Maximum thickness of fastened parts. Please note that the total thickness of metal that this tool can penetrate is indicated. That is, if 1.2 mm is indicated, this means that you can take two sheets of 0.6 mm or 0.8 mm + 0.4 mm, but not two sheets of 1.2 mm.
- Shape and size of the “window”. Rounded corners make work easier.
- The presence of a roller that pushes the punch. Such models are more expensive, but require much less effort.
- The case is free of defects, cavities, cracks, massive and heavy.
- We evaluate ergonomics. The handles should be comfortable, with stops.
- It is ideal if the handles have rubberized inserts. Otherwise, you will have to work with gloves - there will be calluses.
- The handles can be grasped with one hand when extended.
For professionals, such a tool is a godsend, but for amateurs and home craftsmen the price is too high
And it is very desirable that the company be well-known. Although, there are also nameless “Chinese” ones that are very good for home use.
How to mount it correctly
The work of laying a damper layer between the wall and the screed is not difficult. It is performed in several stages.
1. The surface of the wall and the base of the floor are cleaned of dust and dirt - otherwise the glue will lose adhesion to the wall material. This step is especially important if you need to secure the tape outside the building, along the base. After this, degreasing is carried out. 2. The compensation strip is attached to the wall. Here the correct order of operations is as follows:
- laying starts from the corner. Conducted from left to right. The roll is laid on the floor with an adhesive strip to the wall and unwound. In this case, you need to go into the adjacent wall by about 50 mm so that at the end you get an overlap. You can start from a corner without entering the adjacent wall, but then you must also complete it by entering the already laid damper. Naturally, the splicing must be done overlapping;
- the roll needs to be unwound as you pass the perimeter - the tape will lie flat, without sagging or twisting. The protective film from the adhesive strip is also removed slowly - you can contaminate the adhesive layer with an awkward movement;
The protective tape is removed as the perimeter is passed.
- the tape is laid continuously without tension;
- in the corners the “skirt” is not cut, as some experts advise, but is laid in a triangle. This solves the problem of acute and obtuse angles;
- as you pass the perimeter, you need to roll the tape to the wall with a roller, and level the plastic film of the “skirt” so that there are no folds under which the solution can get;
- To attach regular tape, you can use double-sided tape, hot glue, liquid nails, masking tape (the damper is glued to the wall with its top edge) or piles of mortar. It is undesirable to use self-tapping screws and staples - they will interfere with the thickness of the tape. If they are still used, then the fasteners must be installed above the screed, at the level of the floor covering;
- all pipes, columns and partitions in the room are also covered with a compensation strip.
3. The tape is cut, but only after the tie has set. If the height is insignificant, the operation can be ignored - everything will be covered by the baseboard. By the way, some manufacturers make cuts at the top. In this case, it is enough to pull the protruding part and the excess will come off without a knife.
In conclusion, laying damper tape around the perimeter of the walls avoids the destruction of the screed. The work is simple. You can do it yourself. Experience shows that it is more convenient to work together: one rolls out and glues the tape, the second compresses it with a roller and straightens the plastic film of the skirt.
Diffuser
Special polycarbonate diffusers can be selected for all profiles. Polycarbonate has high mechanical strength and is not subject to destruction from ultraviolet radiation.
The glow angle of the LED strip is 120 degrees and it simply illuminates the space in front of it without any screens. At the same time, with low-power diodes you can visually observe pronounced points of glow, and sometimes dark spaces between them.
Here is a clear difference in the luminous flux with and without a diffuser:
To increase the area of the illuminated space and smooth out dark stripes, a diffuser is used. In addition, it also performs a protective function against accidental damage from foreign objects and splashes.
Diffusers are:
- transparent
- matte or milky - they transmit 60% of light
- semi-matte – throughput 70-75%
- internal - inserted into the groove
- external - put on over the sides