Plastering on concrete walls
Despite the fact that concrete has a relatively smooth surface, in the vast majority of cases it is not possible to immediately apply decorative finishing. This is hampered by the curvature of the walls themselves; they are often piled up vertically or run in waves. You can level the surface and make it suitable for wallpapering or painting using plaster. The technology for applying the solution to this base will have several features.
Puttying walls without prior plastering has a number of advantages:
- saving building materials that are not spent on plastering;
- saving time;
- reduction of labor intensity of work;
- reduction of financial costs;
- improving the permeability of walls to water vapor, which increases the comfort of the indoor microclimate without the use of forced ventilation.
There are also known disadvantages of the described technology, which boil down to applying 2-3 layers of putty in the case of maximum permissible differences in wall surfaces. The complexity and time of finishing work increases accordingly. Another nuisance may be the appearance of traces of gas block joints on a fully finished wall. Moreover, according to the “law of maximum meanness”, this will happen within a short time after the object is handed over to the customer.
Advice: Prevent the occurrence of such a defect by carefully monitoring the sealing of the seams between the masonry elements. The seam is filled without gaps or voids. Such control is necessary before completing finishing work.
Advice from experienced professionals
Finishing work on a building made of aerated concrete blocks should begin 6 months after completion of construction. The gas block supplied to the construction site from the manufacturer has a humidity of about 30%. Therefore, it is necessary to allow the wall material to dry and settle. Haste will lead to the appearance of cracks caused by the process of evaporation of moisture from the core of the blocks.
The use of putty based on cement mortars is justified on the outside of the building. Cement creates a moisture-proof crust that prevents water vapor from escaping from living spaces. Where cement plaster is needed - in bathrooms and kitchens - forced ventilation should be installed. The modern trend of cottage construction involves the installation of building ventilation systems, regardless of the main materials used for its construction.
Craftsmen categorically advise plastering, and not puttingty, a wall made of aerated concrete blocks on which tiles are supposed to be installed!
And finally, advice from the treasury of masters: The Lord did not create spare parts for man. Take care of yourself. While at a site under construction, follow safety rules and do not neglect protective clothing and proper footwear. When returning home, do not forget to remove your mask and wash your hands. Be healthy!
Source
Why do you need putty under wallpaper?
Remember what wallpaper used to be like? Paper, with edges that had to be cut off on one side and overlapped. This made it possible not to worry too much about the smoothness of the base; most often, the walls were covered with old newspapers before the final finishing.
Today, old newspapers have already been abandoned, but the unevenness of the walls still requires some tinkering to get the wallpaper to fit as it should. That is why many people prefer to immediately entrust these chores to third-party craftsmen who will do it faster, without unnecessary nerves and with high quality.
Modern wallpaper is glued end to end. And the slightest hole or protrusion at the junction of adjacent canvases leads to a poor-quality seam. Ideally, it should be completely invisible, which is why the base needs to be carefully leveled. But the role of putty is not only this.
Functions of putty
In addition to the final leveling of walls or ceilings, finishing putty allows you to solve other problems, which include:
- Elimination of defects such as cracks, chips, large scratches, etc.;
- Giving the base greater strength;
- Increasing the adhesive properties of the base - its ability to firmly adhere to the finishing coating;
Note. Primer compounds fully possess this property, and in some cases it is enough to use only them if other qualities of the putty are not relevant in your case.
- Reducing the ability of the wall material to absorb moisture. This is important for high-quality wallpaper stickers and allows you to save glue;
- Leveling the surface color. White putty will reliably protect the wallpaper (see Decorating walls with wallpaper in the correct form) from stains that can show through it from an untreated wall.
As you can see, putty has many functions, and any of them can play a decisive role in the quality of the finish.
Putty of different materials
Now let's figure out whether putty is always needed and how it depends on the base material:
- Brick walls definitely need leveling. If the masonry is fairly smooth, you can do without plaster, using several layers of starting coarse putty, and finishing the preliminary finishing with a thin finishing layer.
How to choose a starting putty
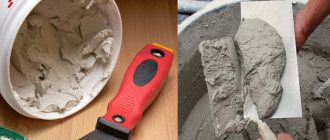
Rough, starting treatment of the ceiling should be carried out using coarse putty. Thanks to its structure, it copes better with various types of defects. There are two types of such putties on the construction market: ready-made and dry.
By purchasing ready-made putty, you can immediately begin finishing the surface, according to the available instructions.
With the second option you will have to tinker a little. This must be done carefully so as not to spoil the material. It is better to prepare a fresh portion of putty each time, since after drying it becomes unusable.
Apply the composition using a large spatula. To ensure uniform coverage, the tool is pressed against the ceiling and pulled towards itself, spreading the mixture over the surface. Make sure that the resulting layer does not exceed a thickness of 0.4 mm.
Recommendations!
Try to press the spatula against the ceiling with equal force, slightly overlapping the previous layer so that there are no untreated areas left. It is more convenient to start work from a wall or corner. This will help keep you in the right direction.
Post-processing
After the surface has dried, it will become clear whether further rough treatment with a putty mixture will be required or whether you can immediately proceed to the final stage of repairing the ceiling.
The presence of cracks suggests a different processing method
First, all crumbling parts, dirt, and construction dust are removed. Then each crack is carefully primed. After the primer layer has dried, the recesses are filled with putty, leveling the surface. Cracks that are too deep are filled with putty in several stages. Then the material is allowed to dry, the entire ceiling area is primed again, and then the work is carried out according to the previously submitted technology.
Installation of beacons
How smooth the surface you get will depend on the correct installation of the beacons. They are:
- Plaster. In this case, gypsum mortar is applied to the wall in equal fragments, so that the height of the beacons corresponds to the thickness of the plaster. The advantage of plaster is that it dries quickly.
- Cement-sand. Such landmarks are made in the same way as plaster ones. Cement mortar is cheaper, but such beacons can only be installed in small rooms.
- Wooden slats. Vertical lathing made of wooden slats is suitable for apartments, however, landmarks of this type quickly swell from moisture, making it impossible to obtain a flat surface.
- Metal slats. This profile is considered the most reliable. Its main advantage is that the beacons do not have to be removed.
To install beacons follow these steps:
- Screw the self-tapping screw under the ceiling (at a distance of about 150 mm from the corner). The thickness for plaster is determined by the distance from the screw head to the wall.
- Install the same self-tapping screw on the floor (it should be screwed in in a vertical straight line from the “ceiling”).
- Place lumps of plaster between the two screws, the height of which should be slightly greater than the guides.
- Attach the metal profile to the screws, slightly deepening it into the solution. At the same time, make sure that the rail is laid evenly; for this, use a building level. If a deviation occurs, the screws must be adjusted until the metal guide is strictly vertical.
- Install the rail on the opposite side of the wall in the same way.
- Stretch the thread between the beacons and, using it as a guide, install the remaining guides. The step between the slats should not exceed the width of the rule.
Is it possible or not?
The answer to the question of whether it is possible to glue wallpaper on concrete is unequivocal - after all, it is possible, but only taking into account all the nuances and features. And the base will still have to be prepared - even without plastering and puttying, but certain actions must be performed to ensure a decent result.
Why is it important to properly prepare concrete before wallpapering:
- Any concrete wall assumes the presence of unevenness and curvature, which will not allow wallpaper (especially thin ones) to be glued evenly: it will not be possible to make neat joints.
- Without finishing decorative finishing, concrete has a special structure - quite rough, its microrelief will be noticeable, everything will show through the canvas. Again, thin wallpaper will especially suffer, as it may even tear when applied.
- Concrete has a certain shade - it varies from light gray to completely dark. And if you stick light wallpaper on a concrete wall, it can change color.
- The risk of white spots appearing on the wall is if the layer of glue was unevenly distributed over the surface, which very often happens when paintings are glued directly to concrete.
- There is a high probability of wallpaper peeling off - the fact is that when the glue dries, bubbles may appear on the surface around microscopic cracks and cavities, which deform the finish.
- The possibility of mold appearing is another serious reason to think about it before gluing wallpaper on a concrete wall without prior preparation.
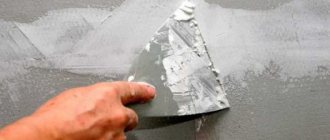
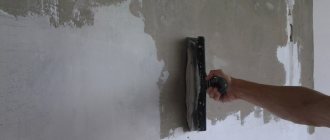
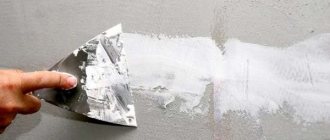
We open the walls with finishing putty.
The finishing putty solution does not contain large fractions and when finished has the consistency of sour cream. The finished layer is smooth, very dense and does not absorb paint.
The method of applying the finishing putty is similar to the starting putty. The only difference is the thickness of the layer: for finishing putty it should be 1.5-2 mm. This thickness helps to obtain a smooth surface without bumps or dents, which is ideal for painting. However, preparing walls for painting involves sanding a layer of finishing putty. Use an abrasive mesh with a grain size of 60-80 to achieve the effect of a “glass” surface and not inadvertently remove the entire previously applied layer.
If applying one layer of solution does not give the desired result, you can apply finishing putty in several layers. Check the quality of the work with a spotlight or lamp. Direct the light source so that it falls at an oblique angle to see all the imperfections. Puttying walls before painting with your own hands means eliminating all irregularities, otherwise they will appear after painting the walls.
Laminate
Sheathing over a metal frame is another way to finish walls without leveling them. Of course, you can use traditional drywall and then paint or wallpaper it. But it’s faster and cheaper to immediately cover the guides with a finishing material, such as laminate. You don’t have to buy an expensive one - study the ads and pick up leftovers at a reduced price. Combine panels of different colors to get a more interesting effect.
Option to finish the wall with laminate. Photo from INTERIOR channel
Important! Consider the technical characteristics of the boards - size, type of locking connection and thickness. Otherwise, you will not be able to assemble a whole canvas.
Is it necessary to putty on walls plastered with cement mortar in front of the wallpaper?
Despite the enormous popularity of gypsum mixtures, plaster based on sand and cement remains in demand. We often see walls perfectly plastered along lighthouses with sand and cement mortar.
The whole problem is the flowability of the material. Even perfectly balanced plaster can crumble a little after drying. Therefore, you need to purchase a deep penetration primer for interior and exterior use. Prime the walls liberally until they stop absorbing it. After drying, the primer will strengthen the walls and they will not crumble.
Note! Not all types of wallpaper can be glued in this case. On walls plastered with sand-cement mortar, you can glue wallpaper made of dense material and with a large texture. Do not glue thin wallpaper, wallpaper without a textured pattern (smooth). If the sun's rays pass parallel to the wall during the day, imperfections are bound to appear. Small bumps may appear on the wallpaper from large grains of sand under the wallpaper. At certain angles, sunlight will create highlights similar to pimples. Believe me, despite the high cost and beauty of the wallpaper, a pimply wall will look terrible.
Since sand and cement plaster crumbles from the lighthouses, they can be visible under thin wallpaper. There will be no problems with dense, textured wallpaper.
Priming drywall
Gypsum is an extremely hygroscopic (moisture-absorbing) material. It is because of this moisture that it collapses. Even if you take moisture-resistant drywall, it is undesirable to use it in rooms where humidity is high - the ingress of water is detrimental to it.
Therefore, priming the drywall is advisable, even if you do not intend to putty or tile it afterwards. Due to the primer, the moisture resistance of the gypsum material increases and the gypsum layer is compacted.
Whenever installing drywall, it is necessary to putty the joints and screw heads. The seams and spaces around the screw heads are primed for better adhesion to the putty.
If sickle tape is used on drywall seams, then priming is required before laying it and after sanding the laid seams for the final finish.
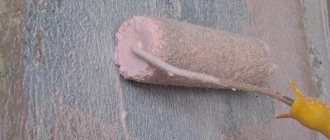
What is the best way to putty the walls? Tools
To putty the walls we will need:
- A trowel for applying the finished mortar to the wall.
- Spatulas (Large, medium (small)).
- Rubber spatula (very small).
Catalog of tools for finishing work
If you rarely go to hardware stores, then it may be difficult for you to immediately navigate which department and what you need to take. Here is a catalog of tools for finishing work, where you can safely search for everything you need for work: construction buckets, spatulas, trowels, trowels, etc.
And below we will look at the most interesting thing - this is the process of puttying walls.
Wooden panel
The panel instantly transforms the interior. You can simply hang it on the wall of your choice, like a painting. The product zones the space; it can be used as a headboard or a decorative accent. Make a board panel of the appropriate size, cover it with stain or oil and fix it. Old wooden boards with defects look best. Another option is to make a panel out of cork or plywood and then decorate it with photographs.
Mesh for plastering works
Mesh for plaster is used when there is no confidence in its strength, and when the thickness of the plaster is more than two centimeters. Experts recommend that the cells on the plaster mesh should not be larger than 5x5 mm.
Using the mesh, a frame is created that holds the plaster on the concrete. This is important in areas where damage and high humidity are possible.
conclusions
Considering the huge selection of putty material for working on concrete, we advise you to pay attention first of all to two parameters - its price and instructions for use. The price may differ several times and not only due to different volumes of packages (see also the article “Plastering walls made of aerated concrete: technology features and materials used”).
The instructions may provide for various nuances of use (like the one presented, which does not require a primer and allows only +3 in the air).
Be sure to watch the video in this article and collect a database of your possible choices.
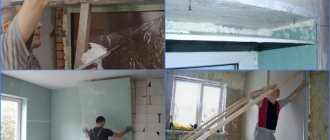
Technology for gluing wallpaper on concrete
Wallpapering concrete walls involves certain rules and stages of work. It is advisable to follow them so that the result pleases with beauty and durability.
Tool
In order to hang wallpaper so that it does not come off in the future, you need to stock up on a set of necessary tools.
What you will need for work:
- Paint roller and special tray
- Rubber roller
- Paint brush
- Sharp utility knife
- Building level
- Simple pencil and tape measure
- Clean rags
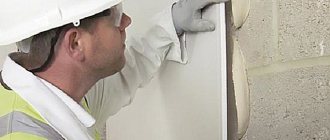
Preparation
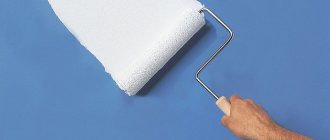
First, the surface of the wall is thoroughly cleaned of dirt, dust and anything that could impair the adhesion of materials. Then the walls are covered with a layer of primer - usually they use wallpaper glue diluted with water or choose a special primer (acrylic is very popular, which does not have an unpleasant odor, demonstrates excellent characteristics, and is affordable).
How to perform priming:
- Shaking the container with primer.
- Pouring liquid into a tray (or any flat container) to make it comfortable to dip the roller.
- Wetting the roller in the primer, lightly squeezing it to ensure even distribution of the composition on the tool and the wall.
- Uniform surface treatment from top to bottom. It is advisable to apply the composition in an even thin layer, avoiding accumulation of the substance in certain areas and drips.
- Drying of the composition, re-application of primer.
Before starting priming, it is advisable to lay all communications that may require drilling holes, gating channels and other work, during which it is necessary to damage concrete and reinforced concrete structures, violating their integrity.
Preparation of materials
Before you stick wallpaper on a concrete wall to prevent it from peeling off, you need to properly prepare the materials. First, carefully measure the height of the walls, mark and cut the canvas into pieces according to the measurements.
Peculiarities
Sometimes it becomes necessary to paint a concrete wall without puttingty. In such cases, it is better to use acrylic or oil paints, and the latter will be more economical.
Please note that oil compositions are less resistant to damage and precipitation than acrylic ones , so they are not recommended for outdoor use.
The procedure for painting a concrete wall will be as follows:
- to avoid accidentally painting the ceiling, apply masking tape around the perimeter of the room;
- Use a damp cloth to remove dust from the wall;
- When performing the above work, you must use personal protective equipment: goggles, gloves, mask;
- the paint from the can is poured into a container and mixed well; for this, use a drill with an attachment;
- the work can be done with a brush or roller; after dipping it into the paint, you need to remove the excess back into the container;
- in open areas the paint is distributed evenly using a roller, and in hard-to-reach areas the work is done with a brush;
- work starts at the top and moves down;
- if you see that one layer of paint is not enough, you need to let it dry and apply a second layer;
- remove the protective tape; if there are flaws, they are corrected with a brush;
- If you plan to reuse the roller and brush, place them in a container of water or rinse well with solvent.
Cork and wood covering
Cork panels are used to decorate bedrooms and children's rooms. This material has good sound insulation, has a pronounced texture and intricate pattern, and its installation is not difficult:
- the plug is attached with self-tapping screws to a wooden frame made of a block, previously installed on the surface to be finished;
- the seams between the panels are sealed with a special sealing material;
- The process is completed by coating the panels with varnish.
Various wooden materials are actively used for interior decoration.
They do not require additional finishing, as they have an attractive appearance and go well with wooden furniture. When finishing interior brick walls, the following important features must be taken into account:
- Such coatings should not be allowed to come into contact with moisture.
- When installing wooden coverings, it is necessary to use a membrane vapor barrier, and its fastening must be done on top of the sheathing.
- Wooden finishing boards, lining and other materials are connected to the frame and to each other without gaps, which eliminates the need for additional processing of the seams.
- Wooden coverings have good thermal insulation properties. For more information on how to cover walls with plasterboard, watch this video:
The color range of this material is quite diverse, which allows you to choose the necessary colors that harmoniously combine with the surrounding interior.
What you need to create a simulation
Among the materials that will need to be purchased for successful decoration are:
- primer;
- masking tape;
- paint;
- plaster;
- putty;
- varnish
In addition to materials, you need to buy tools. Among the devices that will definitely be needed during repairs are:
- putty knife;
- paint roller;
- tape measure and pencil;
- bucket for mixing the solution;
- paint container;
- stationery knife.
The method of simulating brick decor determines what materials and tools will be needed. If additional devices are required during the repair, they can always be purchased. It is recommended to first provide yourself with the essentials.