Proper preparation of walls for painting is the most important stage of decorative finishing, ensuring the aesthetics of the result. The work involves leveling and filling the walls, and this can be done in several ways, varying in complexity and time consumption. In all cases, the base is a starting layer of putty, which can be supplemented with reinforcement and decorative material to achieve greater smoothness and durability of the coating. In addition, the surface needs to be sanded. What do you need to know to make your wall paint perfect?
When can I apply a second layer of putty?
apply a second layer
after 2-3 hours, but you must wait for the finish to dry completely.
The second layer of
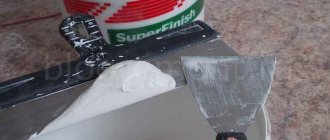
ACRYL-PUTZ SNIEZKA (finish) dries when applied to the completely dried first one in about 12 hours. The time increases due to decreased surface absorption and increased room humidity.
Interesting materials:
How to find out the color profile of an image in Photoshop? How to change the language in Adobe Photoshop? How to change the language to Russian in Photoshop CS5? How to add a magic wand in Photoshop? How to crop the work area in Photoshop? How to open layers on the right in Photoshop? How to Switch the ruler to pixels in Photoshop? How to move multiple layers in Photoshop? How to move a selected area to another image in Photoshop? How to move a selected area to a new layer in Photoshop?
Leveling the wall and preparing for puttying
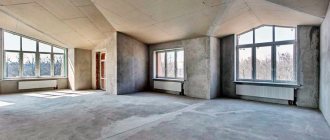
To get perfectly smooth walls, their surface must be pre-treated, eliminating even the smallest differences in height and all noticeable defects in the base. Depending on the initial state of the walls, they can be leveled in one of several ways:
- Preparing the rough coating.
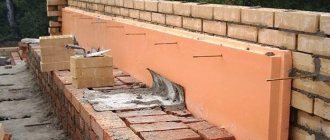
- Plaster coating.
- Finishing with plasterboard sheets on a frame structure.
Sanding will be a suitable option if the clean concrete base or old layer of plaster does not have significant unevenness, cracks or other defects. In this case, it is enough to remove the old coating (wallpaper, paint, decorative plaster, etc.) and remove the thin top layer of rough plaster or concrete using a grinding machine or a block with sandpaper. Before the walls are putty for painting, the base must be covered with two layers of primer, antiseptic and antifungal impregnation if there was mold. As a result of measurements, height differences should not exceed 2 mm.
If the unevenness is significant or the base has significant defects, it is necessary to completely plaster the walls or cover the walls with plasterboard. Previously, flaws in the main surface are sealed with mortar. The old finish should be removed completely, not just the damaged areas, even if some of it appears to be strong enough. Then a new layer of plaster is applied or sheets of drywall are installed using the appropriate technology.
When the preliminary leveling is completed, you should, as in the case of sanding, coat the surface with a primer. You can begin further work after 5–6 hours, since you can properly putty the walls for painting only on a perfectly dry surface - it’s better to wait longer than to apply putty to a wet wall.
Rules for applying the finish
Now let’s look at how to properly apply finishing putty on a wall in more detail. Let's go through all the points. Not just the quality of the coating, but also its appearance and durability will completely depend on the correctness of this work. Before starting work, you should also look at photos of materials; you must initially choose the final type of finish according to the interior of the room.
Material used for finishing putty
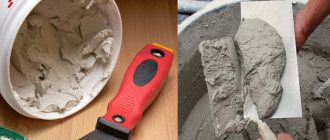
To putty the walls yourself, you will need the following set of tools.
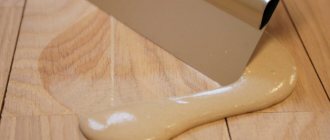
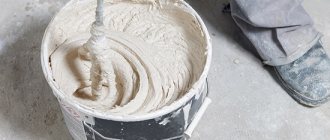
| In most cases, homeowners purchase dry putty and prepare it immediately before work. To stir the mixture with water, you will need to use a special mixer, which will allow you to get rid of lumps in the mixture. When using such a mixer, you can get a homogeneous mixture that will be of high quality. | |
| Spatulas of various sizes | For this work you will have to use at least two spatulas - one small and the second large with a size of 50 centimeters. A small spatula is necessary for working in hard-to-reach places, which improves the quality of application of the mixture. |
| Brushes and rollers for priming | Many homeowners skip the step of priming the walls to save money. However, this is not recommended, as the primer allows you to improve the strength of the finishing materials and improves the adhesion of the putty to the wall. To work with uneven walls, when you need to apply the putty in a thick layer, use a rule that will make it easy to level the putty on a large surface of the walls. |
| Laser or water level | During the work, it is necessary to level the walls, and a level is used to control this work. As a rule, before starting work directly, special beacons are installed, along which the finishing putty is subsequently leveled using a rule. |
| Sandpaper | To obtain a perfectly smooth surface of a putty wall, you must use sandpaper, which is applied after the putty has dried (see How to sand walls after putty and how to do it correctly). To obtain ideal results, we recommend using sandpaper with an index of 240. The finest sandpaper is recommended to be used when applying finishing putty. Whereas when laying the starting putty, coarse sandpaper is used. To simplify sanding the walls, you can use a manual sandpaper, which can significantly simplify and improve the quality of this stage of work. |
| Empty container | Also, for work you will need a container of 10 - 20 liters, in which we will stir the putty. |
Interior options
Any type of wallpaper can be pasted onto perfectly smooth, well-plastered plasterboard floors:
- paper;
- non-woven;
- vinyl;
- fabric;
- liquid.
It all depends on the tastes, preferences and financial capabilities of the home owners:
- In the living room and bedroom, fabric wallpaper, liquid or bamboo, looks good.
- If the room is bright and spacious, you can choose a contrasting design.
- In the child's room, preference is given to safe and environmentally friendly materials in pastel colors.
- For kitchens, choose moisture-resistant wallpaper with interesting prints and ornaments.
- Wear-resistant, durable wallpaper is used in the hallways.
When choosing wallpaper, attention is paid to the characteristics of the room:
- In rooms with low ceilings, light wallpaper with an unobtrusive small pattern looks good. Vertical stripes can increase the height of a room.
- If the ceilings are too high, horizontal stripes and large ornaments will help hide it.
- Huge rooms should be covered with dark wallpaper or with large patterns.
- Small rooms are decorated with light colors.
- If the windows face north, take rolls of warm shades, and those facing south – cold ones.
Lightweight mixtures for puttying walls under wallpaper with your own hands
In some cases, significant time and physical costs are not required to prepare the walls. If this occurs, then the choice is made in favor of acrylic or water-dispersion putty. The first is suitable for those cases where you plan to glue wallpaper near chipboard, and the second for rooms where OSB is needed. Speaking about the advantages of the water-dispersion option, it is worth noting its finished appearance.
If you need to quickly prepare a wall, then you can choose acrylic or water-dispersion putty
In stores it is sold in large buckets with a diluted mixture. The main thing is to seal the container airtight after completing the work, otherwise the putty will have to be thrown away.
If we talk about the acrylic variety, then it is puttied, like a mixture based on drying oil, in non-living areas.
This substance has the following characteristics:
- Low price;
- Economical consumption;
- Presence of unsafe fumes.
You don't always need to buy expensive putty. In order to protect yourself from unnecessary expenses, you should analyze everything first. For non-residential premises, where paint will be used instead of wallpaper, it is recommended to purchase acrylic putty, and for residential premises - water-dispersion putty.
Primer coating
Before you putty the drywall, prime the surface. Any primer is applied to a dry, clean base. Therefore, we first remove dirt from the surface and remove dust (you can use a vacuum cleaner or a slightly damp cloth). After this, prepare the soil according to the instructions (sometimes you need to dilute it with water, sometimes you just need to stir it), pour it into a container and apply it with a brush or roller.
Applying primer
Drywall primer is available for dry and wet areas. For the bathroom and kitchen, choose soil for wet rooms; for the rest, you can use any soil. When choosing soil, pay attention to the presence of antibacterial components. They prevent the development of mold and fungi. This is especially true for the kitchen and bathroom.
| Name | Consumption | Purpose | Drying time | Additional properties | Price |
| Penetrating primer Optimum (10 l) | 6-8 m²/l | For priming brick, concrete, plasterboard in dry rooms. | 30-40 min | 600 rub for 10 kg | |
| Volma Universal (10 l) | 10 m²/l | For rooms with normal and high humidity | 30 minutes | Anti-fungal and anti-mold additives | 600 rubles for 10 l |
| Tex Universal acrylate primer | 5-14 m²/l | For priming porous surfaces, including plasterboard and putty surfaces | 30-40 min | For dry rooms and rooms with high humidity | 650 rubles for 10 l |
| Internal primer Prospector 10l | 5-10 m²/l | For priming porous surfaces, including plasterboard and putty surfaces | 60 min | Anti-fungal and anti-mold additives | 350-400 rubles per 10 l |
| Feidal Tiefgrund LF 10 l | 10 m²/l | For highly absorbent surfaces, including drywall | quick-drying | For indoor and outdoor use, frost-resistant | 850 rub for 10 l |
Usually, for priming drywall, it is enough to apply the composition in one layer, but in the kitchen or bathroom you can use two: to guarantee the result. After the soil has dried (the time indicated in the instructions), you can proceed to the next stage.
Putty technology in stages
For puttying you need to prepare:
- capacity 15–25 l;
- construction mixer or hammer drill with a spatula attachment;
- putty knife;
- roller with suitable hairiness;
- grinding tool.
The floor along the walls should be covered with paper or polyethylene, because putty that gets on the decorative floor covering will not be easy to remove.
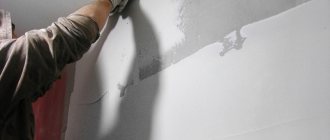
Applying the starting layer
It may seem that a plaster or concrete wall itself is quite suitable for applying paint. However, even ideally plastered walls are not suitable for painting, and it is necessary to figure out how to prepare walls for painting. This is due to the fact that concrete and plaster are porous and hygroscopic materials - they quickly absorb all the moisture from the paint, which will not allow the finishing material to be applied in an even layer. Because of this, the shade of the wall will change, even small irregularities will appear. Putty will prevent all these shortcomings from appearing.
First of all, starting putty is applied to the prepared wall surface. In its structure, it is between plaster and putty - it is no longer so porous, but still does not allow you to create perfectly smooth walls. The composition of this material includes gypsum and coarse lime, which allows you to make the coating layer quite thick - up to 5 mm, and completely hide all the irregularities. In this case, the putty will not crack even without reinforcement.
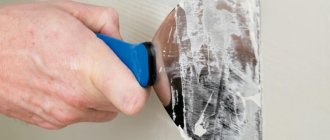
The putty is applied using a wide spatula. Without experience, it may be inconvenient to use, but it is recommended due to the fact that the sharp corners of the tool and the joints of the processed sections of the wall form small irregularities on the surface - the more there are, the more difficult the grinding process will be. A narrow spatula is useful for treating hard-to-reach areas and smoothing out small imperfections in the coating. The tool should be held at an angle of 20°–30° to the wall.
It is also important to consider how many times the walls are puttied. The answer is simple - until perfect evenness is achieved. Usually two layers up to 3–4 mm thick are enough; the second must be applied after the first has dried, moving the joints of the finished areas. Drying should occur naturally, without using a hair dryer, heat gun, etc.; You should also avoid direct sunlight on fresh putty. Once the final coat has dried, which will take 6–8 hours, the surface should be sanded to remove any minor imperfections.
The starting putty can already be painted, but the result will not be of very high quality due to the graininess and porosity of the material, although these parameters are smaller than those of plaster. If you need a perfect finish for walls to paint, the technology will be complicated by applying the finishing layer.
Finishing with finishing putty
The finishing putty of walls for painting does not have coarse-grained inclusions, therefore it allows you to achieve a smooth and uniform surface. Due to the fact that the components of the mixture are very small, its hygroscopicity is reduced - the paint will not be able to penetrate deeply into the surface and will lie in an even layer.
The technique for applying finishing putty is similar to the usual method, the only difference is in the thickness of the layer - it should not exceed 2 mm, otherwise the finish will crack. In addition, with such a thin layer it is more difficult to make a mistake, and bumps and dents will definitely not appear on the surface. However, imperfections related to trowel angles and joints will also be present upon completion of the work. Therefore, after applying the putty, sanding is done again with less abrasive sandpaper.
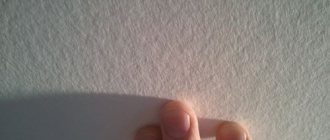
The same question arises - how many times should I putty the walls before painting? If necessary, you can apply a second layer of finishing putty, but usually one is enough. After sanding, the work should be checked with light - the beam from the lamp is directed at an obtuse angle to the wall, and all irregularities will cast a shadow. They are easy to find and grind off with a grinding tool.
When the wall is completely dry, it should be cleaned of fine dust using a dry rag, broom or vacuum cleaner. After this, two layers of primer are applied to the surface. When it is dry, you can start painting. What is the best finishing putty to choose?
Spider web reinforcement
To create a high-quality painted wall, it is recommended to use a spider web; it will protect the wall from cracks. To prevent this, you can strengthen the finish - for this you use a spider web for walls to be painted.
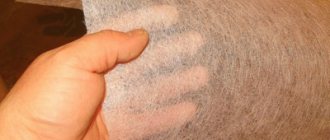
Gossamer is a painting fiberglass canvas in the form of a fine mesh; it is glued to the starting putty layer before applying the finishing coat. In addition, the starting putty should be reinforced, as it shrinks, which can lead to the formation of cracks.
Fiberglass is made from fiberglass threads, making it resistant to moisture, chemicals, and temperature changes. It is durable and ideal for strengthening a layer of putty. In addition, it is very thin and has no relief, so no irregularities will appear on the surface of the finished wall.
Gluing the web is quite simple; To get perfectly smooth walls for painting, you need to follow the technology exactly:
- Glue is applied to the surface of the wall in an even thin layer.
- Strips of fiberglass are applied to the wall. They can have any size, the main thing is to correctly determine the front and back sides of the web, otherwise the material will adhere less well to the surface.
- The painting canvas is then flattened by hand and rolled with a roller to remove air bubbles from underneath it. It is important to ensure that the edges of the web align evenly with the corners of the room. If necessary, excess edges are trimmed.
- The top of the web is coated with glue until the entire web is saturated. The glue will act as a primer, which will reduce paint consumption and also provide better adhesion of the finishing plaster to the reinforcing layer.
- The following strips are glued overlapping; It is recommended to glue them parallel to the floor.
It takes a day for the adhesive to dry completely, after which you can begin applying the finishing putty. In addition, you can paint directly on fiberglass - in this case, an aesthetic relief will appear on the surface of the walls. A good finishing putty for walls is only needed to get a perfectly smooth surface for painting.
Let's get started: how to properly putty walls under wallpaper
In addition to the spatula, you need to buy bars and an abrasive mesh to control the quality of the work being performed. It would not be amiss to remind you that no matter what brand of tool a person chooses, we are always talking only about new products. Simply put, it is not recommended to handle old or used building materials.
In order to properly and efficiently putty the walls with your own hands, it is better to familiarize yourself with the advice of experienced specialists in advance.
Firstly, there will definitely be traces of previous layers of paint and building mixtures. Secondly, even short-term use does not have the best effect on the functional characteristics of the tool, so it is imperative to buy only a new tool.
Related article: Why does the toilet tank sweat?
A good piece of advice would be to avoid using gypsum putty. Despite the low cost of one package, many problems arise when using it. The most common is lumps sticking to the spatula.
Otherwise, you need to purchase the following tools in the store:
- Several clamps and holders;
- Mesh jointer;
- Several sandpapers for sanding;
- 2-liter bucket with a slightly rounded bottom.
Regardless of the degree of complexity of the work, everything is done only using new tools. Bucket, jointer, sandpaper - everything should be thrown away immediately after completing the process of applying the building mixture. Reuse is not allowed because a used tool cannot distribute the putty evenly over the wall.