it possible to putty penoplex and how to do it. A material such as penoplex has a huge number of advantages compared to other types of insulation, and therefore it is no secret that most owners of private houses try to use this particular material to improve their homes.
However, not every person knows that the process of puttingtying such material for thermal insulation has certain nuances. For this reason, in the article below you will learn how to putty penoplex indoors and outdoors, as well as a work technology that will make it possible to create a reliable, high-quality and durable rough coating.
A little about the features of penoplex
It is worth noting right away that it would be more correct to call penoplex extruded polystyrene foam, since the familiar word “penoplex” is the real name of the company that manufactures and sells this heat-insulating material. To some extent, this is reminiscent of the situation with copying machines, which in the CIS countries are still called “copier”.
Extruded polystyrene foam is based on the simplest polystyrene foam, namely polystyrene foam.
But thanks to the processing of the material using a special thermal method, the material was able to obtain the following extremely valuable qualities:
- Strength, which is several times higher than the strength of standard polystyrene foam.
- Uniform structure and very smooth surface.
- Moisture absorption, which is practically zero.
- Higher level of vapor permeability.
In addition, a material such as penoplex has a low level of adhesion when compared with polystyrene foam. Because of this, it would be a grave mistake to putty such material using standard technology. This can lead to the putty starting to lag behind the insulation layer and reinforcing mesh. Although penoplex is not intended for wet cladding, plastering it is in fact possible. Construction specialists were able to develop finishing technology that makes it possible to obtain a high-quality result and also guarantees a high level of strength.
Let's sum it up
Penoplex is laid between the base and the cladding
Each reader was personally convinced that penoplex is easy to putty - it is unlikely that anyone will have any difficulties here. However, you need to be able to handle a hammer, spatula and other similar tools, or at least have some experience in interacting with them. It is also recommended to follow the sequence described above - if you want to get quality and not repeated repairs.
The process of penoplex plastering is described in more detail in the thematic video:
If, after studying the article, there are still some unclear places or questions arise, the video material will definitely give the answer and help in solving difficulties. The main thing is to believe in your own strength and everything will definitely work out!
Rating: 5 / 5, total ratings: 3
Penoplex has many advantages over other insulation materials, so it is not surprising that many home owners try to use it when insulating their homes. However, not everyone knows that the process of filling this heat-insulating material has a number of nuances. Therefore, in this article I decided to share with you the technology for filling penoplex, which allows you to obtain a reliable and durable rough coating.
Penoplex puttying technology and its stages
The process of lining the heat-insulating material “penoplex” consists of the following stages:
- Preparatory work.
- Performing surface reinforcement.
- Applying a layer for leveling.
Each of the stages is extremely important, so you should treat all of them responsibly.
Preparation of material and surface for finishing work
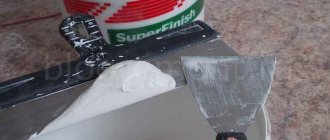
First, you should figure out what kind of plaster will be used to finish the penoplex. Experts advise using universal mixtures from popular brands for work. But it is worth noting that there are also special compositions that are intended for slabs made of polystyrene foam. One of these products for puttingtying penoplex is a plaster-adhesive mixture from the manufacturer Cerisit.
The composition should be prepared exactly according to the instructions indicated on the packaging, but there is a particularly important point that is related specifically to the consistency of the solution. To install reinforcing stacks, the consistency of the composition must be slightly lower than recommended by the manufacturer.
Please note that for leveling the solution must be as liquid as possible. In order to install a reinforcing mesh on the surface of extruded polystyrene foam, you will need 4 kg of composition per square meter, and to create a layer to level the surface you will need all 6 kg of composition.
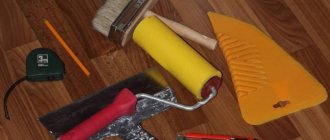
In order for you to be able to properly plaster penoplex, you will need to prepare the following materials and tools in advance:
Adhesive composition for expanded polystyrene and gluing reinforcing mesh.- Deep penetration primer solution.
- Fiberglass reinforced mesh.
- For spatulas with different numbers, as well as a sanding float.
- Corners for perforation.
In addition, the preparatory stage will include grouting the penoplex in order to eliminate possible unevenness and differences in the surface. You should not rush to complete the work, since the overall result at the end will directly depend on the preparation.
Reinforcement
Installation work for plastered mesh is a very important stage, and without it, plastered walls may begin to crack, and this will significantly affect the service life. To install the reinforced mesh, you will need to apply a layer of adhesive to the surface of the penoplex, and its thickness should be 0.3 cm and glue it all to the product.
In addition, when performing such work, you will need to take into account the following nuances:
- The reinforcing mesh should be pressed into the plaster layer no more than 50%, but at the same time the entire surface of the product must be immersed in the adhesive composition. The plaster solution should not be applied at once, but in several stages. Most often this is done in strips that are no more than 1 meter wide, since this is exactly the width of the facade walls.
- The reinforcing mesh must be glued onto the fresh solution, and it must be immersed using a regular smooth spatula.
- Lay the strips of the product overlapping, the allowance should be at least 10 cm. Please note that all work should be done extremely carefully at the corners, from which, as a rule, reinforcement begins. To properly glue a corner, you should use strips 0.3 meters wide, bend them in half, and then press them to the corner and press them into the adhesive.
After the reinforcing layer has dried, you will need to grind the surface. For this task, we recommend using a grinding machine or a grater equipped with an emery cloth. Rubbing should be done in a circular motion and done counterclockwise, but do not put too much pressure on the working tool.
Pay attention to how to properly putty penoplex - it should be taken into account that the drying time of the solution will directly depend on weather conditions. In hot weather, you will only need to wait a few hours, and then you can grout, but in cold weather it is better to wait at least a day.
Finish coating (putty)
And the next, no less important and very last procedure is leveling the surface with plaster. To do this, use the previously unpacked universal composition, as for surface reinforcement. The solution should be applied using a spatula and distributed evenly over the surface of the entire wall. Please note that the layer thickness should not be more than 0.3 cm.
The final procedure is rubbing the penoplex. Everything is done in the same way as with reinforcement, and only after the solution has dried completely. For complete drying, you will need to wait at least 24 hours, and in the cold season, even more. But it’s better not to wait too long, because after 4 days have passed, the solution can become very hard and grouting simply won’t be possible. After you have completely treated the entire surface, the plastering process can be considered complete and we suggest moving on to puttying the premises.
Additional tips from the experts
It happens that after completing the process, the plaster may crack or fall off. This means that the technology was not followed during the work, or low-quality materials were chosen. There are some more tips from the experts that will help you avoid mistakes:
Penoplex is an excellent option for insulation. And if you know how to plaster it correctly, the house will be reliably protected from negative influences. And thanks to the decorative layer, it will be transformed and will delight its owners for a long time. The main thing is to follow the technology, do the work slowly, carefully and efficiently. If possible, ask a friend or relative for help.
Source
Choosing putty for penoplex
Putty is a finishing surface coating using special putty mixtures. The choice of composition will depend directly on the surface on which it will be applied. There are compositions in the form of a powder, and there are in the form of a paste. The latter variety comes in acrylic, silicone, oil and combination types.
Interestingly, the best option for penoplex is an acrylic-based or powder-type composition. Even silicone varieties can be used for internal lining.
Also, when choosing a putty, you should take into account the binding components in the composition and the quality of the substances. The durability of the solution, as well as its protection from moisture, cold and various types of precipitation, will directly depend on the quality of the binding components. When choosing putty for penoplex, it is better to additionally consult with sales consultants. They will help you make the right choice that can withstand the required loads. In addition, you should take into account that facing mixtures for interior premises are not suitable for finishing the facade, so it is better not to save, as otherwise you will need to redo all the work.
Conclusion
Penoplex, as we found out, can be putty quite successfully. The main thing is to properly prepare the insulation surface. Otherwise, the work resembles the process of puttying ordinary polystyrene foam.
Additionally, you can watch the video in this article to visually familiarize yourself with the process of filling penoplex. If any of your questions on this topic remain unanswered, write them in the comments, and I will definitely answer you.
As winter approaches, many begin to think about insulating their homes. Penoplex is a good heat insulator; it is easy to use, has optimal quality and reasonable cost. But is it possible to plaster penoplex? When insulating a building, the plaster solution helps protect the material from atmospheric and mechanical influences, so this procedure is mandatory.
Puttying process
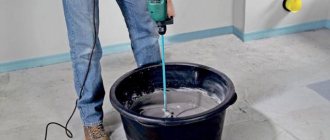
If you decide and use dry putty, then first you will need to dilute it. To do this, fill a bucket with clean water, and then begin to gradually add the powder, and the composition should be mixed using a construction mixer. The putty must have the consistency of mashed potatoes. Once you have the perfect solution, you should leave it for 5 minutes, and then stir again, and only then can you begin to putty the surfaces.
Please note that before putting penoplex, experts recommend treating the surface with a special primer mixture that can ensure adhesion and a high level of waterproofing.
How to properly putty a heat-insulating material such as penoplex? To apply the finished solution, you will definitely need a wide spatula, but you will spread the mixture itself on it using a narrow spatula. When creating the finishing cladding, it is extremely important that the treated new surface area merges in appearance and level with the previously plastered one. The joints should be practically invisible, so it is better to seek help from experts in their field. They know exactly how to putty thermal insulating penoplex correctly and quickly.
The maximum permissible thickness of the putty layer when applied is 0.5 cm, and after it hardens, the entire coating should be grouted. It should be performed in precise circular movements using an abrasive mesh. It should also be taken into account that grinding can be performed no earlier than 5 hours after the composition has been applied.
Helpful advice! When the grouting is finished, you will need to apply a primer layer again - this will help remove the settled layer of dust from the surface and make the entire coating smooth, perfectly even. After the primer solution has dried, you can begin painting or performing another type of decorative cladding.
Applying a leveling layer of plaster
You can plaster over the created adhesive layer. The solution is mixed. After kneading, you need to let it ripen for 5–10 minutes. And then the main work begins. Using a narrow spatula, transfer the mixture from the container to a wide one. Using translational movements from a wide spatula or trowel, the solution is transferred to the wall. The leveling mixture should have a thickness of no more than 3 mm.
After treating the walls, you need to wait for the mixture to dry and rub the surface with a grater or sandpaper. The task is to remove all defects, traces of stripes from the spatula and make the wall smooth, ready for further processing with the finishing layer.
To ensure that the subsequent decorative layer on the penoplex sticks well, the wall is primed again in two layers. And only after drying can the final stage of work begin.
Finishing with a spatula
At this stage, it was possible to hide the penoplex, reinforce it with a reinforcing mesh and level the surface. It is ready to create a decorative layer. It is thin and it is important to work carefully. There are different options for creating a finish. But the essence remains the same - plaster is applied to the surface and then painted. At this point, the work on processing the room is completed.
How not to putty extruded polystyrene foam
To finish extruded polystyrene foam, only two types of facing mixture can be used - mineral and acrylic putty.
Mineral putty is considered the most affordable and easiest to prepare. It contains sand and mineral elements that help the finished coating harden quickly.
Acrylic plaster is more expensive, but much better quality. Acrylic putty does not require special preparatory actions, because it has a high level of adhesion to absolutely any materials.
Prohibited finishing mixtures are:
Dry putty
It is mostly used for interior work, but is also suitable for exterior work. To prepare the mixture, you need to use plasterboard sheets. This is the best option for leveling walls, and thanks to its easy installation it is very popular. Most often, this method is used for finishing walls indoors, but sometimes when there is an urgent need, it is possible to use plasterboard for exterior finishing.
Monolithic plaster
This type, like the previous one, is prohibited for finishing extruded polystyrene foam. Monolithic putty has a certain shape and texture, it has a high level of strength, endurance, and the monolith is resistant to any type of precipitation and natural phenomena.
Silicone putty
Almost all silicone mixtures for facade finishing are made using certain silicone resins, which can corrode the fragile base of extruded polystyrene foam.
Therefore, such putty was best used for finishing stone surfaces, but not as a heat-insulating material.
Bark beetle
This type of plaster, under the interesting name Bark Beetle, contains stone chips, the size of which determines the clarity of the relief already on the surface.
Due to the fact that the composition contains stones, they will help to disrupt the thermal insulation properties of extruded polystyrene foam, as a result of which all the insulation work will have to be redone from the very beginning.
Silicate facade plaster
The main element in the composition is liquid glass. Glass has neutral electrostaticity, which allows it to repel dirt.
Silicate façade putty has the ability to penetrate deep layers of heat-insulating material, which is why it begins to swell and, as a result, collapses.
Application area
The characteristics of the heat insulator provide wide possibilities for its use. Penoplex is used at all stages of construction, starting with laying the foundation. The scope of application of the material is not limited to buildings:
- insulation of swimming pools, utility networks, wells, storage tanks;
- insulation of foundations and blind areas of private houses;
- use for a flat roof with reinforced concrete floor slabs under a roll roof;
- thermal insulation of a pitched roof, attic, attic, balcony or loggia;
- insulation of the ceiling with penoplex, as well as the floor and partitions;
- insulation of walls of residential buildings, garages, warehouses, industrial facilities;
- used in the construction of an airfield runway.
Before purchasing material, you must check the certificates of conformity. Conscientious manufacturers always supply their products with the necessary documents. Their absence indicates low quality of the product. Such insulation is manufactured in violation of standards and GOSTs.