Home » Insulation
Reading time 13 min Published 08/17/2019
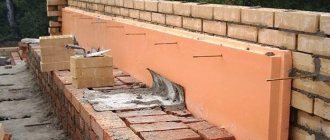
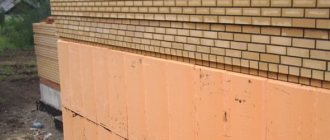
Insulating a house from the facade or from the inside allows you to save on coolant consumption during autonomous heating and retains heat during the main supply of hot water. On the facade, insulation protects the walls of the house, creating a barrier between dampness and brick or silicate blocks. One of the popular insulation materials is Penoplex, which is inexpensive and retains heat well in a building.
Insulation protects the walls from moisture and cold, but thermal insulation also needs protection, for which mesh and plaster are used. We will tell you below how to plaster Penoplex with your own hands.
Preparing for work
Before plastering the thermal insulation, prepare the necessary tools and materials. You will need:
- — Mesh for reinforcement,
- — Metal spatulas/scrapers,
- — Grater for abrasive,
- - Coarse emery,
- - Plaster.
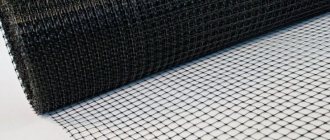
We recommend ROCKfiber facade mesh SSA 1363-4SM - it has been tested in operation and will not create problems. The mesh has a fiberglass base and is impregnated with alkali-resistant polymers. The cell size is 4x4 mm with a density of 140−160 g/m2, the roll width is 110 cm, and the length is 50 meters. When purchasing a mesh, keep in mind that it is attached to the plaster (glue) with an overlap, so the roll covers 42-45 m2 of walls.
Metal spatulas or half-graters are chosen in different lengths - one applies the solution to the wall, the other applies it to the main tool. The optimal length is 30−50 cm and 8−15 cm.
A grater is useful for rough grinding the base layer of plaster; the sandpaper must be coarse, otherwise it will quickly wear off.
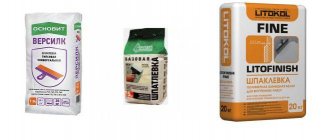
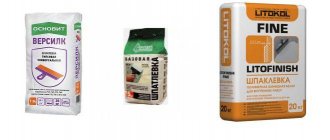
As for plaster, we recommend Ceresit CT 85 or CT 87 for Penoplex. This mixture:
- - Lets out steam
- — Resists mechanical stress and frost,
- — Meets environmental requirements.
CT 85 contains reinforcing fibers that give the adhesive strength and elasticity.
Perel KS Termix
This plaster-adhesive mixture under the mesh is available in both summer (articles 0319 termix and 0320 termix-m) and winter (articles 5319 termix and 5320 termix-m). The summer version provides for use at temperatures from +5 to +30 °C, and the winter version - from -5 to +10 °C). Can be used with alkali-resistant meshes with a density of at least 145 g/m2.
The main component of the mixture is cement; it also contains mineral and polymer additives.
Advantages:
- frost resistance of at least 50 cycles;
- fairly low price (about 20% lower compared to more expensive analogues);
- suitable for gluing mesh to any thermal insulation boards, while providing an adhesive strength of 0.7 MPa;
- dries completely in 24 hours.
Please note that decorative coatings can be applied over the reinforced layer after three days from the end of the work.
Among the disadvantages of Perel KS Termix, one can note a higher mobility of the mixture than its competitors and a short adjustment time (only 5 minutes).
Mesh attachment
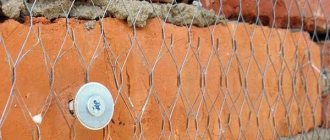
Penoplex reinforcement is necessary, otherwise the mixture will fall off the wall. To attach the mesh, the mixture is mixed to a medium consistency and applied to the surface in a layer of up to 3 mm. No omissions are allowed. A reinforcing mesh is applied on top of the glue and pressed with a spatula using upward movements. ROCKfiber or its equivalent is pressed into the adhesive, but do not press the mesh into the insulation.
The interval between applying the glue and gluing the mesh is up to 20 minutes; if the work is carried out on the sunny side, and there is no possibility of installing a canopy, then the time is reduced to 7-8 minutes - the less/the better.
The next sheet of mesh is glued end-to-end, covering the previous one by 10-15 cm.
For clarity, a short video:
Why plaster
Plastering is a necessary part of the finishing work, allowing you to safely invest in thermal insulation without fear of its destruction in the future.
External plaster protects the facade from wind and precipitation that can cause damage to the material. The inner plaster layer on extruded polystyrene foam can serve as an additional decorative finish.
Penoplex is a durable polymer, however, under strong local mechanical loads, dents can form on it, which can lead to cracking on the sheets. If the coating is plastered, its resistance to impacts will increase, and an additional layer of protection for the synthetic board from UV rays will appear.
Thermal insulating coating made from foam sheets has joints that are usually sealed with polyurethane foam. To form a perfectly flat surface and protect the seams from aging, plaster must be applied on top of the sheets and seams.
Priming
Unlike classic plaster, the layer of soil when plastering Penoplex is 2-3 mm. Its task is to hide traces of reinforcement on the surface and prepare the wall for putty or finishing grinding.
Primer is applied to Penoplex after the first layer has set and the wall has been roughly cleaned with an abrasive. Stripping is not necessary, but helps reduce the amount of glue used on the ground. At a temperature of 20 degrees. and average humidity, the leveling primer is applied after 6-12 hours (the setting speed also depends on the absorption of the wall material).
The primer is applied with the same spatulas or polishers that were used when attaching the mesh. The consistency of the plaster is thicker than when fixing the reinforcing layer.
PRO SR-62
Adhesive used when working with polystyrene foam insulation boards. It will appeal to those who are looking for budget building materials for laying facade mesh - the price for a 25 kg package is only 250-300 rubles. At the same time, the fixation strength and quality of the mixture are in no way inferior to more expensive options.
Advantages:
- frost resistance - its reserve will be enough for 50 cycles if the operating temperature does not exceed 70 degrees Celsius and does not fall below 50 degrees below zero;
- the solution remains usable for 2 hours;
- good resistance to moisture (though only after drying - until the solution hardens, the walls need to be protected from precipitation);
- minimum adhesive strength - 0.7 MPa.
It is recommended to carry out work at temperatures from +5 to +25 °C. If the air is too dry, the mixture will dry out faster, so the optimal air humidity is 80%.
Grinding
It is necessary to plaster Penoplex with a third layer under the putty; if you plan to apply decorative bark beetle, then this stage is skipped. The task of grinding is to perfectly align the texture of the wall. This will reduce putty consumption and speed up finishing work.
The finishing Ceresit CT 85 is made more liquid and applied 24 hours after the primer in a layer of 1-2 mm. The range of movement of the tool is wide. After completing the plastering, there are no minor defects on the wall, the surface takes on a mirror-like appearance, like a cat’s egg, to use the language of builders.
The technology is suitable for outdoor and indoor use.
Application of putty or bark beetle is allowed 2-4 days after the Penoplex has completely dried.
Polystyrene foam, penoplex and expanded polystyrene are very common insulation materials in modern construction. They are used as a heat insulator in residential buildings and industrial buildings. They are actively used for exterior and interior decoration.
Facade plaster using penoplex
When the approach of cold winter is already felt in the air, we can’t help thinking about how to better insulate our home. Penoplex is a very popular option, optimal in price and quality. In use, the material will not take much effort and time from the builder, but it will definitely be necessary to protect the insulation from mechanical and weather influences. How to do this will be discussed in this article.
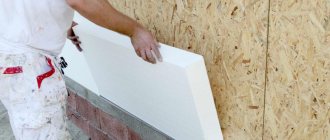
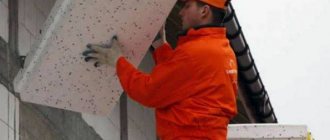
Penoplex is often used as insulation of buildings from the outside or inside. Working with it is made easier by the consistent physical characteristics and dimensions of the slabs. The strength of penoplex is not enough to prevent the slabs from collapsing from pinpoint impacts and other physical impacts (dents cannot be avoided in any case). Therefore, it is necessary to protect the material from the adverse effects of ultraviolet radiation, humidity, etc. And visually, a wall insulated with slabs still seems unfinished and requires additional finishing. The use of penoplex implies, in addition to insulation, also additional finishing.
Facade plaster using penoplex
A simple and inexpensive method of finishing surfaces after insulation is plaster. This type of construction work is appropriate when the slabs are attached to the surface by gluing. Penoplex can be installed in another way: in a supporting frame, in the cells of the sheathing. With this option, the facing of the plane will be done either with panels, or clapboard, or something else.
Mixtures for “synthetics”.
The Russian market today represents several main brands intended for finishing synthetic insulation.
The most famous plasters for penoplex facades are “Ceresit”, “Ecomix”, “Stolit”. The approach to creating such materials varies from manufacturer to manufacturer. For some, polystyrene foam plaster serves only as a covering. The rest produce solutions of a universal type. They must first be glued foam or polystyrene foam under the plaster, and then finish them. This is convenient because it allows you to purchase only one product.
Expert advice: When finishing large areas, it is recommended to use mixtures of the same brand for plastering the entire building.
Famous manufacturers
The domestic market of plastering materials offers products from different manufacturers. The following three brands are most widespread:
- "Ceresit";
- "Ekomix";
- "Stolit."
There are imported products and mixtures of other domestic companies, the characteristics of which are always indicated in the attached instructions.
Ceresit products are presented in a large assortment, including all types of plaster: silicate, silicone, acrylic, cement. The product has good performance characteristics, is easy to use due to its elasticity, and is durable.
Ecomix plasters can be used for exterior work or to decorate interior walls. The compositions are characterized by environmental safety and resistance to moisture. Work on finishing facades using plaster from this company must be carried out in the warm season, at temperatures of at least +7 °C. Mixtures can also be used to eliminate defects: chips, cracks, deformations on old surfaces covered with plaster long ago.
The range is represented by compositions based on cement, to which stabilizers and modifiers are added. Thanks to this, the plaster has high heat resistance, does not react to high and low temperatures, and attaches well to penoplex.
Generalists and specialists.
The most important thing is that the solution for finishing foam plastic, expanded polystyrene or penoplex must be specialized, designed specifically for working with synthetic insulation.
The choice in building materials stores is quite wide. Prices from different manufacturers vary significantly. It is important to understand that it is worth choosing a high-quality composition. This directly affects the quality of the wall covering and how reliable it will be.
It is convenient to use a universal one, suitable for all work performed in the process of plastering synthetic insulation. Options when one composition is used to glue the reinforcing mesh, and another when creating the leveling layer, are also acceptable. It is important to simply decide what is suitable and what is more profitable for you.
Note: There is no need to prime the penoplex before applying the plaster. At least this is not at all necessary, since the material has very good adhesion.
A little about the material
Before you putty penoplex, you may need a set of certain knowledge about this material. Please note that there is a penoplex Foundation that has its own specifications. There are also materials for walls, floors and ceilings.
Penoplex is not quite the correct name. This is extruded polystyrene foam. And the concept of penoplex is nothing more than the name of the company that produces the material. That is, Penoplex. It’s like calling copy machines a photocopier, and all types of diapers diapers. And jeeps are also a misnomer. Although everyone is used to calling any SUV a jeep. You get the point.
The basis for creating extruded polystyrene foam is polystyrene foam. But due to the refinement of raw materials, it was possible to achieve a significant improvement in the main characteristics:
- density;
- smoothness;
- homogeneity of structure;
- almost zero water absorption;
- vapor permeability.
In terms of performance properties, penoplex outperforms polystyrene foam. And by a serious margin. But these advantages led to a strong decrease in adhesion. Materials do not adhere well to the surface of penoplex.
A common mistake is to apply the solution to penoplex using the same technology as when putting polystyrene foam. As a result, the putty, as well as the mesh, simply disappear.
Many people are interested in whether it is even possible to process penoplex using plaster. I'll say this. Initially, the material was not intended for wet finishing. But our masters can do anything. Therefore, a technology was invented that allows you to achieve excellent results.
Types of solutions.
Plastering polystyrene foam and other insulation materials is most often carried out with mineral compounds. They are made from Portland cement and slaked lime. Add sand and stone chips as fillers. The resulting coatings are “bark beetle”, “fur coat”, “lamb”.
Acrylic-based foam plaster also includes stone chips. Ingredients that improve quality are added to it - in the form of modifiers and plasticizers. As a result, the acrylic mixture has higher elasticity values. They are less susceptible to abrasion and mechanical stress.
This type of plaster on polystyrene foam lasts from fifteen to twenty-five years. It costs more than mineral compounds, but it pays off. It is important to take into account that acrylic coating loses color quite quickly. This deficiency must be corrected by simply painting the surface with appropriate paint.
Most often, facade plaster on polystyrene foam and polystyrene foam is finished using various types of mosaic compositions.
"Osnovit Coverplix TC117 H"
A plaster-adhesive mixture intended for areas that must be vandal-resistant (usually they are located at a height of one and a half meters from the base). The extremely high strength explains the relatively high price of this product - it is almost 40% higher than conventional insulation adhesive.
Advantages:
- impact resistance not lower than 8 J;
- the adhesion strength to the heat-insulating board is equal to or greater than 0.12 MPa;
- after drying, the mixture becomes frost-resistant and can withstand temperatures down to -40 °C for 75 cycles;
- maximum operating temperature +50 °C;
- When shrinking, it is almost not deformed.
It should be borne in mind that the viability of the finished solution is only 60 minutes, so you should not mix it in large quantities. Also note that water absorption is not the lowest - for Coverplix TC117 H it is about 15%, despite the fact that the mixture has water-repellent properties.
Prepare the solution.
Compositions for plastering synthetic insulation are usually sold in dry form. Suitable for all three types of material - foam plastic, penoplex and expanded polystyrene. They need to be diluted, making sure to follow all the manufacturer’s recommendations. It is possible to plaster polystyrene foam with your own hands.
Expert advice: To glue construction mesh, the compositions are diluted thinner than the product manufacturer advises. For the leveling layer you need an even thinner consistency.
How to reinforce corners?
In order for the plastered surface of the penoplex to be smooth, it is necessary to secure the corners with a mesh. Slopes and window openings are also covered.
This is important: if you disturb the order, it will be problematic to obtain a good quality finish, since finishing corners and slopes after the walls are covered is much more difficult.
When gluing the mesh to the corners of the walls, it is worth considering some important nuances and following a proven scenario:
- cut a strip, thirty centimeters wide, and the length is equal to the length of the slope or about a meter;
- the strip is folded in the middle, smoothing the fold thoroughly;
- using a spatula, apply the solution to the corner; its thickness is approximately two to three millimeters;
- it is placed on the wall, pressed on with a spatula and smoothed, running the tool from the corner - along the sides and down;
- When the material is glued to the corners, they begin to glue it to the rest of the wall surface.
How to reinforce on a plane?
The technology for gluing reinforcing mesh onto a wall plane involves the following procedure:
- First, fragments one meter long are cut;
- then, taking a spatula 350 millimeters wide, apply the composition to the wall, creating a strip one meter long and ninety centimeters wide; It’s not worth cutting the canvas into larger pieces - it will be difficult to stick them, in addition, the composition dries out very quickly - it’s better to spread it out a little, stick one piece, then move on to the next one;
- applied with a thickness of about three millimeters;
- on the vertical sides it is not immediately glued to a distance of five centimeters from the edges; some experts believe that allowances should be left at least ten centimeters - this will create more stable joints;
- it is applied to the wall and smoothed with a spatula; movements are performed first from top to bottom, then from the center to the sides;
- it is important to ensure that the reinforcing material “sinks” into the solution; if this does not happen, the mixture is added a little; some experts believe that it should only submerge halfway; however, in any case, it is important that the solution is under the entire mesh (except for allowances); you should not skip sections - in the future, these “empty” places may cause peeling and disruption of the structure of the finish;
- the next layer is glued overlapping the previous one; their edges should overlap each other by about five centimeters; this will serve to create strong joints.
Important nuance: If you immediately glue the reinforcing layer, without leaving free edges, then when you further glue the next sheet, the glue will turn out to be too thick - the joints will stand out too much; and this can be visible even under a thick layer.
Primary layer sketch
Penoplex is prepared for plastering by laying the primary layer. For this purpose, alkali-resistant PVC mesh should be used. By using PVC, you will insure yourself against the aggressive influence of cement on the exposed mesh. Cement is known to react with many materials.
Cut strips the length of which should be slightly greater than the height of the wall. Please note that installation is done from top to bottom. Apply the strip to the fiberglass with one hand, and apply the solution to the mesh exclusively along the top edge with the other. Thus, the mesh is, as it were, “welded” to the penoplex. As a result, the primary layer should be up to 5 mm thick.
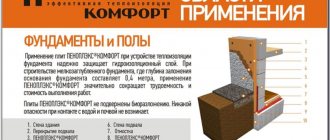
Penoplex insulation scheme: 1 - penoplex slabs, 2 - glue, 3 - dowels, 4 - reinforcing mesh, 5 - primer, 6 - plaster coating
When the top edge is fixed to the plane, apply the solution to the mesh so that it is evenly distributed across the entire width. Every movement comes from top to bottom. Be sure to leave a vertical “tape” clean of the plaster mixture on the right side, because each subsequent strip will overlap the edge of the previous one by almost 1 cm.
As a result, it turns out that the wall will be strip by strip covered over the entire surface with a mesh. Look at all the places on the wall where the geometry of the plane changes (door openings, slopes, window openings) - this is where you should first start laying the mesh.
Reinforcing mesh for foam plastic
Prices for reinforcing mesh for foam plastic
Applying the structure.
Penoplex plaster is applied in two stages. The first involves creating a leveling layer. For this, a universal solution is used. You will need a wide spatula, thirty-five centimeters wide or more. Plus a small tool that is used to apply the material to the insulation. It is recommended to make the thickness of the solution approximately three millimeters. The mixture is applied in parts: first, one fragment of the wall is finished, then the next. It is important that the joints of the leveling layer and the mesh do not coincide with each other.
After it has been applied and allowed to dry for at least one day, it is rubbed off. The time interval from applying the solution to its grouting should not be more than four days, otherwise the mixture will become too hard and it will be difficult to grout. The quality of the grout should be as good as possible, because the final finish will be applied to this surface - a textured or decorative type material.
After grouting, it is primed. A roller wrapped in short-pile material is used. This is necessary for strong adhesion of the finishing layer to the surface. The type of primer depends on what kind of coating is planned. Compositions containing quartz particles are suitable for decorative mixtures. If the wall is to be painted, then the primer needs to be as uniform in consistency as possible, without inclusions.
Thermal panels with polymer cement plaster
It would seem that it couldn’t be simpler by strengthening penoplex - plastering on a mesh can be done at any free time. Unfortunately, the creation of a high-quality and reliable reinforced layer requires a certain temperature, since the adhesive mixture must dry completely. But do not stop work during the cold season, especially since the installation of penoplex can be carried out at any time of the year. It is for these purposes that the manufacturer created thermal panels with a polymer cement coating (penoplex with a reinforced mesh, which is already plastered with a special polymer cement composition).
Such building panels, having all the characteristics of high-quality insulation, allow you to quickly install penoplex with plaster mesh, regardless of the weather. This significantly reduces the work time, and applying the finishing layer of plaster is not difficult, since there is a prepared surface. In addition, these panels, prepared in the factory, are used to create decorative columns, arches and other finishing works. The thermal panels offered by PENOPLEX SPb LLC are high quality and reliable.
Operating procedure.
In order for the coating to remain securely on the synthetic insulation and serve as long as possible, it is important not to violate the technology of applying plaster on polystyrene foam. Finishing of foam plastic with plaster should be carried out in the following sequence:
- prepare the solution correctly;
- make reinforcement on the surface of the insulation under the plaster;
- grout the mesh;
- apply a leveling coating according to all rules;
- rub it in;
- prime the surface;
- apply finishing coat.
"Unis Thermal Facade S"
A specialized composition for creating a reinforced layer on the surface of polystyrene foam and mineral wool slabs. Involves the use of façade fiberglass mesh. It is produced in accordance with GOST and complies with the façade insulation standard STO 2-14-7-211.
Advantages:
- after drying, the composition forms an impact-resistant surface layer, which allows you to extend the service life of the insulation;
- provides reliable adhesion (if the surface is rough or has other flaws, it should be primed first);
- frost resistance of at least 100 cycles;
- operating temperature – from -50 to +70 °C.
To ensure that the layer is truly impact-resistant and does not become cracked, follow the proportions of dry mixture and water indicated on the packaging.
Extruded polystyrene foam (EPP).
This is plastic in the form of sheets that can work under constant exposure to ultraviolet radiation.
The manufacturing method used gives EPP enhanced strength and thermal insulation characteristics. The composition of EPP is similar to polystyrene foam; they are based on one material – polystyrene. But, manufacturing improvements have given it hydrophobicity; it does not allow moisture to pass through or absorb. This is due to the absence of pores; the cells in it are filled with gas. For extruded polystyrene foam, dry plaster is used.
