What it is?
Painting fiberglass (gossamer) is a rolled material made of fiberglass threads. Allows you to prepare the surface for painting, puttying, plastering or wallpapering.
Hides defects and also prevents cracking and peeling of the finishing material during natural shrinkage. It has the properties of a reinforcing material, creating a smooth, uniform surface. It is made by pressing fiberglass under high temperatures. The canvases are impregnated with modified resins or starch. Meets the basic characteristics of fiberglass wallpaper. However, unlike them, fiberglass is not woven on a machine. Without pronounced relief and wicker pattern. Used in rough work.
Main characteristics of the material
Main characteristics:
Fiberglass is resistant to mechanical friction and compatible with adhesives. The reverse side of the material is fleecy, which ensures adhesion to the surface. The front is smooth. Suitable for all types of surface. Used for work in interior spaces. Material with a density of over 50 g/m2 can be used in facade work.
Advantages and disadvantages
Fiberglass is required for decorative finishing of drywall. The material performs especially well under painting, as it hides even significant defects and irregularities, and prevents cracking and peeling.
Advantages and
disadvantages:
Fiberglass does not accumulate static electricity and prevents the formation of mold, mildew, and dust accumulation. Service life - at least 35 years. Before use you need to stock up:
Painting fiberglass - what is it and why?
When the building shrinks or the plaster/putty dries, small cracks form on the walls and ceiling. They greatly spoil the appearance of painted surfaces. To prevent their formation when plastering, use a painting mesh. It reinforces finishing materials, preventing the formation of large cracks. Microcracks are combated with the help of painting fiberglass. This is a thin non-woven material made from many glass fibers of different thicknesses. The fibers are connected randomly to each other, which prevents cracks from appearing. There may be microcracks, but they are not visible. This determines the scope of application of painting fiberglass - to improve the quality of finishing of walls and ceilings.
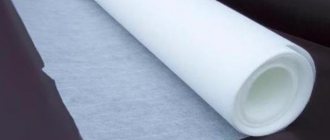
To keep painted surfaces even and smooth, use a “cobweb”
The thickness of this material is small - it is translucent. Because of its appearance it received the name “cobweb”. Sold in rolls 1 meter wide, with different densities - from 20 g/m2 to 55 g/m2. The density is selected depending on the application. For interior work, 30-40 g/m2 is more often used.
Fiberglass is glued with glue for glass wallpaper onto more or less even walls. It successfully masks small cracks (up to 0.5 mm wide) and unevenness, creating a smooth surface. That’s why this technology is becoming more widespread - it simplifies the preparation of walls for painting (putty), and the result is no worse. The same material can be glued to drywall. It successfully masks joints and prevents the formation of cracks in these places. The main thing when gluing is to place the seams of fiberglass away from the joints of the gypsum board.
This is what a fiberglass web looks like
Painting fiberglass is inconvenient to work with - the fiberglass breaks, and its smallest particles can get into the lungs. Therefore, you need to work in protective clothing and, preferably, a respirator. After it is glued and hidden with several layers of finishing materials, there is no question of any migration of fiberglass. In this state it is absolutely harmless.
How to putty spider webs correctly?
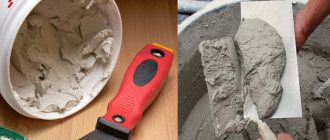
To putty fiberglass, it is better to use non-shrinking gypsum or fine polymer putty (acrylic, latex, silicate). It is important not to use coarse putties. Below we discuss the features of puttying on the ceiling and for painting.
On the ceiling
The material is attached to the ceiling using putty tape or mounting adhesive. If you fix the canvas with a stapler, it may sag. Puttying under wallpaper, panel, clapboard or tile cladding is allowed without leveling significant defects and imparting a white tone.
Technology:
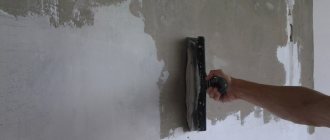
If the surface is being prepared for painting or plastering, sand the ceiling using a circular motion using a float with a P180 attachment. Then dust the base with a vacuum cleaner, do not use a damp cloth. When preparing the ceiling for wallpaper and cladding, this stage can be neglected. Before decorative cladding, apply a layer of penetrating primer.
For painting
The base for painting is puttied using the same technology. However, the process differs in a number of ways regarding materials, coating and defect handling. These include:
Here it is important to achieve a perfectly smooth surface by sanding and multi-layer coating. Each layer is applied 1 mm thick. The total thickness of the coating cannot exceed 10 mm. If the solution gives a yellowish or grayish tint, use a white covering primer.
Step-by-step instruction
After preparing the necessary materials and tools, you can begin roughing the surface. After gluing the fiberglass, 48 hours later you can begin decorative finishing.
Required materials and tools
It is important to prevent glass fiber from coming into contact with mucous membranes and exposed skin. Therefore, stock up on:
Materials you will need:
Required tools:
Primer and removal of surface defects
The preparatory stage involves priming and eliminating minor surface defects. If fiberglass is glued over OSB, then it is necessary to sand off the factory protective coating of the board.
Preparation:
It is recommended to apply the final layer of primer (before pasting) no later than 4 hours before starting work. It is better to sand significant defects if the surface is being prepared for painting. Minor ones will disappear under the canvas.
How to glue cobwebs to drywall or OSB?
Marking the canvas is similar to the method of wallpapering. The roll is stretched on the floor and cut to the height of the wall. The glue is applied to the base, not to the material. Before painting, the strips are glued end to end, and the sticker starts from the corner.
Stages of work:
When attaching fiberglass to the ceiling, the canvas is cut into several fragments. Painting and puttying of the material can be done no earlier than 48 hours later. 3–4 hours before the start of work, it is covered with penetrating soil.
Do not allow the material to join at the seams of plasterboard or OSB - they must be covered with a solid sheet. Otherwise, the putty or paint in these places will crack.
Surface painting
There are 2 ways to paint fiberglass canvas - with and without putty.
In the second case, it will be difficult to achieve a uniform surface, which will significantly increase paint consumption. This option is suitable when it is necessary to preserve the relief of the web and if the joints of the fiberglass are invisible. If this is not necessary, apply 3-4 layers of putty before painting. It is important to sand and prime the plastered surface a maximum of 3–4 hours before starting work. The paint is applied with a short-nap roller in 1–2 layers. For this, water-based, latex or acrylic compositions are used. The second layer is applied 8–12 hours after applying the first. Hard-to-reach places are painted with a soft brush.
Putty on fiberglass - how to cope with the job even without experience
Such types of work as gluing fiberglass and puttying on it are inextricably linked, and if I have already discussed the first part of the process in one of the previous reviews, then the finishing process needs to be analyzed separately. This work is not very difficult if you know all the nuances of the technology and follow all the recommendations that will be presented in the review. We will also figure out how to select high-quality materials so that the result is as reliable as possible.
In the photo: the surface of the fiberglass is not very smooth, and the seams on it are visible, so it is better to putty it
Workflow Description
We will look at several aspects, each of which is important in its own way, just read all the information so that you have a complete picture of the work ahead in your head.
Necessary materials
First we need to collect a whole list of materials that we will use. Below is a table that lists specific types of mixtures; I use them myself, so I can vouch for the quality and reliability.
Of course, there may be other options, the main thing is that they are of high quality, since even perfect adherence to technology will not allow you to do the job efficiently if you used low-quality components.
All formulations are of high quality and ease of use.
| Material | Description |
| putty | I use Vetonit compounds, as they apply just perfectly and rub off very easily. This type of dry mixes is ideal for beginning craftsmen; there are several composition options for different rooms; you must choose what is best suited for your conditions. As for the cost, the price is 400-450 rubles per bag weighing 25 kg |
| Primer | Where would we be without soil, because it is an indispensable attribute of any finishing work. The amount of composition depends on the chosen technology; below I will talk about the main aspects. The fact is that the composition can be applied once or twice, hence the required volume of primer also changes |
The soil allows you to strengthen the surface
I would like to mention another putty composition - “Shitrok”, it is sold in buckets in finished form, which increases the ease of use. I don’t recommend it only because of its high cost - a bucket weighing 28 kg will cost you about 1,200 rubles, but if costs are not important to you, take this option, as it is easier to use due to the fact that it does not need to be prepared before application.
"Shitrok" is another option that is popular among finishers
Work tool
In order for us to carry out work quickly and with maximum quality, we need to have a convenient and reliable tool at hand:
Fiberglass putty is done using these devices
The mixer can also be rented
A grater is needed for final leveling of the putty layer.
Protective equipment allows you to protect yourself from dust
The working process
Many developers do not know whether fiberglass needs to be puttied before painting, everything is simple: if you do not finish the surface, then the texture of the fibers will appear on it, and the seams will also be noticeable, even if they are joined perfectly and there are no unevennesses. Even if you glue wallpaper, you need to putty on the fiberglass, otherwise later, when tearing the material off the walls, you can separate the cobwebs, which is extremely undesirable.
I hope you have figured out how to glue fiberglass to putty or drywall, and your surface is perfectly flat, otherwise the work will become more complicated, because you will have to create a plane, and not just distribute the composition over the surface.
Now let's look at how to putty a surface; instructions for doing the work yourself are as follows:
The workflow consists of these actions
Masking tape will prevent any damage to the adjacent finish.
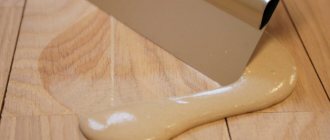
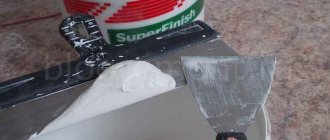
Mix the ingredients thoroughly
“Vetonit” in its finished form retains plasticity for a day, and if it is stored in a closed container, then for two, so there is no need to prepare the mass, like gypsum-based options, in small portions. Calculate how much you will have time to apply in one approach, and prepare as much solution as you need, this is very convenient.
Work begins from the abutment, the composition is stretched in a thin layer
Directional light reveals all surface irregularities
The primer strengthens the surface
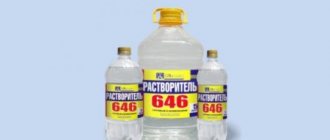
Glue for fiberglass
There is a special glue for fiberglass, it says “for glass wallpaper”. Yes, because canvas is a special case of glass wallpaper. Every normal manufacturer has this type of glue, it differs from ordinary wallpaper glue by special additives - methylcellulose, sometimes PVA, so it is more powerful than standard starch. Sold both in the usual cardboard packs and in buckets in finished form. Among dry adhesives, our craftsmen like Quelyd, Krass, and Pufas the most. Among the ready ones is Oscar. You all probably know how to prepare glue - pour it very slowly into a bucket of cold water with constant stirring. Lumps and dirt should not be allowed. As for consumption, it will be much higher than the numbers written on the pack. On average, one pack per half kilo is enough for 20-25 squares, which is due to the peculiarities of the technology. We will talk about them.
Conclusion
I strongly recommend puttingtying the surfaces on which fiberglass is glued; do not listen to those who say that this is not necessary, the technology was invented for a reason, and no one would complicate the process just like that. Therefore, do everything as expected - and enjoy the perfect renovation of your house or apartment.
The video in this article will help you understand some aspects better, and if you still have questions, write them in the comments below.
Source
Types of fiberglass for ceilings and walls
There are three main types of fiberglass used in construction. The first option, often called ceiling web, has a density of 25 g/m². The weight of 1 m² of material is only 25 g. The use of fiberglass is justified for ceilings for painting, since fiberglass is light in weight, making it convenient to glue.
The distinctive advantages of the material also include the low consumption of paint, which will be needed for the finishing coating. However, low-density fiberglass can be used for surfaces that do not have large cracks or irregularities.
A universal web is considered to be fiberglass with a density of 40 g/m², the strength of which is twice that of the previous option, but it has a lower cost than thicker analogues. This material is used for surfaces that are more subject to mechanical stress, which is more typical for walls. However, it can also be glued to a ceiling that is finished with old plaster. Such fiberglass is also suitable for finishing wall and ceiling coverings in rooms that experience high vibration loads.
Fiberglass canvases for painting have different levels of density.
One of the most durable options is fiberglass with a density of 50 g/m². The material is capable of sealing large cracks. It can withstand significant mechanical loads, so it is advisable to use such a web when decorating industrial premises, workshops, and garages, where there is a high probability of damage to fencing structures. The cost of installing such material is much higher than the cost of gluing previous analogues, which is associated with the large weight of the products and the significant consumption of glue for the web.
Note! High-strength fiberglass is not recommended for use in apartments and residential buildings.
Is it necessary to use fiberglass under the putty mixture?
Most renovation specialists are faced with the problem of cracks along the joints on drywall surfaces.
Even a special mesh cannot always prevent the appearance of cracks, because they appear under the strong influence of shrinkage of the house or temperature changes.
To prevent this from happening, you can use fiberglass (in ordinary speech it is called cobweb), it is actually fiberglass. But this is not like glass wallpaper (braided threads), but a pressed material. With its help, you can strengthen the base well and prevent cracks from appearing.
To improve the technical performance of this material, it is recommended to apply a layer of putty on it.
This article will tell you how to use fiberglass and how to properly prepare it for coating with putty mixture.
Advantages and disadvantages of spider webs for painting
Fiberglass for wallpaper or painting is characterized by increased resistance to temperature changes. Substrate preparation can be carried out at temperatures from -40 to +60 °C, which will not affect the quality of the surface. The material is breathable and hygienic. Fiberglass does not attract or accumulate dust due to its antistatic properties. It eliminates the possibility of condensation forming on the surface, which is the cause of mold and mildew.
Gossamer fiberglass is characterized by hypoallergenicity, which is especially valuable for young children and people with allergies. They do not have a negative impact on human health, which is due to their environmental friendliness.
One of the significant advantages of the material is its fire resistance. It is impossible not to highlight the high wear-resistant qualities, due to which the base will retain its original appearance for a long time, which eliminates the need for frequent repairs. This surface can be painted several times. Fiberglass has an affordable price, as a result of which repairs can be performed efficiently and inexpensively.
Despite the large number of positive factors, fiberglass has quite serious disadvantages. It is necessary to work with the material with extreme caution, since small fragments of glass may break off when laying it. This can cause harm to health.
Cobwebs for painting are characterized by hypoallergenicity and resistance to temperature changes.
When glass fragments come into contact with the skin, they cause skin itching. A more serious consequence that will require seeing a doctor is the elements getting into the respiratory and visual organs. Therefore, it is necessary to work in closed clothing, gloves, a respirator and safety glasses.
Tips for choosing this material
Fiberglass has a high level of resistance to various negative environmental factors (moisture, fire, chemicals, mechanical stress).
The parameters of such material do not deteriorate for a long time.
The best density of fiberglass should be up to 55 grams per square meter. They sell it in rolls 50 meters wide. It is possible to buy not the entire roll, but only the required quantity.
To stick the material, purchase a special glue, the same as for glass wallpaper.
The adhesive composition should be chosen of good quality, because it affects the overall strength of the entire structure.
The consumption of such a product for fixing fiberglass under putty will be half as much as when working with glass wallpaper.
The high level of adhesive consumption depends on the characteristics of the web - it is completely saturated with glue.
What fiberglass is glued to: other composition options
Glue in the form of a dry powder is more profitable to use. The finished composition can be prepared in the required volume. The powder should be diluted with warm water, which is carried out in accordance with the instructions. The dry composition can be bought for 400-450 rubles. for 0.5 kg.
On a note! According to reviews, it is better to paste fiberglass for painting with mixtures of recognized brands Wellton, Oskar, Pufas and Bostik.
Fiberglass can be glued using PVA glue. However, it should be borne in mind that the material has a low density, so it transmits a large amount of ultraviolet radiation. After some time, the glue will turn yellow, which will affect the decorative effect of the final coating. Therefore, when gluing fiberglass to PVA glue, paint should be chosen in dark shades.
Experts recommend using only special glue for fiberglass for gluing.
You can make glue yourself. Before gluing the canvas with gelatin, prepare a composition at the rate of 25 g of the substance per 350 ml of water. After the gelatin has been soaked for 1 hour, add ½ tablet of crushed aspirin and 1 tsp. glycerin or castor oil. The mixture is heated to a temperature of 40-45 °C and removed from the heat. When the glue cools, it will have the consistency of a medium soft jelly.
Work procedure
To avoid errors during work and to avoid starting it again, it is important to follow all technical rules.
This is not a very simple procedure, but you can do it yourself.
Preliminary work
The preliminary stage takes place in the following algorithm:
Installation work
The technology for gluing cobwebs will be described below:
Fiberglass is cut inside and outside the corners. In these places the material will tear anyway, but if it is not cut, it will tear unevenly.
Another thing you need to know is that the joint between two sheets should not be done at the joints of drywall. If this is not observed, the web will burst.
It is important to remember where the joints of the drywall and the seams of the fiberglass are, so that they cannot be joined.
The coating dries in about a day. During this period, you cannot ventilate the room; all drafts must be excluded.
After drying, surface finishing can be done further.
Fiberglass has an outer and inner side. If you have experience working with such material, then the sides can be immediately distinguished from each other. But, if this cannot be done, then all this information must be indicated on the packaging. Usually the roll is rolled so that the wrong side is inside the roll.
Puttying
It is necessary to putty the surface because:
Putty on fiberglass is carried out according to the following algorithm:
To make the entire overall structure stronger, it is definitely necessary to use fiberglass. You can’t skip the puttying stage either.
This procedure is no different from putting putty on any other surface.
Source
Application technology
In order to complete the job without defects and not start all over again, you must adhere to all technological standards. Although the work cannot be called simple, it can be done independently.
Preparatory stage
Preparatory activities are carried out in the following order:
- We determine the dimensions of all surfaces on which the fiberglass will be glued. As a result of measurements, we determine the required amount of material. A certain supply of material should be provided (within 5-10%), since the material is glued overlapping. Also, do not forget about the increased consumption of glue, as mentioned above.
- The canvas is not glued directly onto the drywall, but onto a putty surface. First, we putty the joints and places where the fasteners are located (we use sickle mesh). Next, apply putty to the main surface. The dried coating is sanded with an abrasive until the surface becomes smooth.
- You should also inspect the surface for defects (chips, cracks, etc.). If there are any, seal them with putty.
- Before gluing the fiberglass, the base should be cleaned of dust and dirt. To do this, you can use a slightly damp sponge and a vacuum cleaner. It is recommended to remove dirt immediately before gluing to prevent dust from accumulating again.
Installation work
Below are instructions for gluing fiberglass:
- Cut a piece of sheet to the desired length. It should be noted that full-size sheets can be used for the wall, but for working with the ceiling a two-meter sheet will be more than enough, otherwise there will be difficulties during its installation.
- Prepare the glue. It is important to adhere to all the requirements of the manufacturer. If you violate the cooking technology, for example, the consistency is too thick or liquid, the work process will become very difficult. You don’t have to waste time preparing the adhesive solution, but purchase a ready-made composition - this will greatly simplify the work. However, the cost of finished glue is much higher than the concentrate.
- Let's not forget about our own safety. If particles of fiberglass get on the skin, the sensations will not be pleasant, because we are talking about glass. If particles get into the nose, prolonged sneezing is inevitable. Therefore, before starting work, it is recommended to wear a respirator, safety glasses, rubber gloves and long-sleeved clothing made of coarse fabric. It should be noted that particles should only be feared during installation. After gluing, the particles will settle and will not pose a danger.
- We will apply the glue using a brush. The glue must be quite viscous, so a regular brush or paint roller is not the best choice in terms of ease of use. In addition, the fiberglass allows you to apply a thick layer to the surface, since (as we noted earlier) fiberglass absorbs glue well. It is recommended to pre-smear not the entire wall, but specific areas where the sheets are immediately glued.
- We glue the first sheet from the corner of the structure. The gluing technology is simple: apply a sheet of glue to the layer of glue applied to the wall, lightly press it down and level the surface with your hands. Next, using a smoothing spatula, remove air and excess glue from under the sheet.
- After we have leveled the sheet, we cut off the excess fragments from it. We also cut off overlaps on baseboards and, if necessary, in other areas. For cutting we use a construction knife.
- The next step is to treat the outer surface of the glued fiberglass with glue. Particular attention should be paid to saturating the entire surface area (no dry areas should remain), since otherwise it will not be possible to ensure reliable adhesion. There is a very simple sign that allows you to make sure that the canvas has been properly impregnated - it becomes much darker in the places where the glue is applied.
- A sheet of fiberglass is glued slightly overlapping. First, the sheet must be leveled by removing air from under it, and then a slot must be made directly along the overlap. Next, we cut off the excess parts of the canvas and get a seam that is noticeable externally, but cannot be felt by palpation. Thus, we get a perfectly flat surface.
Note! The material should be trimmed at internal and external corners. The fact is that the fiberglass will tear in these places even without cutting, but in this case the tear line will be uneven.
One more circumstance should be mentioned: the seams between the sheets should not coincide with the plasterboard joints. If this rule is violated, the fiberglass will definitely crack in this area. It is recommended to remember where the sheets are secured and where the joints are to avoid alignment.
The surface will dry for approximately 24 hours. At this time, all windows and vents must be closed. There should be no drafts in the room. After drying, you can continue finishing work.
Advice! The “web” has a front and back side. If you have experience, you can decide on a side at first glance. However, if you have trouble with this, there is a label on the roll that shows the sides. Rolls are most often rolled so that the wrong side is on the inside.
Puttying
The need for puttying is dictated by the following circumstances:
- It was already mentioned above that the absorbency of fiberglass is impressive, and it concerns not only glue, but also other liquids. If you leave the surface unputty, the paint absorption in the future will be very high. You will have to apply 4-6 layers of paint and varnish, which will lead to serious expenses.
- Fiberglass has a peculiar texture that does not look very attractive. This texture will not be hidden by paint, but fiberglass putty will camouflage it perfectly.
- If you have to glue wallpaper, you can’t do without putty, as otherwise the material will inevitably peel off.
Puttying is performed in the order indicated below:
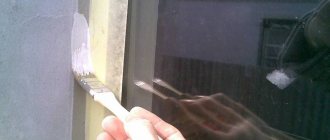
- Apply a layer of primer to the surface. This will reduce the absorption of the material and improve adhesion.
- First, apply the first layer of putty. Let the coating dry (depending on the type of putty, this may take up to a day).
- Apply a second layer of putty. After it dries, sand the surface using a grater and sandpaper. Checking the plane is carried out with an electric lamp.
- The last stage of work consists of painting the surface or gluing wallpaper. Fiberglass can also be treated with decorative plaster.
So, the use of fiberglass is completely justified from the point of view of increasing the reliability of the entire structure. You also can’t do without puttying. This operation is carried out in the same way as treating any other surface with putty.
What kind of putty to putty on fiberglass before painting?
Today, manufacturers of finishing materials provide several types of reinforcing materials for walls and ceilings, and painting fiberglass is considered by many to be the most reliable, provided that the work done on it is of impeccable quality.
This is a rolled analogue of glass wallpaper that does not have a deep texture, but it cannot be called smooth either. The fabric, which is made by weaving fiberglass threads, has a slight roughness; the coarsest structure is called the “web”.
A number of advantages and disadvantages, as well as the technology of pasting with it, can be learned from the article “Treating surfaces with materials to prevent cracks,” and here we will look at how to prepare the surface itself, pasted with fiberglass. After all, although there is a statement that a surface treated with this material is ready for any paint coating, in practice it often turns out to be not entirely true.
Preparing fiberglass for painting
The specificity of the fiberglass material is that it has a high degree of water absorption.
In this regard, when painting, problems arise with high consumption of paint and varnish material, and painting difficulties are a separate issue. The fact is that when using water-based paints and varnishes, the fiberglass instantly draws water out of them, and the strip rolled with a roller immediately dries out, and the painter simply does not have time to roll it out in an even layer. To prevent such incidents from happening, they learned to prepare fiberglass for painting using the methods described below.
Excessive water absorption can be removed if, before painting the fiberglass, you treat it with either a deep penetration acrylic primer or a primer-paint from the line of purchased paints and varnishes. You can also take the paint and dilute it with water to such an extent that it becomes so fluid that it can penetrate into the smallest pores of the fiberglass. What primer should I use to prime the walls before painting?
It is important not to saturate the material until it gets too wet, as is done when priming the putty layer (otherwise the glue will become soggy and the fiberglass will peel off from the wall surface). There is a second method of preparation, as for thin-layer decorative textures, described at the end of the article.
Many people recognize only one sensible way to paint fiberglass with modern paints - using types of rollers with medium pile. In this case, the paint is applied in a thick layer, but you need to try to stretch it, otherwise the layer will crack. It is enough to apply the paint in one layer if the fiberglass canvas has been pre-treated with primer-paint, but to “soften” its rough surface, it is better to apply a second, second layer.
How to glue fiberglass: algorithm for performing the work
Before gluing fiberglass for painting, it is necessary to ensure optimal working conditions. The walls should be inspected for visible defects in the form of cracks, potholes and other defects. They must be removed using a plaster mixture or putty. Next, the base is treated with a special primer, which must have good penetrating ability. This mixture helps to level the surface structure, bind dust and fill microcracks.
Note! Gluing fiberglass to the surface of a wall or ceiling is carried out at a temperature of 15-25 ° C, relative humidity no higher than 60%, excluding drafts and direct sunlight.
Before gluing fiberglass, the surface must be primed.
After applying the primer, it is necessary to allow time for it to dry completely. This is very important, since a fine crystal lattice with high adhesion is formed. This film will be damaged if you do not wait for the base to dry.
Before gluing fiberglass to a ceiling or wall, you need to prepare the material. It is very inconvenient to work with long solid panels. They are cut into elements convenient for work. In this case, allowances (1-2 cm) along the edges should be observed. Next, the glue is prepared. It is applied to the back side of the strip of material along the width and sides, spreading it in a thin layer - 1-1.5 mm.
Note! Material consumption is 10 g per 1 m² of web.
Preparation of fiberglass for decorative coatings
Decorative coatings, first of all, should be divided into thick-layer and thin-layer, since the preparation is carried out in completely different ways.
In addition, the process of gluing fiberglass is slightly different: the glue is applied in a thick layer so that when smoothing the fiberglass, it seeps through. This achieves a high load-bearing capacity of fiberglass; the decorative layer under its own weight will not lead to peeling of the fiberglass covering from the wall. Fiberglass for thick-layer decorative coatings , such as “Marseille wax” and other interior structures, does not require special preparation. Only the fiberglass is primed with primer-paints filled with quartz sand, possibly diluted with water in the proportion specified by the manufacturer. For application, use a brush or roller with medium bristles. If the fiberglass was glued in the “folk” way, that is, with putty, then before applying primer-paint it is treated with a fine-grained acrylic primer of deep penetration. Do I need to putty on a plasterboard ceiling before painting?
You can read about this method in the “painting work” section, article about materials for preventing cracks.
Fiberglass canvas for thin-layer decorative plasters and paints is prepared in such a way as to remove its relief structure. To do this, fiberglass is prepared for putty, then puttied with finishing acrylic painting compounds (as practice has shown, they have better adhesion and minimal shrinkage). If it was glued to putty, then it is primed with acrylic impregnations, otherwise no preparation is made. In order to putty fiberglass with high quality, you need to try to complete the work in one thin layer, not exceeding 2 mm in thickness.
Then everything follows standard technology: sanding the dried layer and priming.