Linoleum has long occupied a leading position among materials used for flooring. This is explained by the convenience and ease of installation, variety of types, ease of maintenance and favorable cost. It can be used in rooms with different conditions, performing well and withstanding negative impacts for many years. When beginners, and not professionals, are going to lay linoleum, they wonder whether it is necessary to glue the linoleum to the floor, or whether this stage of work can be dispensed with. A detailed analysis of this issue will be given below.
A properly prepared base is the key to a quality coating
Before installation you need to prepare the base.
To do this, remove the old coating by prying it off with a spatula and removing it in pieces. If something could not be removed with a spatula, for example, residues of mastic or glue, we clean them with a wire brush. Having completed the dismantling work, we evaluate the surface. Linoleum is an elastic material, therefore, if there are unevenness and roughness on the floor surface, all imperfections will be visible on the coating. In addition, linoleum on an uneven surface stretches and loses its performance characteristics; instead of lasting 5-7 years, it will only work for a couple of years. Therefore, installation at home requires a perfectly flat base, which can be done using a cement screed or restoring the concrete surface.
Leveling with mixtures
For leveling, we prepare a trowel, a grouting spatula, a building level, a long strip or a metal profile. You can use cement-sand mortars or polymer self-leveling mixtures. As a result, you should get a perfectly flat concrete base.
Working with cement screed is more labor-intensive compared to self-leveling mortars, which are applied in a 2 mm layer and dry in half a day. Before you start working with cement mortar, you need to mark a plane that will serve as a guide for leveling. We draw a horizontal line on one wall and continue work, moving perpendicularly along the walls. As a result, we get a smooth surface on the walls.
Next, visually select a square with a side of 50 cm on the floor and fill it with cement mortar. We level the mortar using a spatula and trowel, checking the evenness with a building level. When the surface is leveled, finally we smooth the surface with a trowel again so that there are no roughness or voids. Next, fill the next square in the same way, checking the line on the wall and checking the level for evenness. Thus, we fill the entire floor. Let the concrete harden, this takes several days.
Restoration of concrete base
If the concrete base has small defects, they can be corrected with cement mortar. We prepare a small amount of cement screed from sand, cement and polymer additives. Place the solution in a bowl or container convenient for work. To ensure that the mixture holds firmly on the old base, before applying it we inspect defective areas and remove broken and loose layers. Using a trowel and spatula, apply the mixture to the concrete base so that it completely fills all the cracks and voids, and level it on top. After the procedure, the floor must dry well so that the covering can be laid on it.
PVC Coating Adhesive
This material is laid using two methods. To ensure the best adhesion to the surface, you can glue the entire area of the canvas, but in general it will be enough to glue only the edges of the linoleum strips.
The recommendations of the material manufacturer should not be neglected. For which coating a particular adhesive composition is most suitable is indicated on the packaging with the mixture. But there are also universal options that will almost certainly fit:
- For gluing the coating to surfaces that absorb moisture well: concrete, cement screed, wood, a water-dispersion composition is suitable. This adhesive will not be suitable for a base that does not absorb moisture, for example, an existing PVC coating. The mixture is applied only to the base, and not to the linoleum itself. Among such adhesives, acrylate adhesives and bitumen mastics for fabric-based coatings are known. These adhesives are environmentally friendly, economical and do not have a strong odor.
- A special contact adhesive does not depend on the type of base and does not lose its properties when dry. This adhesive is applied both to the floor surface and to the coating being glued, after which it must be allowed to dry a little according to the instructions. The covering is then pressed tightly to the floor. The glue sets almost instantly, in just a few seconds, even if there are folds and creases on the surface of the canvas.
Types of linoleum
Today, many manufacturers offer two options for flooring: natural - marmoleum and artificial. The first, although more expensive, is eco-safe and highly wear- and fire-resistant.
Artificial comes in four types:
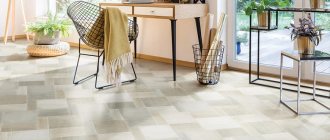
- Polyvinyl chloride is the most common. Made in various colors and textures. It is divided into commercial, household and semi-commercial. Household and semi-commercial products are suitable for residential premises; they can be laid independently.
- Rubber relin based on rubber is used in the finishing of public institutions, on sports grounds, as well as in industries.
- Alkyd or glypthal type of coating, made from alkyd resins, has excellent heat and sound insulation characteristics. However, it is rarely used in residential areas because it is not fire resistant, does not tolerate low temperatures well, and shrinks easily, resulting in cracks.
- Colloxylin or nitrolinoleum has a high degree of elasticity and wear resistance. However, it is highly flammable, so this type of coating is not used for domestic purposes, or in children's institutions.
How to calculate the required quantity
It's actually quite easy to do. The main thing is to calculate the area of the room that you plan to cover
It is important to consider doorways and spaces under windows
When purchasing, pay attention to the width of the roll to avoid joining. Most manufacturers offer marmoleum with a width of 2 meters, but there are also samples of 2.5 meters
As for PVC coating, there is more choice here, in the range from 1.5 to 5 meters.
Experts recommend purchasing linoleum with a margin of 10 cm on each side. If the material has a pattern, the supply may be larger.
What to choose: glue or mastic?
Property owners who are thinking about how to lay linoleum on a concrete floor efficiently and reliably must choose between glue and mastic. These compounds can be used both for partial fixation and for complete gluing of the floor covering to the base. Among the advantages of mastic is high quality waterproofing, since these adhesives are made based on bitumen, synthetic rubber or resins. It is recommended to lay single-layer linoleum on them without a base; this material is used in hallways, bathrooms, bathrooms, and public spaces. Among their disadvantages is low environmental friendliness, this is especially typical for bitumen-based mastics. Among the advantages is the low consumption of mastics, since in order to stick linoleum it is necessary to apply only 0.4 mm of the composition.
Glue for installation requires 1.5-2 times more, but it has its advantages. Among the main advantages:
- a wide range of products for different types of floor coverings;
- high environmental friendliness of water-dispersed compositions;
- attractive price;
- ease of operation.
Since most types of linoleum are supplied on a heat-insulating basis, it will be difficult to do without the use of glue.
How to remove coating from concrete floor?
Before laying linoleum on the surface, it is necessary to dismantle the existing coating. It can be different: wooden or, for example, tiled. Each type of coating, as is known, requires the use of varying degrees of force and different materials used for this matter. Therefore, in order to properly remove the old coating, you need to follow certain algorithms and only then will you get a truly high-quality outcome.
Removing a wooden floor
First you need to remove the baseboards, if any. It is advisable to start from the corners in order not to damage the baseboard and leave it intact for further use. We insert a nail puller into the gaps between the floor and the baseboard and separate them from each other. Next, we pull out the nails with chisels or unscrew the screws with a screwdriver. It all depends on how the baseboard is attached to the floor surface.
If there is paint on it, it will prevent easy dismantling. Therefore, when separating it is necessary to use a nail puller and a hammer. If the layer is thick and you cannot find the nail, count 10-12 centimeters from the corner. This will approximately be the location of the first nail.
After all the baseboards have been removed, you need to begin dismantling the wooden floor. It is recommended to start by removing the back side in order to completely preserve the boards for possible future use for various purposes.
If the boards are attached with screws, the technology is quite simple. You just need to unscrew the screw with a screwdriver and tear off all the wooden parts. If they are nailed, it’s worth working hard and strictly following the instructions:
- We find the latest board.
- We drive a nail puller under it.
- Lift it with a hammer.
- We step on the floorboard, as a result it will be located in its place, and the nail will stick out.
- We remove the nails.
If the floorboards are pressed tightly against the wall, you need to use both a nail puller and a hammer. And those areas that have succumbed to damage can be easily hidden under any baseboard. Next, we use a crowbar to remove the rotten wooden joists filled with cotton wool or glass wool. In the second case, it is necessary to carry out the work strictly with gloves in order not to damage your hands.
Once you have removed the logs, the dismantling can be considered complete.
Removing a concrete floor with tiles
Typically, such tiles are firmly fixed to the concrete, therefore, it is impossible to tear them off without damage. Those areas that are also damaged can be filled with concrete mixture, thereby completely leveling the surface. Dismantling of this kind is very difficult and dusty, so you need to be patient and have a mask that will protect your respiratory system.
There is another type of tile installation - glue installation. To do this, you need to remove the seams yourself and moisten these places with water. Next, use a spatula to remove the rest of the coating. After all the tiles have been removed, you can remove the screed.
This is a very complex process, since the screed is a concrete layer that levels the surface. And it needs to either be reconstructed or completely removed. There are several removal methods:
Shock. Removal occurs using a jackhammer
But it is important to remember that when performing actions in this way, you need to know that the screed does not contain reinforcement, otherwise you will need the help of specialists
- Diamond cutting. This method can be used if the thickness of the concrete is not more than 25 centimeters and does not contain reinforcement. It is usually performed by two people, since it is almost impossible to cope with such a sharp attack on your own. The appearance of the special machine is simple - it is a kind of mechanism with a disk that cuts the surface, and it is also oversized, which is convenient for small rooms.
- Diamond drilling. Such a mechanism is very expensive, its price varies from 150 to 250 thousand rubles. He makes holes in the floor surface and removes screed in the corner parts of the room.
Removing the coating from a concrete floor is undoubtedly a complex and labor-intensive process that requires time and effort. A good result depends only on your own skills, mastery of tools and the practical application of all the above tips.
Preliminary stage for laying linoleum
Preparing the base
Preliminary work is very important
Modern multi-storey buildings are equipped with floors made of high-strength concrete slabs. The final coating is laid on a solid base. To lay the canvas, preliminary preparation of the concrete floor for linoleum is required. First of all, we need complete dismantling of the old fabric and insulating layer. Then the surface is cleaned from dust, debris, and any contamination. Next, a screed is performed, which can be “wet” or “dry”.
Removal of old coating and surface assessment
The old coating from the concrete floor is completely removed, then it is necessary to remove all large and small debris, sweep and vacuum the floor. After cleaning, they begin to evaluate the subfloor. Indications for leveling a concrete floor:
- the presence of shells, cracks, potholes;
- unevenness and bumps on the screed;
- height difference is more than 2 cm.
Other deficiencies that need to be addressed include mold and mildew. Floors with traces of fungus are washed, treated with an antiseptic and dried well.
Antiseptic for concrete
Repairing defects
Subfloor defects include potholes, sinkholes, and cracks. They not only create irregularities that can lead to damage to the linoleum, but also worsen the sound and heat insulation properties of the floors.
Cracks in the concrete floor
Damage is repaired with cement-sand mortar with the following ratio:
- cement grade M400-M500 – 1 part;
- sifted sand - 6 parts;
- water – 1 part.
Mix the solution in the following sequence: mix dry cement and sand, then gradually add water, achieving the desired consistency. The crack is cleaned, expanded, and debris is removed from it.
Dry floor cleaning
Moisten the crack and apply the solution using a spatula. Level the surface and leave for 12-24 hours until the solution sets.
Sealing cracks with cement mortar
Large defects under a wet screed can be repaired using polyurethane foam, having first cleaned and moistened the surface. Irregularities and bumps with a height difference greater than the level of the planned screed are knocked down to floor level with a hammer or hammer drill.
Wet screed
Leveling with a solution is necessary for high-quality installation of the material. Procedure:
Screed with a mixture of cement and sand
- Remove the old coating, clean the concrete surface from dust, dirt, and debris;
- Apply sealant to the joints near the walls. Small cracks are sealed with cement mortar, large cracks are filled with foam;
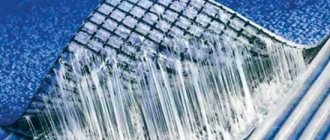
- Lay a layer of waterproofing. The film is overlapped, slightly extending onto the walls;
- Lay the expansion tape along the walls. This is necessary in case of thermal expansion of the hardened coating;
- Mark the height of the future screed. The operation is performed using a level. The device shows a horizontal line on the wall, which is repeated with a pencil or thread. You need to determine the highest point on the concrete floor, then measure 3 cm up. This is the level of the future flooring;
- Install a perforated profile that will serve as a beacon. The height of the elements is adjusted by wedges. Wood chips or special construction tools are used here;
- Prepare the pouring mixture. The solution is mixed using an electric drill with a special attachment;
- Let the finished mixture sit, then gradually fill the areas between the beacons. The solution is poured first at the far walls, then the excess is distributed to free places using a metal rule. The edge of the instrument rests on the tops of the beacons;
- Wait until the screed has matured. At this time, the room is not ventilated. Sometimes the laid mortar is spilled with water.
Leveling the surface with a self-leveling mixture
After the solution has matured, some irregularities often form on the surface of the base. Whether they need to be corrected or not depends on the type of linoleum being laid. The coating has a thick soft base, with a springy backing, which automatically eliminates minor differences in height. Laying thin linoleum on a concrete floor requires careful leveling of the base with a special water-soluble mixture.
This material is also used in self-leveling floors.
The solution itself spreads over the concrete base under the influence of gravity and does not require special leveling. After pouring, the surface is treated with a spiked roller. To reach the far corners with the tool, spiked shoes are required. After the mixture has hardened, the floor is primed twice.
Dry screed
Leveling a concrete base without using a liquid solution is done as follows:
- Remove old coating from concrete floor. Clean the surface from any dirt or debris;
- Apply sealant to the joints near the walls. To seal large cracks, polyurethane foam and a cement-sand mixture are used;
- Lay a waterproofing film. The edges of the material need to be brought slightly onto the wall;
- Place the beacons in the same order as for pouring the solution;
- Fill the space between the beacons with fine expanded clay or other insulation. Level the surface with a metal rule;
- Lay sheets of gypsum fiber board or any thick dense plywood on top of the beacon profiles. The slabs are laid in two layers so that the joints at different levels are further away from each other. Specially adapted floor elements equipped with a locking system are available for sale.
The process looks something like this
Selection of material and preparation of tools
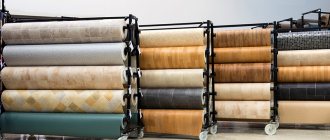
To lay this coating you will need not only a number of tools, but also the material itself. And his choice must be taken with full responsibility. There are many types of linoleum, but among them the following main ones can be distinguished:
- made of PVC. It is characterized by its low cost and good quality, but it still tolerates loads worse than natural coatings and does not like the effects of aggressive chemicals. Also, PVC linoleum is afraid of sub-zero temperatures, which is why it is important to transport it very carefully in winter;
Polyvinyl chloride linoleum (PVC)
Different types of polyvinyl chloride linoleum (PVC)
- made from natural materials. It costs a lot of money, but is very durable and does not get pressed under furniture even for a long time.
Natural linoleum
Examples of natural linoleum
When choosing linoleum, its thickness is taken into account, as well as the presence of an insulating layer. You should not buy very thin linoleum even for an apartment with little traffic - it can quickly lose its appearance.
The material can be homogeneous, that is, without a base, or heterogeneous, equipped with a backing on the reverse side. If you purchase the first option, then experts recommend laying an additionally purchased substrate for finishing coatings underneath it. Heterogeneous is available on two types of substrate - foam or fabric (jute). The latter option has excellent thermal insulation properties, while the first is considered more durable and durable.
Commercial homogeneous linoleum
Advice! You need to choose linoleum according to its performance characteristics based on the conditions under which it will be used.
Linoleum in the apartment
As for the external data of the coating and its color scheme, here you need to focus on the interior design. You can also think about your taste preferences and buy the color of linoleum that you like most. But if you need several of them, it is recommended to purchase rolls from the same batch - then the stripes will not differ in color and shades.
The purchased material is stored in a vertical position. It is recommended to immediately place it in the room where the repairs will be carried out. This is especially important if the material was transported outside in winter.
Wear resistance and abrasion classes of linoleum
Important! Linoleum cannot be laid at temperatures below +18 degrees.
Also for installation of linoleum covering you will need:
- tape measure - for taking measurements and marking the material;
- long metal ruler – for convenient cutting of the coating;
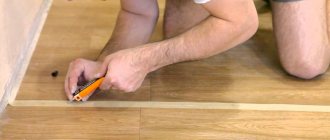
- linoleum knife - for cutting material;
- marker – for marking;
- glue and a notched trowel - in case of installation of the coating using the adhesive method.
Tools for linoleum flooring
Double-sided tape can also do a good job. In some situations, it can even replace the adhesive composition. And for joining individual linoleum sheets, special cold welding is purchased.
Substrate on a concrete base - a waste of money or a necessity
Substrate
In answer to the question of how to properly lay linoleum on a concrete floor, there is an important component – the underlay. Many will consider this to be overinsurance, a waste of money and, in general, an unnecessary purchase for such an ideal base as concrete, and for such an unpretentious material as linoleum. After all, there is no doubt about whether it is possible to lay linoleum on concrete.
Is it worth gluing?
Before you disassemble the method of gluing linoleum to the floor, you need to become familiar with the methods of installing this type of coating in general. Methods for laying linoleum:
- ordinary flooring without the use of adhesive components;
- gluing using regular double-sided tape;
- connection to the base using mastic;
- gluing with special glue.
Linoleum is easy to install even for a beginner
Technology for laying linoleum using tape
In the first case, it is enough to simply place the linoleum on the floor surface, let it rest, and then install plinths around the perimeter of the room - this will fix the material. But this technique is only suitable for laying the covering in rooms with a small area and it is desirable that the linoleum be laid in a continuous strip, without joints. The method is also suitable for installing coatings where the load on the base will not be too intense. Otherwise, the material will “float”. The main disadvantage of the method without using glue is the appearance of folds on the coating over time, some mobility of the material in any case, which will affect the durability of the material.
Trimming linoleum when laying
The most difficult, but better quality material can be laid on mastic or glue. This method is optimal for installing coverings over large areas, as it will not allow the linoleum to move on the floor and, accordingly, will not allow the material to quickly become unusable.
Double-sided tape is also a good option, but for concrete surfaces it’s far from the best. The fact is that it may not stick well to this type of base.
Installation with double-sided tape
And now the answer to the question - is it necessary to glue linoleum to concrete at all? It is necessary, but not always. For example, if the material is installed in one large piece in an apartment, then it is quite possible to do without the adhesive installation method, securing the material with a plinth around the perimeter of the room. If the installation is made from separate sections of material, then you will still have to glue it, otherwise it will move over time.
In this case, it is better to glue linoleum to the floor
It is also important to evaluate the operating conditions of the material before making a decision on gluing. For example, if the room is a walk-through room, people constantly move around it, or it is an office space, then fixing with glue will be, if not necessary, then desirable
However, in rooms you don’t have to glue the canvas completely - sometimes it’s enough just to apply glue crosswise in several places of the material and that’s it - the coating will stick. But in the corridor it is recommended to glue the material over the entire surface.
Why glue linoleum to the floor
Main conclusions
And so, in this article I tried to answer the question of whether it is necessary to glue linoleum to the floor in an apartment. I think it’s still necessary, especially since it’s not a complicated or expensive process at all. You can handle it quite well on your own.
In addition, high-quality and evenly glued linoleum acquires a structure that is more resistant to various external influences, which extends its service life. Unless of course you get tired of him during this time.
An exception can be made for small rooms, such as a toilet or storage room, by laying linoleum in them without gluing. And that is provided that everything is done correctly.
The fact is that after laying and trimming, the linoleum should rest for at least a day, or preferably three days. This is necessary so that its structure is stabilized in the environment in which it is laid. After this, it can be secured with skirting boards.
If you do this work yourself, then waiting a few days and then installing the skirting boards costs nothing. But if a team of “professionals” does this, then of course they will not wait.
In other cases, it is better not to save time and do the work in such a way that you do not regret it later and do not redo it several times.
But it must be said that gluing linoleum to the floor does not guarantee the complete absence of bubbles and damage in the future. This method only significantly reduces the likelihood of their occurrence.
I did not mention one more method of laying linoleum. This is when it is secured around the perimeter with double-sided tape.
I think that the benefits of this method are not obvious, since securing the linoleum with baseboards is quite sufficient. But this method still will not save you from stretching and deformation of the canvas. Especially if the area of the room is large enough.
Well, that’s all about whether to glue linoleum or not.
Good luck and try to carry out repair work in the house with pleasure. Then it will be creativity, not a burden!
Best regards, Alexander Tkachenko.
Features of installation
Typically, linoleum is laid on various types of concrete screeds, as well as on floor slabs. It all depends on the nuances that relate to the load on the floor and the purpose.
All base options can be divided into several groups, which depend on different percentages of consumables: crushed stone, sand and gravel
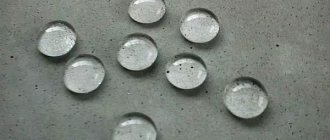
It is also important to understand that such screeds, regardless of consumables, will be treated with absorbent rough. This means that the entire surface perfectly absorbs moisture, gaseous substances, and so on.
Adsorption is a useful factor that allows you to lay linoleum for a long period of use.
Linoleum can be glued directly to a concrete subfloor
As for the correctness of the technology, its implementation requires the correct selection of adhesive mixtures. They must provide strength, fix the floor covering well, and, if necessary, not affect the complexity of dismantling. Typically, the adhesive base is recommended by linoleum manufacturers; it is advisable to listen to them.
Preparatory work
To create a perfectly flat floor, it is necessary to level the surface at the stage of creating the screed. The subfloor must have a thermal insulation layer. Often homeowners decide to install heated floors. This technology is relevant in our time and is capable of efficiently heating the floor.
Laying linoleum on a heated floor is carried out in the same way as on a regular floor, only you will need a “layer” of polyethylene or other rolled material, depending on the type of horizontal heating system.
If it is still not possible to completely eliminate the unevenness and minor differences in height remain, then you can think about using a self-leveling floor. The self-leveling solution will eliminate even minimal unevenness, thereby creating an excellent surface for the floor covering. Cracks on the floor can be repaired with putty.
For the speed and cleanliness of the procedure, many craftsmen fell in love with the leveling method using dry screed or plywood. You can resort to it only when the height of the floor allows it and the foundation is strong.
Why is it necessary to glue linoleum to the floor?
If we answer this question briefly, we can say the following: if you want to get a high-quality coating that will last a long time and without complaints, then it is better to glue linoleum to the floor.
If you intend not to bother with this issue, then you can lay the so-called dry method, which does not guarantee reliable operation in the future.
The fact is that if you lay linoleum without a sticker, especially over a large area, this can cause various unpleasant consequences.
- With changes in temperature and humidity in the room, different linear expansions may occur in different areas of the canvas. This will result in surface bubbles, waves and slanting wrinkles. You've probably seen such defects before. They appear more often and more strongly, the lower the quality and performance characteristics of linoleum.
- Under mechanical loads on the coating, stretching may occur in certain areas, and even ruptures of the canvas. This can happen, for example, when moving heavy furniture.
- If linoleum is laid in a high-traffic room, this can cause the canvas to shift and wrinkles to form if it is not glued to the floor.
- And of course, you need to glue the joints of the linoleum sheets, if any. Otherwise, firstly, moisture will get into these joints, which does not bode well. Secondly, at the joints the linoleum will “dry out” and shrink over time, forming cracks. Therefore, it is better to glue such joints, even if you use metal overlays on them.
In the photo, the situation is of course catastrophic and linoleum does not always swell so much. This is clearly an example of not the best quality flooring. But still this problem exists.
By the way, if you want to know how to choose high-quality linoleum, I highly recommend reading my article “How to choose linoleum for your home based on quality.”
One counter-argument to installing unstick linoleum is that old linoleum will be more difficult to remove if it is glued to the floor.
Yes, indeed, removing old linoleum when replacing it will be a little more difficult.
But how often do you change linoleum?
Usually once every ten years, or even less often.
So what is better, to tinker a little more once when replacing glued linoleum or to look at its defects for ten years?
And then, it is not necessary to glue it with liquid nails and other powerful glue that will stick tightly.
By the way, there is one slightly adventurous argument in favor of glued linoleum.
If your old glued linoleum is in quite good technical condition, then it can be repaired, the surface thoroughly cleaned and used as a substrate for new linoleum. That is, lay new linoleum on the old one, gluing it in the usual way.
By the word repair, I meant that you need to cut and re-glue the bubbles, if any, and coat the joints with sealant, if any.
But I repeat, this is of course not a very professional installation method, but it saves time, effort and improves the heat and sound insulation properties of the floor.
How to choose the right product
When choosing a new coating, it makes sense to take into account the following key characteristics:
- structure;
- purpose and class;
- compound.
According to its structure, linoleum is divided into heterogeneous and homogeneous. The first type consists of several layers (2-7), the topmost of which is a transparent layer and is responsible for wear resistance. Next comes the decorative layer, which directly contains the pattern or design of the product. The last component of a heterogeneous coating is from one to several layers that increase tensile strength and impart insulation to the material.
In addition to a number of obvious advantages, such linoleum will be an excellent solution in a situation where it was not possible to achieve a perfectly flat surface of the original material even after eliminating all the imperfections.
As for homogeneous linoleum, which usually consists of only one layer, it also has its advantages. Firstly, the price of such a coating is lower, and secondly, its pattern remains unchanged throughout the entire period of use, since the pattern lines run throughout the entire thickness of the material. In addition, the undeniable advantage of homogeneous linoleum is the possibility of its renewal after a long period of use by grinding.
Before choosing single-layer linoleum, you should make sure that the surface of the original coating is truly perfectly flat. Otherwise, the thin surface of the new material will eventually repeat the relief of the old one.
The next characteristic of linoleum is its class, which is allocated for each of the following three groups:
- household (non-commercial);
- semi-commercial;
- commercial
For household linoleum, designed specifically for installation in residential premises, there are three classes (21, 22, 23), each of which reflects the degree of permissible load on the coating. Thus, a product marked with the number 21 is adapted for a low level of load on it; accordingly, its installation will be appropriate in rooms with low traffic (for example, a bedroom or pantry). The number 22 means that the product is intended for medium load, which means it can be placed in the dining room, living room or office. For the kitchen and hallway, it would be wise to choose products with maximum wear resistance: class 23 linoleum would be the right solution for the kitchen or hallway.
As for semi-commercial linoleum (it also has its own class system), its qualitative differences from its household counterpart are minimal, but the cost is significantly higher. If the financial issue is not of great importance, it would be wise to immediately choose a commercial type of coating; such linoleum will last at least 10 years without the appearance of creases, dents and other unpleasant defects.
According to its material, linoleum is as follows:
- natural;
- polyvinyl chloride;
- colloxin;
- glyphthalic;
- rubber.
The highest demand in the modern market is natural and polyvinyl chloride. Natural linoleum contains exclusively natural ingredients: resin, crushed oak bark, limestone, linseed oil and natural dyes. It is produced both with a base (jute fabric) and without.
Polyvinyl chloride linoleum is made from polyvinyl chloride with the addition of plasticizers and fillers such as lime flour and pigments. Its structure can be both homo- and heterogeneous; the base can be either fabric (gives softness to the floor) or foam (has increased moisture resistance).
You will learn whether it is possible to lay new linoleum on top of the old one from the following video.
Recommendations
In order not to make a mistake when buying with the quality of the material and to make a good installation of a concrete floor with linoleum, it is worth taking note of a few tips from experienced craftsmen.
When purchasing, it makes sense to do a small elasticity test: if, when you compress the substrate with your fingers, dents remain on the material, the raw material is not suitable for purchase; It is unacceptable to level concrete with gypsum-based mixtures: in damp rooms they peel off in layers, and this material is not designed for heavy weight loads; If the floor is cold and level, the underlay is necessary for thermal insulation; When preparing the screed method, it is important that it dries completely (on average 28 days); You cannot lay fiberglass in rooms with high traffic; Before laying, the presence of detergent residues, oil stains and dirt on the concrete surface is unacceptable.
We recommend watching the following video for tips on choosing a substrate.
Glue installation technology
The technology for laying roll materials on glue, the sequence of processes and the requirements for installation rules are the same for all types of household and semi-commercial linoleum. It is important to follow these guidelines to get a good final result for your floor finish.
Laying technology
Preparing the base
Preparation of the base is the most important stage of installation. The final appearance of the floor when it is put into operation directly depends on the base on which the linoleum is laid. The main requirements are evenness and smoothness of the base.
The floor is cleared of debris, mortar build-up, concrete, and swept well. The condition of the foundation is determined. There may be 2 options:
- It is enough to make spot or patch repairs of the surface or screed over the entire area. In this case, the floor is well vacuumed and moistened. Prepare cement mortar M-150, make a screed over the entire area along the beacons or fill all the holes and cavities with the mortar, smooth it with a wide spatula, as a rule. According to SNiP, when determining the evenness of a surface using the 3-meter rule, gaps between the floor and the rule are allowed up to 3 mm per 1 meter. It is necessary to achieve such quality, otherwise defects will be visible on the finished floor.
After drying, the floors, in both versions, are primed with compounds suitable for the specific type of linoleum. It is necessary. Adhesion to the base and the adhesion force of the adhesive layer to concrete increases.
Priming the concrete base
Installation of linoleum
Take into account allowances for doorways, windows, and niches. The best option is to lay it in a whole piece, if the size of the room allows. When the area is large, you will have to make joints between the individual canvases. If you choose a coating with a pattern, you will have to take this into account when joining and buy more for the possibility of matching.
The purchased linoleum must accept the room temperature before rolling out. Then roll out and trim along the walls and niches with a gap of 5 - 10 mm and leave for 2 - 3 days to straighten. When the linoleum is leveled, check the expansion joint between the edge of the canvas and the wall again; it should be 10 - 15 mm and covered with a plinth.
Fastening with glue
When working with glue, follow the manufacturer's recommendations for layer thickness. A thicker layer may not dry out, and a thin layer will not provide strength.
Before applying the glue must be mixed well. It is applied to the floor in heaps with a metal spatula, then spread evenly with a notched trowel (usually No. 2) with a tooth height of 1.5 mm over the entire area.
When rolling out the canvas, make sure that there is no air left between the base and the floor. Roll the canvas with a heavy roller or square from the center to the edges until air bubbles are completely removed. Leave until the glue has completely dried for the period recommended by the manufacturer.
Prepare the glue yourself
If it is not possible to purchase an adhesive mixture, but you urgently need to fix the linoleum, it is permissible to use a composition prepared by yourself. It is based on any solvent, such as acetone, and linoleum itself. It is necessary to grind a small area of the coating to the state of sawdust.
The smaller the crumb, the faster it will dissolve. To check whether it will be possible to prepare glue, take a small part or half of the shavings and fill it with an arbitrary amount of acetone. Soon a uniform mass will form.
However, its properties will be inferior to the analogues considered, so it is better to use this method in situations where gluing linoleum is a temporary measure.
Is it necessary to glue linoleum to plywood?
Is it necessary to glue linoleum to plywood? People often face this question when the material has already been purchased, lies in a roll, a screed has been made, and a plywood base has been prepared on top. Yes, you need to glue, but not always. It all depends on what type of linoleum you choose.
Types of linoleum
This flooring can be divided into three groups:
- domestic;
- commercial;
- semi-commercial.
They differ from each other, like laminate, in load class. Therefore, their production technology is different. The basis also has differences.
Commercial and semi-commercial are made from non-foamed PVC (polyvinyl chloride). They are intended for use in offices, shops, even in workshops at enterprises. They have an increased protective layer against abrasion made of polyurethane. These types of linoleums need to be glued .
Shown are the varieties of linoleum adhesives
Household can be on a different basis:
- jute;
- felt;
- non-foamed PVC.
The last one listed is soft to the touch and is typically 3mm thick. This type of linoleum does NOT need to be glued . On the contrary, after spreading it on the plywood, make a cut so that it does not lie flush against the walls and there is a gap of 0.5 cm.
This needs to be done because this type of material will spread a little over the course of the year. If you lay it end to end, a bulge may subsequently appear near one of the walls. There will simply be nowhere for the linoleum to move. The gap itself is not critical; it can easily be covered by baseboards. The joints of household linoleum are glued together using cold welding.
In addition to commercial and semi-commercial, you need to glue linoleum with a jute and felt base. Patterns can be made from commercial material using hot welding. All the fun is not cheap, but very stylish and practical.
Glue for linoleum on plywood
It is best to use dispersion glue such as KS, PVA, Bustilat. You can, of course, spend money by choosing the Forbo brand, which not only produces this glue, but also linoleum. The quality of their materials is close to ideal. The world's largest tennis and athletics events take place on Forbo flooring.
Applying linoleum glue to plywood
How to glue linoleum to plywood?
The work is carried out with a notched trowel. Glue from the container is poured onto the plywood and evenly stretched over the area. No more than 30 minutes should pass before installation. The consumption of linoleum glue on plywood is on average 300 grams per square meter. After installation, it must be allowed to stand for at least a day. For more precise timing, it is better to read the label of a specific manufacturer.
The most important thing is that you understand what load is expected for this material. If this is a bedroom, a room, or any other living space, then in this case a plywood base will be justified, and the household look is intended specifically for these purposes.
But for a room with a large flow of people or heavy equipment, you need to take a more expensive type of product. Semi-commercial for small shops and offices, commercial - for supermarkets, hospitals, and factories.
More information in this video.
We will be grateful if you share the material on social networks. Maybe it will be useful to someone too.
Calculation of the required quantity and type of linoleum
Before visiting a hardware store to buy a roll of linoleum, you should decide on its quantity. To do this, you need to measure the length and width of the room and multiply the obtained data. As a result, we will obtain the required area value. On each side you should add 10 cm of reserve.
The most convenient option would be to lay linoleum in one piece, without joints or joints. This coating will last longer, since there will be no parts where the material can break or bend.
If the visit is large enough and installation in one roll is not possible, then the connections of different parts should be carried out with the utmost care, or seek help from professionals.
You need to choose flooring based on the room where it will be located. The higher the load during use, a higher abrasion coefficient is selected. Depending on the expected loads, the following types of linoleum are distinguished:
- Lightweight household - for bedrooms and rarely visited rooms.
- Average household - children's rooms and living room.
- High household - kitchens and hallways.
- Light commercial – offices and conference rooms.
- Medium commercial - training rooms, large offices, small shops.
- High commercial – large shops and restaurants.
A more detailed description of the types of linoleum is presented in the photo below:
The purposes of use are easy to determine from the name - household ones are often used for residential premises, and commercial ones - for offices and shops. At the same time, commercial types of linoleum have an increased margin of safety. Thus, in terms of abrasion coefficient, commercial linoleum for light loads is equivalent to a household coating for high loads.
In terms of the number of colors and patterns, the range of linoleum is very large. The chemical industry is actively using modern technologies to give buyers of linoleum and other floor coverings a design to suit every taste.
Advice! If the coating will be laid in several parts, then you should pay attention to the drawing. You may need to purchase an additional amount of coating in order to correctly assemble the complex pattern at the joints.
Working conditions
Before gluing linoleum to concrete, you need to make sure that the surface is thoroughly repaired and prepared. Having attached the building level to the floor, the master must check the entire area. A difference of more than 2 mm is not allowed. It is also necessary to vacuum the surface and rinse it with water. It must be well dried before applying glue.
The temperature in the room should not be lower than +15°C. Linoleum needs to sit indoors for some time to acclimatize. Full adaptation requires at least 2 days. There is no need to open the rolls during this period.
Preparatory stage
Before applying the adhesive, the subfloor must be treated with primer. Its composition must be suitable for the glue. Manufacturers usually indicate product compatibility.
If bitumen mastic is chosen, then the soil can be prepared from it. To do this, the composition is diluted with gasoline in a ratio of 1:2. For synthetic-based adhesives, it is recommended to prime the floor with drying oil.
In practice, it is rarely possible to carry out such a procedure, so most often only the floor is primed.
Before starting, holes are drilled for mounting the baseboard. The height is calculated in advance so that the plinth only lightly touches the floor covering, but does not press it. Wooden plugs or dowels are placed in the holes, depending on the type of fastener.
Preparing the concrete base
Whatever type of linoleum you choose, before you start laying it, you need to prepare the base. The quality of the base directly affects the service life of linoleum. The slightest depressions and protrusions on the surface will cause the new linoleum to wear out quite quickly. It must be smooth, free of debris and old coating, have sound insulation and thermal insulation.
Since we are interested in a concrete floor, we will consider its preparation in more detail. If the differences in the heights of the base do not exceed 2 mm per square meter, then you can simply putty the depressions and eliminate the protrusions.
Before you begin laying linoleum, you must carefully prepare the base
For larger differences, it is worth performing a new floor screed. For these purposes, both traditional screed (concrete or cement) and self-leveling mixtures are suitable. The advantage of the latter option is that they make it easy to obtain a perfectly flat surface and, even with a fairly large thickness, they dry much faster than a regular screed. But even in this case, this process will last several days depending on humidity, air temperature and other factors. After the base has completely dried, if necessary, carry out thermal and waterproofing of the floor.
When you can do without gluing linoleum
Just as there are factors when sticking is mandatory, there are factors when it is not allowed. This applies to the following points:
- The material must be laid on plywood, chipboard, fiberboard, OSB, laminate and parquet boards. These surfaces do not withstand the effects of glue, they can become saturated with the composition, and then swell, which will lead to creaking and delamination;
- Paint is applied to the base, here a reaction to the glue may occur, then the paint will appear in places on the surface of the linoleum, and it will be impossible to remove these stains;
- The screed is in poor condition, allowing the adhesive mixture to seep under the concrete base, and the gluing effect will not occur.
Plywood, chipboard, fibreboard, OSB, laminate and parquet boards do not withstand the effects of glue.
What to glue
To understand the best way to glue a specific type of linoleum to the floor, it will be useful to know the compositions of fixing mixtures and the mechanism of their action.
Water-dispersion adhesives
Dispersion adhesive contains water-insoluble inclusions of tiny particles of adhesive resins. In solution they are contained in the form of suspensions. The consistency of such glue can be from liquid to paste.
The main performance properties of water-dispersion adhesive compositions for linoleum:
- viscosity - 25000-40000 mPa s (milipascal second);
- Viability in the open state is 10-60 hours.
To work with linoleum, three types of glue are mainly used:
- Bustilat.
- Acrylic glue.
- Gumilax.
Bustilat is a long-liver in the construction market, but until now, it is universally in demand.
Glue bustilate
It is based on a polymer thermoplastic resin. The additives used are latex, chalk and carboxymethylcellulose (CMC), which forms the viscosity of the solution. High viscosity is a feature of this composition.
Characteristics of bustylate:
- application layer depending on the base - 3-7 mm;
- glue consumption - 400-600 g/m2;
- The total drying time under the flooring is 72 hours.
This adhesive is applicable to almost all types of rolled floor coverings and insulating underlays in medium- and high-traffic areas.
Acrylic glue
This type of glue is a mixture of acrylic resins and various additives. It contains no toxic or pungent odor-emitting inorganic solvents.
Glue characteristics:
- application layer thickness - 3-6 mm;
- glue consumption - 250-300 g/m2;
- Complete drying time - up to two days
After applying the acrylic composition to the surfaces to be glued, you must wait 15-20 minutes until they are firmly connected.
Acrylic glue
In rooms with high loads, carpet, commercial and household linoleum can be laid on acrylate.
Humilax is a viscous pasty mass. The main components of the composition are rubber and latex.
Characteristics of Humilax:
- application layer - 1-2 mm;
- consumption - 200-300 g/m2;
- Setting time: 72 hours.
The paste is used mainly with marmoleum and other natural coatings. The composition also works well with felt and fabric bases.
Mastic
The main types of adhesive mastics for linoleum:
- bitumen-rosin;
- bitumen-latex;
- bitumen-rubber.
All types of coatings can be glued to mastics, but there are preferences. So, the first two compositions fix PVC linoleum well to a wooden base and concrete. Rubber-bitumen mastic is quite suitable for fabric-based coatings.
Mastics for linoleum
Properties of mastics:
- application layer - 3-4 mm;
- consumption - 100-200 g/m2;
- gluing time - 24 hours.
Reactive polymer mixtures
Reaction adhesive is a complex chemical substance that includes polyurethane and epoxy resin. When it is combined with the linoleum base, a chemical reaction occurs, which results in the creation of a durable intermediate layer. This connection is called cold welding.
Cold welding
Due to the rigid adhesion, the flooring acquires useful qualities:
- water resistance;
- resistance to loads;
- durability.
Reaction-polymer mixtures used to work with linoleum may differ in consistency, depending on the purpose of application.
This glue has an advantage over other compounds in terms of adhesive strength, but it is also more expensive. Therefore, its main use is fixing linoleum joints.
Adhesive for linoleum from natural materials
For this special and expensive type of flooring, a special adhesive is produced that contains a small amount of water in its composition, since water tends to deform natural linoleum, which is sensitive to moisture.
Professional adhesives take into account the parameters of the surfaces being bonded, which guarantees the quality of the connection and long service life under temperature changes. To prevent deformation, the joints of the coating strips are glued with a strong fixing compound, ensuring a rigid adhesion. This composition is a two-component polyurethane adhesive. It creates an impeccable connection, is durable, and is resistant to moisture.
How to lay linoleum
The material can be used for arranging public, industrial and residential premises. Its versatility is primarily associated with wear resistance. Linoleum is laid not only in apartments, but also in large shopping centers. More details about the methods of laying linoleum will be discussed in this article.
You can lay linoleum yourself
Concrete and wood floor
You can easily lay linoleum on a concrete floor. In general, there may be differences on the surface, the main thing is that they are not local - small and deep pits and tubercles are excluded. There may be changes, but they are smooth. If there are significant unevennesses, it is better to fill in a leveling screed before laying linoleum.
Linoleum lays on a flat concrete floor without any problems
This finishing coating is also laid on a flat wooden floor. Many people think that the wood will rot underneath it. If the wood is dry, without signs of infection with fungi and mold, then nothing will happen to it. When laid correctly, a sealed layer is obtained, so that moisture does not penetrate inside. If there are seams, they are welded so that moisture penetration into them is unlikely. To prevent water from getting under the baseboards, choose wide models and press them well to the floor. A more reliable way is to lay self-adhesive tape under the linoleum along the perimeter for sealing.
If the boardwalk itself is made correctly, with normal ventilation, then there is no reason for it to rot. If you are very worried, before laying linoleum, treat the floor with antiseptics.
If there are noticeable cracks in the plank floor, they will be visible on the flooring after some time. If they are small, they can be puttied and the surface can be leveled using sanding. Sometimes the floorboards arch, lifting slightly at the edges. It will not be possible to sand such a floor - there are a lot of nails. In this case, or if the gaps are too large, it is recommended to put sheet material on top of the boards - plywood, OSB, MDF
They are good because they do not have very high thermal expansion, and OSB does not yet absorb moisture (you can take moisture-resistant plywood), and this is important in wet rooms (in the kitchen, for example)
Before laying linoleum on a wooden floor, it is better to level it with plywood or OSB
Chipboard and fiberboard as a base for linoleum are not a very good option - when humidity increases, they swell, and the fiberboard goes in waves. After drying, the original shape is not restored, so the linoleum laid on top becomes hunched and wrinkled.
Before laying linoleum, you need to lay OSB or plywood. This is necessary if the plank floor “plays” and the boards sag. If you lay the coating directly on the boards, it will crack in the places where it bends, and quite quickly. This means replacing the floor covering, and problems with the boards are also possible - moisture can seep into the cracks.
This is what it means “with seams running apart”
When laying any sheet material to level the floor under linoleum, it is laid with the seams staggered so that they do not coincide (like brickwork). Small seams are left between the sheets, which are then filled with elastic (non-hardening) mastic.
Is it possible to lay new linoleum on the old flooring?
Let’s say right away that before laying linoleum, it is advisable to remove the old coating. But this can be problematic and then it is permissible to lay flooring on top of an existing one. This is true only if the old floor is smooth or unevenness can be repaired. New linoleum is laid on the old floor, on tiles, on parquet. If there are defects in the base - chips, dents, protrusions - they are eliminated, sealed with putty, trimmed, the seams between the tiles are rubbed down so that the surface is even.
The base must be level
There are usually no problems with old linoleum as a substrate. If there are bumps, they are pierced, filled with glue, and the cracks are coated with a repair compound - cold welding for type “C” linoleum or sealant. When laying new linoleum on old one, there may be another problem - it will turn out too soft and significant depressions may form under the legs of the furniture.
On parquet, as well as on plank floors, it is advisable to lay a backing made of sheet material - the planks can also “walk”, tearing the coating.
Why glue when you can just lay it down
How to lay a chipboard floor.
Laying chipboard on a wooden floor, on a concrete floor with your own hands, instructions, photos. Long-term practice of laying linoleum reveals the following facts:
- glued linoleum lasts 40% longer than one laid without glue;
- If linoleum is not glued, it will certainly suffer from temperature changes and changes in humidity.
As soon as the heating starts working in the apartment, the material contracts - unsightly gaps appear between its joints. With the onset of spring, humidity rises, and the flooring responds by stretching and blistering;
- areas where waves and bubbles appear wear out very quickly and begin to look unpresentable, which makes it necessary to change the flooring again;
- Although simple glueless installation of linoleum is recommended for small rooms (up to 20 square meters), defects still soon appear on the soft canvas: depressions from furniture legs, waves and swellings. In addition, non-glued linoleum is easier to move and damage when rearranging heavy furniture;
- The seams between the glued sheets are stronger and come apart much less often.
How to glue correctly: step-by-step instructions
Laying linoleum with glue in a room being renovated or a house under construction is carried out upon completion of all finishing work. General requirements for such premises:
- air temperature not lower than 15o
C; - humidity of the base: concrete - less than 5%, wood - up to 10%.
Before starting work, you should make a correct calculation of the material based on the area of the room.
Material quantity calculation
This is necessary in order to know how much material is needed and determine the locations of the joints of the fabrics.
Preparing the base floor
A common mistake made by some “masters” is the desire to lay linoleum on any, even unprepared, surface, hiding its imperfections. But you need to remember that the technology of installing linoleum using glue on any type of subfloor requires preparation of the base.
It is believed that the best base floor option for linoleum is a concrete screed. It is a solution of sifted river sand and cement (1 part of cement + 2.5-3 parts of sand).
Before gluing any linoleum onto a concrete base, you need to assess the condition of the screed to ensure there are no defects critical for laying the sheets. These include:
- open cracks;
- potholes;
- detachment of the upper cement layer;
- increased base moisture.
To increase the adhesive effect, the concrete base is primed.
One of the ways to install linoleum on concrete is to use a self-leveling self-leveling mixture.
Self-leveling screed device
The self-leveler forms a strong and level base for the adhesive flooring. This option is simple to implement, and the resulting surface can be ready for laying the final floor.
The algorithm for preparing a wooden base for linoleum is as follows:
- Defect the floor and, if necessary, strengthen all wooden elements with nails or screws.
- Sink and putty the fastener caps.
- Use a planer or grinder to remove protruding irregularities.
- Fix all large cracks in the wood and gaps between the boards by puttying.
- If necessary, scrape the surface.
- Remove all debris, dust and wash the floor clean.
In case of obvious and irreparable defects of the wooden floor, additional flooring made of multi-layer plywood, fiberboard sheets or OSB boards is laid on top of the boards.
A more modern material used to prepare any base floor for linoleum is gypsum fiber sheet (GVL).
GVL for floors
This is a homogeneous material with high density and has significant advantages over flooring made from other materials - moisture resistance, environmental friendliness, heat and sound insulation.
The final stage of preparing any base floor is checking and eliminating possible defects at the junctions of the floor and walls. All cracks must be plastered or foamed.
Adjustment of linoleum
Before adjusting the linoleum, you need to decide where to start laying the first sheet - from one of the walls or from the center. But it should be remembered that a joining seam in the center of the room will not add aesthetics to the room.
There are basic rules for fitting linoleum:
- If the pattern of the canvas requires selection, then the material is cut taking into account the coincidence of the pattern, shifting the subsequent sheet relative to the previous one.
- For complex configurations of protruding structures and recesses, cardboard patterns are made, according to which cuts are made on the canvas.
- The first panel is laid to the wall with a gap of 5 mm.
- Each subsequent sheet is tightly joined with a narrower laid one.
- The last canvas is overlapped onto the wall and trimmed.
Wall overlap and trimming
Fitting the canvas against the wall is an important step and precision cutting requires some skill. Therefore, it is advisable to practice this procedure a little on scraps of material.
Two methods of cutting linoleum are shown in the video
Trimming linoleum
Gluing
The step-by-step process of gluing the canvases looks like this:
- Taking into account the recommendations of the instructions for the adhesive composition, apply it evenly to the base.
- Press the linoleum and roll it.
How to glue the edge
The most effective and easy-to-use method of fixing panels at joints is cold welding.
Joining a seam using cold welding
The algorithm for working with joints is as follows:
- thoroughly vacuum the edges of the canvas;
- to protect the joints from melting, seal them with masking tape;
- cut the tape along the seam;
- immerse the needle of the tube as deep as possible into the seam, start laying glue into it so that no more than 3 mm of the reagent remains above the surface;
- After 15-20 minutes, remove the tape.
PPE for working with reaction mixtures
You should work with gloves and safety glasses, and the room should be ventilated.
What to do if linoleum starts to peel off
It often happens that the fixed coating peels off from the floor after some time and requires repair. How to fix the defect? If swelling occurs, you can make a puncture in the fabric using a thin awl. The air is then released and the area is ironed with a hot iron through a thin sheet of white paper. The glue melts and re-bonds the surfaces.
Gluing joints together
How to glue linoleum together if the fabric comes apart at the joints? The separation of the seam indicates a violation of the cold welding technology. The resulting defect can be easily eliminated - the seam is cleaned, degreased with alcohol or gasoline
Then the coating is carefully folded back and an adhesive is applied underneath it. Next, the joints are fastened by cold welding