Material selection
Before plastering the walls, you need to select a finishing material. You can determine which plaster is better, taking into account the type of base and the technical characteristics of the plaster mixture. The materials differ in their components, texture, and consistency. Plaster can be purchased ready-made or made independently.
Gypsum mixtures for walls
Gypsum plaster is used for finishing, decoration and can be used as a replacement for putty. A thin-layer coating of the base can be made with a gypsum solution. Wallpaper can be pasted onto a surface plastered with gypsum. The gypsum mixture can be of varying degrees of granularity; to prepare the solution, the mixture is diluted with water. Different consistency of plaster is achieved by different proportions of powder and water. Using dense gypsum plaster you can eliminate cracks.
Plastering with a gypsum mixture is carried out at a temperature of +5…+30°C. The standard proportions of powder and water are 2:1. Consumption per 1 m² is about 8 kg. Setting time is about 60 minutes. Gypsum plaster for wallpaper dries in 7 days.
The plaster contains 95-97% natural ingredients that do not emit toxic fumes when the temperature rises. The material is environmentally friendly and safe. After application, you get a smooth base with the selected shade. Has a high level of adhesion with different materials. The specific gravity is small. The elasticity of the finished composition is high, so the surface does not crack or shrink. The material has high vapor permeability and is resistant to mold and mildew. The coating is fireproof.
When using this material, it is necessary to take into account low moisture resistance, so the product is optimal for rooms with dry air and humidity not exceeding 65-70%. The disadvantage is the high cost and low resistance to mechanical damage compared to synthetic building materials.
Wallpaper is pasted onto the plastered surface in a thin or medium-thick layer. The thickness of the mass should not exceed 0.5 cm.
Cement mortar
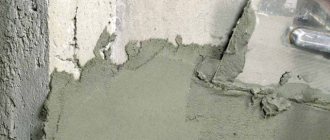
Plaster cement mixtures are applied in a dense layer of 5 mm. Finishing materials with the addition of cement powder are used to smooth out defects and fill cracks on the surface. Application is carried out in several layers. Cement finishing materials can withstand high air humidity, so the mixture is recommended for finishing basements, kitchens, bathrooms, and toilets.
However, it must be taken into account that when plastered with a cement base composition with coarse sand, the surface acquires a rough texture. To cover the surface with wallpaper, you will need to putty the walls. Cement mortar is used to treat surfaces with rough texture (brickwork, monolithic concrete base, wooden wall covered with chain-link mesh).
In accordance with the proportions of the components, the mixture is available in the following varieties:
- cement-sand with modifying additives;
- lime-cement (differed by the presence of lime).
Before plastering the walls, you need to determine which mixture can be used for the type of base. Cement mortars can be used to finish surfaces made of different materials; using a dense layer, you can eliminate cracks, height differences, and fill joints between floors. By plastering with cement mortar, the strength of the wall and resistance to mechanical damage are increased.
The strength of this plaster is 6-12 MPa. The consumption of the finishing mixture when applied in a 1 cm layer is 12-20 kg/m². The level of frost resistance reaches 50 cycles.
Wallpaper can be applied after 72 hours. Complete hardening occurs in 10-30 days. To increase plasticity, plasticizers are added to the composition.
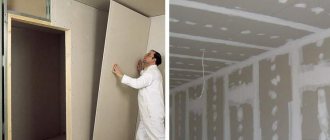
How to putty drywall
Very often, builders assemble plasterboard partitions too quickly, and therefore the quality of work suffers. The fact is that not every builder is a master at using a spatula, and responsibility for puttying the partition, unfortunately, passes to the owner. But if you use the guide and still try, you can achieve an excellent result.
Self-tapping putty
The main condition here is that the screws need to be well sunk. Before you begin to putty, run a putty knife along the plasterboard sheet. If the screw is not sunk well, the spatula will stumble. The irregularities need to be recessed inside the sheet; to do this, use a screwdriver. Next, use a primer, wait for it to dry and start puttingty. It is advisable to process all screws separately. To achieve a smooth surface, putty the drywall locally, this will improve the quality of the work.
When you have completed the putty, let it dry for 24 hours. Next, go through the sandpaper and check the evenness of the surface; if there are unevenness, putty again.
Seam putty
First you need to prepare enough putty. Apply the first layer of putty to the entire seam, and then use a serpyanka. Gently apply it to the new layer of putty and use a putty knife to press it inward. Next, apply a second layer; it should cover the serpyanka completely. Then wait until the layer dries and sand.
Puttying internal corners
Here you will have to try very hard, because you need to apply the putty on both sides of the corner at once. After this, gently press the serpyanka, but make sure that it is distributed between the walls very clearly and evenly. When the procedure is completed, cover the tape with one layer of putty. Then everything is as always - leave the putty to dry for one day, and then use a spatula to clean the wall from dried bumps and treat it with sandpaper. If there are any irregularities left somewhere, you will have to apply putty again in these places.
Putty on external corners
You will need a metal corner to facilitate the putty work and save the corner from damage. A very durable and comfortable corner - galvanized, it will last longer and will not break after one blow. When you cut the corner to height, you need to make the ends pointed, just trim each side from the side. Next, apply one coat of putty to the two outer sides of the corner and gently press the corner to the desired size. Apply a second coat of putty and cover the corner, but very often a third coat is needed. If you wait for the putty to dry, but you are not satisfied with the quality, apply a third layer and smooth out all the unevenness.
Happy renovation!
Tools and accessories
Do-it-yourself wall plaster under wallpaper is applied using the following tools:
- construction mixer;
- putty knife;
- Master OK;
- containers;
- falcon;
- trowel;
- a set of spatulas of different sizes;
- rule;
- graters;
- plaster ladle;
- brushes;
- set of rollers;
- building level;
- cord;
- construction tape;
- yardstick.
If necessary, beacons are used to level the surface, corners, and reinforcing mesh made of fiberglass or metal.
Wallpaper in modern interiors: 33 ideas for cool design
Cooperating with is reliable and prestigious. The specialists working here are professionals of the highest level. operates throughout Moscow and the Moscow region.
Preparing the wall surface for wallpapering
Before you putty the walls in your apartment, you need to prepare them for wallpaper. The uniformity of application of the plaster layer and the aesthetics of the pasted wallpaper depend on the quality of leveling the base.
Main stages of surface treatment:
- cleaning of old finishing materials;
- foundation inspection;
- impregnation of surfaces with antiseptic solutions;
- padding;
- sealing cracks and joining areas with putty;
- installation of beacons.
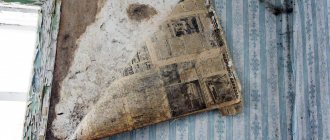
Removing Old Finish
It is necessary to plaster the walls in the apartment on cleaned surfaces. Before properly leveling the walls, you will need to clean off old coatings (dyes, plaster mixtures, wallpaper). To remove flaking fragments of old putty or primer, you need to tap the walls with a small hammer. To process the surface, suitable tools are used depending on the wall material (hammers, hammer drill, etc.). The old trim is knocked down to the base of concrete or brickwork.
Preparing the base
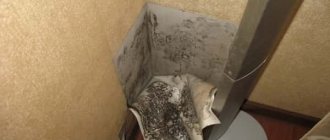
The next step is to re-examine the wall for treatment. If there are damp areas of the wall with mold, they will need to be insulated. After investigating the source of the high humidity of the coating, repair work is carried out to eliminate the defects. Then the areas are dried.
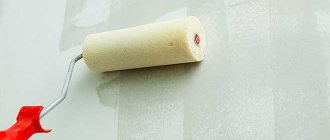
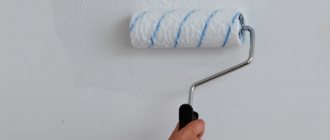
Areas damaged by mold are treated with antiseptic solutions or dissolved bleach. Then the treated and dried walls are covered with a protective primer. Primer mixtures help increase surface strength and improve adhesion.
The primer is applied using a brush or a special roller for painting. Smooth bases without cracks can be prepared for plastering without putty.
Installation of beacons
In some cases, plastering walls under wallpaper is done after installing beacons. The procedure is necessary in the presence of differences in heights, depressions and allows you to make smooth walls for gluing wallpaper of different density levels.
The following elements are used as poppies:
- standard profiles;
- scraps of metal pipes;
- wooden blocks;
- string metal structures.
The work is performed in the following sequence:
- Beacons begin to be installed from the corner of the room;
- 4-5 portions of the plaster mixture are applied from top to bottom;
- a wooden strip or part of a metal profile is installed in the applied solution;
- the next beacon is installed on the opposite side of the room;
- after the plaster mortar has dried, strong twine is pulled;
- the remaining beacons are installed along the stretched fishing line;
- It is required to maintain a distance between beacons of up to 1 m.
Puttying chipboard under wallpaper: how to do it right
Chipboard is a facing material made from wood particles, obtained by hot pressing of particles, mainly wood chips. Due to its characteristics, such as high density and homogeneity of the material, this material is widely used in construction and repair work.
When working with chipboard, the same types of putty are used that are used for OSB boards, that is, the putty is suitable for wood materials. It is worth noting that puttying corners and seams has nuances. For puttying joints, a sickle mesh is also used together with a suitable solution. This is a universal reinforced material used during work to strengthen the surface and prevent the entry of air bubbles.
Preparation of the solution
At the next stage, a plaster solution based on dry material is prepared. Work is carried out according to the instructions indicated on the packaging. The proportions of water and finishing mixture and the temperature at which it is permissible to prepare and use the solution are taken into account.
Manual cooking
When using the manual method, you will need the data indicated on the instructions for the building mixture, based on the volume of the product per 1 m². Taking into account the area to be processed, the required volume of material for the room is calculated.
Dry powder and water are mixed in the container in the required ratio. In some cases, additional plasticizers may be required. When using a gypsum-based solution, it is necessary to prepare the mixture in small portions, because the material hardens quickly and becomes unsuitable for finishing work.
Mechanical mixing
When using the mechanized method, the mixing process is completed quickly. However, you will need a construction mixer for the job.
Mixing the solution is performed in the following sequence:
- A small amount of water is poured into the container.
- Dry plaster is added to the liquid in portions.
- Using a mixer, mix the solution.
- During the process, you can change the consistency of the plaster by adding dry powder or water.
- The finished mass must be held on the trowel.
Installation of beacons
To make perfect alignment, you should install special landmarks on the wall - the so-called “beacons”. They can be metal profiles, smooth wooden blocks, metal pipes, etc. String beacons are also available for sale in the form of metal strings stretched from one corner of the wall to the other.
Conventional vertical beacons are installed as follows:
- We begin installation from one of the corners of the wall. To do this, first along the corner, from top to bottom, we make 4-5 splashes of plaster mortar.
- Then we take the beacon (batten, pipe, etc.) and bury it in the patches of mortar, using a building level to make sure that the beacon stands clearly vertically. The distance from the wall to the outer surface of the beacon should be 2–3 cm, that is, the thickness of the plaster layer.
- We take the second beacon and install it in the opposite corner of the wall in exactly the same way. Let's wait until the patches of the solution set, firmly holding the beacons.
- We stretch twine between the beacons in their upper and lower parts, along which we position the remaining beacons. We fasten them using the same technology using patches of plaster mortar.
The distance between the beacons should not be more than 1 m. Thus, it will be more convenient for you to level the plaster solution using the rule.
The procedure for plastering walls
You can determine how to properly plaster walls under wallpaper, taking into account the stages of surface treatment.
The following procedures are required:
- sprinkling:
- leveling the plaster coating;
- covering and grouting the wall.
Spraying
The spraying stage involves plastering with a thin layer (no more than 5 mm). When processing a wooden wall, the leveling layer can be denser (up to 9 mm). The purpose of this work is to eliminate cracks, defects, and depressions in the wall. Before the procedure, the wall is wiped with a damp cloth or sprayed with a spray bottle.
Pre-treatment allows you to level the base, increase adhesion and prevent subsequent layers of plaster from falling off. The pre-treatment composition must be liquid, so the product is diluted with water. The consistency of the liquid in the solution should be about 60%.
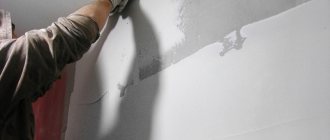
Basic alignment
At the subsequent leveling stage, the wall is prepared for wallpapering. The plaster for processing should be thick, with a water concentration of up to 35%. The thickness of the applied layer should not exceed 7 mm. If there are large irregularities and cracks, leveling is carried out in several layers; the plaster must be leveled according to the rule. Each layer must be thoroughly dried beforehand.
Excessive thickness of the plaster layer can lead to its subsequent cracking. It is recommended to apply the layer using 2 spatulas (compact and large). Using a small tool, the mixture is collected, and with a large spatula, the mixture is transferred to the surface of the wall and distributed over the plane. Corner areas are sealed using a trowel or corner trowel.
Experts suggest choosing 2 techniques for applying the composition:
- Using wide movements of the spatula, the plaster is distributed in different directions along the base. The tool must be pressed to the surface at an angle of 20°. The remaining irregularities are eliminated by grouting. The method helps to get the job done quickly.
- Applying plaster in small strokes. This method is more labor-intensive than the first, but the alignment will be done better. You will need to apply 2 layers. It must be taken into account that in this case, rubbing the surface is not required, because the wall will be smooth.
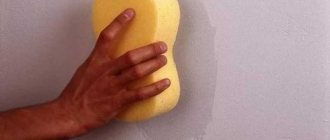
Covering and grouting walls
After leveling the surface, the plaster is usually dried. The beacons will need to be removed and covered. The plaster solution for this procedure should be less viscous and contain smaller proportions of sand. The sand used is fine-grained. The covering layer should not exceed 5 mm. Work is carried out with a wide spatula until the soil dries. For a lime-based primer, a lime-gypsum coating mixture is optimal.
The hardened covering is rubbed until completely dry using a grater. First, the surface is wetted with water, and the tool is made in a circular motion.
Above the protruding parts, the pressing force must be increased, and under the depressions, it must be weakened. During the grouting process, excess composition and traces of working tools are eliminated, and porous areas are filled.
The smoothness of gypsum coatings is achieved using sand-free mortar. The plaster is diluted with the addition of glue and applied with a trowel in a zigzag motion. The treatment increases the strength of the coating.
Common mistakes
Any repair is an expensive pleasure. However, you can save a lot of money by doing some of the work yourself. This is where do-it-yourself wall putty comes into play. How to eliminate mistakes that a newbie in this business might make? Let's look at the most common of them.
- The recommended layer thickness is not observed, resulting in cracks.
- The use of certain types of putty for purposes other than their intended purpose, for example, leveling surfaces is done with a finishing solution.
- Poor application of primer results in the top layer falling off.
- Cracks and seams are not processed properly, for example, without embroidering or using sickles.
- Applying successive layers of putty to an uncured base leads to loss of flatness and sagging levels.
Terrifyingly beautiful: 15 shocking plastic surgeries that ended in failure Plastic surgery among celebrities remains incredibly popular to this day. But the problem is that in the past the result was not always ideal.
Top 10 Broke Stars It turns out that sometimes even the biggest fame ends in failure, as is the case with these celebrities.
How to look younger: the best haircuts for those over 30, 40, 50, 60 Girls in their 20s don’t worry about the shape and length of their hair. It seems that youth is created for experiments with appearance and daring curls. However, already last.
13 signs that you have the best husband Husbands are truly great people. What a pity that good spouses don't grow on trees. If your significant other does these 13 things, then you can s.
Why do you need a tiny pocket on jeans? Everyone knows that there is a tiny pocket on jeans, but few have thought about why it might be needed. Interestingly, it was originally a place for storage.
15 most beautiful wives of millionaires Check out the list of wives of the most successful people in the world. They are stunning beauties and are often successful in business.