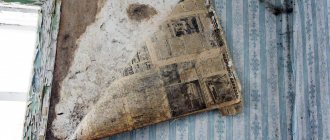
Wallpaper can be glued to almost any surface, be it plaster, wood or even bare concrete. The main thing is to prepare the walls for gluing. If necessary, level or screed, plaster and prime. Is it possible to neglect the preparation and paste the wallpaper without this labor-intensive stage? Yes, you can. But in this case, the sheets will quickly peel off and the repair will have to be redone. Why - read the article.
What functions does the primer perform?
Ideally, priming should be done at each stage of finishing, that is, before applying putty and before gluing. The primer performs a number of important functions:
- Makes the surface smoother, fills pores and microcracks. Material consumption is reduced and adhesion is increased.
- Strengthens the surface and prevents its destruction. Wallpaper glued to primed drywall will be easier to remove during the next renovation.
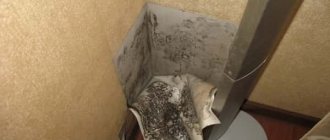
- Promotes the formation of a normal microclimate by filling small pores in the coating. There are primers for interior work that contain an antiseptic that prevents the proliferation of fungal and mold spores. Such solutions are very useful for corner and damp apartments, where there is a high risk of mold.
If you skip priming, the following may happen:
- Destruction of the plaster layer. The situation when the plaster cracks occurs precisely when the wall was not primed before applying the material.
- Higher material consumption. An unprimed surface will absorb moisture well and will ultimately require more glue. As a result, the gluing process becomes more complicated and the sheets do not stick well. Since a large amount of glue is absorbed, the adhesion will be worse and the wallpaper may come off after just a few months or a year.
The most unpleasant thing is that the consequences listed above cannot be eliminated cosmetically. They can only be corrected by completely redoing the finish. Saving on priming significantly reduces the service life of the finish, so the answer to the question of whether walls need priming before wallpapering is unequivocal - yes, it is necessary. It remains to figure out which solution to choose and how to use it correctly.
A good primer matched to the surface guarantees the durability of the finish.
Plasterboard putty under wallpaper
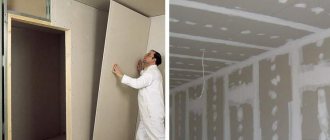
It is impossible not to take into account the joints of the sheets, which must be sealed first. For this purpose, special white paper is used, which also stands out significantly against the background of the general surface. If finishing with plasterboard was carried out in a newly built house, then perhaps after some time the structure will shrink.
If the joints of plasterboard sheets are not reinforced and the entire surface is not puttied, then when the walls of the house shrink, folds and creases will appear on the wallpaper. For rooms where a high level of humidity is expected, it is better to use primers that also have antiseptic properties. Drywall today is firmly established in leading positions of popularity among other construction and finishing materials. It is used for leveling walls and installing partitions, creating suspended ceiling structures and other original interior elements. It can become an excellent base for any decorative finish - it can be wallpaper, paint, ceramic tiles and even artificial stone. - Due to the rapid setting of ready-made mixtures, it is necessary to work with them quickly enough. When making it yourself, do not knead a large volume of material.
The container with the prepared mixture must always be kept closed, collecting a small amount of putty in a separate container. The disadvantages of cement putty include a coarser-grained structure, in contrast to gypsum or polymer putties.
Additional information on the topic:
- How to make a transom over an interior door from plasterboard
- Plasterboard partition in a nursery for two children of different sexes
- Suspended plasterboard ceilings combined with stretch ceilings
- Installation technology multi-level plasterboard ceiling installation
- Plasterboard ceilings and plasterboard arches
What solution to use
The best option for coatings made of concrete, plasterboard and plaster is an acrylic primer. It does not have a specific smell, it is easy to work with, and the drying time is about 5 hours, which is much less than other compounds. For wood it is better to use alkyd solutions. This primer must dry for at least 10 hours.
Previously, diluted PVA or glue for gluing were used for priming. This is not to say that this is a completely wrong move. This ensures good adhesion, but the surface will not be strengthened, as is the case with the use of acrylic solutions. Some craftsmen coat the wall alternately with a special compound and glue; with this option, the finish is best maintained. This method is also used for non-woven wallpaper. That is, the surface is primed, then covered with a layer of diluted glue, and only after this layer has dried do they begin to glue the sheets.
In stores you can find special primers “for wallpaper”. Often their main component is the same PVA. You can prepare this composition yourself by diluting regular PVA to the desired consistency. The only advantage of a purchased solution is ease of use; you won’t have to worry about whether you prepared everything correctly thanks to the presence of clear instructions.
Alkyd primer is in demand due to its versatility
Nuances
It is important to note that when gluing non-woven wallpaper in pastel colors, it is necessary to apply the primer as evenly as possible. Any dark spot will be visible under the translucent layer of wallpaper. There are special coloring solutions on the market, but you can also simply add white water-based paint and then the problem will be solved.
This procedure will allow the wallpaper to better resist moisture. Non-woven fabrics have already proven themselves well in the bathroom and kitchen, but you can always improve their characteristics. This way you will ensure that the canvas will last for many years without damage or defects.
How many times to treat the wall
The standard consumption of acrylic primer is 100-200 ml per 1 m2 of surface. One layer is often not enough; it is advisable to apply it twice. How many times to prime depends on the initial condition of the wall. Before each new layer, you must wait until the previous one has completely dried.
After everything is dry, you can cover the wall with glue. This can be diluted PVA or wallpaper glue. In the second case, carefully read the instructions; if it does not indicate that the glue can be used as a primer, then it is not suitable for this. When choosing any solution, pay attention to the drying time; this determines how long it takes to glue the wallpaper.
Proper preparation of joints, sheet fastening points and corners
Further processing of plasterboard walls for wallpaper begins with sealing the seams. This process uses reinforcing tape and comes down to a series of steps:
- the joints are expanded as necessary so that the solution penetrates between them;
- mix the putty in a small volume so that it does not dry out;
- using a small spatula, cover the seams, which should be covered to a width of 5 to 7 cm;
- the laid material is allowed to dry, after which the defects are removed;
- the joint is lubricated with glue (PVA is suitable), onto which fiberglass tape is applied (for reliability, it can be lubricated again on top);
- when the serpyanka dries, apply a 2nd layer of putty mixture about 10 cm wide;
- Uneven surfaces are removed from the dried surface with a spatula.
Work on finishing the outer corners of a room is the most labor-intensive. This is primarily due to the low strength of these areas.
The way out of the situation is reinforcement, which is performed using perforated plastic or aluminum corners.
The whole process goes like this:
- check the flatness of the end part with a level;
- begin to prime the drywall after wetting the corner with water;
- the inner part of the corner cut to size is treated with an adhesive composition and given time to dry (from 20 to 40 seconds);
- after this, the perforated material is glued and puttyed after 30 minutes;
- it is allowed to attach the corners to a layer of putty, pressing them into the solution; after which the protruding excess is leveled, the position is checked with a level or rule.
If the applied glue has dried out on the corner, you can add a new one. There is a method of securing with staples from a construction stapler and then sealing with the prepared mixture.
When using plastic material with a rounded shape, then up to 2 cm is cut from the corner of the plasterboard. It is placed on the solution, the squeezed-out excess of which is wiped off the rounded part with a damp rag or sponge.
To prepare internal corners for wallpapering, it is enough to use only reinforcing tape. It is set up with putty. Then smooth it into the shape of the corner with a trowel or spatula, giving it the desired shape.
How to use primer
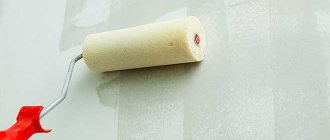
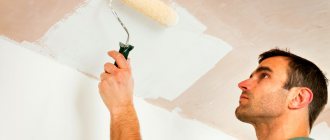
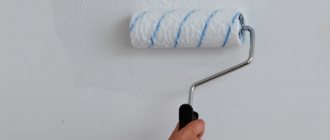
It is best to dilute the primer in a bucket. It is very important to mix the solution well so that there are no lumps in it. The best option is to use a drill with a mixer attachment. If the walls are perfectly smooth, you can use a roller. If there are any unevenness, use a paint brush. Make sure that the solution is applied in an even layer. Even with ideal walls, it is better to treat the corners with a brush, since it is almost impossible to coat them well with a roller. When to glue the wallpaper after treatment depends on how long the primer takes to dry. Once the surface is completely dry, you can begin gluing.
A well-mixed solution can be easily applied with a roller to smooth walls.
Applying the finishing coat
The final coating will eliminate all minor irregularities and imperfections that remain after applying the starting composition.
If the wall is almost flat, only one layer of topcoat is applied. To grout the corners you need a rubber spatula.
Finishing work is carried out as carefully as possible, since defects in this layer cannot be corrected. To notice even small irregularities, you can use additional side lighting.
After the finishing layer has dried, a primer is applied to ensure reliable adhesion of the wallpaper to the wall.
Puttying brick surfaces
The specificity of brickwork is its heterogeneity, deepening of the seams and possible vertical deviations. It is important to ensure that the wall does not have any bulges by using a plumb line. If there are no problems, the work will be easier and there will be minimal consumption of materials. In case of large deviations, alignment is performed using beacons.
To level the masonry, an inexpensive putty for wallpaper on any base is suitable:
- Polymer;
- Cement;
- Plaster.
Select a variety that meets functional requirements. If you have to do multi-layer leveling, there is no point in buying the most expensive compound.
The cement that sticks out at the seams must be chipped off or beaten off, but the masonry itself provides high adhesion. After preparing the surface, a working solution is prepared and distributed over the wall. The technology for applying the finishing layer of wall putty under wallpaper with your own hands is no different from working on any other surface.
In case of large deviations, alignment is performed using beacons.
Useful tips
Priming walls may seem like a simple task, but it is far from it. Use our recommendations to avoid complications:
- do not forget that the wall must be perfectly clean before treatment;
- If the mixture gets on clothes or the floor, immediately wipe it off with a damp cloth or cloth;
- Do not dilute the entire solution at once. Quite often only part of the mixture is used;
- when applying primer, try to avoid the formation of drips and puddles;
- For work, use old clothes and do not forget about protective equipment: glasses and gloves.
