Published: 06/23/2012 Category: Construction Views: 11441
Pouring the subfloor
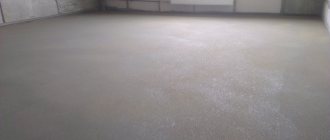
When people talk about floors, they usually mean flooring . But this is just the tip of the iceberg. Under parquet, tiles, laminate or carpet there is a multi-layer “pie” of the subfloor . Without a solid base, the finished floor has little chance of survival. Anything goes wrong, and the expensive flooring material will begin to warp, peel off, become covered with cracks, that is, gradually collapse.
The floor is like a suitcase with a double bottom: under the beautiful outer layer there is a base, or, as it is also called, a subfloor. The success of the final coating largely depends on the condition of this base. A slight curvature, bump or other defect in the subfloor will inevitably manifest itself on the front side. However, it is not enough just to level the base. You also need to make the subfloor “stand still,” that is, not peel off, crack, or break into pieces.
Let's face it, creating a level, strong, and stable subfloor is no easy task. Until recently, leveling the base was considered perhaps the most labor-intensive and time-consuming stage of repair. Fortunately, modern technology has changed the situation. Thanks to specialized building mixtures, the installation of subfloors has been significantly simplified. The quality of alignment has reached a previously unattainable level. Of course, it’s too early to write off cement-sand screeds. Their main advantage is the low cost of raw materials (usually sand concrete is used for traditional leveling). But if you think carefully, it turns out that the benefit is small, and taking into account all the disadvantages of a traditional cement-sand subfloor, it is even negligible.
Unlike conventional floor screeds , leveling layers made from building mixtures do not require steel reinforcement, do not shrink (that is, do not shrink when drying), do not crack, do not peel off, and, in addition, quickly set and harden. As for evenness, the current standard (deviation from the horizontal - no more than 2 mm per 2 linear meters) is observed unconditionally (provided the instructions are followed).
Preparing the base for the subfloor
The first step is to prepare the base subfloor. The ceiling is cleaned of dust, debris, peeling, oil stains and other contaminants. The weak base is strengthened, potholes, dents, cracks and other surface defects are filled. For this purpose, special repair mixtures are used.
If the base is concrete preparation, then you need to maintain a technological pause of 28 days until the concrete gains 70% strength. The overdried substrate is slightly moistened with water (otherwise the base will take water from the primer or mortar mixture). A damp base is also not suitable. You need to wait until it dries (to a humidity of 5%) or use a special primer (with a residual humidity of no more than 28%).
To ensure reliable adhesion of the screed to the base, a primer is applied to the prepared base. The material is selected based on the properties of the base floor, for example, porosity. If the substrate absorbs a few drops of water within 30 seconds, a primer for porous substrates should be used.
Cost comparison
The prices presented for comparison today are not constant, since manufacturers of concrete and mixtures often focus on the exchange rate, but they give a general idea of which material is more profitable and cheaper.
You can make the concrete mixture yourself, or you can purchase it ready-made at a concrete plant. The cost of 1 m3 of the finished mixture is 2500-3500 rubles. The costs include the cost of renting a mixer and transportation depending on the distance.
Preparation of cement-sand mixture from ready-made dry mixtures:
Gypsum mixture "Ekopol". Mixture consumption (with a thickness of 10 mm) 13 kg per 1 m2. The cost of a bag weighing 30 kg is 385.5 rubles. Consumption for cooking 1 m3: 13x100=1300 kg. It will take 1300/30=43.33 (44) bags. Cost 44x385.5=16,940 rubles. Floor screed "Almi" 25kg. Mixture consumption is 1.5-2.0 kg for a layer of 1 mm. The cost of the bag is 115 rubles. Consumption per 1 m3: 2.0x1000=2000 kg, 2000/25=80 bags. Cost 80x115=9,200.00 rub.
At first glance, ready-mixed concrete is cheaper than others, but the cost can be increased if additional construction equipment has to be used to lift the concrete mixture in a multi-story building.
Laying cement-sand screed
Laying lightweight cement-sand screed
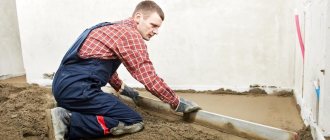
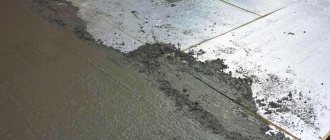
1. Sand concrete is mixed with water, mixed with ceramic gravel and laid out over a grid.
2. The solution is leveled with a spatula.
3. The screed is aligned according to the beacons using the rule.
The cement-sand screed must have a thickness of at least 3 cm. Reinforcing mesh is used to strengthen the layer. When leveling with a thickness of 7 cm or more, the reinforcement may not cope with shrinkage deformations, and then cracks will appear in the screed (harbingers of delamination). Walking on a traditional cement-sand floor is allowed no earlier than a week after installation.
All this time, you need to take care of the screed: periodically moisten it, avoid drafts, maintain a certain temperature and humidity. The floor covering can only be laid after 28 days, when the cement has gained 70% strength and the screed has given up excess moisture.
Simple screed | Screed on the separating layer |
Screed on the thermal insulation layer | Screed on an insulating layer with heating |
If the base base (usually the surface of a reinforced concrete floor) is not in harmony with the geometry and the differences in height at different points exceed 2-3 cm, then coarse levelers are used. They are laid using the same technology as traditional cement-sand screeds. Beacons - special steel slats - are attached to the prepared base in 2 m increments. The dry mixture is mixed (diluted) with water in the proportion specified in the manufacturer's instructions (printed on the packaging). The solution is applied in portions and leveled using a spatula, trowel and rule. You can limit yourself to a thick screed if you plan to lay tiles in the room.
For delicate coatings, it is recommended to prepare the base in two stages: first the leveler, and then the self-leveling floor. Often it is necessary to bury utility pipes in the screed, which significantly increases the thickness of the subfloor. In such a situation, it is recommended to use mixtures for lightweight screeds. They contain crushed expanded clay or polystyrene foam granules. The thickness of the leveling layer can reach 30 cm. Lightweight screeds are three times lighter than cement subfloors.
What factors influence the construction technology of rough screed
Ground water level.
Ground water level
If they come closer than two meters to the surface, then be sure to add sand and gravel. The bedding serves to prevent the absorption of moisture by soil capillaries. If there is a bedding, then the use of a film to retain cement laitance is mandatory. If the rough screed is done directly on the ground, then the film does not need to be placed.
The photo shows crushed stone bedding
Important. The location of groundwater must be determined in the spring; it is during this period that it rises the most.
If the floor structure is intended to accommodate heat transfer fluids, then the rough screed must have a compensating gap between the foundation. Such designs eliminate the negative impact of thermal expansion and eliminate the possibility of cracking or swelling of the rough screed.
Compensating gap
If the planned load on the floor can exceed 200 kg/m2, then reinforcement is required. The fittings parameters are selected individually for each case. The same approach is needed in cases where it is planned to install interior partitions on the floor. You should not rely only on the reinforcement of the finishing screed; its physical characteristics do not allow it to withstand heavy loads.
Waterproofing subfloors
The installation of subfloors in wet rooms (bathrooms, toilets, kitchens) begins with waterproofing. However, it happens that a waterproof barrier is created throughout the entire apartment. After all, neither bedrooms, nor living rooms, nor children's rooms with offices are insured against leaks of heating pipes.
Waterproofing of bathrooms with a coating elastic membrane
Various materials and technologies are used for internal waterproofing Floors and walls are coated, pasted over or treated with special penetrating compounds. Coating waterproofing can be bitumen-based (bitumen-polymer mastics) or cement-based (cement-polymer dry mixtures). In addition, products are produced that are entirely made from synthetic components (based on polyurethane, epoxy resin, etc.).
Waterproofing a bathroom in a wooden structure
For interior spaces, it is recommended to use polymer-cement coating waterproofing - rigid or elastic. Rigid mixtures include quick-setting cements, fillers and various active mineral and synthetic additives. Such materials are usually used in houses with established foundations. In addition, rigid waterproofing (“Stromix-barrier”, “Prospectors”; “Glims VodoZgor”, “Glims”) is indispensable when sealing leaks. New buildings are prone to movement, which causes cracks to form in walls and ceilings. In this case, it is safer to use elastic cement waterproofing.
Cement-based coating waterproofing is effective, environmentally friendly, easy to use, reliable and durable. To prepare the solution, you need to pour the dry mixture into water (the proportion is indicated on the package) and mix. The composition is applied with a spatula or brush (unlike hydroglass insulation, which requires a gas burner to apply). In this case, a dense and durable waterproof layer 3-4 mm thick is formed, capable of withstanding the pressure of water (specifically, “AquaShield” can withstand 6 atm). In addition, such a waterproof barrier adheres well to leveling screed and tile adhesive. The service life of cement waterproofing is practically unlimited. The main thing is to comply with technological requirements. The coating must be continuous, without breaks and cold seams (front joints of areas treated at different times). The waterproofing is applied to the walls to a height of 10-15 cm. If work is continued after a sufficiently long break, then the solution is applied with an overlap of 30 cm onto the already laid layer.
Pasting waterproofing technology involves the use of bitumen-containing roll materials. Hydroglass insulation is especially popular. However, to create a durable waterproof barrier, you should use products based on polymer-modified bitumen "Technoelast Alpha", "Luberit-Elast", "Izolast").
Penetrating waterproofing (“Penetron”, “Stromix”, “Starateli”) requires professional, if not masterly, execution. A special mixture (high-quality cement, sand, active additives) is mixed with water. When applying the solution to a concrete surface, the active components penetrate into the pores, capillaries and microcracks and interact with the chemical formations present in the concrete. The resulting microcrystals fill the smallest voids and crevices. Concrete becomes waterproof and even more durable. However, the use of penetrating waterproofing has its own specifics. The concrete base must be of high quality and well compacted. Microcrystals are not capable of healing defects larger than 0.3 mm.
Why is it so important to choose the right materials?
The quality of the result directly depends not only on compliance with the technology, but also on the materials used. If the expiration date of the cement or ready-mix has already expired, it is difficult to expect that the floor will last for several decades. It will very soon begin to dry out and cracks will appear. Repairs in a new building will have to start all over again.
Basic requirements for the material:
- Sand - river or mountain. It can be washed or seeded. The faction is large.
- Cement. The brand and expiration date must be taken into account. If cement in bags has been stored for more than six months, it is not recommended to use it for critical work. The same applies to various mastics.
- Roll waterproofing. There should be no breaks or other defects through which moisture can pass.
- Fittings. Metal elements must be free of rust.
Special requirements are also imposed on sheet materials (plasterboard, plywood). They should be dry, without splinters or cracks.
Bathroom waterproofing
Why do you need to waterproof your bathroom? First of all, to form a bowl in which water will be retained in case of leakage. This makes sense if the floor level in the apartment is higher than the floor level in the bathroom. Otherwise, the water will find its way through the doorway into the corridor and flow to the neighbors along the joints between the walls and floor.
Bathroom waterproofing
1. Waterproofing begins with strengthening the corners between the walls and the floor. The area is treated with waterproofing mastic. The corners are glued, recessing the edges in the solution.
2. The mastic is distributed along the junction of the walls and floor. The tape is glued to the wall, extending at least 10 cm onto the already reinforced corner.
3. The edges of the tape are covered with mastic on top and puttied using a smooth steel float.
4. The mastic is applied with a trowel or roller.
5. The holes for the pipes are protected with special cuffs. They are glued in the same way as tapes.
6. Then the mastic is applied to the walls. In our case, the walls are completely covered. Waterproofing is applied in two layers (this will avoid gaps and significant differences in the thickness of the coating, and will also hide sealing corners, cuffs and tapes), with an intermediate three-hour drying according to the manufacturer’s recommendations.
7. Treatment of the floor begins from the corner farthest from the exit, so as not to walk on the waterproofing layer.
8. The first layer can be applied with a roller; for the second, a steel float is optimal (since it is unlikely that it will be possible to smooth out the thick composition well with a roller). You can begin finishing the floor and walls no earlier than two weeks later.
How to check the quality of finished screed in a new building
The builders say the floor is ready for finishing. How can you check its quality without any special knowledge? There are some effective tips:
- Visual inspection. There should be no cracks or chips on the surface.
- Measurements. You will need a 2 meter long rail. It is applied to the floor. Standards allow gaps of no more than 2 mm for laying laminate, linoleum or parquet. If the screed is poured under the tiles, the gaps should not exceed 4-5 mm.
- Slope. The maximum permissible value is 2 cm per 10 meters.
- Strength. A wooden block is knocked on the surface of the screed. The sound should be ringing.
- Humidity. If the floor has not yet dried, you cannot start laying tiles or laminate. To check, attach a piece of polyethylene to the screed. After a day there should be no moisture on it.
If the above requirements are met, the screed is poured with high quality. It will last for several decades without replacement.
Self-leveling mixtures for subfloors
For leveling to zero, self-leveling mixtures (mineral self-leveling floors) are used. In the standard version, such materials form a layer of up to 30 mm. At the same time, mineral self-leveling floors are produced for thick application (up to 80 mm). A self-leveling mixture solution prepared according to all the rules is close to liquid in consistency. It is literally poured onto the base, taking into account the thickness of the finishing layer. The solution spreads, forming a perfectly even coating. To direct the process in the right direction, the spilled “pancake” is distributed with a squeegee with a height adjuster and a needle roller.
Self-leveling floors require quickness. The spill and leveling should be completed in 20, maximum 40 minutes. And after two to four hours you can already walk on a thin screed. Typically, a team of at least two people (or preferably three) works with a self-leveling mixture. One mixes, the other pours and levels the screed, the third also has a job - bringing the ready-made solution (it’s better to walk in special “sandals”).
In passing, we note that large areas (for example, an open-plan floor in a country house) are divided into separate sections (delimited by bumpers - dividing tapes) and filled in stages. As soon as the screed has set in one area, the bumper is removed and another is poured.
Self-leveling mixtures are well suited for quick local repairs. Let's say the floor in the bathroom and toilet can be repaired in one weekend. If you dismantle the old floor on Saturday in the first half of the day and pour in a leveling screed, then you can move on the new subfloor in a few hours, and lay ceramic tiles in a day, that is, on Sunday evening. However, you will have to wait a little longer for the tile adhesive to harden.
Laying self-leveling floor
In this example, Thomsit DD self-leveling compound was used for finishing leveling. Layer thickness 0.5-5 mm, material consumption 1.5 kg/m² per 1 mm of floor thickness. Self-leveling floors can be used when installing underfloor heating.
Laying self-leveling floor
1. Gradually pour the dry mixture into a container with clean cold water. The solution is kneaded using a mixer (drill attachment) until a homogeneous mass is obtained. Then a technological pause of 5 minutes is maintained for the mortar mixture to mature and mixed again. The solution must be consumed within 30 minutes from the moment of preparation.
2. The mixture is poured onto a dry and clean concrete base.
3. The mixture is distributed over the area of the room using a squeegee. They move on the liquid self-leveling floor in special shoes (soles with spikes and straps).
4. The squeegee ensures uniform floor thickness.
5. A needle roller removes air bubbles from the floor, which negatively affect the strength characteristics of a thin screed.
6. Base leveling is complete.
Varieties
Rough screeds are divided into the following types:
- By type of materials:
- Concrete.
- Cement-sand.
- Plaster.
By type of installation:
- Wet.
- Semi-dry.
- Dry.
- Liquid.
By type of adhesion to the base:
- Related.
- With a separating layer.
- Floating.
Self-leveling gypsum floors
Cement mortars are usually used to level the base base. This is explained both by the high technical and operational indicators of such materials, and by the established tradition, largely due to the professional conservatism of builders. Undoubtedly, cement screeds and self-leveling floors are universal. They are used in rooms with different temperature and humidity conditions. Cement floors are highly resistant to dynamic loads and wear.
Meanwhile, recently the “public favorites” have been crowded out by worthy competitors - self-leveling gypsum floors . Gypsum-based products are widely in demand in the West (where mixtures based on anhydrite, that is, dehydrated gypsum, are also produced). Gradually she is gaining more and more admirers in our country.
Gypsum floors are famous for their unique ability to positively influence the indoor microclimate. Gypsum absorbs excess moisture from the air, and, on the contrary, moisturizes the dry atmosphere. Natural “climate control” promotes the well-being of wooden floor coverings, reducing the risk of deformation of parquet and solid wood boards due to sudden changes in temperature and humidity.
Screeds under ceramic tiles are treated with a special primer, otherwise the gypsum subfloor will draw water out of the tile adhesive. Dehydration of the adhesive layer will lead to peeling of the coating. Before pouring plaster on the floor in the bathroom, you need to consult with a specialist about waterproofing the floor “pie”.
Briefly about the main thing
Floor screed is required in almost every room, as it is a leveling layer and the basis for installing a finishing coating made of different types of materials. The screed can be wet, semi-dry or dry, and the installation of each of these types requires a set of special tools, as well as compliance with a step-by-step algorithm. The most practical is considered to be a semi-dry screed, since it is installed using special equipment and requires minimal labor. At the same time, such a subfloor has increased porosity and is not recommended for outdoor use or for rooms with high humidity. In living rooms, modern dry screed made from bulk materials is also popular, which provides increased heat and sound insulation of the floor structure.
Floating floor device
You cannot do without a specialized building mixture if you plan to install so-called floating floors in a house or apartment. Such structures refer to complex bases that place special demands on leveling materials.
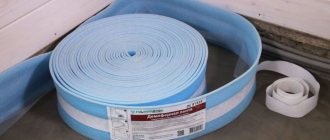
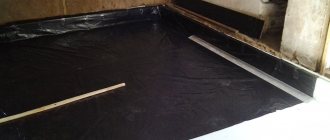
“Floating” floors are designed to increase the heat and sound insulation ability of the floor. To combat impact noise, rigid layers are separated by elastic layers. Mineral wool slabs are laid on the ceiling, and then a polyethylene film is laid, which is placed on the walls. Damper seams are made along the perimeter of the room. Then a leveler is laid or a self-leveling solution intended for “floating” floors is poured. If the height of the room does not allow centimeters of free space to be allocated to the soundproofing “pie,” they do without heat-insulating boards, and use special thin sound-absorbing materials instead of polyethylene.
Another option is installing heated floors. In this case, heating elements (water heating pipes or cable heating sections) are introduced into the cement screed. To prevent heat from escaping “to the left” (or rather, down), thermal insulation is placed on the ceiling - usually slabs of extruded polystyrene foam (on the first floors) or foil foam foil (on interfloor floors). After installing the heating system, a screed is laid. In a heated floor system, the leveling layer performs an accumulating function. It, like a stove, accumulates heat, and then (with the heating turned off) releases its reserves, heating the air in the room. It turns out that the screed has nothing to catch on and at the same time it needs to withstand temperature loads every day. Only high-quality mixtures that contain special additives that ensure the stability and integrity of the leveling layer under adverse operating conditions can withstand such an operating mode.
Foundation preparation process
All work on arranging a rough screed begins with careful preparation of the soil base. To begin with, it is important to identify the highest and lowest points, taking into account the level of the soil and the evenness of its surface. A laser level will help determine their values. This procedure is necessary in order to evaluate for yourself the entire scope of work, as well as determine how much building materials may be required.
It is also important to pay attention to thoroughly compacting the soil. To do this, you can use special construction equipment - for example, a roller or vibrator. The procedure is necessary so that in the future the soil does not sag significantly and this does not lead to cracking of the rough screed, which will undoubtedly negatively affect the finishing floor covering.
Pneumatic rammer for soil compaction
After the soil has been thoroughly compacted, a sand and gravel cushion is laid. It can also be made of clean, washed and river sand. The thickness of this layer should not be more than 60 cm. In the latter case, a layer of gravel or expanded clay is also poured on top, which will make it possible to create a more durable base.
Attention! Before the soil is compacted, it is important to cut off the entire fertile layer, if any. It can be found in a more worthy use than burial under the house. The soil layer is removed approximately 35 cm.
It is also recommended to fill the pillow not all at once, but in layers - for example, 20 cm each. In this case, each layer is well compacted separately. The procedure will make the base as dense as possible. Before compacting, the pillow is moistened with water. The thickness of the expanded clay layer can be at least 10 cm. This layer is also compacted separately.
Expanded clay backfill
Prices for popular models of electric vibratory rammers
electric vibrating rammer
Installation of dry (floating) screed
Until now we have been talking about wet screeds , that is, leveling the base using building mixtures mixed with water. At the same time, there are also dry methods for constructing subfloors. If there is no water, there is no need to wait for the layer to be completely ready, to ensure a favorable setting and hardening regime. There is no need to worry whether the screed will “grow together” with the base and whether the ceiling will withstand the additional load.
The main component of the dry screed is a backfill made of calcined fine-grained expanded clay. Gypsum fiber panels are mounted on the loose layer. The dry screed also insulates the floor and protects against impact noise (though not for the owners of the apartment, but for their neighbors living on the ground floor). When installing it, first of all, a polyethylene film with a thickness of 100-120 microns is laid, which is attached to the wall with damper tape. Thus, a soundproof barrier is created. Dry expanded clay backfill also works to protect against impact noise and also retains heat inside the room.
With proper installation and operation, dry screed (complex systems OP-131 and OP-132 from Knauf) will last for many years without causing the slightest concern to the owners. Moreover, such a subfloor does not create a significant load on the floor. Dry screed can be laid on weak foundations. Installation takes a few hours (work can be carried out at low temperatures). Dry screed, unlike cement analogues, has good thermal insulation properties. The floor retains heat, making it pleasant and comfortable. Dry screed is often accused of causing hydrophobia. Of course, flooding is contraindicated for such a foundation, as is the case with many floor coverings and other finishing materials. However, a small amount of water will not harm him.
In this example, dry screed was carried out using the integrated prefabricated floor system OP-131 (technology) using floor elements consisting of gypsum fiber panels measuring 1.5 x 0.5 m with profiled edges. Thanks to the high technological readiness of the elements, floor assembly is reminiscent of a child's game of construction kit.
Installation of dry (floating) screed
1. Mark the level of the subfloor on the walls. Then a plastic film is laid on a clean and dry base. The rolls are laid with an overlap of 25 cm and placed on the walls to the height of the floor. Installation of dry screed. In our example, dry screed was performed using the complex prefabricated floor system OP-131 (technology) using floor elements that are gypsum fiber panels measuring 1.5 x 0 .5 m with profiled edges. Thanks to the high technological readiness of the elements, floor assembly is reminiscent of a child's game of construction kit.
2. Edge tape is attached to the walls along the perimeter of the room.
3. Expanded clay is poured onto the base. If the thickness of the screed exceeds 2 cm, then the dry backfill is compacted with a hand roller.
4. Place two guides along the walls and check the thickness of the layer.
5. Expanded clay backfill is leveled using guides and slats.
6. Gypsum fiber panels of the subfloor (“superfloor”) are prepared for installation.
7. The panels are laid, moving from the doorway to the window. For unplanned movement, “islands” are laid on the backfill. The panels are glued together with a special adhesive mastic.
8. Gypsum fiber panels are fastened with self-tapping screws.
9. Laying of the super floor is completed. For multiple sections, additional elements are prepared from the panels.
10. The joints of the subfloor panels are filled with putty.
Calculation of solution in buckets
In individual construction, scales are rarely used to measure the amount of bulk materials, much less water. The most common measure in private households is a bucket. Therefore, we will consider how to accurately measure dry building materials using household buckets with the most common volumes of 10, 12 and 15 liters.
For example, the ratio of components for mixing 1 m3 of concrete prepared from the CEM I 32.5H PC grade: 0.42 tons of cement and 1.47 tons of river or quarry sand. To find out the number of buckets, you need to know their volume and the ratio in kg of building materials to volume in m3.
- First step: you need to convert the volume of the bucket to m3. Knowing that 1 l is equal to 1 dm3, and 1 m3 is equal to 1000 dm3, the result will be the following numbers: 10 l is 0.01 m3, 12 l is 0.012 m3, 15 l is 0.015 m3.
- Second step: it is necessary to convert the weight of cement into m3. There are 1.3 tons of cement per cubic meter (the arithmetic average, taking into account the different densities of the brands). The % ratio calculation for converting 0.42 tons to 1 m3 would be: 420 kg x 100 / 1300 = 32.3% (0.323). This means that the volume of Portland cement per cubic meter is: 1 x 0.323 = 0.323 m3.
- Third step: calculating the number of buckets for Portland cement. Bucket with a volume of 10 liters, number of units: 0.323 / 0.01 = 32.3. Bucket with a volume of 12 liters, number of units 0.323 / 0.012 = 26.9. Bucket with a volume of 15 liters, number of units 0.323 / 0.015 = 21.5.
- Fourth step: convert the volume of sand into cubic meters: 1 m3 will contain 1.75 tons of sand. Calculation of the % ratio to convert to volume units: 1470 kg x 100 / 1,750 = 84% (0.84). This means that the volume of sand per cubic meter is: 1 x 0.84 = 0.84 m3.
- Fifth step: calculating the number of sand buckets: 10 l bucket, number of units: 0.84 / 0.01 = 84. 12 l bucket, number of units: 0.84 / 0.012 = 70. 15 l bucket, number of units: 0, 84 / 0.015 = 56.
How to make a solution by measuring material in buckets
Adjustable floors
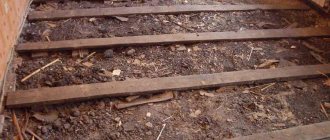
The classic subfloor is the installation of floors on joists . Purlins (logs) made of solid, first-class timber or thick boards (single frame system) are laid on the base base with a certain step. In large premises, a double frame system is installed, in which the logs in the perpendicular direction are tied with crossbars (lintels made of timber). The upper end of the bars is carefully planed. To level the logs, planks are usually placed under them, wedges are driven in, or pure quartz sand is added. Over time, such supports dry out or crumble, and the floor begins to sag and creak.
Construction of a subfloor on joists
Modern adjustable floors are free from such disadvantages. Similar systems are manufactured in the “Department of New Technologies”). Holes are drilled in the logs (standard bars two or three meters long) at a certain pitch. During installation, hollow plastic stand-up bolts are screwed into these holes, through which the height of the subfloor is adjusted. Steel dowels are placed inside the racks, which secure the logs to the base base. To increase the soundproofing ability of the floor, the space between the joists is filled with mineral wool slabs made of basalt or glass fiber. Sheets of plywood are screwed onto the top of the joists (in two layers, with the seams staggered). Then the finishing coat is applied.
Adjustable floors have excellent prospects . Such subfloors can be installed in the shortest possible time. Rigid steel fasteners maintain a stable position of the joists throughout their entire service life. The tree does not come into contact with the concrete base, due to which it is protected from moisture and rotting. The gaps promote natural ventilation of the entire structure. The adjustable floor system allows the base to be perfectly level. But widespread adoption of the technology is hampered by its rather high cost.
Application area
The most popular among rooms where concrete screed is laid on a slope is the bathroom. In addition, external territories cannot do without such a device. These include entrances to the garage, personal plots, and premises of economic importance. Screed in a bathhouse or when installing shower cabins, the floor is also actively installed with some slope.
Such a screed device is necessary in places of unorganized outflow of water in order to compensate for the difference between adjacent surfaces. If you have an idea about the process of installing a concrete floor, then no difficulties will arise during the work. There are no special features. But some recommendations are worth considering in order not to deviate from the technology itself.
Installation of an adjustable floor
Installation of an adjustable floor
1. Verify the horizontal position of the lag.
2. Steel dowels are inserted into the stand-up bolts.
3. Excess plastic racks are cut off. Sheets of plywood are screwed on top.
You can read more about adjustable floors in a separate article - Design options for adjustable floors.
These articles may also be of interest to you:
- DIY installation of semi-dry floor screed
- How to make a floor screed correctly
- TOP 7 mistakes when leveling the floor
- High-quality screed - reliable floor
What else would you like to read?
Tags: floor waterproofing, gypsum floor, wet screed, self-leveling floor, floating floor, floor on joists, adjustable floor on joists, self-leveling mixtures, self-leveling gypsum floor, screed, floor screed, dry screed, subfloor installation, cement-sand screed, Rough screed, rough floor
