When using a self-leveling floor, beacons are not needed, since the mixture has self-leveling properties and can be brought to “zero” without reducing performance characteristics.
Conventional cement-sand mortars do not have such properties. The minimum layer thickness is 3 cm; at the lowest points of the house it can reach 10 cm. Therefore, information on how to set beacons for floor screed to increase productivity and quality is relevant for an individual developer.
Why are beacons needed?
Any type of tie requires the use of beacons during manufacture. Even self-leveling floors are best made along guides. Although such a finishing solution has the property of self-leveling. But without beacons, the quality of the fill may suffer.
The use of guides is required when:
- Floor covering with any finishing coating. From linoleum to tiles.
- Leveling the floor with differences in level.
- Arrangement of thermal and waterproofing of the surface.
- Installation of "warm floor".
And the most experienced professional builders, when installing floor slabs, will not be able to position them in the same plane. Changes are always inevitable. And even with successful installation, you need to remember about the shrinkage of the building. But it happens unevenly.
It is simply not realistic in all respects to produce a screed of the required thickness without special devices. Even a talented master will never rely on his eye. In addition, floor beacons also perform additional functions.
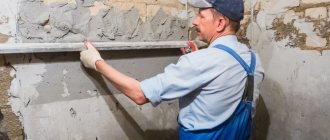
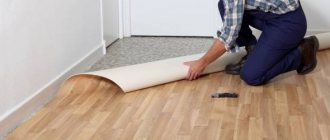
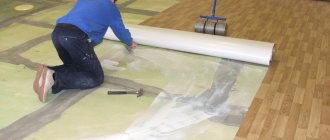
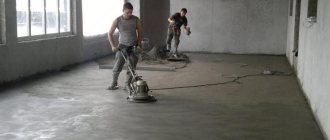
Surface prepared for pouring Source pol-spec.ru
Technologically, it is much easier to carry out backfilling or filling in already fenced areas. They also help to navigate with bringing the floor to the desired level. They can also be used to easily determine the future amount of work.
Various materials can serve as guides:
- wooden slats or bars;
- metal pipes;
- plaster profiles;
- logs;
- adjustable benchmarks;
- profiles for drywall;
- self-tapping screws;
- cement mortar;
- combined options.
The master himself always chooses the material. Any of them will provide sufficient accuracy when pouring the screed. And builders always use the one they are more used to.
Installation requirements
Installation of beacons on the floor may differ slightly in technology. But there are rules that must be followed in any case. And first of all, the master must prepare the surface.
The plane that needs to be leveled may consist of reinforced concrete slabs, wooden elements, or simply a bulk sand cushion. Regardless of the composition of the base, the entire room is cleared of debris.
Laser level Source diabaz-angarsk.ru
In addition, all tools and building materials that are not needed in the work are removed from the room. The most free zone for movement is created. This is the main condition for the convenience and safety of all subsequent actions.
The procedure for performing preparatory work:
- If there is an old covering on the floor, then the baseboards are dismantled and the cladding is completely disassembled.
- Stains and dirt on the base are removed.
- All significant protrusions on the surface are sanded.
- Cracks and holes are filled with mortar. Large cracks are first widened and reinforced.
- The base is primed with at least 2 layers.
- The surface is covered with waterproofing material.
Next, the required amount of materials is determined and the tool is prepared. To obtain the zero level you will need a laser device. It will provide maximum accuracy. In extreme cases, you can use a regular hydraulic building level.
Wall marking Source sense-life.com
See also: Catalog of companies that specialize in finishing materials and related work
You need to remember technical standards when working. The screed cannot be less than three centimeters in thickness, provided that these are ordinary floors. When they are heated, this size increases to 5 cm. But the maximum level of lifting of the guides for floor screed is not regulated. The height depends on the characteristics of the base.
It is advisable to have beacons of the required length. It is better when one guide is placed from one wall to another. If this cannot be realized, then the two elements must be joined together with the utmost precision in level.
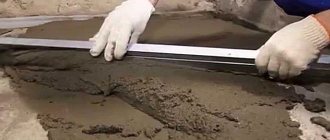
The distance between the slats is selected arbitrarily. Focus on the length of the rule. And the width of the future pouring area should be 20-30 cm less than the tool. But the outer planks must be positioned no more than 20 cm from the walls.
Dimensions
It is best that the beacons for the screed are solid, spanning the entire width of the room. If their length is not long enough, then you can change the installation across the room.
It is also worth remembering the standard sizes of different types of profiles:
- plaster beacons T-shaped 10x26 or 6x21 mm have a length of 2.7-3 m;
- guide profiles, rack-mount, ceiling profiles can be 2.75, 3, 4 and 4.5 m;
- bent profiles can reach a length of 6 m.
Tubular beacons with a rectangular or round profile come in different lengths, depending on their purpose, but most often it does not exceed 6 m.
How to find the zero mark
To create a perfectly flat plane near the future floor, it is necessary to correctly mark the room by level. To do this, you can use a conventional hydraulic one. But working with a laser analog will give more accurate results.
Working with a water level Source ppt-online.org
The device is installed in the center of the room according to its manufacturer's instructions. The laser pointer is fixed at a height of one meter and is first directed at any of the walls. A mark is made on it. Moving the pointer in a circle, you need to repeat the operation with each wall.
By the way. Experienced craftsmen claim that such a procedure can be performed easier and faster with a simple water level. And no less accurate. From arbitrarily placed marks on any of the walls, points are marked on the others.
The resulting marks are connected by a line to obtain the base level. Now you need to measure the distance from it to the base of the floor near each wall. The smallest one is selected from the results obtained. This size is laid out on each partition from the base line strictly vertically down.
The newly plotted points are again connected to each other by a solid line. And this marking is considered level zero. This should not be confused with the floor level. To get the latter, you need to do some calculations. To do this, sum up all the elements of the future finishing coating. For example, the height of the joists and the thickness of the floor board. Or a layer of glue and tile parameters.
Screed level Source sense-life.com
Required Tools
Installing beacons for floor screed is a painstaking process and requires patience and care. To construct them we will need:
- factory beacons;
- water level (hydraulic level);
- tracer thread (beater);
- self-tapping screws with plastic dowels;
- rotband;
- thin cord or nylon thread;
- tape measure and square;
- trowel and spatula;
- building level and rule;
- perforator;
- drill with mixer;
- screwdriver and screwdriver.
Attention! When making markings, it will be convenient to use a tracer thread - a special device designed for applying straight lines to any surface. A thin thread is wound on a spool, which is located inside a flask with dry paint (ocher). To draw a line: shake the flask well, pull out the thread of the required length, press it to the control points on the surface with a slight tension, move it a short distance and release. A thread of the “beater” stained with ocher flaps on the surface and forms a straight line on it.
Installation of beacons with various types of screeds
Pouring a floor with concrete can be done in different ways. There are dry, semi-dry and wet screeds. In fact, beacons made of any material are suitable for each method. But experienced professionals recommend using an individual approach.
Dry screed
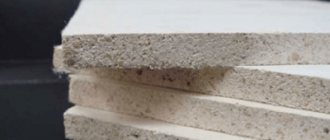
If sheet material (plywood, plasterboard or chipboard) is used for the rough floor covering, then it is enough to place any bulk raw materials under it. And you don’t need to use any water solutions. And sometimes such backfill even acts as the final coating. If space requirements allow.
In this case, the best guide is considered to be a U-shaped beacon profile for steel floor screed. It is strong enough not to bend under the weight of the backfill. This is the best choice because the guide is not removed after pouring, but remains in the screed. The profile must be found with the required rib height. From 27 mm and above.
The profile in a dry screed is positioned with sharp edges upward. The flat part is laid tightly either on the base of the floor or on a layer of bedding. Bulk material is distributed on top and leveled using the rule. Since the sheets of rough coating will lie on the edges of the beacons, the screed will have sufficient sound insulation.
Dry floor screed using beacons Source publish.com.ua
Semi-dry screed
The cement mortar itself serves as a guide for pouring the floor. It is poured into mounds in the corners of the room. Next, small flat areas are formed from them at the level of the future floor. The same spots are arranged over the entire area of the base with equal spacing along the length of the rule. After the solution has hardened, all that remains is to distribute the liquid concrete between the sites and level it according to the intended level.
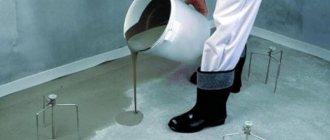
Wet screed
If the height from the base of the surface to the level of the future floor is significant, then in order to save material, a backfill is made from bulk raw materials or their mixtures. Expanded clay is more often used as the latter. This allows you to make a screed only 3 cm thick. According to the minimum standards.
Metal pipes or a drywall profile are used as beacons for pouring the floor. As a rule, to achieve the desired height, bricks or small bars are placed under them. The beacon is secured to the support using alabaster. This allows you to start pouring faster.
Supports for installing beacons Source remont-pola.ucoz.ru
Briefly about the main thing
It is impossible to make a perfect floor screed using only an eye. Therefore, special devices are used in the work - beacons. They are installed on the base, maintaining a width distance between each other slightly less than the length of the rule. After the solution has set, the guides are removed.
Beacons can be made of any hard and strong material. From wooden slats to steel profiles or pipes. Craftsmen often place guides on self-tapping screws screwed into the base. The latter are easy to adjust during installation, thereby setting the desired level.
Ratings 0
Installation for self-leveling floors
Due to the fact that self-leveling floors dry out very quickly, guidelines for pouring them are very important . Otherwise the surface will turn out uneven. The beacons that are used in this case are called benchmarks.
They are a tripod with a vertical pin located in the center. It runs on a thread, which allows you to adjust the height. Installation of beacons under the floor screed in this case is quite simple.
The highest point of the floor is determined. A benchmark is installed in it. In this case, the central pin should be located at a height of 2 mm . This is the height of the floor.