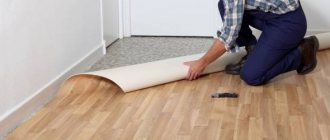
Validity of the event
Ready-made adhesives today come in a variety of mixtures. Cement compositions are in great demand due to their high strength, resistance to moisture, inertness to fungal formations and rust. All this is provided by a binder component, mineral filler and functional additives.
But when referring to the instructions, you should pay attention to the permissible values regarding the unevenness of the base. The limit is most often 5 mm. Such a limitation is not always observed on a concrete or wooden site. Therefore, before tiling work, it is necessary to decide how to level the floor under the tiles and implement the event.
Correctly identified level difference of about 10 mm Source pol-exp.com
Important regulations
Most often, a concrete slab or rough screed serves as the base. There are requirements for them that are approved in SNiP 3.04.01 of 1987, SP 71.13330 of 2011. Here it is worth paying attention to the following:
- Degree of humidity. The indicator is limited to only 4%. In this case, the ability of the base to absorb moisture is important. Thus, porous materials must be impregnated with a deep penetration primer in 2-3 layers, and in the case of damp materials, primers are used for work in conditions of high residual moisture content.
Device for determining the moisture content of concrete Source proceq.com
- Strength. The standard value is considered to be 150 MPa, but it can be higher. This ensures sufficient load-bearing capacity of the floor, eliminating the possibility of its deformation under load.
- Evenness. Adhesive solutions are used for cladding not only based on cement. Therefore, it is worth adhering to the standard for differences of 2, and not 5 mm, for each linear meter in any direction.
- Purity. This means not only the absence of dust and debris. We are talking about areas with corrosion and fungal infections, stains from oily substances, soot and soot. Remains of old decorative coating in the form of paints or bitumen mastics must also be removed.
One of the ways to clean the floor from dirt and old coatings Source hilti.com
You need to level the floor for tiles in any room. But not in every case the base should be formed strictly at a horizontal level. So, in a bathtub, shower, swimming pool, bathhouse or sauna, a technical bias towards the water drainage point must be observed. The minimum deviation is 2-4%.
Characteristic features of the bases
Concrete floors, due to sagging and depressions, almost always do not meet the requirements regarding the base for facing materials. Here the differences often reach and even exceed 100 mm.
Most experts do not accept a wooden floor as a working base for tiles. This is due to the inherent softness of wood and the ability to change shape with changes in temperature and humidity levels. That is, with a high probability, the tile adhesive will subsequently peel off and collapse due to mechanical load during operation.
Floor condition assessment
Before leveling the floor for tiles, you need to determine the highest and lowest points on the job site. For the event you will need a water, bubble or laser level. It’s easier to work with the latter paired with a regular tape measure.
Assessing the evenness of the subfloor using a laser level Source kraski-net.ru
The results of assessing the situation will be three decisions at once. The first concerns the amount of work to be done if leveling is still required. The second is the determination of the maximum layer, which varies among levelers. Third, the mixture is selected, taking into account its minimum layer, the total material consumption is additionally calculated.
See also: Catalog of companies that specialize in finishing materials and related work
Waterproofing
Carry out waterproofing according to the instructions:
- First of all, clean the base from debris and fine dust - then prime it well.
- On both sides, timber or profile pipes should be installed in the shape of the letter “T”, which will form a lighthouse. The beacon must be placed exactly at the level of the screed. If you intend to leave them in the screed in the future, then it is important to impregnate all elements with protective compounds that prevent rotting. Metal beacons will need to be treated with compounds to protect against corrosion.
- Then mastic is applied to the slabs for waterproofing; you can take a rubberized material that will be fused together using a burner.
Ways to solve the problem
The choice of leveling technology using tile adhesive instead of a self-leveling floor or by forming a screed using self-leveling mixtures is determined by a number of points. These include the nature and condition of the rough foundation, operating conditions. Let us consider in more detail the features of each of the methods without taking into account preliminary repair of the base and treatment with primer or protective compounds. This is justified by the fact that for any method, preparation is carried out according to an identical algorithm.
An example of a special primer for concrete floors Source prom.st
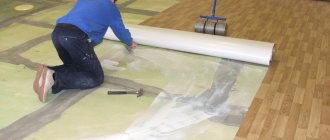
Self-leveling floor
The technology here involves pouring the floor under the tiles with a leveling or self-leveling compound. The material on trading platforms is presented in a wide range, which is justified by the different fraction and nature of the mineral filler, and the type of binding component. The permissible application layer depends on the first criterion - from 2 to 100 mm. In the case of the second, experts recommend considering samples with a cement base or in combination with gypsum (depending on operating conditions).
An example of a factory mixture for self-leveling floor Source cloudinary.com
Among the advantages of self-leveling floors are the simplicity and speed of formation of the leveling layer, and rapid drying. After a day, as a rule, it is permissible to walk on the floor; after 3-4 days you can begin tiling. Full strength is achieved within two weeks.
The workflow includes only three steps. First, the liquid solution is mixed in compliance with the proportions of the mixture and water. Instructions are always included on the packaging. Next, the base is poured in the direction from the far corner to the exit from the room. The final stage is rolling the composition with a needle roller. This is necessary to eliminate air, distribute the solution over the plane, and smooth out sagging. The procedure also promotes better and uniform adhesion of the leveler to the base. Without rolling, layering of portions is observed, pores are formed, which reduces the declared strength indicators. Less often, the leveler peels off due to excess air and uneven contact between materials.
Rolling self-leveling floor with a needle roller Source elka-palka.ru
Preparatory work
Some novice renovators are convinced that to fill they only need to dismantle the old floor, but this is a big misconception. Removing the rough base is just the beginning of the work before pouring the concrete base.
All debris must be removed, not only with a brush, but also with a vacuum cleaner. After this, work is carried out to connect all the necessary communications and seal all cracks and chips, if any.
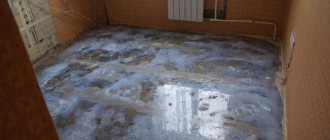
Moisture protection should be made of good materials, in this case you will not flood your neighbors if the heated floor or other plumbing fixtures leak.
We would not recommend that you make waterproofing only from PE film, as it is destroyed by the concrete base within a year. For better waterproofing, it is worth using bitumen mastic or polymer compounds, as they perform their functions better.
Video description
In this video, using the example of a self-leveling floor from Vetonit, errors when pouring floors and the technology for carrying out the work are discussed:
Screed
Floor screeding under tiles is carried out using a wet or semi-dry method. In both cases, a mixture of sand and cement is used. The difference lies in the water content, which determines the rules for forming the leveling layer.
Wet screed
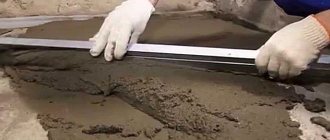
Before pouring concrete, the base is covered with a waterproofing film, and a damper tape is fixed around the perimeter. If it is necessary to form a large layer (over 40-50 mm), an additional metal mesh is laid or reinforcing fiber is added to the solution at the mixing stage. At the end of the preparatory work, lighthouses are installed.
The solution is prepared from individual components (standard proportions of sand and cement are 3 to 1) or from a factory mixture. The proportion of water is 0.45-0.55 of the volume of the binder component. It is less common to add gravel or crushed stone. The permissible fraction here is 20-40 mm, the dosage is 4 parts to the traditional composition.
Filling is carried out in sections between the beacons. The distribution of the solution and leveling of the coating is carried out according to the rule. To ensure uniform drying of the concrete over its entire thickness, the screed must be covered with polyethylene for the first three days.
Leveling the base using wet technology Source worldsur.ru
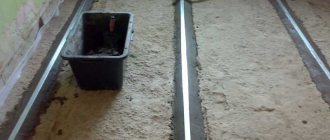
Semi-dry screed
For semi-dry screed under tiles, the working mixture is prepared from cement and sand in proportions of 1 to 3. The amount of water is determined based on the weight of the binder - 0.4-0.5 liters per 1 kg. To increase strength, 12 mm long fiber fiber is added to the mixture.
The technology involves performing three steps within one hour until the composition begins to harden. Before leveling the base, you need to cover the floor with waterproofing and secure the damper tape. If necessary, additional slab thermal insulation is laid under the film. Next, beacons are installed.
The semi-dry mass is poured onto the finished base in parts between the landmarks. The mixture is distributed according to the rule. Next, the coating is compacted. It is not necessary to grind the surface before facing work. If the working site has an area of more than 15 sq.m, then expansion joints 3 mm wide are formed.
Consistent formation of semi-dry screed Source kitchenremont.ru
Requirements for floors and screeds
Requirements for floors and technologies for their arrangement are given in SP 29.13330.2011. The minimum thickness of the leveling cement screed when laid on concrete bases is 2 cm. The compressive strength of sand-cement mortars used to make a monolithic screed must be at least 15 MPa.
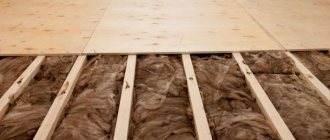
If it is planned to install an electric or water heated floor system in a room, then a layer of thermal insulation is provided. In this case, the thickness of the screed and the physical and mechanical characteristics of the insulation are calculated taking into account concentrated loads. The calculated values are shown in the table.
Another requirement is that the floor level in bathrooms should be 1.5–2 cm below the floor of adjacent rooms, and if the drain in the shower room is installed on the floor, then it is necessary to maintain a general slope of 1–2% of the floor level towards the drain hole. In addition, the bathroom and toilet must be separated from other rooms by a threshold. This is necessary so that in case of burst pipes or other emergency situations, water does not immediately flood the entire apartment, but is located in a room with waterproofing. On the other hand, if there is a serious leak, such a step will be enough for 1 minute of “flood”, and you will constantly stumble over it. Therefore, this requirement remains at the discretion of the apartment owners.
Briefly about the main thing
The tiles are laid using technology on the base with limited differences from 2 to 5 mm, so the tiling is carried out after leveling the floor.
To prepare a concrete base, there are rules that are prescribed in SNiP 3.04.01 of 1987, SP 71.13330 of 2011.
A thin-layer coating is formed from a self-leveling mixture based on cement or cement-gypsum base.
Leveling differences with a layer of more than 30 mm is carried out using sand concrete using a wet or semi-dry method.
It is permissible to level the floor with cement-based tile adhesive, provided that a small layer is maintained and a coating 5-10 mm thick is formed in two passes.
You can begin cladding only if the leveling coating has completely dried.
Ratings 0
How to level a bathroom floor without knocking down old tiles
When carrying out renovations in the bathroom of an old house, when there is a risk of damage to the integrity of the ceiling, or in the case of communications located under the tile, it may be advisable not to dismantle it, but to level it on top of it. A prerequisite for this is that the tiles are firmly held on the base, there are no peelings or loose elements. If, when tapping under some tiles, a dull sound is heard, it is better to carefully remove such covering.
To level the tiles, self-leveling mixtures are used, or when laying a new coating, a thicker layer of tile adhesive is applied, but within the maximum thickness specified by the manufacturer. An important nuance of this technology is the need to ensure reliable adhesion of the leveling layer to the surface of the old ceramic. This can be achieved as follows:
- Using a circular saw with a concrete wheel, cross-shaped notches are made on the surface of the old tiles. You also need to clean the seams from dirt and grout, embroidering them with a grinder.
- Using a sanding machine, roughen the entire surface of the old cladding.
After these operations, all debris and dust are removed from the base using a vacuum cleaner. As a primer before applying the leveling layer, it is recommended to use compounds that increase the adhesion of smooth and poorly absorbent substrates. An example of such a primer is Betokontakt from TM KNAUF.
After the soil has dried, a self-leveling mixture is poured or a new cladding is laid on a leveling layer of tile adhesive.
A mixture of glue and sawdust for wooden surfaces
The third method is suitable for wooden floors. A floor that has become warped over time and has become “wavey” can be straightened using a simple mixture of PVA glue and ordinary sawdust.
A mixture of sawdust and glue
The procedure is the same: you need to find the highest place on the floor, and from this place, using “beacons,” fill the curvature with sawdust mixture. To prevent the mixture from thickening too quickly, the sawdust can be moistened with water.
If the floor is like an accordion, after preliminary cleaning you can cover it with chipboard, thick plywood, nailing and leveling the surfaces. After this, all gaps, cracks and seams are treated with a mixture of PVA and sawdust.
If the floor is like an accordion, after preliminary cleaning you can cover it with chipboard, thick plywood, nailing and leveling the surfaces
This method has a drawback: the glue takes a long time to dry. However, after drying, such a surface acquires the properties of hard plastic.
It is better to leave wooden surfaces where there is no heavy load on the tiles - on terraces, verandas, etc.
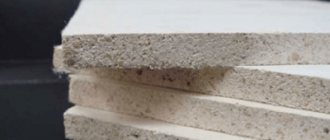
chipboard sheet
Required Tools
To level surfaces in rooms with high humidity, you will need the following materials and devices:
- drill with an attachment for preparing building mixtures;
- level;
- hammer;
- construction knife;
- cement-sand mixture;
- brush or roller;
- waterproofing sheets or mastic;
- spatula, rule;
- reinforcing mesh;
- waterproofing tape.
Exterior coating finish
If the cladding is held tightly, it does not need to be dismantled. In this case, alignment is done like this:
- Uncoated tiles are washed and degreased. Remove old seams with a grinder and a stone disc.
- If necessary, remove the glaze. To ensure good adhesion, more than 50% of the coating is removed. Rub the surface with a grinding disc, giving it the desired roughness.
- Clean the floor covering from dust, apply a primer, for example, Knauf Betonokontakt. It is recommended to distribute the product several times, taking breaks of 2-4 hours.
- Pour in the self-leveling mixture and spread it with a needle roller.
Installation of beacons
Correct installation of beacons and floor screed in the bathroom is good because at the final stage the floor turns out to be absolutely flat, which reduces the cost of tile adhesive to a minimum. In most cases, beacons can be installed using a two-meter slatted level. Beacons are installed in slides along the wall in increments of about half a meter. They are pressed into the solution, controlling the position with a level. All beacons are installed in the same way relative to the first one. A clear horizontal line should form between the first and subsequent ones.
Installation of beacons
If the screed needs to be poured onto foam plastic, then it is cut out in the places where the beacons are installed. Otherwise, it will be impossible to install the beacons evenly in level, which will make laying the tiles much more difficult.
You should definitely make sure that the thickness of the screed is not less than half a decimeter. This is especially important if it is poured over foam plastic - its thinner layer can quickly crack. After checking the height of the installed beacons, which is measured from the slabs to the ceiling, you can install metal or wooden beacons, and then proceed to pour the screed, the technology of which you should also know.