Painting on wet plaster with water-based paints has been used by people for a very long time. Ancient paintings of temples, residential and public buildings are known. Even in ancient caves, various images are found on the walls. For some time this decoration was forgotten, then it began to be reborn again. Painting on wet plaster is called fresco.
In the late Middle Ages, plaster and Armenian cake were used. When we only want to put small details in gold, it gets powdered gold and after painting it is applied with a brush. Sometimes gold powder is also sprinkled onto paint to give a litmus effect.
In the Middle Ages, tempera was always used. The pigment must be highly crushed and agglutinated with egg white or resin. Especially with rubber, because it is more stable and brighter. The technique is the same as the temperature on board, these are painted layers. The paint is applied with very thin brushes or a pen.
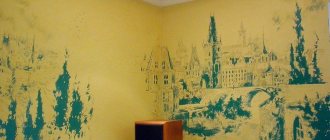
Images on the walls of modern buildings can look very elegant. They are quite unusual and look quite bright. Painting walls on wet plaster requires special skill from the artist. He must know perfectly well the characteristics of the material, which is capable of absorbing various coloring compounds.
To prevent painting on plaster from fading, you need to select paints and prepare the wall well. Nowadays, craftsmen often use similar paintings on the interior walls of the kitchen and other rooms in the apartment. As a result, the home takes on a completely new style, becoming more comfortable and unusual.
Parchment is a fairly stable support, but is very sensitive to changes in humidity, like wood, which absorbs moisture and produces a crop. Another problem is that it is very dirty with dust, do not leave it in the open air. Sculpting techniques are much less studied than painting because they are more difficult to learn. In addition, sculptors paint much less than painters. We rely on a few manuals that we keep and works in progress. Everything else is a hypothesis, an assumption.
Size. Modeling. Finish: This is the treatment given to the surface of the work. Leave the material visible: uncovered, for example when the material is good and beautiful. But it is polished or varnished. You can also leave the material because it has symbolic meaning.
Drawings on wet plaster were made in ancient Rome. They were applied not only to the walls, but also to the ceiling of buildings. The work was carried out on both dry and wet surfaces. The technique of painting a dry surface with your own hands is called alsecco. Wall painting of this kind is done with paints that are mixed with water, glue, or raw chicken eggs. You can paint walls outside and inside buildings. The alsecco technique appeared much later than fresco. And it looks brighter and retains its colors for a long time.
Mask the material: This is done if the material is bad or has a fault. Usually it is disguised with paint, for example, it is more naturalistic. In other cases, it is colored to give it a symbolic character, the opposite of the previous one. It can also be plated with metals.
Stones have different characteristics depending on the minerals they contain and the geological process of formation. Stones can have three origins. Igneous: formed from magma. Sedimentary origin: formed by the accumulation of materials.
Painting with water paints on wet plaster flourished during the Renaissance. Light colors were applied to the wall first, then darker shades followed, and the most saturated colors were applied last. The coating is prepared for the design in a special way. For this, lime with brick chips is used, which can hold water for a long time. Along with these components, flax threads or crushed hemp are added to the plaster solution. The preparation process looks like this:
Metamorphic: They come from one of the above, but other materials are added. Depending on their origin, they are hard or soft and their color varies. To carve, you need to choose a stone that is not very heavy or very soft, and should also be compact so that it does not break it. The color of the stone should be uniform so that the color does not dominate the shape. Most used for carving.
Diorite: This is the most complex of the igneous ones. It's very strong and very dark. It polishes well, although it is difficult to carve. You can't do parts in an extension and you can't do a lot of parts. When polished it gets a lot of shine. It was used a lot in Egypt and in Rome because they bought it from the Egyptians. Roman tombs produced plenty of this material.
- unevenness is created on the wall;
- the old coating is cleaned and primed;
- at least 3 new layers of plaster are applied;
- drawing is applied.
The irregularities are made specifically for better adhesion of the plaster mortar to the wall surface. This can be done using a hammer drill. Notches are applied up to 8 mm deep. Their number per 1 m² can reach 120 pieces. The artist cuts the drawing made on paper into fragments and transfers them to the wall. Lime is most often used to whiten the background. After this, each fragment of the picture is filled with the desired color.
Porphyry objects are very valuable. Granite: It is less hard than the previous one, but very resistant. It's quite a lot and well Polish. The grain that forms the stone is visible, although it is polished. The red granite of Aswan is well known. Basalt: usually gray or black. It is heavy, but quite fragile, it breaks a lot if it is left outside.
Sedimentary: Typically porous and not easily polished. Sandstone: very soft and very brittle, canceled on the outside. Limestone: Formed by calcium carbonate. It is soft, abundant and quite resilient as the limestone is soft when extracted but hardens over time. If it breaks, it melts because the interior is still soft. Yes, it can be polished, but usually polychrome. The whitest is Tura limestone, widely used in Egypt.
Paintings on wet plaster are called frescoes. You need to treat the wall quite quickly, while the coating is still damp. It is for this reason that a life-size drawing is made on paper. When applying paints mixed with lime, you should remember that painting on plaster becomes lighter as it dries. A correctly applied fresco can delight homeowners for many years.
Plaster: Can be carved, but not very common. This is the only material that can be used with all three methods. It is very soft and very transparent, so it is often polychrome so the transparency is not visible. Marble: This is limestone that has undergone a reaction. It is easy to cut and durable. It has a crystalline appearance and luster that limestone does not have. Can be polished and get a lot of shine. It is the most used stone in Western sculpture. It can be white or with colored stripes.
We select the stone we are going to carve. In the period before the fifth century, and in the Middle Ages, any stone was commonly used for practical reasons. In the Middle Ages there is usually no free sculpture, but it is removable, and the same material as the building is usually used to make it lighter. In Egypt, materials are chosen because each material has symbolism. Since the fifth century in Greece marble has been used for aesthetics and in Rome because they have many quarries.
The process of painting on wet plaster
The process of painting walls on wet plaster is based on several stages.
Let's look at them in more detail. Preparing the base
The surface preparation process is quite an important point, which can subsequently play an important role during painting. There are several points that must be done one by one and it is not recommended to skip them:
We start by removing the old finish. It should be removed using a spatula. If the old finish holds up quite firmly, even after hitting it with a hammer, then it can be left. At the end of the work, completely clean the surface of dust. In order for the adhesion of the new layer of plaster mixture to adhere well to the surface, it is recommended to make notches with a depth of about 5 - 7 mm.
Related article: Features of fiberglass wallpaper for painting
To increase adhesion and remove dust residues, the surface is primed. There should be several primer layers, this will ensure the quality of plastering.
Initial, also called basic, plastering. It is performed mainly for the purpose of leveling the surface. It is an intermediate layer between the wall itself and the finishing plaster. Only after the base plaster has completely dried is a new layer applied, on which the painting will be done.
Preparation of mortar for finishing plaster
An important point is the preparation of the plaster mortar, which has its own secrets. It was on a similar composition that frescoes were once applied. The composition itself was kept secret for a long time, so components can be selected and replaced as necessary. So, the composition of the solution is:
- The base material for the solution is lime. The better its quality, the stronger the plaster will be.
- The lime must be extinguished with water and kept in this state for several days.
- The filler in this solution is coarse river sand and brick chips. Experts recommend using the latter option. Thanks to this component, the drying time of the layer is slightly longer, which makes it possible to paint with paints.
- To prevent cracking of the plaster layer, finely chopped hemp or cellulose is added to the composition.
Pay attention to the proportions:
- For the base layer: 1 part lime paste and 3 parts filler.
- For the finishing layer: 1 part lime paste and 2 parts filler.
Preparing the surface for painting
Surface preparation is considered the first stage of painting. Its goal is to level the wall with lime plaster and smooth it to almost perfect condition. Traces of the old coating must be completely removed. Old paint or poorly adhering plaster, wallpaper, whitewash - everything that was previously on the wall must be removed.
Today, frescoes are made using a lime-sand mortar, it is diluted in a ratio of 1:4 (1 – slaked lime, 4 – sand). But the finishing layers adhere to different proportions - 1: 2.5 (instead of sand, it makes sense to take powdered grated brick).
Why you shouldn’t take cheap lime for the plastering part of the work:
- it is made from waste and is considered lean, since it contains less calcium oxide and is extinguished more slowly;
- Due to such a slow slaking, as well as a large number of impurities, such lime will cause efflorescence, which means it may subsequently fall away from the wall, forming unattractive smudges in plain sight.
Previously, it was natural for artists to thoroughly wash and stir the lime to achieve complete slaking. But today it is possible to immediately buy pure lime and slak it at home.
The sand that will be part of the solution must be clean. The same river sand is perfect for this. It is advisable to sift it through a medium-sized sieve, because plaster compositions love fine sand, this way you can achieve a more plastic composition.
Plaster surface preparation takes place in 3 stages:
- Spray For lime mortars, a brick wall is considered the ideal base; a concrete one is a little worse. If the wall has wallpaper, everything needs to be removed; if the wall is crooked, it must be reinforced. The spraying itself is carried out either with a trowel or with a pump. The rule is to remove excess. It happens that you can see that the spray will be thick. It needs to be stretched 2-3 times to avoid cracks. And in this case, the reinforcing mesh is placed here (but first you need to get the beacons).
- Primer. Prime the wall when the spray has set a little. The thickness of the solution is important; it is applied to the wall with the same trowel, and it should be ground with a trowel. Excesses are also removed by the rule. This completes the geometric leveling of the surface.
- Cover. For the covering layer, you need to make a more liquid solution; grated brick or fine sand work well as a filler. Moreover, grated brick will still be preferable, since it retains moisture well (and this is advantageous for high-quality setting of the solution). The covering layer itself is small, no more than 2-5 mm, it is applied with a grater.
Hint: in one fresco painting technique you need to apply as much cover as you can cover with the fresco. So, for example, an experienced artist can paint about 7-9 squares (taking into account the complexity of the composition, of course). If there are many small details in the composition, productivity will be lower, which must be taken into account when applying the covering.
Decorative artist Sergiy Gusev talks about preparing the wall and painting.
Fresco painting technology
Painting a fresco should be quick, but there is no need to rush in this matter. In order not to waste time on thinking and reworking, the master must familiarize himself with all the subtleties in advance and know the work scheme, sequence and final appearance of the finished product. There is a method that allows you to divide all the work into three stages:
- making a drawing;
- applying tones;
- finishing the image with highlights and shadows.
This technique allows you to fully exhaust the life of drying plaster.
The beginning of painting on wet plaster is to create a drawing. This process involves searching for darkened and lightened areas in the fresco for better expressiveness of the work. The end of the stage is a completely delimited area of work for each color.
When the surface of the fresco is fully revealed, you must first start working with shadows. In some situations, there is a possibility of descriptions and shadows drying out, in which case yolk diluted with water is introduced into the solution. It does not slow down the drying of the plaster, but forms an adhesive mixture that holds the paints to the surface.
During the writing process, the master has to take into account many features of this technique.
Initially, it is important to remember that lime-containing colors will lighten quite a lot after drying. Alas, it is quite difficult to guess the final tone, since the plaster behaves differently each time
It depends on the nature of the surface on which it is applied. If the wall continues to quickly absorb water, the fresco will dry faster. If the plaster is applied to a non-water-absorbent wall and if a three-layer primer is used, the drying time will increase.
Artistic decorative plaster requires increased care and painstakingness, since it will not be possible to change a section of the fresco; you can either make small adjustments or start all over again. Therefore, if the painting is not done by you, but by a hired artist, stand next to him and completely control the process, at least by being present and looking as if you are a professional in this matter.
The great masters of the past used solutions according to their own recipes, and most of the secrets, alas, have been lost. By and large, they are not needed to perform frescoes in our time, since current technologies have already advanced well. Choose any one that is currently known, and let artistic plaster with your own hands become for you more than a hobby and a true work of art.
One of the most ancient finishes, which was undeservedly forgotten for some time, is painting on wet plaster with water-based paints. One of the options for painting is called a fresco, which was created back in the Renaissance. Nowadays, this technique has again become widespread.
Although this type of finishing requires some minor skills, it is quite possible to do it yourself. In this article we will try to acquaint novice craftsmen with the main nuances of painting walls on plaster and with the technology for performing the work.
The technology for performing plaster painting is not particularly complicated.
The main stages of its implementation are as follows:
- The drawing is done on the walls or ceiling, which are pre-plastered. Work begins on a wet base.
- The contours of the design are applied to the surface, and then they begin to paint it with water-soluble paint.
- After the “painting” has dried, it acquires a kind of depth through the absorption of paints by wet plaster mixtures.
If you evaluate this process, it may seem that there is nothing complicated about it. Only during work will all the nuances that accompany this creative process appear:
- condition of the walls;
- preparation of solutions;
- painting technology.
If you are not confident in your skill and artistic abilities, you should first practice in small areas. Initially it can be done on a dry plastered wall.
On video: creating a pattern on decorative plaster.
General information
Types of painting
Plaster painting is becoming more and more popular every year and is an excellent alternative. Most people are interested in how painting on wet plaster is translated, and from Italian the word “raw” is translated as “fresco”.
There are two application methods:
Please note that the technology for painting on both dry and wet surfaces is significantly different. When choosing a method of application, you should be guided by the requirements for the appearance of the images, the availability of time and funds, as well as your personal drawing skills.
Fresco manufacturing technology
Even if you do not plan to do the work yourself, you will still need to supervise specialists. The final result, as well as the durability of the image, will depend on how accurately the work technology is followed. If the technology process is violated, it may turn out that the image after a while will begin to crumble and crack.
To create high-quality images on the walls, you will need:
The technology of applying a fresco will require a certain skill, as well as the skill of the artist. If you are not confident in your abilities, then it is better to invite a professional.
Old style fresco painting technology
The fact is that fresco as a form of art has not been used in decoration in its classical form for a very long time; instead, so-called “decorative plasters” have become fashionable.
Their advantage was that they did not require special qualifications of craftsmen or a lot of time.
This is due to the complexity of its execution, starting from preparation and ending with the final stages of painting.
We can highlight the following list of painting stages:
- surface preparation;
- transferring the contours of the design to the surface;
- preparation of paint compositions;
- coloring (“cutting”) areas of the picture and background;
- detailed painting (painting of small details, shadows, highlights).
An important point among all this is that at all stages of painting the surface must be damp, that is, the surface of the plaster is not allowed to dry, protecting it from drying by the sun, draft, etc., curtain it with damp burlap after the end of the working day. So, let's talk further about how to paint a fresco, and more specifically, how to paint a fresco on the wall.
Surface preparation
for old-style fresco painting is to level the walls using lime plaster and smooth them almost to perfection (high-quality plaster with plane deviations of up to 2 mm/2 m). After leveling the walls, they are smoothed using sifted lime milk, which is called sandless plaster coating.
Transferring the contours of the design to the surface
performed using the so-called “cardboard” or fresco card.
To produce it, the full-size original drawing is taken (usually consisting of many sheets, since the drawing is large), and the main contours are transferred to carbon paper, after which punctures are made along these contours with an awl.
The finished canvas with pierced contours is leaned against the surface, and by pressing with a cotton swab with coal dust, the contours are interrupted along the pierced holes.
Preparation of paint compositions
happens in advance, before painting the frescoes. To do this, an alfresher (a master of fresco painting) takes the original in color and rubs certain pigments on water, obtaining a different, required tonality/color of paint.
The finished mixtures are poured into sealed containers, designating each main color with a number; the number is also affixed to sections of the contours.
The pigments themselves are natural/artificial alkali-resistant compounds, and they are rubbed exclusively in water, sifted through a sieve No. 0.071 and 0.06 with 6400 and 10000 holes/cm2, respectively, in a ratio of 1:3.
Cutting sections of the drawing
- This is the first stage of painting, which involves painting with primary colors the areas marked with contours on the surface.
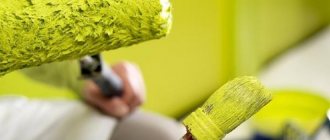
To do this, take paint and paint with soft brushes (so as not to damage the wet plaster), first the largest areas, then the smaller ones in descending order.
The important thing in this process is that the started area must be painted at once, excluding breaks; in addition, the work needs to be done in an orderly manner and in stripes if the areas are very large (to prevent overlaps as a result of the paint setting).
Detailed painting of areas
performed over cutting; its essence is the application of small details, highlights, shadows, textures, etc.
Again, soft brushes (squirrel or kolinsky) are used for this purpose. As with cutting, each element must be applied without interruption; the work is such that the possibility of correction is excluded, so you need to work carefully and impeccably.
As for shadows and highlights, in fresco painting there are 3-4 tones of each, that is, the shadow can be deep, medium and shallow. The same is true with lighting effects; there are several tonalities of lightening.
There is another type of fresco - “fresco a secco”
, the essence of which is painting on dry plaster (from Italian Secco - dry) with the same pigments rubbed on water mixed with milk of lime.
The technology is almost the same, however, after the plaster has dried, it is moistened with water and primed with grade 1 lime-lime mixture (MgO2 no more than 3%) – 1; water – 9. The primer is again moistened with water before painting.
The only advantage of this type of fresco is that it is possible to make adjustments and other corrections; for this, the corresponding area is moistened, a primer is applied and painted again. It is worth noting that such a fresco has duller, bleached colors (due to the presence of lime in the paints), and is also less durable than a raw fresco.
Technique of wall painting with paints on dry plaster.
Wall painting on dry plaster is called Alsecco. They use paints mixed with raw eggs, glue based, and water. Painting on dry plaster is more resistant to polluted air and dampness. This way you can paint the walls of buildings from the street side.
The technique of wall painting with paints on dried plaster appeared later than frescoes. Compared to light translucent frescoes, painting on dried plaster looks bright, colorful, and does not lose its original appearance for a long time.
Wall painting on dry plaster is carried out by artists. Therefore, the facade of a house with such decoration or the interior of a room looks elegant and chic.
What is unique about the alsecco technique?
Recently, wall painting on dry plaster has begun to decorate many buildings, and masters have appeared who are fluent in the specific features of this work. Unlike a fresco, painting an image on a dry wall does not require fast work, since the artist is not involved in the process of drying the wall. After all, the fresco must be applied to a damp surface, which means you need to have time to finish the painting before the surface dries. It is more convenient to paint on a dry wall. Can be done by one artist or a group. This painting technique originated in Europe in the Middle Ages and is still used today. What attracts such pictures?
- Paints are based on natural materials: water, lime. They can be used to paint walls even in a nursery. They are absolutely safe for health.
- Durability. Colors based on natural ingredients adhere well to plaster, do not crumble or fade.
- All details of the picture are carefully recorded.
- Resistant compositions are not afraid of exposure to natural factors or sudden changes in air temperature. The alsecco technique is used to decorate plastered exterior walls and building facades, painting blank walls and solid brick fences.
The technique of wall painting with paints on dried plaster should be well mastered by a person who approaches the matter with soul and has an artistic vision.
Disadvantages of painting wall art on dry plaster.
The complexity and responsibility of the work requires its execution by a real master - an artist. This kind of work is unique, exclusive, and cannot be exactly repeated. Therefore, the cost of finishing will be higher than stencil images. The work will take a long time to complete. Therefore, you can’t count on quickly completing the decoration of a room with wall painting on dry plaster. In order for the artist to work calmly, without haste, discuss with him in advance how long you need to focus on. The functionality of the room may vary. Therefore, such expensive design projects should decorate offices, living rooms, and libraries.
How to prepare a wall surface for an artist's work.
If you want to get the perfect picture on the wall, prepare it well. The wall must be cleaned of old paint or wallpaper. Carefully repair dowel marks or other defects with putty. After this, coat the surface with a primer and plaster again. Achieve a completely flat surface. Once it's dry, prime it again and let it dry. The place for the masterpiece is ready! The subtleties of working with dry plaster are that the material is applied in several layers. Each subsequent layer is applied to the dried previous one.
Painting on wet plaster with water paints
The meaning of this technique is that the design is applied to the wall before the plaster dries. First, light colors are applied to the surface, then darker, more saturated and bright elements are alternated.
The plaster mass itself also has its own peculiarities: in its production, high-quality lime is necessarily used, which is quenched with water until the active chemical reaction stops.
Also, to make plaster you need the smallest brick chips - they are able to retain water for a long time and not dry out. The wall is also prepared in a special way: unevenness is artificially created on it to enhance adhesion to the material. During painting, the wall surface is regularly moistened so that the paint lies on the wet base. After drying, the picture will lighten a little, which is due to the presence of lime in the composition.
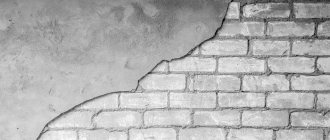
The quality of the finished fresco will depend on the type of surface. For example, brickwork absorbs water strongly, so the fresco will dry quickly, and without additional priming, the contours of the image may crack. On weakly absorbent bases the fresco dries slowly, as a result the painting will look more natural. The more layers of plaster applied to the surface, the longer it takes to dry.
Technology of painting on wet plaster with water paints
The technique of painting on a wet base is quite complex. It includes the following stages of work:
- Creating a drawing and preparing a life-size model.
- Cutting the workpiece into separate fragments.
- Transferring the drawing to the wall, tracing the contours.
- Whitening the main background.
- Filling individual segments of the fresco with color.
There are also simplified options for performing the technique. If you have the skill and some experience, you can do the job even at home. In the original, speed of reactions and precision of strokes are required. To make the task easier, the layout of the picture should be painted in advance as it will be done on the wall, and painted with shadows.
History of the method
Painting on wet plaster was practiced in the ancient Mediterranean. Some paintings made several centuries ago have survived to this day - they can be seen on the walls of temples and ancient buildings. In Ancient Rome, painting on plaster decorated palaces, walls in the houses of rich people, and public buildings. There were especially many frescoes in the cities of Pompeii and Herculaneum, which later turned out to be covered with the ashes of Vesuvius.
In the Middle Ages, frescoes became even more popular. Thanks to inexpensive raw materials, which were prepared from local minerals, they began to be used everywhere. Italian artists who possessed enormous skill and talent became widely famous.
Because the paint adhered tightly to the plaster, it lasted an incredibly long time and did not fade, although it became paler after drying. Until the 18th century, fresco occupied a leading position in interior decoration, and only later was it replaced by new types of art.
The essence of the process
After the plaster based on sand and lime is applied to the wall in several layers, a drawing is made on the top with certain types of paint. The latter must be water-soluble, based on lime, casein or silicates.
Gradually, the paints are absorbed into the plaster and color the lime (calcium carbonate) present in it. As a result, the painting becomes part of the wall and is not erased. It can only be removed by removing a layer of plaster.
Frescoes in the apartment
A fresco is a type of monumental painting: it cannot be removed, like a painting, and hung in another place. For a fresco to truly decorate a room, it must become an integral part of the interior, in harmony with its other elements. That is why you need to think through the design of the room in advance and decide on the type of painting that will be depicted on the wall.
The dimensions of the fresco also need to be calculated
A little history
The art of painting on wet plaster originated in the ancient Mediterranean.
This method owed its popularity to cheap paints, which were made from local mineral raw materials and diluted with water. In Rome, fresco painting decorated the homes of rich people and public buildings; examples of such work can be seen in Pompeii and Herculaneum, where the painting was well preserved thanks to the nearby Vesuvius: the cities were covered with ashes at the beginning of our era. The fresco received its development in the Middle Ages, where it became an indispensable attribute of temples. Italian masters were especially famous, for whom fresco was a sign of the artist’s aerobatics. Fresco painting services were in deserved demand: such painting was practically eternal, because the paint was absorbed into the plaster and set with it. When drying, it faded somewhat, but this was compensated by the main purpose of the fresco: it was done in large interiors, where the impression of painting was obtained at some distance from it. Painting on wet plaster dominated in churches until the 18th century, gradually being replaced by other forms of interior design.
painting
As you know, lime solution has an alkaline reaction, therefore, when mixing paints, alkali-resistant pigments are needed. What kind of pigments are these: ocher, cinnabar, ultramarine, this will also include manganese peroxide, lemon, umber, as well as burgundy, scarlet, etc. Although in relation to today there is no point in even listing the pigments: there are many more of them. The main thing when buying paints is to look at their solubility in water and their resistance to alkalis.
Attention! The pigment needs to be tested. It needs to be diluted in the composition with which you will work. For example, in water and lime
And then the pigment is applied to a previously prepared piece of plaster. For beginners, it makes sense to carry out such testing with all pigments.
For example, in water and lime. And then the pigment is applied to a previously prepared piece of plaster. For beginners, it makes sense to conduct such testing with all pigments.
How the painting itself happens:
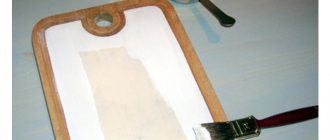
- If you are doing wall painting for the first time, it is advisable to make a full-size template on paper. A troublesome measure, but not at all superfluous. The template is subsequently applied to the wall and the master pierces the contours of the main figures of the picture with a needle. This is done so that an imprint of the image appears on the wall.
- After the print appears, you can trace the contours. Usually they start working with light tones, gradually moving to dark ones. Layer-by-layer application works well - this way the finishing layer shows itself more clearly.
- If there is a need to whiten light areas, this can be done with slaked lime. Only then will the primary colors be applied to them.
- If the working day is already over, but you didn’t have time to do everything (and this happens most often), the plaster, which has not yet been filled with painting, needs to be cut off diagonally with a stationery knife. Cut exactly to the thickness of the covering layer - this is done for subsequent masking of the seam.
And a little more about paint. If you decide to paint the external walls, then the best option would be paints based on liquid glass. They are spread on the palette. In contact with lime, liquid glass will give a stable, insoluble texture, very durable. Such paints outperform traditional compositions in many respects.
Painting on dry plaster
What previously only decorated temples, medieval castles and royal palaces has now begun to appear in the homes of ordinary people. New inexpensive materials imitate marble, expensive wood, and elegant stucco. Not surprisingly, wall paintings have also begun to attract the attention of many people. There are two main ways to apply a design to such a surface - painting on wet or dry plaster. The first method is very interesting, but more complex. The fact is that the painter’s working time is limited by the drying time of the surface. If something does not go according to plan, it will be extremely difficult to correct the defect. Most likely, you will have to delete the failed fragment of the picture. Therefore, we will consider here the second method, which is easier to implement in practice at home - applying a pattern to dry plaster.
Painting technique on dry plaster
For this type of artistic work, lime, oil, and wax paints made on a mineral basis have always been used. You can buy new, more durable dyes - these are materials based on PVA or casein-oil emulsion. Some artists choose acrylic paints, matte or glossy. They dry very quickly, which is not always convenient, but subsequently form a durable protective layer that protects the design from moisture and sun. There are special compositions that imitate mother-of-pearl, patina, cracking, creating a glow-in-the-dark effect
It is also worth paying attention to coating waxes and varnishes that can change the appearance of the painting for the better and protect it from various damages. Before painting on plaster, we create a sketch. We decide on the scale of our composition, draw it on paper and divide it into squares
This will make it easier to transfer the image to the wall, so as not to make a mistake and not redo complex work in a new way. Level the surface of the wall, remove traces of whitewash, smooth out all the unevenness, and make your future “canvas” smooth. Here you cannot do without priming, which is made with lime paste and a composition based on casein glue. The composition of the primer may vary slightly depending on what paint you choose for the job. It is usually done in three stages, drying the surface each time. We divide our “canvas” into even squares. This work can be done in several ways - draw markings with charcoal, stick masking tape, thin thread or twine on the marks. If the drawing consists of large elements, then transfer all the main starting points to the wall using a large ruler. Carefully begin to draw out the contours of the composition using charcoal or sepia. As you work, constantly adjust the image so that everything looks as proportional and harmonious as possible. When you start working with color, it is better to take dark color tones first; you should move on to white elements only at the end of the work. Start drawing from the periphery, gradually moving towards the center of the composition. Evaluate your work as a whole; perhaps it’s better to work on something again while you still have the opportunity. At the final stage, we cover the painting with varnish or another protective layer.
Undoubtedly, dry plaster walls, with artistic painting applied to it, will perfectly decorate your home. But you need to choose the right design so that it fits into a classic or modern interior, and does not look ridiculous here. Depending on this, choose a landscape, abstraction, drinking theme, mythological plot or something else. Remember that an original fresco can completely and unrecognizably change the appearance of your room.
Results
There are a huge number of types of paint and varnish material on sale for painting wall surfaces on dry and wet plaster. When carrying out work, the master must take into account all the nuances of the application technique used. It is important to prevent damage to the integrity of the plaster layer. This can happen if the artist, due to lack of experience, tries to mix the applied shade with the wet color from the previous layer. Painting using more than 3 shades of color requires special skill and attention. Painting on wet plaster is gaining immense popularity due to the ability to create unusual images on wall surfaces.
Source
Types and techniques of painting
Images on the walls of modern buildings can look very elegant. They are quite unusual and look quite bright. Painting walls on wet plaster requires special skill from the artist. He must know perfectly well the characteristics of the material, which is capable of absorbing various coloring compounds.
To prevent painting on plaster from fading, you need to select paints and prepare the wall well. Nowadays, craftsmen often use similar paintings on the interior walls of the kitchen and other rooms in the apartment. As a result, the home takes on a completely new style, becoming more comfortable and unusual.
Drawings on wet plaster were made in ancient Rome. They were applied not only to the walls, but also to the ceiling of buildings. The work was carried out on both dry and wet surfaces. The technique of painting a dry surface with your own hands is called alsecco. Wall painting of this kind is done with paints that are mixed with water, glue, or raw chicken eggs. You can paint walls outside and inside buildings. The alsecco technique appeared much later than fresco. And it looks brighter and retains its colors for a long time.
Painting with water paints on wet plaster flourished during the Renaissance. Light colors were applied to the wall first, then darker shades followed, and the most saturated colors were applied last. The coating is prepared for the design in a special way. For this, lime with brick chips is used, which can hold water for a long time. Along with these components, flax threads or crushed hemp are added to the plaster solution. The preparation process looks like this:
- unevenness is created on the wall;
- the old coating is cleaned and primed;
- at least 3 new layers of plaster are applied;
- drawing is applied.
The irregularities are made specifically for better adhesion of the plaster mortar to the wall surface. This can be done using a hammer drill. Notches are applied up to 8 mm deep. Their number per 1 m² can reach 120 pieces. The artist cuts the drawing made on paper into fragments and transfers them to the wall. Lime is most often used to whiten the background. After this, each fragment of the picture is filled with the desired color.
Paintings on wet plaster are called frescoes. You need to treat the wall quite quickly, while the coating is still damp. It is for this reason that a life-size drawing is made on paper. When applying paints mixed with lime, you should remember that painting on plaster becomes lighter as it dries. A correctly applied fresco can delight homeowners for many years.
Details
Technology overview
Image selection
The surface of the wall on which the image will be applied should be naturally lit and open. If you do the wall painting yourself, you should choose simple images with no more than 3 colors.
Surface preparation
In order for the layer of plaster to hold firmly, you should make the surface on which the solution will be applied as rough as possible. To begin with, remove all peeling parts of the building materials, and for stronger adhesion, you should make shallow potholes on the wall surface using a jackhammer or hammer drill.
Please note that if the walls were previously plastered, you should knock down the mortar in those places where it does not adhere well. Priming the walls ensures excellent adhesion of materials and will help remove dust from the surface.
Making the solution
To paint on wet plaster, you need to prepare a solution based on fresh lime of the highest grade with the addition of quartz sand or brick chips. By the way, the last addition increases the drying time of the solution, and this will make it possible to apply a design. Lime should first be quenched with water until the corresponding reactions in the solution stop. To do this, leave the lime, which will be filled with water, to infuse for several days. The composition of the solution for each layer will need to be different, and in the table we have given the proportions of the components mixed together.
| Layer | Filler | Lime |
| For the primary layer | 6 measures | 2 measures |
| For the last layer | 4.4 measures | 2 measures |
| When applying three or more layers | 3.6 measures | 2 measures |
Application of plaster composition
In order to get the perfect result, you should strictly follow the application technique. The work should be carried out in several stages, and the appearance, as well as the quality of the drawing, will depend on their implementation.
The application steps are as follows:
Please note that the consistency of the solution should be such that a spatula, which is lowered into it, comes out dry. This will guarantee a minimum degree of shrinkage of the mortar after it is applied to the wall surface, and to increase the degree of strength, flax fiber and chopped hemp should be added to the plaster mortar.
Drawing
Even experienced professionals prepare a drawing on thick paper in advance. It is not necessary to draw every detail, the main thing is that you clearly highlight the contours of the main elements. If the company is large, it should be cut into several parts of the same size. When choosing a size, keep in mind that each part must be applied to the surface of the walls in one go.
We invite you to watch the master class in the video. Here are step-by-step instructions for painting walls on wet plaster:
As long as the brush glides easily over the surface of the wall, the paint will be perfectly absorbed, penetrating into the base and fixing itself in it. If grooves remain after the stroke, the plaster has dried, you should cut it off in the area, apply a new layer of plaster mortar and only then continue to apply drawings. Once painting of the fresco is completed, it should not be touched for 1-2 weeks. The fact is that the paint and varnish material will be absorbed unevenly, and therefore, while the surface dries, the saturation of the colors may change several times. When the image dries, it will take on the desired appearance.
Recommendations
To get a better image on the wall surface, you should consider the following tips:
Paints and varnishes should be applied from lighter to darker shades. Be sure to follow this sequence so that the light colors have time to be absorbed into the plaster layer. As you work backwards, you will notice where the tone has faded and needs to be updated.
Painting on dry plaster
This type of finishing is used much less frequently than fresco. The method of applying a pattern to dry walls is called Alsecco. We invite you to watch the detailed master class in the video. Due to the fact that the artist does not depend on the drying process of the surface, this type of work does not require speedy execution. For painting, paints based on lime and casein dough are used. It is completely safe for human health and is even suitable for decorating children's rooms. This kind of work can be done by professional artists or people who know how to draw well. Handmade work is more expensive and unique than drawing from a sketch. Before applying the image, the wall surface should also be moistened, and the paint should be applied in several layers. Each further layer is applied after the previous one has dried.
LMB for painting
To paint on wet plaster, you need to choose a paint material, and it can be water-based, tempera or lime paints. Let's look at each type separately.
Water based
Limestone
Tempera
| Type of paint material | Properties |
| Colors can be diluted with water, and you can also add calcium hydroxide (lime) to the composition. | |
| Paints are made on the basis of lime paste or lime water. They are convenient for making amendments on a dry base. | |
| Used to retouch the finished image. The composition contains casein, eggs, additives, dry pigments, and substances to slow down the drying of paint. | |
| Adhesive |