Painting on wet plaster with water-based paints has been used by people for a very long time. Ancient paintings of temples, residential and public buildings are known. Even in ancient caves, various images are found on the walls. For some time this decoration was forgotten, then it began to be reborn again. Painting on wet plaster is called fresco.
In the late Middle Ages, plaster and Armenian cake were used. When we only want to put small details in gold, it gets powdered gold and after painting it is applied with a brush. Sometimes gold powder is also sprinkled onto paint to give a litmus effect.
In the Middle Ages, tempera was always used. The pigment must be highly crushed and agglutinated with egg white or resin. Especially with rubber, because it is more stable and brighter. The technique is the same as the temperature on board, these are painted layers. The paint is applied with very thin brushes or a pen.
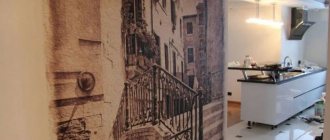
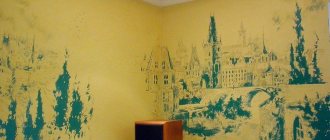
Images on the walls of modern buildings can look very elegant. They are quite unusual and look quite bright. Painting walls on wet plaster requires special skill from the artist. He must know perfectly well the characteristics of the material, which is capable of absorbing various coloring compounds.
To prevent painting on plaster from fading, you need to select paints and prepare the wall well. Nowadays, craftsmen often use similar paintings on the interior walls of the kitchen and other rooms in the apartment. As a result, the home takes on a completely new style, becoming more comfortable and unusual.
Parchment is a fairly stable support, but is very sensitive to changes in humidity, like wood, which absorbs moisture and produces a crop. Another problem is that it is very dirty with dust, do not leave it in the open air. Sculpting techniques are much less studied than painting because they are more difficult to learn. In addition, sculptors paint much less than painters. We rely on a few manuals that we keep and works in progress. Everything else is a hypothesis, an assumption.
Size. Modeling. Finish: This is the treatment given to the surface of the work. Leave the material visible: uncovered, for example when the material is good and beautiful. But it is polished or varnished. You can also leave the material because it has symbolic meaning.
Drawings on wet plaster were made in ancient Rome. They were applied not only to the walls, but also to the ceiling of buildings. The work was carried out on both dry and wet surfaces. The technique of painting a dry surface with your own hands is called alsecco. Wall painting of this kind is done with paints that are mixed with water, glue, or raw chicken eggs. You can paint walls outside and inside buildings. The alsecco technique appeared much later than fresco. And it looks brighter and retains its colors for a long time.
Mask the material: This is done if the material is bad or has a fault. Usually it is disguised with paint, for example, it is more naturalistic. In other cases, it is colored to give it a symbolic character, the opposite of the previous one. It can also be plated with metals.
Stones have different characteristics depending on the minerals they contain and the geological process of formation. Stones can have three origins. Igneous: formed from magma. Sedimentary origin: formed by the accumulation of materials.
Painting with water paints on wet plaster flourished during the Renaissance. Light colors were applied to the wall first, then darker shades followed, and the most saturated colors were applied last. The coating is prepared for the design in a special way. For this, lime with brick chips is used, which can hold water for a long time. Along with these components, flax threads or crushed hemp are added to the plaster solution. The preparation process looks like this:
Metamorphic: They come from one of the above, but other materials are added. Depending on their origin, they are hard or soft and their color varies. To carve, you need to choose a stone that is not very heavy or very soft, and should also be compact so that it does not break it. The color of the stone should be uniform so that the color does not dominate the shape. Most used for carving.
Diorite: This is the most complex of the igneous ones. It's very strong and very dark. It polishes well, although it is difficult to carve. You can't do parts in an extension and you can't do a lot of parts. When polished it gets a lot of shine. It was used a lot in Egypt and in Rome because they bought it from the Egyptians. Roman tombs produced plenty of this material.
- unevenness is created on the wall;
- the old coating is cleaned and primed;
- at least 3 new layers of plaster are applied;
- drawing is applied.
The irregularities are made specifically for better adhesion of the plaster mortar to the wall surface. This can be done using a hammer drill. Notches are applied up to 8 mm deep. Their number per 1 m² can reach 120 pieces. The artist cuts the drawing made on paper into fragments and transfers them to the wall. Lime is most often used to whiten the background. After this, each fragment of the picture is filled with the desired color.
Porphyry objects are very valuable. Granite: It is less hard than the previous one, but very resistant. It's quite a lot and well Polish. The grain that forms the stone is visible, although it is polished. The red granite of Aswan is well known. Basalt: usually gray or black. It is heavy, but quite fragile, it breaks a lot if it is left outside.
Sedimentary: Typically porous and not easily polished. Sandstone: very soft and very brittle, canceled on the outside. Limestone: Formed by calcium carbonate. It is soft, abundant and quite resilient as the limestone is soft when extracted but hardens over time. If it breaks, it melts because the interior is still soft. Yes, it can be polished, but usually polychrome. The whitest is Tura limestone, widely used in Egypt.
Paintings on wet plaster are called frescoes. You need to treat the wall quite quickly, while the coating is still damp. It is for this reason that a life-size drawing is made on paper. When applying paints mixed with lime, you should remember that painting on plaster becomes lighter as it dries. A correctly applied fresco can delight homeowners for many years.
Plaster: Can be carved, but not very common. This is the only material that can be used with all three methods. It is very soft and very transparent, so it is often polychrome so the transparency is not visible. Marble: This is limestone that has undergone a reaction. It is easy to cut and durable. It has a crystalline appearance and luster that limestone does not have. Can be polished and get a lot of shine. It is the most used stone in Western sculpture. It can be white or with colored stripes.
We select the stone we are going to carve. In the period before the fifth century, and in the Middle Ages, any stone was commonly used for practical reasons. In the Middle Ages there is usually no free sculpture, but it is removable, and the same material as the building is usually used to make it lighter. In Egypt, materials are chosen because each material has symbolism. Since the fifth century in Greece marble has been used for aesthetics and in Rome because they have many quarries.
Applying plaster to the surface
The plaster mortar is applied to the prepared wall in the following order:
- the surface is moistened one day before laying the composition;
- 1.5 hours before the start, moisturizing should be repeated;
- the first layer of plaster mortar with a thickness of no more than 8 mm is applied;
- for greater adhesion, wavy lines are applied every 40 mm;
- the plaster is dried for two weeks;
- again moisten the surface generously until it is completely saturated with water;
- apply an intermediate layer of plaster;
- after all layers of the solution have dried, the finishing layer is applied in small parts, and a drawing is immediately made on it;
- the operation is repeated to apply a new fragment of the pattern.
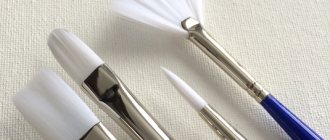
Before the plaster with a pattern dries, there should be no drafts or temperature changes in the room. For more fruitful work, it is recommended to prepare the necessary materials and equipment:
To obtain quarry material, excavations are made in the ground, wedges of wood are inserted, which are wetted so that they swell and tear the rock. In these cracks the beak is inserted and the material is removed. It then becomes more or less a bucket of stone. After this, thinning is carried out, that is, the first sketch of the sculpture, the shape is approximated. Roughing can be done in a workshop or in a quarry. In ancient times, this was done in a quarry to take the weight into the block and carry it better.
There can be one or several sizes. Monolithic pieces are more valuable due to their complexity. Sculptures are made from various blocks because they are cheaper and easier to transport. Contracts usually specify how many pieces the sculpture will be. Their execution is also faster because several sculptors can work. If a part is broken, it can be replaced. Colossal sculptures, or those that have parts in extension, are composed of several parts. When they are produced sequentially, they are also produced in pieces.
- image on paper;
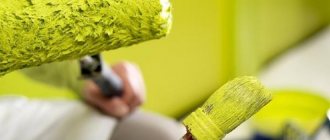
- acrylic water paints;
- solution;
- tools.
Application of decorative plaster
You can make paintings from decorative plaster with your own hands. They are placed on the walls and ceiling of the apartment. To work you will need:
- level;
- plumb line;
- different spatulas;
- grater;
- Master OK;
- rule;
- tool for applying relief.
You can apply artistic plaster to the surface with your own hands in the following way:
It is usually assembled using a pin and notch, i.e. one part has a protrusion and the other has a hole. Sometimes they put up bridges, but they usually remove them. You can also put in spikes. Roughing or troweling tools: These are used to remove material.
Thrown percussion: These serve to strike a material or another instrument, which in turn hits the material. Pots: Used for finer strokes, especially details. A quiet blow: they beat me up. Pointers or punches: These are metal and are usually prismatic or cylindrical, terminated in a tip. They are used as a first approximation to the form. This is one of the oldest instruments.
- the surface is wetted with clean water;
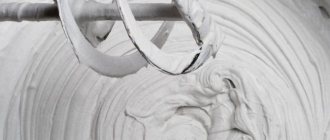
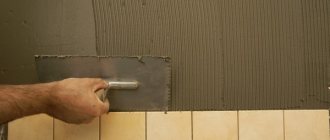
- use a spatula to throw a little plaster onto the wall;
- after filling the entire area, the solution is leveled with a grater;
- Using a level, the correct application of the solution is monitored.
The wooden surface is pre-filled with shingles, which act as cladding. Its cells are 4x4 cm. Before applying the material, they are moistened with water. In some cases, shingles are replaced with mesh to save time. It can be made of various materials: steel, copper, galvanized iron, plastic, twisted wire. The plaster is applied using the usual methods. If you plan to apply a panel of decorative mixture to a section of a wall or ceiling, there is no need to level the last layer. But there should be no large bumps or depressions on the surface.
Chisels: It ends in a straight mouth, with a sharp bevel. The chisel is used on the surface left by the pointer. Serrated chisels. Scissors. Drill bits or drill bits: These are used to make holes. Regular drill: ends at a more or less circular point to make holes.
Arch Bit: This is a regular drill bit but with a rolled rope which in turn is attached to the arch. By turning the bow, the rope moves and turns the bow. In Greece since the 5th century, tretine has also been used for carving. Also used to create very deep folds. Drill holes first with a trephine to mark the path, and then the chisel goes through so that it no longer protrudes from the path of the fold.
To make paintings from plaster, you need to have certain tools. The most common of them is a roller, on which there is already a simple pattern or relief. It is moistened in water and rolled over the plastered area. If, after the wall has dried, you also apply paint, you can get a beautiful plaster panel.
Polishing tools: or finishing. Basswood or Rasps: Metal sheets with grooves. Very small files are called mouse files. The file is used to remove marks from other tools. They are also suitable for touching, such as bending or rounding. The file leaves a matte stone finish.
He puts on a cloth and wipes himself. They can be used to dry or dampen the stone to create a smoother polish. This provides brightness and gives textural effects as you polish more or less. One that the artist performs directly with his tools. This is the most primitive system. This is a difficult method because you must have excellent technical ability. Another problem is that if you deduct a piece of stone that you shouldn't have back, no agreement, you won't be able to get the material back.
The next tool for obtaining relief is a stencil. It can be made in the form of stamps and combs. The design is applied in approximately the same way as with a roller. But these tools cannot be called the only ones. It is quite possible to create a pattern on plaster with your hands, a plastic bag or a foam sponge. The surface must be damp. Artistic plastering of walls can be done using special compounds, which themselves leave their own pattern on the surface. The plaster composition of the bark beetle has a pattern in the form of traces left by the beetle of the same name. Such patterns look great on walls and are especially resistant to temperature changes, humidity conditions, and mechanical stress.
It's slow work and it improves the performance significantly. It requires a lot of physical effort and you must be in good shape. Beveled size: This is a relief in two planes: one from the figure and one from below. Draw what you want to do and lower the bottom part. The numbers remain at the same level as the original block.
Carving on planes: this is a normal relief. The profile is drawn and then lowered from the most protruding to the smallest, with each protruding part representing a plane. He usually works with a block, inclined or horizontal, because in the Middle Ages sculpture was considered to be visible from the front. The sculptor works on the block as if it is a relief, he does not think that he will be seen from behind. Sometimes even the back is hollowed out to reduce weight.
Marble plaster leaves relief paintings on the wall. This method has the following features:
- high strength and durability;
- fire safety;
- resistance to environmental influences.
Fur coat-like surface finishing is often used. It is done by spraying using a brush or broom. As a result, a certain picture or panel of decorative plaster is formed on the wall. Any of the above methods can be used on external and internal wall surfaces. This will not be a painting on the wall, but creating something like this with your own hands is quite simple.
In Greece and Rome and during the Renaissance, the stone works vertically, as it will see the entire sculpture. The block is drawn on all four sides and then lowered. Abandoned from mannerism. The last great sculptor of erect stature is Michelangelo.
Size according to drawings. You should always have a 3D model because the dot pattern consists of taking some benchmarks from that model and feeding it into the block. The model does not have to be the same size as the work. Typically the original model is cast and the second model is used. This is done because if the model is broken, damaged or you want to repeat the work at another time, you will always have the first model in good condition.
Technique of wall painting with paints on dry plaster.
Wall painting on dry plaster is called Alsecco. They use paints mixed with raw eggs, glue based, and water. Painting on dry plaster is more resistant to polluted air and dampness. This way you can paint the walls of buildings from the street side.
The technique of wall painting with paints on dried plaster appeared later than frescoes. Compared to light translucent frescoes, painting on dried plaster looks bright, colorful, and does not lose its original appearance for a long time.
Wall painting on dry plaster is carried out by artists. Therefore, the facade of a house with such decoration or the interior of a room looks elegant and chic.
What is unique about the alsecco technique?
Recently, wall painting on dry plaster has begun to decorate many buildings, and masters have appeared who are fluent in the specific features of this work. Unlike a fresco, painting an image on a dry wall does not require fast work, since the artist is not involved in the process of drying the wall. After all, the fresco must be applied to a damp surface, which means you need to have time to finish the painting before the surface dries. It is more convenient to paint on a dry wall. Can be done by one artist or a group. This painting technique originated in Europe in the Middle Ages and is still used today. What attracts such pictures?
- Paints are based on natural materials: water, lime. They can be used to paint walls even in a nursery. They are absolutely safe for health.
- Durability. Colors based on natural ingredients adhere well to plaster, do not crumble or fade.
- All details of the picture are carefully recorded.
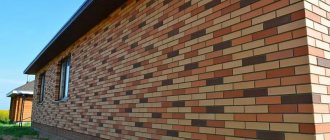
- Resistant compositions are not afraid of exposure to natural factors or sudden changes in air temperature. The alsecco technique is used to decorate plastered exterior walls and building facades, painting blank walls and solid brick fences.
Important to note! Using this technique, paintings on any subjects made in different artistic styles will look quite harmonious.
The technique of wall painting with paints on dried plaster should be well mastered by a person who approaches the matter with soul and has an artistic vision.
Disadvantages of painting wall art on dry plaster.
The complexity and responsibility of the work requires its execution by a real master - an artist. This kind of work is unique, exclusive, and cannot be exactly repeated. Therefore, the cost of finishing will be higher than stencil images. The work will take a long time to complete. Therefore, you can’t count on quickly completing the decoration of a room with wall painting on dry plaster. In order for the artist to work calmly, without haste, discuss with him in advance how long you need to focus on. The functionality of the room may vary. Therefore, such expensive design projects should decorate offices, living rooms, and libraries.
Advice! Choose a subject for a painting carefully, expect that the painting will last for a long time, so that after 2-3 years you don’t have to cover it up or spend money on a new painting.
How to prepare a wall surface for an artist's work.
If you want to get the perfect picture on the wall, prepare it well. The wall must be cleaned of old paint or wallpaper. Carefully repair dowel marks or other defects with putty. After this, coat the surface with a primer and plaster again. Achieve a completely flat surface. Once it's dry, prime it again and let it dry. The place for the masterpiece is ready! The subtleties of working with dry plaster are that the material is applied in several layers. Each subsequent layer is applied to the dried previous one.
Advantages and features of painting
It’s not for nothing that painting on wet plaster is called artistic. Its implementation assumes that a canvas will be created that has high aesthetic characteristics. Its advantages:
- a unique composition is created;
- the drawing can be of any content and style;
- fits into any interior.
Complex compositions, including landscapes and scenes from famous paintings, are popular. The painting may also contain a simple ornament.
Considering the high requirements for the aesthetic side of the canvas, its inherent disadvantages become clear:
- you must be able to draw well;
- working with wet plaster is quite difficult;
- the speed of drawing must be high;
- it is necessary to properly prepare the surface.
These features determine the high cost of such work, which not every master can handle. The painting process takes a long time. If you still want to do the painting yourself, you can try it on a small area.
Painting on wet plaster with water paints.
The fresco technique, or wall painting on wet plaster with water-based paints, flourished during the Italian Renaissance. First, light colors are applied to the wet plaster. Then subsequent darker and more saturated layers are applied alternately.
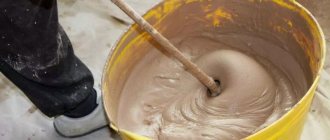
Plaster for painting on wet plaster is prepared in a special way. It contains brick chips, which hold water for a long time and do not dry out. The other main component is lime. They take the highest quality lime and quench it with plenty of water until the process stops completely.
To prevent the wall surface from cracking, linen threads and crushed hemp are added to the plaster. They bind the plaster mortar.
The wall is prepared as follows. They create irregularities and depressions for better adhesion of the solution to the wall. The old coating and dirt must be cleaned off. The surface is constantly moistened, and the solution is applied in at least three layers.
Technology of painting on wet plaster with water-based paints.
First, the artist creates a life-size drawing on paper. It is cut into separate fragments. Parts of the drawing are applied to the surface of the wall or ceiling and outlined.
The main background is usually bleached with lime. Each outlined segment is then filled in with color. The mural must be painted quickly. This requires the artist to have precise strokes.
In order not to waste precious time until the plaster has dried, the master must work quickly. To do this, a color drawing is prepared in advance. Then the tones and color boundaries are applied. Each area is painted with shadows.
Remember! Paints for frescoes have a peculiarity - mixed with lime, they lighten when dry.
The master will have to adapt to the nature of the surface. If the surface under the finishing plaster absorbs little water, the drying of the fresco will be slow. If there is brickwork underneath that absorbs water, the process will speed up.
If the plaster is applied in 4-7 layers, the surface will take longer to dry. Moreover, each next layer should be thinner than the previous one. If the surface dries out and does not absorb paint well, this area is cut off and a new composition is applied to this area. The main thing is that the seam is invisible.
Procedure
Preparing the walls
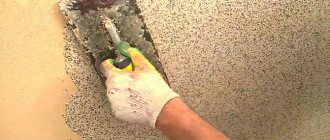
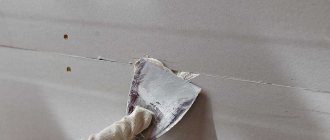
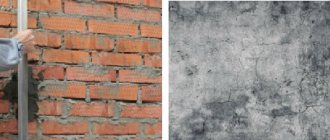
The first step is to remove the old finishing materials. If, in general, the plaster adheres securely to the base, then it can be left. The wall must be cleaned of dust and construction debris. Then it is necessary to make notches about 8mm deep. To do this, use a hammer drill, chisel or axe. The density of notches is approximately 100-120 pieces per 1 m2. After this, dust is swept away from the wall.
In order for the plaster solution to adhere as securely as possible to the base, it must be primed with a deep penetration solution. After the primer has dried, a rough plaster layer is applied. Its task is to eliminate defects and level the surface. The layer should dry well, then you can proceed to creating a base layer on which the drawing will be applied.
Preparation of the solution
The secret of a high-quality fresco lies in a properly prepared solution. There is no universal recipe: each master independently selects the proportions of the components. But you can use general recommendations, adjusting them as necessary.
The basis of plaster is lime. It must be fresh, clean and of high quality. There is no need to skimp on the material: the better the lime, the stronger the base will be, and the better the paint will adhere to it. The lime must be extinguished with clean water and left for two weeks. This has a positive effect on its properties. Coarse sand is used as a filler; brick chips can be added to it.
If you are preparing a solution for the street, then the amount of crumbs should be minimal. Adding finely chopped hemp or cellulose fibers will help give the composition elasticity and protect the coating from cracking.
The solution is prepared immediately before use. The base layer is prepared in the following proportions: lime paste - 1 part, filler - 3 parts. For the front layer, take a little less filler - 2.2 parts.
Plastering technology
Fresco painting requires adherence to a certain order of plastering. The prepared surface must be moistened the previous day, repeating the moistening again 1.5 hours before plastering.
The first layer of solution is applied no thicker than 8 mm. Spread it over the wall with a grater, without trying too hard to smooth it out. Creating wavy grooves 2 mm deep every 40 mm will help improve the adhesion of the plaster layers.
The first layer is allowed to dry well (about 12 days). Then it is well moistened. The second layer will be intermediate. You can skip it, but with minimal experience in performing such work it will give you the opportunity to correct errors.
Sometimes the base surface becomes covered with a whitish coating. You need to get rid of it by cleaning and moistening the wall again. If this is neglected, the adhesion of the plaster will be disrupted, and the fresco may delaminate. When the intermediate layer dries, it is moistened and the topcoat is applied. Brick chips and fibers are not added to the solution for it. It is made with a thickness of 1-3 mm. It dries quickly, so treat the wall gradually. At the same time, a drawing is applied.