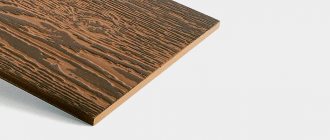
Mosaic plaster is more common on external walls. But consumers like the successful combination of stone grains, which allow them to achieve incredible textural effects, so much that they began to use this cladding for indoors. The illusion of a mosaic is complemented by the durability of the coating, which is not susceptible to mechanical stress and does not fade in the sun.
Due to their high strength, mosaic plasters are used for finishing public buildings, because they are used under difficult conditions. An additional area of use is the surfaces of corridors and halls, where the cladding is subject to increased abrasion.
Composition of plaster, its pros and cons
Decorative mosaic plaster may include the presence of different stones. Their type determines the name of the mixture. She may be:
- lapis lazuli;
- malachite;
- quartz;
- granite;
- marble.
Some types of mosaic plaster involve mixing different stones with each other, which allows you to get even more unexpected effects. Surfaces have a special structure if they are coated with a composition of elements of different fractions and rocks.
Attention! The basis can be different materials, this is not only light or heavy concrete, as well as brick and plasterboard, but also ordinary plaster.
Mosaic plaster may have a certain binder:
- mineral;
- acrylic;
- silicone.
The first option is the cheapest and requires the presence of cement or gypsum. The most common are acrylic solutions with high decorativeness and elasticity. Silicone mixtures include potassium glass, so the layer hardens very quickly.
Before using mosaic plaster for decoration, you should consider its pros and cons. Among the first are:
- UV resistance;
- resistance to damage;
- vapor permeability;
- versatility;
- strength;
- long service life;
- environmental friendliness;
- ease of application;
- ease of care.
The material is universal, which means it can be applied to almost any surface. It is offered for sale in a wide color palette, which can be combined with combined finishing materials or select a mixture separately according to your own taste.
But mosaic plaster also has its disadvantages. They consist in the high cost of the material, the inability to use it in conjunction with mineral wool or glass wool insulation, as well as low maintainability. As for the second factor, it can be explained by the fact that the composition may contain resins, which should not affect the mentioned insulation materials. Do not forget that facade plaster in some cases cannot be repaired. And if you do not have the appropriate skills, you will have to turn to professionals for application, which will be accompanied by additional costs.
Price
The approximate cost of the mixture is around 150 rubles per kilogram. It can be even higher if the composition contains expensive components, for example, marble chips, silicate composites.
The price for processing one square meter of surface will be from 300 to 900 rubles and even higher.
Mosaic plaster has many nuances and special technical indicators. It is important to work with it correctly (apply and let it dry), then the resulting coating will have a high level of strength and an attractive appearance.
Types of mixtures
Mosaic plaster should be classified according to the fraction of stone grains. Their sizes are:
- large;
- average;
- small;
- finely textured.
In the first case, the fraction reaches a size of 2.5 mm, and in the latter this value is less than 0.8 mm. Classification can also be carried out according to the type of raw material or type of binder. In the first case, the plaster is, for example, malachite, granite or marble. As for the type of binder, you can find lime-gypsum or cement mortars on sale.
Popular plasters
Selected crumbs are made from:
- marble;
- quartz;
- granite
These fillers are the most popular. But on sale you can also find exclusive solutions that include:
- jade;
- lapis lazuli;
- malachite;
- Agatha.
All of them have good resistance to humidity and temperature, and also have mechanical strength. When choosing plaster for the facade, you should pay attention to mixtures with coarse fillers. But plasters with fine grains are suitable for plinths.
Adhesive mixtures on different bases act as binders. But for outdoor work it is better to use an acrylic base. Mixtures with silicone binders are usually not used for cladding facades. And if the consumer likes mineral plasters, he is recommended to pay special attention to cement mortars.
Beautiful examples
The use of mosaic plaster allows you to create spectacular artistic images and is a real find for decorating rooms and implementing bold design ideas.
A harmonious combination of shades will make the hallway cozy and aesthetically pleasing.
Contrasting colors and beautiful texture of the cladding will give the house austerity and well-groomed appearance.
A composition of ceramic tiles and “mosaics” successfully emphasizes the style and perfectly decorates the facade.
Mosaic plaster in the decor of public spaces looks neat and laconic.
Decorative brick and stone chips are an excellent solution for modern interiors.
Preparing the wall
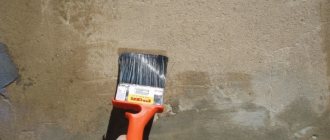
Surfaces are traditionally cleaned of dirt and dust, excess elements that could interfere with application, as well as grease and bitumen stains. If there are cement deposits, they must be knocked down. The cracks and cracks are opened and filled with mortar. Additional strengthening of these areas can be done with reinforcing tape. In order to reduce the consumption of facade plaster, you should level the base or wall with putty. After drying, it is sanded and treated with a primer to increase adhesion.
When choosing a primer, you need to pay attention to tinted compounds, the shade of which should match the color of the plaster crumbs. If there are minor defects and irregularities on the rough surface, you should not get rid of them, since the plaster will be able to hide them.
Attention! Mosaic plaster will have greater consumption as the grain fraction increases.
Preliminary work
Mosaic plaster can cover minor nuances on the surface, but in principle it should be smooth and free of significant defects.
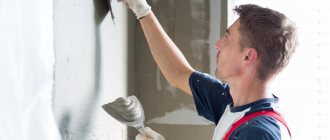
The old layer of paintwork is completely removed, depressions and cracks are covered with a rough plaster mixture. It is better if it is white or light, since dark tones can affect the final color of the coating. Next, look at how level the base is on all sides using a building level.
After this, a primer layer is applied, which will increase the level of adhesion of the plaster composition to the base and it will give a good density of application of the mixture.
The primer is applied two or three times; before each application, wait two hours for the previous layer to dry.
Make inconsistent movements with the brush to create a relief structure.
Sometimes a sand or quartz based primer is used with a specific tone that is similar to the tone of the topcoat.
Technology and conditions of application to the façade and plinth
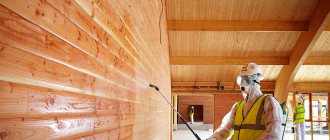
Finishing with mosaic plaster begins only after the primer layer has dried. Regardless of where the finishing will be done - on the facade or basement of the house, the technology will remain the same. It is important that the air temperature is kept between + 5 and + 30 ˚С. If the mixture is purchased ready-made, there is no need to dilute it.
Attention! To form a layer on one surface, it is better to purchase material from the same batch, since the colors of marble and quartz grains may differ in different colors, which will be immediately noticeable in adjacent areas of application. If the mosaic plaster is made on an acrylic base, when wet you can see the whiteness, which will disappear after drying.
Regardless of the type of plaster used in the work, it should be mixed before application. The compositions are made in such a way that they contain grains of different fractions in one material. The first layer is applied with a thickness equal to the largest grain size. The joining of adjacent sections is carried out before the material dries.
Mosaic plaster should be applied to one wall or side of the plinth in one step. This will allow you to obtain a uniform color of the coating and will not reveal the joint areas. During the plastering process, you should check the evenness of the applied layer every 3 m2. If necessary, the surface is leveled with a trowel. Mosaic plaster for the plinth can be applied using a combination of compositions or colors. In order to separate one area from another when forming a pattern, you should use masking tape, which is removed only after the material has dried.
Attention! In order to somehow structure the application process, you can visually divide the surface into separate 100 cm strips. As soon as the entire wall area is filled with such areas, you can begin smoothing. There should be no gaps formed. No more than 20 minutes should pass from the moment of applying the first strip to the moment of smoothing.
Environmental conditions
Mosaic plaster for decoration should be applied only at positive temperatures. In order for the base surface to look ideal, it is better to choose late spring for work, when there is no longer any rain to be expected and the air humidity is ideal - low.
Although the temperature range for application is recommended within + 5 ˚С, the optimal limit will be 22 - 25 ˚С. Air humidity should not be higher than 80%. You should not start applying marble or any other mosaic plaster if the weather is hot outside and the surface to be finished is exposed to direct sunlight. It is also important to avoid windy weather, since the adhesive filling will dry out too quickly, preventing normal fixing and polymerization.
Improper drying conditions can also reduce the adhesive characteristics of the material, as a result of which the plaster may peel off. If the air humidity is too high and the ambient temperature is low, drying may take up to three days. This will provoke a change in chemical properties and reduce the adhesion of the plaster components to each other.
Sometimes failure to comply with the conditions leads to freezing or insufficient drying of the mixture. And if it rains heavily afterwards, it can simply wash away the decorative coating. During the curing process, it is important that there are no sudden changes in temperature or humidity. The coating should be protected from contact with water and temperature drops to + 10 degrees or less for another 3 days.
Basic application rules
The layer thickness must be maintained within specified limits. You should not press too hard on the tool, but be guided by the size of the grains. It will be more difficult to decorate a wall that has not been previously leveled. In this case, base errors will have to be leveled with decorative plaster. This will increase its consumption and the risk of varying degrees of curing in neighboring areas.
In order to further increase adhesion, the surface should be prepared with a plaster backing compound. The formation of a decorative layer can be done using a stainless steel grater. In this case, you should use the technique of applying a new layer over the previous one that has not yet dried. You should not wait until polymerization of the rubbed surface occurs. If you allow the previous layer to dry and begin to form the next one, the joints will be noticeable, which will spoil the aesthetics of the coating.
If there is a risk that it will not be possible to maintain ideal conditions during the application and drying of the mixture, before applying mosaic plaster, you should approximately determine its drying time. This will depend on the type of rough surface, air temperature and humidity. It should take a maximum of 48 hours to dry.
Attention! Smoothing should be done 15 minutes after applying the base layer.
Docking principles
Sometimes, for decorative purposes, when finishing facades, as well as indoors, it is necessary to use several colors on one plane. To create clear and even boundaries, the best option is to use paper tape. When making a horizontal demarcation, you first need to apply the upper section, and only then the lower one.
So:
- Using a lead pencil, you need to make slightly noticeable notches on the dry, primed surface, and stick tape between them, tightly, with tension. Then you need to check the evenness of the line and apply the mosaic plaster mixture to the area, grabbing the surface of the tape.
- During final smoothing, the tape should be carefully removed and the edges trimmed. When the mixture in the area above has completely dried, a new strip of tape should be glued to its bottom edge, not reaching 1 mm from the border line, and the processing of the lower area should begin.
- It is necessary to avoid getting the mixture from the lower zone onto the masking tape on the upper zone and periodically remove the material that gets on the tape. It is important that the layers when smoothing the lower zone are equal in thickness, and that there are no noticeable gaps in the border area.
- To create logos, the best option is to use pre-prepared stencils. A layer of the mixture on the stencil should be applied to a completely dry surface. If the logo is large enough and it takes a lot of time to cover it with the composition, you should carefully control the drying of the mixture in the treated areas in order to promptly smooth the layer and remove the stencil from this area.
- If the decorative layer on the border of the masking tape or stencil has dried, when removed, there is a high probability of getting a torn, rather unaesthetic edge, which is very difficult to restore.
Indoor technology
If you plan to use acrylic plaster in your work, you should remember that it has quite an impressive mass, which means it can slide off the surface of the trowel. In order to avoid overuse of material, before starting the process, you should lay a metal sheet or linoleum on the floor to be able to collect the fallen mixture.
The application of mosaic plaster begins with a mixture of mortar and a spatula. The layer on the wall should be quite uniform and dense. Movements with a spatula should be directed from bottom to top. You should try to periodically clean the spatula with a damp sponge, so you should also place a bucket of water nearby. When there is a need to process a corner, this area should be worked on immediately - wet on wet, otherwise the joint will be visible.
Depending on which skirting boards are supposed to be installed, the sequence of work depends. If these elements are made of ceramics, then they are installed before applying the plaster. But in the case of a plastic baseboard, you will have to work the other way around.
The grouting process should be carried out from top to bottom using spreading movements. Excess plaster can be removed with a spatula. It is important to prevent the formation of voids between the grains. If depressions are noticed during mashing, they are covered with a sufficient amount of solution.
Attention! When choosing plaster for interior walls, you should avoid using a mixture with quartz filler, as it has natural radiation. Typically, such plasters are used for facade work.
Durability is the main advantage
Basement is the base of a building that rests on a foundation. In strip foundations, the base is the upper part of the foundation itself. Also, the plinth is the lower belt of the facade. The presence of a belt protects the building from environmental influences and pollution. To achieve the best result, you need to choose the right material for processing the base. Treating the base part of the foundation not only provides protective properties, but also gives the walls of the house an irresistible appearance. The choice of material for finishing the base is the best solution.
Related article: How to lay tiles on an OSB board: can they be laid on plywood, laying and how to lay the floor, how to glue ceramic
Colored mosaic plaster
A durable layer of the mixture is applied to the base, while one rule is followed: the outer walls must be dry. This rule is due to the dense consistency of the mixture, through which water slowly evaporates. If this rule is violated, mold will form on the walls. Properly preparing the outside of the house for plastering is the key to the durability of mosaic plaster. The mixture, applied in a small amount to the wall of the building, turns out smooth and neat. Before starting the process, it is recommended to apply a layer of primer to the facade. The preparation process will help strengthen the base and regulate its ability to absorb moisture. Then the surface is leveled. Correctly completed preparation steps and the plastering process itself will allow you to achieve maximum stability of the exterior walls of the house.
Mixture consumption and damage restoration
As the fraction increases, the consumption of the mixture also increases. So, if the grain size does not exceed 1 mm, about 3 kg of solution will have to be spent to process a square meter of wall. If the composition contains 3 mm grain, you should purchase material at the rate of a maximum of 7.5 kg per square meter. If the fraction is average and does not exceed 1.5 mm, the solution will need about 4 kg per square meter. When the grain in the composition is no more than 2 mm, for surface treatment you should purchase material at the rate of 5.5 kg per square meter.
As for repairing the surface if it is damaged, this happens quite rarely due to the fact that mosaic mixtures are very durable. But if this does happen, the problem area is removed, it is covered with a primer, and then plaster is applied. Particular attention should be paid to the joint areas that may be noticeable.
Required Tools
To perform plastering work, you should purchase basic material in quantities corresponding to the dimensions of the room, as well as tools and consumables:
- grater and grater;
- trowel and spatulas of different sizes;
- textured rollers, stamps, stencils;
- masking tape;
- basic plaster;
- primer and brush;
- polyethylene.
Price
The cost of plasters is determined by the type of decorative coating, the included polymers and the region. The most expensive places to buy plasters are in Moscow Region and St. Petersburg .
The price is affected not only by the composition, but also by the packaging. A ready-made solution, packaged in a 1 kg bucket, will cost much more than dry material from a paper or plastic bag, which you need to prepare yourself.
The larger the volume of plaster, the cheaper it is to purchase . For example, a dry decorative mixture with modifying additives from, sold in Rostov-on-Don (25 kg), in bulk is only 165-175 rubles per bag.
Weber Vetonit, with delivery throughout the Russian Federation, sells bags (25 kg) of dry material intended for concrete, cement plasters, ceramic and sand-lime bricks for 750 rubles. The cost of plaster from Stroytorg in Novosibirsk is 820 rubles.
For large volumes of work, it is most profitable to purchase material in bulk, preferably at the construction bases of companies.
This is an approximate price table for several types of plasters, since due to the unstable economic situation, they are constantly changing among both manufacturers and suppliers. The cost is indicated in rubles:
| City | Type of plaster | ||
| Bark beetle (RUB), paper packaging 25 kg | Fur coat (RUB), bucket 18 kg | Mosaic (RUB), bucket 25 kg | |
| Moscow | 600 – 150 | 1300 – 1620 | 5200 – 8100 |
| Krasnodar | 300 – 1300 | 1300 | 5700 |
| Kursk | 250 – 1200 | 1200 | 3100 – 5700 |
| Novosibirsk | 300 – 1300 | 1300 | 5000 |
| Khabarovsk | 250 – 1250 | 1250 | 3170 – 5780 |
Dry decorative plaster in packages of 16-25 kg is much cheaper than ready-made in buckets, exactly half. A person must decide for himself which one is most profitable to buy, in accordance with his budget.
Cost of work on applying plaster in the Russian Federation:
- “fur coat” and bark beetle – from 370 rubles. per sq.m;
- layer up to 30 mm on a complex surface – 470 rub. per sq.m.;
- layer more than 30 mm – from 590 rub.
Possible mistakes
If you violate the rules for applying decorative plaster, mistakes can occur, so you need to carefully read the instructions and strictly follow the rules for applying the mixture:
- Incorrectly carried out preparatory work. Here it is important to achieve the removal of cracks and maximum leveling of the surface, otherwise the plaster will emphasize the imperfections of the wall.
- Incorrect preparation of the solution and non-compliance with proportions. The sequence of actions and the accuracy of mixing are important here. Particular attention must be paid to uniformity, the absence of lumps, and the ability of plasticizers to reveal their functions (maintain the solution and let it stand).
- Neglect of the factory instructions supplied with the material. A complete violation of the technological process can lead to the fact that a low-quality solution made by a master will quickly lose its performance characteristics. The plaster will fall off and will not last long. The thickness of the layer matters here. The decorative layer should be thin.
To avoid various installation mistakes, it is best to entrust the work to professionals. Beacon profiles removed in time will be the key to the quality of work - cracks will not appear in their place, and rust will not appear.
Features of decorative finishing
Imitation stone can be used as a decorative finish for the foundation. To do this, you will need to buy or prepare a sand-cement mortar yourself. The thickness of the decorative layer of plaster for the plinth depends on the type of masonry chosen. For brick, 1 cm will do, and for stone, 3 cm will do.
You can create decor on the plinth in two ways:
- cutting. Using a sharp object, the plaster is cut into small stones. Larger round stones are made by hand;
- stencils. To do this, the blanks are applied to the surface, pressed to form an imprint, and then removed. The seams widen and get an even pattern.
After creating the desired pattern, it is left to dry completely. Then the base is coated with a primer and, if desired, painted.
Decorative plaster of the base under the stone
To finish the façade of the plinth, you can use stone cladding that imitates the surfaces of natural materials. This method is the best in terms of natural appearance.
A mixture of sand and cement is used, where one part is M400 cement, and three parts are sifted sand. The mixture is diluted with water to a thick sour cream, since it is convenient to apply it to the walls.
The thickness of the layer of decorative material is calculated based on the masonry of the wall. For bricks or blocks it will be 0.5-1 centimeter.
To imitate the surface of torn stone or pebble, natural or artificial stone, you need up to 3 centimeters.
The sequence of work is as follows:
- Stencil application, for which the blanks are applied to the surface by lightly tapping them. The screen mesh is removed and the seams are unstitched. Then you get even rows of patterns;
- Cutting, when the shape of stones is cut into the mortar with sharp objects, and large elements and the roundness of their shape are made by hand. The resulting surface will not be similar to the work of Titian, but externally it will be practically indistinguishable from stone cladding, especially if a mosaic is made.
Any paint for the base can be used for outdoor work. You can paint the base within a couple of hours.