How and with what to plaster external brick walls with your own hands, it's easy to figure out. This material is applied according to the general scheme, but it is worth considering some nuances when carrying out external work.
So, external walls can also be plastered, especially when it comes to arranging a bathhouse or other small extension that cannot be finished with special materials.
Brickwork is often plastered, thereby protecting it from destruction. The surface is covered with siding, securing it with profiles. This allows you to achieve a good insulating effect.
Types of Tools Required
Plastering external walls made of brick and other materials is not complete without the following types of tools:
- Spatulas. It’s better to take two – one larger (6 cm), the other smaller (8 cm). With the help of a small one you can work out hard-to-reach areas, and a large one will make the surface of the main area smoother.
- Trowel, primer brush. The brush can be synthetic, durable, with thin bristles.
- Grater. With its help you need to carry out several types of manipulations with the wall.
- Rule. Useful for creating a smooth surface of applied plaster.
- Level and plumb line, beacons. All these devices are needed to ensure uniformity of the applied layer. The result is measured with a level, and they work with a plumb line and beacons when using plastered material.
- Mixer. Necessary for stirring the composition, avoiding the appearance of lumps. Mixer is a special mixing attachment for a drill.
You can also prepare a scoop and trowel. These tools will allow you to quickly level the surface of the wall, but you can do without them.
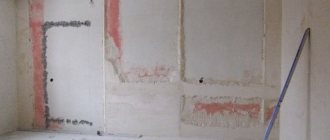
Nuances of wall preparation
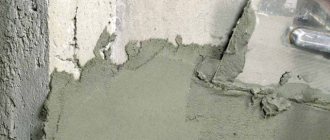
Before applying plaster, you need to prepare to clean the walls from all kinds of dust and dirt and remove old facing building materials. This step is important, since it determines to what extent the plaster will be effectively preserved in the future.
In order to ensure strong adhesion, you need to thoroughly clean the walls, eliminating absolutely all protrusions located on the brick, in order to eliminate delamination of the plaster in the future. The cleaning method is selected taking into account the properties of the building material from which the wall is constructed.
Old surface
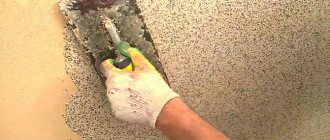
The old plastered surface must be cleaned down to the brick. First of all, such a multi-year layer is tested for strength. In case it breaks and flies off without any particular stress, the removal process will not be difficult. If, on the contrary, it is durable and without flaws, then it is permissible not to remove it at all. In the presence of a wide variety of defects, including hidden and barely noticeable ones, cracks and voids, all old plaster should be cleaned entirely. In order to accurately determine the strength of the plaster coating, you need to hit the surface of the wall with a hammer.
Using a sprayer or brush, treat the removal area with warm water. As a result, the building material softens a little, and there will be less dust in the process. It is necessary to spray the wall indoors frequently during work. Next, using a sledgehammer or hammer, they go over the wet wall: the weak parts of the plaster will come off immediately, after which the master will orient himself where he will need to apply force in the future. Using a hammer and a chisel, remove the old layer from a high area of the wall, little by little moving down, prying up the layers, with an ax or hammer, then the plaster will begin to fall off in layers.
Similarly, to remove the plaster layer, it is possible to use a specialized grinder with a disc. The operating principle of this tool is that it does not knock off, but rather erases the plaster layer until the wall is completely clean.
New wall
For this type of wall, a general cleaning procedure is performed. It is necessary to process all the seams, and if their depth is less than 1 cm, then they must be deepened. In the case when the brickwork is fresh, the roughness for applying the composition is considered sufficient, otherwise a notch is made with an ax/chisel with a stroke depth of 4-6 mm and a length of 10-13 mm.
If there are greasy stains on the walls, they are degreased using chemical solutions. If the required solution is not at hand, then it is necessary to mechanically remove the greasy stain to the full penetration depth.
Cracks found in bricks or facing layers must be thoroughly cleaned. Only after this can you begin the process of treating the walls with ordinary water to wash away dust and dirt.
Installation of beacons
External plastering of brick walls begins with the installation of beacons. If this stage is carried out correctly, you can completely eliminate the need for subsequent leveling of the surface, making it initially flat.
The beacons consist of a metal profile; a gypsum-based mixture is used for fixation. Using a level, the accuracy of installation of beacons is determined; a plumb line is also required for this work. Also, the modern building materials market offers laser systems for faster and easier measurements. An economical option is to attach threads to beacons.
How to fix beacons:
- gypsum mixture is prepared;
- small cakes of approximately the same size are formed from the mixture;
- each is attached to the walls at an equal distance;
- beacons are applied so that the plaster layer is a maximum of 2.5 cm (if the plaster is strong and thick, then the maximum limit increases to 4-5 cm).
Plastering of brick walls outside begins when the beacons installed on the plaster dry well.
The mesh, which is attached to the wall before covering with plaster, will help strengthen the adhesion of the materials and increase the strength of the canvas. This will make it possible in the future not to redo the entire plaster layer that protects the brick from negative natural factors.
Brick finishing mixtures
In order to improve ordinary brick walls, plastering should be done using solutions with traditional cement composition or decorative plasters. The first mixture can be prepared independently from cement, sandy loam and liquid, while the decorative mixture is best purchased from a retail chain, since it contains many ingredients and is made using complex technologies.
Cement-sand mixture
The ingredients of a standard cement-sand mortar are water, cement as a binder and sand added in a strictly defined ratio. The strength qualities of this type of surface treatment directly depend on the brand and the amount of cement consumed.
Cement-sand mixture
Grades M150/M200 are used exclusively for interior decoration, and the strongest M300 or more is used for exterior decoration of facades. Maintaining the ratio is extremely important. If there is a shortage of sand, after natural drying is completed, the composition will dry quickly and be less strong.
The use of cement without adding sand is allowed only for filling small cracks; this composition is not used to improve the brick coating.
The use of excessively fine-grained sand is similar - it is undesirable, since such plaster can create cracks. The presence in the sand of a huge number of heterogeneous inclusions, for example, clay and soil fragments, can cause the weakening of the finishing layer and its cracking.
The performance quality of the plastered surface directly depends on the type of sandy loam used. The best choice is river or washed quarry sand 0.5-2.0 mm. The presence of large fractions will make the wall being treated excessively rough. Sand larger than 2.5 mm is used only for brickwork, and much coarser sand, up to 5.0 mm, is used for installation work on reinforced concrete structures.
In addition to the classic CPS, lightweight cement putty is used in practice, the formulation of which contains slaked slak and mineralized fillers. Due to its porous texture, it has the lowest thermal conductivity. In order to impart plasticity to the mixture and increase cementation properties with the surface, a variety of plasticizers are included in it. As a rule, their part in the composition does not exceed 1%. The lime mass further enhances the quality of cement.
Gypsum plaster
This is an internal finishing material. It is easier and more comfortable to work with gypsum mixtures, as it has better adhesion. Their characteristic feature is that after the preparation of the solution is completed, it is no longer possible to add water to it. Do not forget that gypsum sets very quickly, therefore it is unacceptable to prepare a lot of mixture at once. To make gypsum plaster paste, the dry mixture is poured into water, waited until it absorbs it, and the mixture is effectively stirred with a mixer or by hand.
Gypsum plaster
When processing is carried out in several layers, the first one is leveled in the horizontal direction, and the next one in the vertical direction; 3 hours is enough for the layers to completely dry out. Gypsum building materials are neither alkaline nor acidic, they must have a neutral pH of 7. For this reason, it is possible to work with this type of material without gloves. However, in this case, if redness and itching occurs on the surface of the skin, in this case, most likely, alkali was included in the mixture as a filler.
The gypsum solution quickly hardens and becomes stronger. Once hardened, it breaks easily. The above must be taken into account when performing reinforcement of joints and finishing cosmetic decoration.
Perlite plaster
Perlite is made from an acid-resistant volcanic glassy material - obsidian, which resembles a pearl structure. This is a very coarse-grained sand of color and looks like fine grayish-white crushed stone. This material is used for quite popular exterior wall treatment. The coating is distinguished by its wear resistance, durability and technological simplicity.
Perlite plaster
In addition, this building material has good heat and sound insulating properties. The above makes it possible to use it as an auxiliary heat insulator at various construction sites. Perlite plaster on sand-lime brick belongs to the group of “warm” finishes.
The components of perlite plaster include the following basic materials:
- Filler is a sponge-grade building material;
- perlite base for heat and sound insulating spraying;
- binder base - gypsum, cement and lime materials or a combination thereof;
- polymer additives for the effectiveness of plasticity, increasing water-repellent qualities, increasing the intensity of filling the composition with air.
In the production of such plaster, the ability of perlite to increase many times when heated to 1200 C is used - to swell. It has the ability to grow 15-20 times. With this effect, the building material is filled with a large number of air bubbles and a rather low thermal conductivity is created, thereby explaining the “warm” properties of the plastering treatment. Perlite is similarly added to mortars for the production of lightweight concrete, gypsum mixtures and other plaster pastes.
Lime mixture
Lime, lime-gypsum and lime-clay mortars are used for external plastering that is not exposed to precipitation, and equally for interior decoration of rooms in dry apartments. In order to increase adhesion and create excessive strength, building gypsum is added to the lime mixture.
It is important to remember that the composition finally hardens after 30 minutes, and the process starts after 4 minutes. The lime composition is prepared by adding 1 part lime mass and 3 parts sand. Although the required proportion is selected based on the fat content of the original paste. Water and sand are added to it in small parts, stirring each time and controlling the oiliness of the acquired mass. In the final result, the building material should be similar in consistency to dough.
Lime compositions are budget-friendly. They are used for interior decoration in homes with acceptable humidity. The paste is safe, has good thermal insulation, is easy and simple to prepare, and is not very expensive, but it is not durable.
Sequence of actions for applying plaster
So, let's look at how to plaster a brick wall:
- It is better to start work by using a primer. To do this, apply a diluted primer with a brush. If this is not provided for in the budget, then simply spraying the wall well with water is enough.
- A thin layer of plaster is applied. A spatula is used to coat the material - it applies and levels the material.
- The layer of plaster cake should be greater than the height of the lighthouse. The cake is leveled at the same level, distributing the product.
- After a thin layer, you should apply a second, thicker one, but you need to wait until the first one dries well.
- It is better to plaster the outside of a brick wall in sections that should not exceed 50 cm in length and width.
- Using the rule, the surface is leveled. To do this, the rule is established between the beacons and moves either down or up.
- If there are holes in some places, they are refilled with material and leveled first with a spatula, then with a rule. If there is excess, it is removed.
Usually, when working on the second, third and subsequent sections, the joints turn out to be slightly uneven. It is better to work on this problem immediately after creating the joint. The material is leveled wet, and the rule without using a spatula is also used for this.
Important nuances of brick plastering
Rice.
7. Plastering the external wall of a house In cases where the applied layer has a significant thickness, it is applied in several stages (with a thickness of each layer ≤ 5 mm), with mandatory reinforcement.
The intermediate layers may not be leveled. The maximum permitted thickness of the plaster layer cannot exceed 100 mm. at the same time, the probability of its delamination and shedding increases significantly. The optimal thickness is considered to be up to 50 mm. Acceptable environmental parameters for plastering brick walls are temperature (5-35) °C, humidity ≤ 65%.
The electrical wiring is de-energized, the recesses for installing switches and sockets are covered with masking tape. They also protect door (window) trims.
- It is recommended to add quicklime (calcium oxide) to self-prepared solutions for exterior finishing.
- In order to increase the thermal insulation properties of the plaster, porous substances (pumice, sawdust, analogues) are added to the solution.
- It is strictly forbidden to dry the plaster with a hairdryer or other means. This will lead to cracking.
How and with what to plaster external brick walls with your own hands: video
Facade plaster for brick walls is used quite often. After all, it is quite a comfortable and durable material. Plastering of external insulated walls can also be done; for example, it is successfully used for finishing foam plastic on the outside of a room.
Today we will look at how to properly plaster external walls. Also in the video in this article you can see all the details.
Preparation of the solution
Before starting work, you should decide what is better to plaster the brick walls inside the house in a particular room. The use of mixtures based on gypsum and clay in rooms with high humidity is not recommended. Mixtures based on cement and lime can be used in any room.
Currently, for plastering walls, they mainly use ready-made dry mixtures, which only need to be diluted with water according to the instructions.
Before plastering brick walls inside the house with mixtures with a predominance of gypsum, you should know that such mixtures gain strength and dry out very quickly, so the quantity for a single batch should be limited.
Finishing external walls with plaster
Plastering the walls outside the house is done using different materials, and when purchasing, it is advisable to pay attention to the packaging. It can be packaged in a bag or bucket, which will contain the necessary information regarding the characteristics of the plaster and its places of application. Let's look at how to plaster the walls outside and what you need to pay attention to when purchasing materials.
The packaging contains the following information necessary for the consumer:
| Type of plaster | It can be purely cement-based or with the addition of limestone, restoration or for working in a thin layer. |
| Conditions of use | Plaster can be for interior work or facade. |
| Weight of one package | This information is necessary in order to calculate the required quantity. Most often, packaging is carried out in twenty-five kilograms. |
| Application temperature | Talks about the temperature range at which work can be done. |
| Adhesion and compressive strength | These indicators indicate the strength of the applied plaster and its ability to adhere to various substrates. It is desirable that the numbers be as high as possible. |
| Layer thickness | As a rule, this indicator is indicated in a certain range. |
| Steam resistance coefficient | The higher the indicator, the worse the permeability. |
Plastering the facade
External walls can be plastered either by machine or by hand. If the brick facade has a large area, the first technology is better suited. When a consumer asks a question about how to plaster walls on the street, he should know that in addition to machine-applied plaster, about 2% hardener should be added.
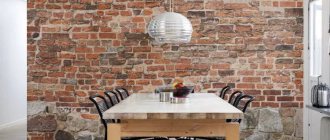
Attention! Brick and plaster look great together, so you can combine a cheap cement-sand mixture with a decorative brick finish.
Attention! Plastering one wall must be carried out in one step. This is due to the fact that the plaster may harden unevenly, which will lead to the formation of cracks on the facade.
Manual and mechanized plastering
The manual application technology was discussed in detail above. There is another technology that is optimal for a large surface area of brick walls - mechanized.
Algorithm for performing work with mechanized plastering
The preparatory stage is similar. After its completion, a team of plasterers installs a plastering station at the work site and connects it to water and power sources. The dry plaster mixture of the selected brand is loaded into the hopper. From there, the material is fed by a screw into the mixing chamber, where it is mixed with water. The continuity of the feeding and mixing process guarantees the homogeneity of the resulting mixture. The plaster is applied to the wall at an angle of 90° through a special nozzle mounted on the supply hose (the shape of the nozzles can be changed).
Rice. 8. Mechanized plastering of brick walls
The process ends after the beacons are closed. The finishing is done manually.
Advantages of machine application
Mechanical mixing produces a high-quality plaster mixture with a high content of air bubbles. This increases the volume of the solution while reducing its weight. The savings in raw material are quite significant. Consumption is approximately 16 kg/m2 (at 35-45 for the manual version). The finished composition is homogeneous.
Other advantages of mechanized plastering are that:
How to plaster a brick wall
Let's take a step-by-step look at the main stages of the work.
Preparation of plaster mortar
The quality and durability of the applied layer of plaster depends on proper preparation:
Example. If there is an excess of binder, a greasy paste-like solution is obtained. It is characterized by increased consumption and a tendency to surface cracking when drying. A lack of binder makes the paste thin and significantly reduces its strength.
Rice. 5. Preparation of plaster mortar
You can mix the components by hand (with a shovel or electric drill with a mixer) or in a mortar mixer (for a team of several plasterers and a large volume of work).
Surface priming
This step is mandatory. Performed immediately after the preparatory one. This is explained by the high porosity of the brick, which absorbs water from the applied finishing material. As a result, the strength of the latter drops by almost half.
The choice of primer type is associated with an assessment of the following factors:
The optimal solutions are materials based on silicone or acrylic (water-soluble universal). It is recommended to apply the primer in two or three layers, applying them by hand (brush or roller) after the previous one has completely dried.
Reinforcement
Reinforcement increases the strength of the coating. When performing this, a reinforcing mesh with a cell size of 10*10 is used:
The mesh must be installed after the soil has dried. It is coated on both sides with mortar, which eliminates contact with the surface of the brick. Stretch it overlapping in place, fix it with self-tapping screws, nails or special hooks (fastening pitch, 250 mm). Fixation is carried out without tension, without sagging and the formation of mesh bubbles.
Installation of beacons
Lighthouse profiles are commercially available. The installation of beacons is carried out according to the following algorithm:
Applying layers of plaster mortar
When working independently, you should consider a few simple recommendations:
Before applying plaster in an apartment or private house, it is recommended to wet the surface of the wall.
The spray is applied first. This is a material that has the consistency of liquid sour cream. Direction of application: bottom left – top right. The composition is applied in blocks (between two adjacent beacons). The thickness of 1 layer is 4-5 mm. after 3-4 minutes, areas that strongly protrude beyond the beacons are cut off or smoothed. There is no need to level it (the option of applying a layer by spreading is possible).
The second layer is soil. The consistency of the mixture is doughy. Apply after the previous layer has dried. Thickness – up to 20 mm. The casting is carried out in the places of the recesses left after the first pass. The alignment is performed by the rule. 3-4 times from bottom to top, then from top to bottom once (this reduces the likelihood of the mixture running off). The solution is again added to the remaining recesses. And the work is repeated as a rule.
The third layer is the covering. It is not required. The solution becomes quite liquid. Application thickness up to 2 mm. The covering is leveled with a trowel. If the estimated thickness of the plaster layer exceeds 30 mm, it is more economically feasible to use plasterboard sheets for interior finishing. After the plaster has set, the beacons should be removed and the remaining traces should be sealed with putty.
Finish grout
The final grouting of the surface is carried out with a float. First pass, in a circular motion. The second is vertical alignment. Tritium - horizontally.
If plastering for wallpaper or painting is carried out, the surface is additionally sanded.
A little about pricing
As mentioned above, facade work and materials are very expensive, regardless of what surfaces you need to work on: brick or concrete. The price for plastering brick is comparatively lower than for insulation. Also, the price depends on the thickness of the plaster sheet. Thus, the lowest price is approximately 350 rubles per 1 m².
We should not forget that casting door and window openings is charged higher than plastering flat walls, again due to the labor intensity of the process.
How to plaster with plaster
A brick wall can be plastered with gypsum mortar, which is attached to the wall mechanically (see Gypsum plaster: technology of use). Gypsum mortar is not used in damp rooms or in case of wall vibration. This mixture is used for finishing plastering of wall surfaces.
- Gypsum is applied to the wall by spraying.
- The layer quickly levels out.
- The solution, which includes gypsum, sets quickly, which requires preparing it in small portions according to the attached instructions from the manufacturer. After covering with gypsum plaster, the wall surface is free of defects and ready for further finishing.