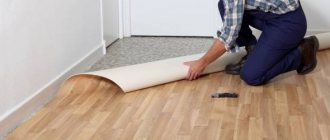
Many owners of city apartments or country real estate use linoleum as flooring. This material can be laid in different living rooms, but the durability of this roll product depends on proper preparation of the base. Plywood for linoleum is considered one of the best options for a leveling layer. It can be used for laying on a concrete floor or a wooden base. Next, we will look at the advantages and disadvantages of the material in question and the features of its installation.
Procedure for laying plywood under linoleum
Laying plywood on a wooden floor under linoleum is used to level the base when changing the covering. This type of underlay eliminates complex repairs or replacement of floor slats. Wooden flooring reinforced with plywood boards becomes a good base for a floor under linoleum, and due to the thermal insulation properties of plywood, heat is retained in the house. Every willing craftsman can install slab flooring, but theoretical training and practical skills are needed to avoid mistakes when laying the product.
Plywood marking
After the preparatory measures and before directly installing the plywood sheets on the floor, it is necessary to mark the covering and the elements of the plywood itself:
Leveling the floor under linoleum
- in the center of the room, to check the horizontal surface of the wooden base, you need to install a laser level indicator;
- you should measure the distance from the surface of the wooden flooring to the laser beam of the level and mark them with a marker;
- the measurement results should be entered in a notebook with a previously prepared sketch of the room;
- plywood flooring must be laid on the floor, marked and cut into tiles to ensure ease of laying the covering;
- each element must be numbered so as not to be confused during installation;
- the layout of the plywood sheets should be sketched in a workbook;
- when laying out plywood sheets, take into account 2–4 mm of distance between them;
- the gap between the wall and the edge of the plywood flooring should be from 0.8 to 1 cm.
Such gaps are needed to compensate for the expansion of the material during mechanical load and temperature changes.
Properties and options for laying plywood
Plywood is a product made from glued wood layers of peeled veneer, laid mutually perpendicular to each other relative to the location of the fibers. The material is made from deciduous and coniferous wood.
The design and special glue give the slab geometric accuracy, strength and water resistance. For construction work, an important indicator of water resistance divides plywood into three types:
- FC - refers to a product with an average level of water absorption. It is used for interior work, in the manufacture of furniture and souvenirs.
- FSF – refers to a product with increased moisture resistance. It is used in external construction work, when constructing rough floors, bases for soft tile roofing, and outdoor advertising structures.
- FBS – moisture resistance of the product prevents swelling of the material in a humid environment.
Made from softwood veneer, wood and birch, the board is the most durable of these.
To increase the biological resistance of the slab, the sheets of the product are coated with synthetic resin. Thanks to these properties, a subfloor made of plywood grades 2 and 3 FSF, unsanded and sanded on one side of the product, is used as a base for a linoleum covering.
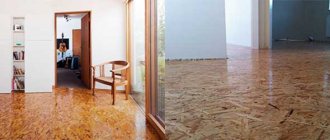
Very often this material is chosen as a rough coating
Using plywood for a subfloor
One of the installation options is on a concrete floor, when the old wooden covering is removed along with the joists.
The cleaned surface of the concrete floor is checked with a laser level for horizontalness. If the deviations are less than 5 mm, a self-leveling self-leveling floor is used. In case of greater deviation, a concrete screed is applied to the base.
After the leveling coating has dried, work on installing the sheets of the product is carried out. The concrete surface is primed to prevent dust from getting between the sheets of the product and the base.
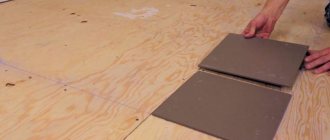
To prevent warping of the coating, the sheets of the product are cut into squares with a side of 50-60 cm. After sawing, the edges of the slabs are sanded and the slab is covered with a protective layer of antiseptic.
If plywood is placed directly on concrete, then glue is enough
Laying plywood under linoleum on a concrete base is done using glue. We lay out the sheets according to a previously prepared diagram, which takes into account the dimensions of the floor of the room and the size of the slab.
To prevent the panels from pressing through at the joints, the sheets are laid out in a checkerboard pattern. A compensation gap of 3–4 mm is left between the sheets, taking into account temperature fluctuations and the changing load on the floor covering.
The gap between the walls and the flooring is 10 - 15 mm. The sheets laid on the glue are additionally fixed to the base with dowels so that the sheet does not move until the glue dries. After fixing the sheets, the subfloor is sanded and primed, and a linoleum coating is laid on the flooring with a dried primer layer.
When installing a linoleum floor covering, the durability of the product depends on the condition of the base. A foundation made in violation of the instructions will lead to a defective subfloor.
Material selection
Plywood options for flooring
It is important to choose the right plywood for the job. Laying under linoleum on a wooden floor yourself involves following the following recommendations:
The thickness of the sheets is in the range of 14-22 mm. The minimum acceptable value is 10 mm, but it is not recommended to use it, since the sheet will not be able to withstand a significant load. It is worth remembering the traffic flow of the room and what furniture is installed in it. The greater the load on the floor covering, the greater the thickness of the rough layer should be taken.
It is strongly recommended to choose a moisture-resistant material that is not exposed to water, does not absorb it and does not change its shape and structure.
This is especially important for wet rooms, but it will not be superfluous in others, since there is always the possibility of flooding or spilling liquid on a wooden floor. Although the coating does not allow water to pass through, its base in most cases is not resistant to it, and the seams between the sheets or the joint between the floor and the wall remain weak points.
The second or third grade of plywood for linoleum is accepted. Laying on the floor as a rough covering does not require the use of the first grade. It can be used, but it is not economically profitable.
It is best if both sides of the sheets are sanded.
Installation features
Plywood under the linoleum is laid on the joists when the wooden covering is dismantled.
After removing the old flooring from the floor lath, the joists are left in satisfactory condition for further use. Using a laser level, we check the top edge of the joist for horizontalness, and also measure the distance between each element for comparison with the dimensions of the cut sheets of the product.
If the plywood sheets are laid on less than 2-3 logs, increase the number of the latter, reducing the gaps between them. We insert jumpers from boards between the joists and fasten them with self-tapping screws. We install the jumpers one from the other at a distance the size of the side of the plywood sheet.
We check the assembled base for horizontality using an aluminum rule with a level. We protect the wooden frame from moisture using an antiseptic.
For thermal insulation and sound insulation of the floor, between the joists we lay stone wool slabs with films that protect the insulation from moisture. We fasten the prepared sheets of the product with self-tapping screws to the frame.
How to lay plywood on a wooden floor when removing the covering is not practical. If no defects are found after checking the floor covering and joists, we use a base for laying the subfloor made of plywood.
The level will help check the correct assembly of the floor
We check the horizontal surface of the wooden floor using a laser level. Loose boards are additionally secured with self-tapping screws. We go over the warped floor slats with a plane and remove any uneven surfaces. To close the gap between the slats, use silicone sealant.
If the surface of the old floor does not have horizontal deviations, cover the base with a primer. Cover the floor with plywood over the dried primer. We lay the sheets of the product according to the previously described scheme, securing the plates to the base with self-tapping screws.
An important point before laying plywood is to study the characteristics of the material included in the table.
The first method is laying on the old coating
If the wooden floor in the house remains in good condition and does not have major defects or flaws, but you need to lay a new floor covering, then laying a subfloor made of plywood on the existing wooden floor is the best solution. It is important that the old coating is fairly even: the height difference should not exceed 1 cm. This installation method is demanding on the surface, so it is necessary to prepare the wooden floor by renewing defective old boards and leveling the surface.
For ease of work, pre-dried plywood sheets can be sawed into squares measuring 60x60 cm. If plywood is laid in a room with a large area, you don’t have to cut the sheets into squares, but sawing allows you to identify possible delaminations in the middle of the sheet that are not noticeable from the outside. It is better not to use plywood with delaminations for subflooring.
For large premises, it is permissible not to cut sheets Source couo.ru
After preparing the old wooden floor and plywood sheets for the new one, the installation process begins, consisting of several successive steps:
- Marking
The sheets are laid out on the base so that adjacent rows are offset from one another by approximately one-third of the width of the sheet. Protrusions, niches, etc. are marked on the sheets.
Lay out sheets prepared for marking Source parket-sales.ru
- Sawing
According to the markings made, recesses are cut out in the plywood. Sheets are cut so that the number of seams is minimal
Cutting plywood with a circular saw Source pinimg.com
- Laying the substrate
To smooth out minor unevenness in the floor, you can lay a polyisol backing between the plywood and the boards. It consists of polystyrene granules enclosed between two layers of film. In addition to smoothing out unevenness, the underlay provides sound insulation and also removes moisture from the plywood flooring. Polyizol is spread on a wooden base, the seams are taped
Polyizol can be laid not only under laminate, but also under plywood sheets Source stroyday.ru
Advantages of a plywood subfloor
Laying plywood sheets on a slatted floor has some advantages over other flooring methods. So, a plywood floor allows you to:
- create a continuous flooring that does not acquire unnecessary relief over time;
- do not engage in additional dismantling of the old coating;
- significantly reduce work costs and reduce the labor intensity of the process;
- use moisture-resistant types of plywood for additional protection of wooden floors in bathrooms, kitchens and toilets;
- have a minimum of seams between floor structural elements, which are the weak point of this system.
A variation of the first method - laying on adhesive compounds
Sometimes the surface of the old coating is almost perfectly smooth. It will still not be possible to lay laminate on such a floor, but it is possible to replace the hardware with adhesive compounds. For gluing plywood sheets, water-based glue, mastic, assembly adhesive, bustilate, and liquid nails can be used.
Example of glue used Source eco-stroycity.ru
Technology for laying plywood on a wooden floor
Stage No. 1. Preparing old coating
First, the condition of the old floor is assessed. It is necessary to pay attention to the absence of elements damaged by mold and rot. If damage occurs, you should definitely replace the old subfloors with new ones. Such damage to the surface indicates increased humidity in the room. Its source should be identified for further elimination.
If there are cracks and holes in the floors, their width should not exceed 5 cm. Otherwise, restoration of the old floor covering will be required. As a rule, prefabricated elements of any wooden surface will deform over time. This, in turn, leads to the appearance of relief. To eliminate this problem, floors should be sanded according to the following scheme.
- You need to get a grinding machine. It's better to rent it, because... For a one-time DIY repair, it is not advisable to buy such expensive equipment.
- Loose elements should be secured. Floorboards must be secured using wedges and nails. By the way, this will help prevent floors from squeaking in the future. During use, the nail heads are completely recessed into the board. This will allow you to avoid damaging the machine when sanding.
- All metal elements – screws and staples – must be removed from the floor surface. If protruding nails are found, they are driven flush with the boards, as stated above.
- The direct grinding process takes place diagonally across the room. It is necessary to ensure that the processing strips overlap. The machine does not need to be kept in one area for a long time. It should not be done with force, as this will create unevenness on the floor surface.
Stage No. 2. Preparation of plywood sheets
It is important to understand that plywood is a wood material, so its parameters may change subject to changes in temperature and humidity. Before using plywood sheets, they should be kept indoors for some time to stabilize the humidity.
If the plywood before purchase was stored in conditions close to those where it will be used after purchase, then it is enough for it to lie indoors for a day. If, before purchase, the material was stored in a warehouse where storage conditions differ from those in residential premises, then the correct decision would be to leave the material stored for 5 days at room temperature.
Stage No. 3. Cutting plywood
The sheets are laid out throughout the room and cut with a jigsaw. The fact is that laying a rough plywood floor with solid elements is not the best option. It is better to cut them into smaller elements in order to reduce possible processes of sheet deformation to a minimum. For example, a standard 1.5 x 1.5 m plywood sheet is sawn into 4 parts.
Each element should be numbered so as not to confuse the order in which the sheets are attached during work. When laying out sawn elements, it is necessary to take into account the gaps between the sheets of 2-4 mm. The distance between the wall and plywood sheets should be 8-10 mm. These gaps are designed to compensate for the expansion of the material under load on the coating and with temperature changes.
Stage No. 4. Impregnation of plywood
Plywood sheets mounted under linoleum need impregnation. The fact is that these elements can be damaged by mold when moisture gets on them. Therefore, it is necessary to use special antifungal antiseptic compounds, for example, soak plywood with drying oil.
During impregnation, the solution is applied using a regular brush. The surface should dry well, after which the sheets can be used for laying on the floor. Additionally, it is recommended to coat the plywood with varnish. This is not necessary, but rot resistance and strength will increase significantly.
Stage No. 5. Technology for installing plywood sheets
There are many different nuances here. For example, plywood can be laid directly on a plank floor, on a concrete screed and on pre-installed joists. If the third option is chosen, then when laying the logs, plates must be placed under them for leveling.
On any surface, a gap of 3 mm is needed between the sheets. This is necessary so that the surface remains flat during deformation. You should select the optimal method of fixing plywood: for a wooden floor or when placing plywood on joists, only self-tapping screws are used, and for cement-sand screed - glue and quick-installation dowels (additional fastening).
If plywood sheets are mounted on a concrete screed, their surface is degreased and cleaned. A primer is used to increase adhesion. Only after this a uniform adhesive layer about 3 cm thick is applied to the sheets. When the entire flooring is glued to the surface, you should wait until the glue has completely dried. After this, the plywood, as described above, is additionally fixed with dowel screws in increments of 15-20 cm.
Stage No. 4. Cosmetics
The final step in installing rough plywood flooring for linoleum is to seal the seams in the joints between the sheets with a spatula. For this purpose, wood putty is usually used. After it has dried, the surface should be leveled: to do this, the joints are manually sanded with sandpaper. You can use a grinding machine. Next, linoleum is laid.
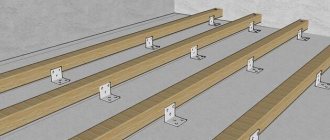
The second method is laying on logs
If the height difference on an old wooden floor is more than 1 cm, you need to lay the plywood in a second, more labor-intensive way. This method is also suitable if the old coating has become unusable and needs to be removed. The essence of the method is to lay plywood sheets on wooden supports, the so-called logs, which serve as the basis for the subfloor instead of the old coating that has become unusable. The logs are wooden blocks with a cross section of 40x40 or 50x50 mm and a length of 1.5-2 m.
Before installation, be sure to check the relative humidity in the room to decide which plywood to use for the joist floor. It is optimal to use environmentally friendly types of plywood - FC and FBA, but they can only be used in rooms with a relative humidity of no more than 60%.
Installing joists instead of a removed wooden floor Source pol-spec.ru
Before installation, it is necessary to inspect the old floor and replace damaged boards. After preparing the base, the process of installing the logs and laying the rough coating begins:
- Marking
The process begins almost the same as in the first method. In addition to the protrusions and niches, the joints of the sheets are marked. This is necessary in order to subsequently install the lag exactly in the place of the future seam. Otherwise, the edge of the sheet may “hang in the air”
- Sawing
This stage is no different from the previous method. Sawing is carried out according to the applied markings
- Installation of logs
Installing joists is the most critical stage, since the quality of the entire floor depends on their correct installation. Beams begin to be laid from the highest point of the floor, which is located using a building level. The logs are attached one by one to the base with self-tapping screws. In sagging areas, place bosses of the required height from fiberboard or timber. After installing all the beams, for greater structural rigidity, it is permissible to lay the second row perpendicular to the first.
You can install 1 row of logs Source pol-spec.ru
Or 2 rows of joists Source blog-potolok.ru
The frequency of installation of the bars determines what thickness of plywood to use for the floor along the joists. The more often the bars are installed, the thinner the sheets can be. It is recommended to install logs at intervals of 40-50 cm.
The main task when installing joists is to ensure that the upper ribs of all beams lie in the same horizontal plane. This is achieved by constantly checking the installed bars with a level and using a laser level
- Laying insulating materials
If necessary, sound and heat insulation is placed in the space between the joists. Communications can also be laid in this layer. It makes no sense to install heated floors under plywood, since it has poor thermal conductivity and retains temperature well without additional materials.
Communications can be installed under the subfloor Source archiq.ru
Do you need plywood under linoleum and how to lay it correctly
Many owners of city apartments or country real estate use linoleum as flooring. This material can be laid in different living rooms, but the durability of this roll product depends on proper preparation of the base. Plywood for linoleum is considered one of the best options for a leveling layer. It can be used for laying on a concrete floor or a wooden base. Next, we will look at the advantages and disadvantages of the material in question and the features of its installation.
How to determine the required thickness of the plywood layer
To select the optimal thickness of the plywood underlay, there is one simple rule: this layer must be at least ¾ of the final floor covering. Thus, you can determine the brand of plywood for any modern flooring material.
Choosing plywood thickness:
For parquet
For parquet, this value ranges from 16 mm.
For laminate
The laminate must be laid on a substrate of at least 12–15 mm if the plywood is laid directly on the screed. When installing floor joists, the plywood layer must be at least 20 mm.
For linoleum
For linoleum it will be enough to lay a layer of plywood from 12 mm. A smaller layer can have a detrimental effect on the quality of the floors and lead to gradual deformation and the identification of all irregularities and differences.
Read also about what kind of material this is - chipboard.
Plywood for the floor under the finishing coat is an extremely successful and economical solution. This way, you can not only perfectly prepare the surface and level out problem areas. Thanks to the plywood backing, the necessary hardness and reliability, which are so important for the prospect of long-term operation, are ensured. To summarize, it can be noted that it is most advisable to use plywood, sanded on one side, of the second or third grade with a thickness of 12 to 16 mm and with emission category “E 1” for the rough floor covering.
Do you need plywood for linoleum?
Using plywood, which is used as a leveling layer, the following additional tasks can be solved:
- raise the floor level;
- insulate the base;
- improve sound insulation performance.
Leveling the old floor with plywood before laying linoleum
The material in question copes well with the tasks of preliminary leveling of various base surfaces, while the sheets have a minimal cost. If you lay the sheets on a wooden floor, they form a perfectly flat plane. This allows you to evenly distribute forces on the floor covering while a person moves around the room, as well as from constant loads, for example, from installed furniture. This property of the material can be associated with the fact that the weight of a person will affect the whole sheet, and not several individual boards.
The main advantages of plywood are:
- low price of material;
- the possibility of uniform distribution of loads on the base;
- masking unevenness and other defects of the base layer;
- no creaking floorboards;
- additional thermal insulation and sound insulation indicators;
- good strength and wear resistance of the material.
Despite the huge number of advantages, the material has several disadvantages. These include the possibility of changes in the linear dimensions of products under the influence of moisture, damage to the surface by fungus and mold. Another disadvantage of the products in question is flammability and deformation during sudden temperature changes.
Basic properties of plywood
The thickness of plywood under linoleum must be at least 12 mm.
Plywood is several layers of thin wood glued together.
With its help you can level not only the floor, but also any other surfaces. It is a durable environmentally friendly material that can last a long time. The surface of plywood is flat and smooth, able to withstand temperature changes in the room.
When using plywood for the floor, the load falls on the entire sheet, which prevents the surface from sagging.
The plywood sheets fit closely together, preventing rodents or insects from getting underneath them. If necessary, sheets of plywood can be easily changed. Plywood under the linoleum will increase the heat and sound insulation of the floor.
What kind of plywood to lay under linoleum?
Before laying sheets on a wooden or concrete base, you need to familiarize yourself with the existing types of plywood, their properties and technical characteristics. The property owner must clearly understand what product is in front of him. Several decades ago, plywood was presented on the construction market in the following varieties:
- The packaging option is a product with thin walls, which was used as containers for various products. Now such products are not used due to the use of cheaper analogues.
- Structural plywood sheets are used for sheathing the surfaces of building envelopes and for other purposes, such as the construction of the frame of residential buildings.
- Furniture plywood has found wide application in the field of furniture manufacturing. The products have different thicknesses and are used for rear walls, shelves and other purposes. Laminated material is used for the manufacture of furniture facades and side walls. The surface of the products can imitate the texture of wood and has a special protective coating.
- Construction plywood sheets are considered one of the most common options. This material is used in a wide variety of areas of construction and can be used as a base for subsequent laying of linoleum.
Does plywood need to be treated? It is recommended to impregnate ordinary sheets, with the exception of moisture-resistant products, with antiseptics and fire retardants, which will prevent the appearance of fungus and mold and protect the products from fire as a result of exposure to high temperatures. The lamination procedure improves the attractiveness of the material and increases its moisture resistance.
One more question: do I need to putty the plywood ? Yes, it is necessary, but you cannot use ordinary putty for this purpose. The seams between the sheets are treated with a special solution that prevents the occurrence of fungus and damage to the material by parasites. The primer is applied with a brush. After complete drying, the cracks are puttied with a special composition of epoxy resin and wood dust in equal proportions. The mixture is heated to a temperature of 40 degrees and all cracks are filled. A day after puttying, they begin sanding the surface.
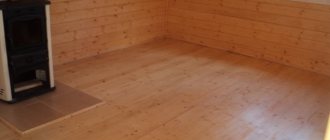
This is how old wooden floors are leveled: a frame is assembled, insulation is laid, then sheets of plywood are laid.
Sheets of plywood for preliminary leveling of the base under linoleum are marked as follows:
- FC is a material with good moisture resistance. The veneer sheets here are glued together using a special carbide composition. The material in question has a minimal amount of harmful substances, so it can be used for interior decoration of residential buildings.
- FSF is a sheet with increased moisture resistance. The veneer in such products is glued together using formaldehyde glue. This substance is harmful to human health, especially in high concentrations.
- FBA is plywood that is glued using albumin casein glue, which is absolutely safe for humans. Such materials are recommended to be used for leveling the base in dry rooms due to low moisture resistance.
- FB is considered the most durable and reliable product; it differs from other options in its good moisture resistance and resistance to various external influences. The veneer sheets are glued together using bakelite glue. Such products are designed for use in rooms with the most unfavorable conditions.
- FSF-TV is treated with special impregnations and fire retardants, which increases the product’s resistance to fire.
Many users wonder whether it is possible to paint the surface of plywood sheets. Paint is often used instead of an antiseptic. This composition covers the sheets on the outside and inside. Paint improves the moisture resistance of the material, prevents it from rotting and mold. One more question: do you need to dry the plywood? Drying oil is often used as a primer for pre-impregnation of the material.
In addition to the brand and purpose, plywood sheets are divided by grade. To pre-level the base under linoleum, the following materials can be used:
- The first grade has improved quality. There are no chips, cracks, potholes or other defects on the surface of such material. The sheets are impregnated with various compounds and are often used as an independent floor covering.
- The second grade of material has a limited number of surface defects, their number is indicated in special documents. This is also an attractive option and is used as an independent finishing material.
- The third grade of plywood has a larger number of knots and other defects than the two previous options. Such sheets can be used to install a base under linoleum or used to install hidden parts of building structures.
- Plywood of the fourth grade has the maximum number of defects, knots and flaws on its surface. Such products are notable for their low price, but have worse quality indicators.
Grade 3 or 4 plywood can be used as a base for the flooring. This surface will be hidden, which means you need to pay attention to strength and reliability indicators, and not the appearance of the product. It is also necessary to take into account that with an increase in the number of grades, the cost of building material decreases. It is unwise to spend extra money on purchasing a substrate.
About using plywood flooring
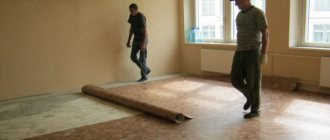
Natural wood is widely used in construction for the manufacture of floors. It has good thermal insulation, a pleasant-to-touch surface, and creates a cozy, warm environment in the house. However, over the years, such a coating loses its attractiveness - the boards dry out, begin to sag and creak. There are ways to renew wood flooring, but often it fails and the wood floor needs to be completely replaced.
If you need to lay laminate or parquet instead of an old floor, it becomes necessary to prepare a high-quality substrate. Modern floor coverings are extremely demanding on the surface, and an uneven wooden covering is not suitable, even if it is well preserved. But if the wood floor is still in good condition, you can lay a subfloor made of plywood sheets over it. This substrate is distinguished by the quality of the resulting surface, speed of installation and low cost.
A wooden floor can retain sufficient strength, but be visually unattractive Source bricoleurdudimanche.com
Plywood is a material made by pressing together an odd number of sheets of rotary-cut veneer. The veneer is made on a special peeling machine. Adjacent sheets are laid in a mutually perpendicular direction, which ensures high physical and mechanical properties of plywood. The material is used in construction, furniture production, carpentry and carpentry. Plywood is often chosen as a substrate for parquet, linoleum or laminate due to a number of advantages:
- The plywood backing provides a smooth surface.
- Large sheet area ensures quick installation.
- Plywood sheets have high strength, wear resistance, and load resistance.
- The subfloor extends the life of the underlying floor covering.
- Creating a plywood backing does not require large financial costs.
You can lay flooring on multilayer plywood Source fanerasnab.ru
What thickness of plywood is needed?
The thickness of the sheets will depend on the height differences on the base. If the base layer is leveled using a self-leveling screed, then the thickness of the material can be 4 millimeters. For uneven base surfaces, sheets with a thickness of 10 to 21 millimeters are used.
Is it necessary to glue linoleum to plywood? If there is an uneven base, the sheets are glued to the base surface with a special solution. Learn more about which linoleum glue to choose. It is also recommended to fix linoleum on a wooden plywood base using special compounds. In small rooms, the flooring is secured using skirting boards, which are nailed to the wooden floor.
Video description
This video clearly shows the process of installing joists instead of the old floor that was removed:
The main thing to remember is that the seams between the sheets should run exactly in the middle above the joists so that their edges do not sag. We also must not forget that the thickness of the plywood for the floor along the joists depends on the frequency of laying the joists. Typically, plywood sheets with a thickness of 16-20 mm are used.
The only drawback of the method is that the floor on the joists “eats” about 10 centimeters from the height of the room, depending on the thickness of the joists and plywood. However, if it is installed in a large country house, such a loss will not be decisive. Therefore, to the question of what kind of plywood is best to lay on the floor in a house made of timber, the answer is unequivocal - as thick as possible.
Plywood under linoleum on a wooden floor
Due to its practicality, affordable price and ease of installation, linoleum is one of the most popular materials used in floor reconstruction. Laying it is not difficult, but a perfectly flat base surface is required, otherwise even through a fairly thick layer of coating all the defects of the old floors will appear: height differences and gaps between the floorboards. Laying plywood on a wooden floor under linoleum is the easiest, fastest and cheapest way to prepare a base for this material.
What kind of plywood is used on the floor?
In addition to the thickness and size of the sheet, you will also have to choose the type and grade of plywood. First, let's look at the type. If you plan to lay plywood on the floor under some kind of coating, you can use unsanded sheets. Under a hard finishing coating, such as parquet or parquet boards, grades 1 and 2 will be used. For a soft surface - such as carpet - you will have to use only the first one with a minimum number of knots.
The grade of plywood is determined by the number of knots, their condition and the presence of other defects. The best is first/highest, but some factories also produce “luxury” or “elite”. They use veneer for the outer layer(s) without any flaws at all.
If you plan to use the plywood floor as a finishing floor, that is, “for painting,” you need one sanded on one side and of the highest grade. If your budget is strictly limited, you can take a lower grade. But the defects will have to be puttied and sanded. This is an additional waste of time without guaranteeing an ideal result.
You need to choose the type of plywood depending on the planned finish coating
Types of moisture-resistant plywood
In general, it is advisable to use moisture-resistant material for the floor. There are the following types of moisture-resistant plywood:
- FC. Suitable for rooms with normal humidity. Urea glue is used in production. It is environmentally friendly, but the water resistance of the material is average.
- FKM. It is also safe, and has higher water resistance, since melamine glue is used. But the price is more expensive. It makes sense to use it when installing floors in the kitchen and hallway.
The most popular types of plywood - FSF. Cheap, waterproof. But the layers are glued together using a phenolic binder. So for use in residential premises, a hygienic certificate indicating the formaldehyde emission class is required. A material with a formaldehyde emission class no higher than E1 is considered safe. Can be used for installing floors on an open balcony or loggia, in a bathroom or toilet.
- FB. Plywood with bakelite binder. Lightweight, highly moisture resistant, safe. But darling. Used in the construction of aircraft, often called aviation.
- BS. Alcohol-soluble glue is used for gluing veneer. Plywood is moisture resistant, durable, expensive. Does not withstand exposure to some chemicals. It is used with caution when laying ceramic tiles - modern tile adhesive may contain various additives that can cause destruction of the adhesive layer.
So, when laying plywood in residential premises, the optimal choice is FC plywood. For the kitchen, bathroom and corridor in a private house, it is better to take FKM or FSF (but check its safety).
Why plywood?
Of course, there are other worthy ways to get a perfectly flat surface for linoleum instead of a cracked and uneven old wooden floor. But laying plywood under linoleum has a number of undeniable advantages:
- There is no need to dismantle the old coating, which means significant savings in both time and money.
- Sheets of plywood will help distribute the load more evenly across the entire floor. This will avoid sagging and creaking of the floorboards when walking; such a coating can withstand heavy loads for a long time without deformation or other undesirable consequences.
- If the old floors are uneven, then plywood will allow them to be leveled without much effort and expense.
- There is no fear that after a certain period of time the floors will acquire relief, which will ultimately appear on the linoleum.
- In parallel with direct tasks, laying plywood will increase the heat and sound insulation of the floor.
- The work of installing plywood is accessible to almost any average person; just the most minimal construction skills and watching a training video are enough. In addition, these works will not require the purchase of any special tools. The only exception is a floor sander, but you can do without it if you can’t borrow one from friends or rent it.
- This is the most cost-effective way to install high-quality linoleum on a wooden floor.
Briefly about the main thing
Laying plywood over an old wood floor is a great way to quickly and inexpensively prepare the flooring for laying linoleum, laminate or parquet. The plywood floor creates a flat surface for laying the final floor covering. There are 2 main ways of how and what kind of plywood to lay on the floor: laying directly on the old covering and laying on joists. The choice of method primarily depends on the condition of the old floor covering. Regardless of the chosen method, when laying it is necessary to comply with technological requirements: leave damping gaps, arrange the sheets in a checkerboard pattern, use high-quality materials. If all requirements are met, flooring laid on a plywood subfloor will last for many years.
Ratings 0
Some disadvantages of plywood sheets
Despite the impressive list of advantages, plywood is far from an ideal material and has quite significant disadvantages that must be taken into account when using it:
- It is quite flammable. This drawback can be eliminated by impregnating the sheets with a fire retardant solution.
- Hygroscopic, that is, susceptible to moisture. Therefore, it is extremely undesirable to use plywood in rooms where the humidity exceeds 68% for a long time. If there is no other way out, then you should use special moisture-resistant plywood in the bathroom or kitchen. In this case, do-it-yourself impregnation of ordinary sheets with a special composition will help a little.
- Impregnation with an antiseptic is mandatory, since plywood is a favorable environment for the proliferation of various microorganisms and fungi.
- Due to changes in temperature and humidity, the material will experience certain deformations, so it is necessary to have technological gaps between the seams and along the entire perimeter of the coating.
Kinds
The plywood production technology consists of forming a monolithic slab from many thin sheets, usually from coniferous wood. They are carefully glued and pressed together. The thickness of the plywood sheet is determined by the number of boards used in production. Usually this is an odd number: from 3 to 11. When, as standard, chipboard sizes are 16 mm and can be higher.
Plywood grade 4 4 what it is and how to use it can be found out in this article.
Special impregnations make the material moisture-resistant, which allows it to successfully compete with the main substitute - chipboard. Unlike fibreboards, which instantly swell when exposed to water, plywood holds its shape well and can be used in rooms with high humidity and the risk of leaks.
The chemicals used in the production of plywood boards vary in composition and may contain formaldehyde, which is harmful to humans. That is why it is customary to classify plywood also by product brand, and based on the components contained, make a decision on the advisability of using it in residential premises.
What is better OSB or plywood for the floor can be found in this article.
Category “E 1” means a formaldehyde content of no more than 10 mg per 100 g of dry weight. These are recognized as acceptable values for safe use in human environments. Class “E 2” means an increase in a harmful substance in the range from 10 to 30 mg per 100 grams of weight. This criterion cannot be called safe in any way, so the scope of application of this plywood is exclusively industrial.
FK and FSF plywood with increased moisture-resistant properties is recognized as the safest and most environmentally friendly. Other types of this material, abbreviated FOF and FB, are commonly used for industrial purposes and non-residential buildings.
Usb plywood price for one sheet is described in this article.
What grade of plywood should I choose?
The correct choice of material is the key to preparing a high-quality base for linoleum. What can you do to guide you?
- For any room, not just the bathroom or kitchen, preference should be given to moisture-resistant plywood. It is better to protect yourself from the possible penetration of liquid under the linoleum, and this can happen in any room: moisture can seep out when you wash the floors carelessly, leakage from heating radiators is possible, or something can simply spill. Having saved on material, you can then spend a lot of money replacing swollen floors. Moisture-resistant plywood is marked “FK”.
[smartcontrol_youtube_shortcode key=”choosing plywood for the floor” cnt=”4" col=”2" shls=”true”]
- The thickness of the plywood sheets should not be less than 12 mm if the rough coating is laid in one layer. The greater the expected load on the floors, the thicker the sheet of plywood should be taken. But it should be taken into account that this layer, albeit slightly, will reduce the dimensions of the room.
- Hardwood veneer in plywood sheets allows the latter to withstand higher loads compared to material made from softwood.
- Preference should be given to material polished on both sides. You can also use unsanded plywood marked “NSH”, but it will have to be treated with sanding paper.
Materials such as MDF or OSB are significantly superior to ordinary plywood in their qualities, but they are also much more expensive. If you have a sufficient budget, it is recommended to use them; the financial costs in the future will be more than compensated by the strength and durability of the coating.
- If you doubt that you will be able to impregnate the sheets with the required composition yourself, then it is better not to risk it and buy plywood with factory impregnation, even if it will cost a little more.
Which variety to choose
To determine which plywood to choose for your floor, you should consider the existing varieties. Plywood is classified according to the following criteria:
- According to wood material
Plywood can be made from softwood and hardwood. Hardwood material has higher mechanical properties, but is also more expensive
- By moisture resistance
Moisture resistance directly depends on the adhesive composition used in plywood. For example, FBA plywood uses natural albumin-casein glue, so it is resistant to moisture. FSF plywood contains formaldehyde glue, which ensures high moisture resistance
- By defects
Based on the presence of knots, wormholes, curls, etc. in the veneer, 4 grades of plywood are distinguished. Grade I is the highest quality and most expensive, grade IV has a large number of defects
- For surface grinding
Plywood can be sanded on both sides (Sh2), sanded on one side (Sh1) or unsanded (NS)
- By number of layers
There are three-, four-, five-layer and multi-layer plywood
There are many varieties of material Source amazonaws.com
To determine which plywood is best to lay on the floor, you need to know the conditions of its use. The room where the subfloor will be laid must be heated. Temperature changes are allowed within 16-28 °C. The relative humidity in the room should be within 60%.
If you plan to make a substrate in rooms with low humidity levels (bedroom, living room, hall), you should use FBA plywood, as this is the most environmentally friendly material. In rooms with humid air, it is better to use moisture-resistant varieties - FK or FSF.
A typical solution to the question of which plywood is best for the floor is to use birch plywood Ш1 or Ш2 grade II or III with a thickness of 10-22 mm. This solution combines a fairly high quality surface combined with an acceptable cost.
It must be said that the thickness of the plywood should be 2-3 times thicker than the final floor covering. Using thick plywood will provide greater rigidity to the subfloor, but working with such material will be inconvenient. In addition, the price of plywood will be higher.
Mid-price plywood is suitable for the substrate Source remontnik.ru
Surface inspection and preparation
Any surface requires preparation before reconstruction, and wooden floors are no exception:
- Skirting boards are removed if they are present on old floors.
- Waterproofing and the presence of moisture sources are checked. Without eliminating the latter, it is pointless to lay plywood; they will fail in a fairly short period of time.
- Replace rotten or damaged elements.
- In old floors, it is permissible to have gaps up to 5 cm in size. If the gaps between the boards are larger, then they need to be eliminated.
- If there are significant differences in height between the floorboards, grinding will have to be done, otherwise such relief will subsequently appear on the surface of the linoleum. To do this, you need to rent a grinding machine.
Before grinding, all metal elements are removed or recessed so as not to damage the abrasive. Loose floorboards are secured using wedges, nails or self-tapping screws. Sand the floors diagonally, making overlapping strips and not holding the machine in one place.
In addition to the base, you also need to prepare the plywood sheets themselves. First of all, you need to let them sit indoors for at least three days. If you plan to impregnate the plywood, then you need to allow time for it to dry.
Impregnation of plywood with polyvinyl acetate putty has become widespread as a relatively cheap but reliable way to protect plywood sheets. You should also remember to treat the material with an antiseptic.
Preparatory work
Plywood sizes
Laying plywood sheets begins with the selection of material. Based on the technical characteristics and features of the product, it is better to choose grade 2 or 3 FSF plywood, sanded on one side and 1.5 cm thick.
To use plywood to level a wooden floor, the supplied sheets must first undergo three days of acclimatization in the room where they will be laid. During this time, the humidity and temperature of the material are equal to those in the room. This procedure is necessary in order to maintain the geometry of the product during installation.
To do the work yourself you need the following tools and equipment:
- laser level indicator;
- tape measure or electronic rangefinder;
- cordless screwdriver or screwdriver;
- jigsaw;
- Bulgarian;
- black marker;
- hammer;
- axe;
- electric plane;
- gas key;
- wedges for maintaining gaps.
Any of the power tools listed above can be rented so as not to make such expensive purchases for just one occasion.
When laying plywood on an old wooden flooring, you must:
Layout options for plywood sheets
- assess the general condition of the wooden covering;
- replace rotten and mold-damaged floor elements;
- if a source of high humidity is detected, it must be eliminated;
- clean the surface of metal elements, namely staples, protruding nails and screws;
- plan the flooring with a planer to remove unevenness and clean its surface from paint;
- perform fine grinding of the surface, if necessary;
- perform antiseptic and antifungal treatment of wooden coverings;
- dismantle the plinth elements;
- pull the boards together to eliminate cracks in order to press their damaged edges more tightly;
- treat plywood sheets with an antiseptic.
Cutting plywood sheets
On many construction forums you can find recommendations to lay plywood by first cutting the sheets into identical square elements. This is not at all necessary; you can install entire sheets if the dimensions of the room allow. It is important to follow the following rules:
- The boundaries of the joining of plywood sheets should not coincide with the cracks in the old coating.
- The elements should be laid in a checkerboard pattern so that the seams between the sheets of adjacent rows are offset by at least 20–30 cm.
- You also need to leave a compensating gap of 2–3 mm between the sheets, and about 10 mm between the plywood and the wall. This is necessary so that the coating does not swell due to thermal expansion of the material. Subsequently, the joints between the sheets are sealed with a special wood putty, and the gap around the perimeter of the room will be closed with a plinth.
The most convenient way to cut sheets is with an electric jigsaw. The resulting burrs on the plywood are removed with fine sandpaper.
How to lay plywood on a concrete screed?
First you need to check the floor with a level. The maximum permissible discrepancy should not exceed 2 mm.
Then the base is carefully prepared. Using a vacuum cleaner, all debris and dust are removed, the room is de-energized, and then the surface is washed with warm water. After drying, you need to cover the concrete screed with a thin layer of bitumen varnish or putty.
Ideally, after drying, it is necessary to lay a thin waterproofing film. It is laid with slight tension and fixed at the edges with special glue. After the glue has set, you can begin laying the plywood.
Picture 1.
All fitted sheets are numbered according to their arrangement. First, identical squares are prepared. After this, you need to lay the plywood in a rough version. That is, do not attach it to the floor, but simply put it the way you want to see it in the future (Fig. 1). At the same time, do not forget that the squares must be laid with overlapping seams. After numbering, you can already carry out the final installation.
The best option is to fasten plywood using “liquid nails” or glue special for this purpose. Bustilate can also be used. But it is undesirable to use self-tapping screws in this case. After setting, the linoleum floor is ready!
Laying sheets
The cut sheets are laid out on the floor for fitting. It is better to number them and draw up a simple diagram of their location, so as not to suffer later when selecting the right element.
- Before applying the glue, the surface is cleaned of dust and degreased with white spirit. A layer of glue no more than 2–3 cm thick is evenly applied to the floor surface.
You can use special wood glue or home-made mastic: PVA is mixed with gypsum until the consistency of thick sour cream. You should try to smooth out the unevenness and fill the cracks with the adhesive solution.
- Sheets of plywood are glued according to the laying diagram, their level is controlled, after which it is necessary to allow the adhesive solution to set. This will take 1–2 days.
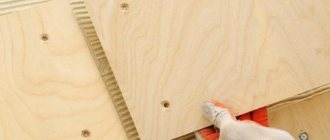
- After the glue has dried, additional fixation is performed with self-tapping screws. They should be placed no closer than 20 cm from the edge of the sheet in increments of 15–25 cm. To prevent the heads of the screws from showing through after laying the linoleum, they should be recessed, for which it is better to first countersink the holes.
- At the final stage, all joints are sanded and smoothed with wood putty. You can use PVA glue mixed with plaster or small wood shavings. The holes in the sheets where the screw heads are located are also puttied.
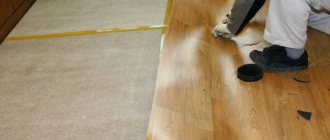
The process of laying plywood sheets is shown in more detail and clearly in the video.
After the putty has dried, the surface is cleared of any debris that has formed and linoleum is laid on it.
(votes: 3 , average rating: 3.67 out of 5)
Useful tips
To understand how and what kind of plywood to lay on the floor , you can read brief tips on laying a subfloor:
- Plywood sheets should be laid offset, as in brickwork.
- When marking recesses and niches, the sheets need to be numbered and a diagram of their installation drawn up.
- More than 3 sheets of plywood should not be joined in one place.
- There should be a gap of 3-5 mm between the sheets, and 8-10 mm between the sheets and the wall.
- The thickness of the plywood sheets should be 2-3 times greater than the thickness of the final coating. Typically 16-20 mm is used.
- Self-tapping screws are selected at least 3 times the thickness of the plywood.
- The pitch between the screws should be approximately 15-20 cm.
- If thin plywood is available, you can lay the floor in 2 layers. In this case, the seams in the layers should be in different places.
- If logs are installed, the gap between them should be no more than 50-60 cm.
- The edges of the sheets must rest on the joist.
The result of high-quality work in compliance with technology Source pinimg.com
see also
- DIY well house
- DIY play mat for children
- What is the difference between an induction hob and an electric hob?
- How to glue a decorative PVC apron panel in the kitchen
Which way to unscrew the water filter?- Reverse osmosis filters for home
- Distance between buildings in the private sector
- Wood boiler for private heating
- What to do to stop the refrigerator from smelling
Pipe passage through a metal roof- Make an opening in a load-bearing wall
Surface cleaning
Before you start laying plywood under the linoleum, the base needs to be cleaned of various irregularities, material residues and dust.
Removing debris must be treated very scrupulously, which is why many craftsmen use a construction vacuum cleaner. Some use a regular broom, however, at this stage you need to be careful, since the broom cannot be moistened. Otherwise, the screed will get wet, and this is not recommended, because excess moisture can have negative consequences for the plywood sheets.
Fixing sheets
1.The initially prepared material must be treated with an antiseptic and varnished. This step is optional, but it increases strength and adds rot resistance.
2.The surface is cleaned and then degreased. You can also use a primer for these purposes.3. Next, a sheet of plywood 10 mm thick is fixed to the adhesive layer. Later the same procedure is repeated with all the parts.4. After drying, the material is additionally fixed with self-tapping screws.5. All cracks that have formed must be sealed with wood putty.6. Next, the joints are sanded with sandpaper.7. The linoleum is unfolding.
Primer
It is recommended to use mastic mixed with glue as a base. The plywood under the linoleum will be attached to this base. It is recommended to dilute this mixture a little with any solvent, and then apply it with a paint roller.
Why cover:
1. Perfectly removes dust from the surface, due to which the particles also stick to the floor, and a stronger adhesion is formed.2. It has the ability to penetrate deeply into the base, which gives the concrete special strength.