General rules
A building made of such material consists of a huge number of small elements interconnected into a single monolithic structure. Brick has three parameters - length, width and height. When we talk about single-row masonry, it means that the width of the row corresponds to the maximum dimension. For a standard stone it is 250 mm.
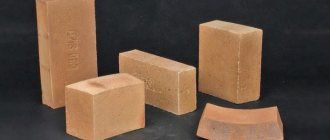
Brick stone is a piece of clay that has been processed under high temperature. Each face has a name:
- pastel – the largest side;
- spoon - medium;
- poke - end part.
Before starting masonry work, it is recommended to verify the accuracy with which the parameters of stones from different batches match.
Single brick masonry is used for the construction of small structures and interior partitions. To give the structure additional strength, the laying is carried out offset so that the top brick overlaps the vertical seam located in the previous row.
The main rule of brickwork in one brick is that the initial and final rows are always laid out using the butting method, and only whole stone is used.
Calculation of wall thickness
If you need to calculate the thickness for a future brick wall, take into account the dimensions of the standard product:
- width 120 mm;
- length 250 mm;
- thickness 65 mm.
Recommended thickness of solid brick walls for residential buildings.
The weight of one cubic meter of brick is approximately 1800 kg. When making calculations, it is necessary to take into account the climatic features of the area where construction is being carried out. For example, if in winter the temperature reaches -25 °C, the width of the external walls should be calculated as 51 cm (2 bricks) or 64 cm.
Given this feature of building materials, it is easy to perform calculations and find out the expected consumption of bricks to build a house. For example, construction is planned to be carried out in areas where severe frosts are common. It is planned to build the structure without installing an insulating layer. In this case, the thickness of the walls should be 51 cm. This means that the masonry should be made 2 bricks thick.
Knowing the length and height of a structural element of a building, it is not difficult to calculate the area for each individually. Next, we find out the area of the brick and calculate the amount of material that will be required to build a wall with specific parameters. Multiply the amount calculated for one of them by the weight of one brick - you get the weight of the wall.
1 m³ of brick weighs 1800 kg. If we take the weight of the wall as X, we can calculate the required amount of building material (Y): X/1800=Y (m³). If you find out the price of bricks, and it can vary depending on the suppliers, then you can very simply calculate the total amount that the construction of the building will cost.
Preparing the solution
Masonry mortar is an important product that ensures the safety of a building. It consists of three components - cement material, river sand and water, combined in certain proportions.
The sand is pre-sifted and dried, after which it is combined with cement, mixed, and then water is added in portions. The resulting solution must be plastic.
How much of this component is required depends on the brand of cement. In addition, this indicator affects the final strength of the masonry.
An excessively liquid mortar mixture should not be prepared. On the lower rows, four parts of sand are laid per share of cement, but after sixty percent of the structure is removed and in order to increase strength, the amount of sand is reduced to three parts per batch.
There is no need to prepare a large volume of masonry mortar, because it quickly loses its plastic properties, and even with the addition of water, the quality of the mixture will not improve.
Basic terms
Let's start with general concepts. Everyone knows exactly what a brick looks like, and that it is ceramic and silicate, too. But not many people know how the edges of this material are correctly called. And in the description of masonry technology they appear very often.
Name of brick faces: pastel, spoon, poke
The largest edge is called “ pastel ”, the middle - side - “ spoon ”, and the smallest - “ poke ”.
The dimensions of the brick are, in principle, standardized (250 * 125 * 66 mm - single and 250 * 125 * 88 mm - one and a half), but the technology of its production is such that they can differ significantly from different manufacturers: by 2-3 mm in each edges, and this is quite a significant difference, considering the number of pieces in one row. Therefore, before ordering a batch, it is advisable to measure samples from several firings in order to determine how accurately the technology is maintained.
It is also important to pay attention to the geometry: the edges must be positioned strictly at 90°. Otherwise, bursting loads will occur and the wall may crumble.
Features of masonry
Before starting the construction of a one-brick house, certain preparatory measures are carried out. To work you will need:
- trowel;
- bushhammer;
- marking cord;
- building level, rule;
- plumb line, tape measure, square, metal staples;
- brick, cement, sand;
- concrete mixer, different shovels, container for masonry mixture, buckets.
Before moving on to practical measures, the outline of the building is outlined along the already poured foundation. At the initial row, a high point on the surface is determined and marked with brick material. It should be kept level, controlling the masonry with a cord stretched between the corners. It is allowed to use beacons installed from bricks in a middle position in relation to two corner sections.
The mortar mass is thoroughly mixed again and laid out in a strip for the brick row. For butt laying, the width of the strip should be 200 - 220 mm; for a spoon row, this figure is approximately halved.
The mortar is leveled with a trowel, the laying of bricks begins from the corner area, while the first pair of stones is adjusted on each side at the same time.
The marking cord is stretched so that it is on the upper edges of the already laid bricks. The laying is carried out from the corners to the central point of the row, guided by the cord. After this, the masonry becomes alternating - a pattern of alternating perpendicular and parallel laying is observed. After every fifth or sixth row, reinforcement is performed with a metal mesh.
The vertical seam sections of two rows laid in a row should not coincide - cracks will form and there is a possibility of masonry collapse.
Mixing mortar for brickwork
To connect the bricks into a monolithic and strong wall, you will need cement mortar. And in this section of the article you will learn how to prepare it.
Step 1. Prepare all the necessary components - M400 cement, good sand, a small amount of water and a plasticizer. The latter is necessary to create an elastic, high-quality mixture that will lie on the brick and smooth out without any problems. Use either specially formulated additives or regular detergent as a plasticizer.
Preparing everything you need
Step 2. Turn on the concrete mixer, pour three-quarters of a bucket of water into it, then add 30-50 ml of detergent. Wait until the mixture of the two liquids is thoroughly mixed and foams.
Adding detergent
Step 3. Fill two buckets of sand. Also wait until all the components in the concrete mixer turn into a mixture.
Sand is poured
Step 4. As soon as the sand and liquid are mixed, add two more buckets of sand. Repeat the same steps as in the previous operation.
Sand is poured a second time
Step 5. Add one bucket of dry cement grade M400 to the concrete mixer. Turn the bulb down a little, about 5-10°.
The pear turns slightly downward
Step 6. Stir the ingredients just until the mixture becomes slightly moist. After this, gradually add water to the concrete mixer. Do not overdo it with water, otherwise you will have to add dry ingredients and plasticizer again, and it will be difficult to maintain the correct proportions.
The solution is almost ready
Water is added to the concrete mixer
Step 7. As soon as the mixture is completely mixed and begins to stick off the walls of the concrete mixer, pour it into a previously prepared trough or any other container of suitable volume.
The solution is poured into the trough
Step 8. Stir the resulting mixture with a shovel, check how elastic it is and whether its consistency is suitable for use in brickwork.
The mixture is stirred with a shovel
Step 9. After preparing the mixture for fastening the bricks, do not forget to clean the stopped concrete mixer from any remaining mortar.
At the end, you will need to clean the turned off concrete mixer
Prices for popular models of concrete mixers
Concrete mixers
Laying "butt" and "press"
Brickwork of 1-brick walls is carried out using one of two existing methods, which differ not only in the features of the manipulations, but also in the thickness of the masonry mortar used.
The seamless version of the “back-to-back” masonry is done with a liquid mortar mixture on the walls, which are subsequently covered with a plaster composition. The masonry material is laid out on the surface of the brick row, leveled, the bricks are laid with the stones tightly pressed to the surface, leveling in place is carried out immediately, the evenness is controlled by a level.
The solution is applied in a thickness not exceeding two centimeters, leaving a small gap at the edge to prevent the mixture from being squeezed out.
The “pressing” technique is performed with a thicker masonry mixture; the brick is placed on the spoon edge to create contact along the side surface and ensure vertical stitching. It is important to maintain accuracy and precision, since once mistakes are made, the quality of the masonry cannot be corrected.
At the moment of laying, the brick stone is pressed against the trowel, the tool is quickly removed from the seam area, the width of which is created due to the applied pressure. As practice shows, the horizontal seam is twelve millimeters wide, and the vertical seam is about ten millimeters wide.
When performing masonry work, it is necessary to control the thickness of the joints, which must remain unchanged.
The method is labor-intensive and involves many additional movements, but ultimately the masonry achieves good density.
Advantages and disadvantages of a one-brick wall
A wall with this thickness has sufficient strength to serve as a load-bearing structure for low-rise buildings. This is the most common type for the construction of garages, small cottages and garden houses for seasonal residence, summer kitchens and outbuildings.
A one-brick wall can support the weight of the floor slab and the truss system of a pitched roof.
More detailed information about floor slabs, their types, markings, as well as how to calculate the load on the slab can be found here. Read this article on how to install a gable roof rafter system.
It is used as inter-apartment partitions in brick, panel or monolithic houses. A thickness of 250 mm is the minimum size of a brick wall that provides the required strength as one of the floor supports.
Read here what other materials you can make partitions from.
For these purposes, solid bricks with a grade of M150 are used. In addition, such a partition with finishing layers of plaster provides the required sound insulation index.
But the load-bearing capacity of a wall of one brick is not enough for the construction of multi-storey buildings. But in terms of thermal insulation properties, this thickness is not enough for the external walls of a heated room.
According to new standards introduced in 2003, a thickness of two bricks (51 cm) also no longer provides the required level of thermal protection.
Aligning the corners
Now let's look at how to correctly lay corners, the construction of which requires close attention. It is these areas that are the basis for the construction of the walls of any structure - a garage box, a bathhouse, a country house. Mistakes made contribute to the violation of the geometric shapes of the building and the weakening of its reliability and stability indicators.
At the initial stage, orders are fixed in corner areas. At the same time, remember that the placement of corners should always be several rows ahead of the laying of the entire wall.
Types of masonry along the width of the wall
The masonry varies depending on the number of bricks along the width of the wall. There are masonry of a quarter, half, one, one and a half, two and two and a half bricks.
Quarter brick masonry
The most economical masonry. Involves laying each brick on a spoon. For example, if you take each brick measuring 350x120x65 mm, then the thickness of the masonry will be 65 cm. A wall laid in a quarter or half brick should not exceed 3 m in length and 5 m in width.
Half-brick masonry
When laying half a brick, each building element is laid on a bed. The width of the masonry becomes the width of the brick. For example, if you take a brick measuring 250x120x65 mm, then the thickness of the masonry will be 12 cm. In this way, continuous masonry is laid in a monolithic structure.
Laying ceramic bricks in one brick
Single brick masonry. This laying of ceramic bricks will be wider. Allows you to make a wall 230 mm wide. That is, according to the size of the longest side of the brick block. This is the simplest masonry. It can be easily handled by 1 person. Bricks can be laid either by pushing or pressing. In the latter case, the thickness will be greater.
One and a half brick masonry
The one and a half brick wall will have a thickness of up to 38cm. The width consists of the length of 1 element (usually 250 mm), as well as the width of the adjacent element (120 mm). Of course, the thickness of the seam is added - 10-12 mm. Such masonry can be used, for example, when facing bricks are not used. A chain ligation occurs. With it, there is an alternation of tie and spoon rows.
Two brick masonry
The two-brick wall is about 50 cm (510 mm) wide. The height of the structure based on 2 brick blocks and the joints between them is 154 mm. Calculation: height: one brick - 65 millimeters, seam height is 12 millimeters. It involves laying brick blocks in horizontal rows. It is necessary to take into account the geometric characteristics of the building, its purpose, and the greatest load. In addition, you need to keep in mind the thermophysical properties.
Laying 2.5 bricks
2.5-brick masonry is masonry with a width of about 62-64 cm. It is used when the building needs to be significantly strengthened. Usually there is an alternation between a joint row and several spoon rows. They start with the butt row. Bandaging the seam with an offset, usually half a brick. In a tray row, the bricks alternate: from the front side and from the back. Between them are bricks placed with the butted side.
Three brick masonry
It is rarely used when a thorough wall seal is needed. Heat loss with such a width of the walls will be minimal. But you need to first take care of a more reliable foundation. Also take into account that the cost of purchasing bricks and labor will be higher.
This type of ceramic brick laying is rarely used, because according to standards everywhere, the maximum accepted thickness of the entire brick wall will be no more than 2.5 bricks. To build a wall with 3 bricks, use the 2 + 1 brick scheme. Each subsequent row will change by simply superimposing these combinations on top of each other. For example, 2 outside + 1 inside, the next row is the opposite: 1 outside + 2 inside and so on. It is necessary to lay out the outer wall with either 1 brick or two in order to link all the bricks into one whole. The width of the masonry will be 770 mm or more.
All masonry width values are approximate, since the thickness of the mortar and the exact size of the brick chosen for construction are not taken into account.
Useful tips
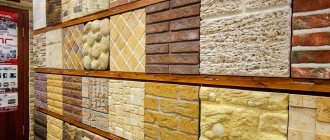
First of all, decide what kind of brick material you will be dealing with - for front finishing or interior installation. Red brick is considered a classic option; its parameters have not yet changed. The rest of the brick stone is characterized by its size and application for certain objects. White sand-lime brick is considered a cheaper material; it is no different in size from red stone, but is somewhat heavier in weight. It is not recommended to carry out construction with such material above eight meters, since a large load is created on the lower rows. The quantity of each type of brick material should be determined based on the consumption per square meter of masonry and the load allowed by the design specifications.
If you are building a building for commercial purposes, it is recommended to lay out the walls using the spoon method. To enhance the load-bearing capabilities of the structure, masonry rows alternate with the bonding technique. First, a bonded row is laid, after which a double row is laid, in which the bricks are installed on the edge in pairs. After this, the partition turns out to be strong and reliable.
For reinforcement, you should use a steel mesh, the cell size of which is 3 by 3 centimeters. It is laid on the first row and after every fifth or sixth.
The first and final rows are laid perpendicular to the main masonry to form a fastening belt. When working with masonry mortar, ensure that the joint areas are completely filled to prevent the formation of drafts.
Bricks can be laid in rows or in several lines simultaneously, creating for each of them a corresponding offset with respect to the vertical seam. The second option is complex and requires certain skills. You will have to constantly monitor the evenness of the wall being built.
Before laying, the material is slightly moistened to improve its adhesion to the masonry mortar. This is most important if construction work is carried out in regions with hot climatic conditions. There is one peculiarity - masonry work is always carried out from inside the room, the evenness of the rows is checked by a stretched cord. Work starts from the corner areas. This stage is the most important and is performed under constant control of the vertical and horizontal levels.
Masonry work is carried out along the entire perimeter, under the hand of a mason. The height of the corners should exceed the main wall by three to four rows.
The masonry is completed by joining the joints.
How to lay bricks correctly - step-by-step instructions
Now let's start describing how to lay bricks correctly. For this purpose, several step-by-step instructions have been created, each of which is included in a separate subsection.
Important! Before starting construction, it is advisable to “practice” making brickwork and its individual elements, such as corners and pillars. This will give you basic mason skills and will save you from some mistakes in the process of building your own house, barn, garage or any other building.
Dry laying on the plinth
Work begins with laying out the first row of bricks “dry”. It is necessary to calculate how many blocks will be needed in this case, and to give an approximate idea of how to make the correct masonry.
Step 1. Unpack the bricks and check the bricks from different pallets. Due to certain characteristics of the raw materials and technological process, they may differ from each other in shade or size. Identify these features in advance. When laying walls and other structures, it is advisable to use bricks from the same batch and the same shade.
Checking unpacked bricks
Step 2. Spread and secure roofing felt on the base or foundation - it is necessary for waterproofing. Without it, the brick will “draw in” water, which will not have the best effect on its durability. Then lay out the first row of blocks without mortar and careful adjustment. Prepare a pin or piece of reinforcement with a diameter of 8 mm - it corresponds to the thickness of the mortar layer between the bricks.
Laying the first row of bricks on top of roofing felt
Step 3. Now lay the bricks on the edge of the plinth, carefully aligning them and maintaining the required gap using a pin of the appropriate diameter. In this way, dry laying is done around the entire perimeter of the building being built - pay special attention to the corners.
Laying out the second row
A pin is used to maintain the gap
Step 4. Measure the length from one corner to the other and write down the results. Also take diagonal measurements to see if everything is correct and if the project numbers are being met.
Measurements are being taken
Step 5. At the corners, mark the plinth with a pencil in the places where the edges of the bricks will be located. If you wish and have time, the same marks can be placed along the entire length of the walls - this will require additional effort from you now, but will greatly facilitate the work in the future.
Marking with a pencil
Laying out the first row
One of the most critical stages in laying bricks is working with the first row. The quality of the subsequent masonry and the entire structure as a whole depends on how correctly it is laid out. Take this into account and carry out this work as carefully as possible.
Step 1. Using the marks made during the dry laying stage, lay the first bricks on the corners of the plinth. In this case, a reinforcing mesh of wire was laid on top of the roofing felt.
First brick laid
Step 2. Having placed the corner bricks of one of the walls on the mortar, carefully adjust them to their height using the handle of a trowel or very light and careful blows with the blunt part of a pickaxe hammer. In this case, be sure to use both a water level and a building level - you need to make sure that the blocks on the two edges of the walls are located at the same height.
The process of fitting corner bricks
Step 3. Using the same principle, lay out the first row of bricks at all corners of the future building.
Laying the second corner brick
Step 4. Stretch a mooring thread between the corner bricks, which will be used to align horizontally and vertically all the other blocks of the first row. The cord is secured either using corners (as in the photo below) or in a row. Please note that the mooring thread should not sag and that when laying it, it is not advisable to “push” it towards one of the edges of the brick.
The mooring thread is stretched
Step 5. Proceed with laying out the remaining bricks of the first row. Using a trowel, lay the mortar on the plinth, level it to a height of about 1.5 cm, lay the brick, level it horizontally and vertically, using a mooring thread. If this is your first time working as a mason, check with a building level. In this case, it is allowed to adjust the brick by lightly tapping it with the handle of a trowel or the blunt end of a pickaxe hammer. After this, the thickness of the horizontal seam should be approximately 8-10 mm, and the vertical seam - 8 mm. Remove excess solution with a trowel.
The second brick of the first row has been laid
Step 6. Using the same principles as stated above, lay all the bricks of the first row.
Laying the first row of bricks
Step 7. After laying the last brick in the first row, check again whether the height of all the blocks is the same, whether there is any bulging forward or backward relative to the base. If everything is in order, proceed to laying out the corners of the second row, moving the berth and further construction work.
You can start laying out the corners of the second row
Laying bricks end to end and pressed together
After laying out the first row, it is necessary to begin creating subsequent layers of brickwork. In this case, the actions are carried out according to a similar algorithm - corners are created, the thread is stretched, blocks are laid. In this subsection we will focus on the last operation. There are two main techniques for laying bricks - end-to-end and pressed. Let's consider both in turn. Let's start with laying bricks using the end-to-end method.
Step 1. Stretch threads along the upper edges of the laid out row. It is advisable to do this both from the outside and from the inside. Then pour cement mortar onto the bed of the previous row of bricks.
The threads are stretched along the upper ribs
Step 2. Using a trowel, spread the mortar over the surface of the previous row of brickwork. Its thickness should be slightly greater than the thickness of the horizontal seam you plan. Also make sure that the mortar completely fills the vertical longitudinal and transverse joints on the previous row of brickwork.
The solution is spread over the surface of the previous row of brickwork
Step 3. Take a brick, tilt it down a little with a spoon or a poke (depending on how you need to lay it) and, immersing it in the solution, move it so that a layer of the mixture floats onto the tilted edge. As a result, you have horizontal and vertical seams at the same time.
Laying bricks
Another photo of the process
Laying bricks end-to-end with the tongue edges adjoining each other
In the illustration you can see how the bricks are laid in place, both for spoon and bonded masonry
Step 4. Using the same principle, lay the remaining bricks. If they deviate in height from the boundary established by the mooring thread, adjust them by lightly tapping them with a trowel or hammer. Cut off the excess mortar from the outside with a trowel, and partially fill the vertical seams where there is not enough mixture.
Laying the remaining bricks
Now let's look at laying bricks against each other.
Step 1. As in the previous instructions, stretch a mooring thread along the upper edges of the row, and lay out and level the mortar on the bed of the underlying layer of bricks.
Laying bricks pressed
Step 2. Then turn the trowel on its side and, with a gentle movement over the mortar, rake part of it to the vertical edge of the brick next to which you are going to lay the new one. As a result, you should have an even side seam.
Part of the mortar is raked to the vertical edge of the brick
Step 3. Holding the mortar on a vertical edge with a trowel, lay the brick in the desired place and press it to the bed of the previous row and to the spoon (or poke, depending on the type of masonry) of the adjacent block. Carefully pull out the trowel.
The brick is laid in the right place
Step 4. Using the same principle, lay the next brick. Adjust them in height with light blows with the handle of a trowel, if necessary.
Laying the next brick
Adjusting brick height
Step 5. Cut off the excess mortar that has flowed out of the horizontal and vertical seams with one movement of the trowel. The mixture can be sent to a bucket to its main part or placed on top (in the case when the joint of the pokes or spoons of two bricks is not sufficiently filled with mortar).
Removing excess solution
The diagram shows the principles of installing bricks using spoon and butt laying.
Step 6: Repeating the previous steps, lay out all the remaining bricks in the row.
The remaining bricks are laid out
Prices for cement and basic mixtures
Cement and base mixtures
Video - Brickwork for beginner masons
Video - Mistakes of novice masons in brickwork
Practical advice from experts
- After every five to six rows, reinforcing mesh is laid.
- The bricks should be bandaged, that is, the seams of adjacent rows should not overlap.
- Before laying, each brick is immersed in water for better adhesion of the mortar.
- If you are doing masonry for the first time, then start with primitive buildings (steps, columns, etc.). After this training stage, it will be easier to lay out more complex structures - a summer kitchen, for example, or a brick grill.
- After preparing the tools and consumables, it is advisable to carry out the so-called dry masonry (without using mortar) in order to identify possible flaws. If everything is fine, then you can start laying the mortar.
- For the first experiment, the best choice is a face brick (it has a smooth side) or a chocolate brick (with excellent decorative properties), the dimensions of which are slightly smaller than usual. Conversely, you can use rough brick, which looks like natural stone.
- Before proceeding directly to the laying, you need to draw up a detailed plan in which all the rows of bricks will be drawn. This will avoid unnecessary costs, since brick is a very expensive material. The dimensions of the brick are as follows: 6.5x12x25 cm. When calculating, you should “throw” about 10% more on top of the required amount, since damage is inevitable (especially if the laying is being done for the first time).
And remember the main thing - there is no need to rush. First, lay the brick dry, as we have already discussed, then apply the mortar and begin laying, tapping each piece with the end of the trowel so that it takes the desired position. The solution that protrudes out must be removed with a trowel and thrown back into the bucket.
Bricklaying
There is no need to rush when working with the solution, because this is not a “Moment” that sets in a few seconds. You will have enough time to experiment with installation, remove and install mortar, turn the bricks in one direction or another - in a word, make sure it turns out perfect. After acquiring the appropriate skills, you will be able to put the required amount of mortar on the trowel the first time and immediately install the brick in the required place. This way the laying procedure will be completed much faster.
| Name | Average density, kg/m3 | Porosity, % | Frost resistance grade | Strength grade | Color |
| Solid brick | 1600-1900 | 9 | 15-50 | 75-300 | red |
| Hollow brick | 1000-1450 | 6-8 | 15-50 | 75-300 | light brown to dark red |
| Hollow brick “super-efficient” | 1100-1150 | 6-10 | 15-50 | 50-150 | shades of red |
| Facing brick | 1300-1450 | 6-14 | 27-75 | 75-250 | white to brown |
| Glazed or engobed facing brick | 1300-1450 | 6-14 | 27-75 | 75-250 | any |
| Brick parameters | Hyperpressed brick | Clinker brick | Sand-lime brick | Ceramic brick |
| Compressive strength, kg/cm² | 150-300 | 300-500 | 75-200 | 100-175 |
| Frost resistance, cycle | 75-150 | 50-100 | 35-50 | 15-50 |
| Moisture absorption,% | 6-8 | Less than 6 | 6-12 | 6-8 |
| Thermal conductivity, W/m° C | 0,7-0,8 | 0,7 | 0,3-0,7 | 0,3-0,5 |
| Weight for size 250x120x65., kg. | 4 | 3-4 | 3,8 | 3,5 |
Prices for building bricks
Construction brick
Find out how to lay facing bricks with step-by-step instructions from our new article.
And as a conclusion – a thematic video material.