A fairly common everyday situation: you purchased an apartment on the secondary market and are already making plans to renovate it soon. And everything would be fine, but one moment can ruin your mood for a long time. We are talking about walls painted with old paint and varnish material. If a lot of time has passed since the walls were painted, then you will have to work hard to get this job clean. How to remove old oil paint from walls as quickly as possible? Despite the obvious difficulties, there is a solution to this problem. More precisely, there are even several of them. About all of them - in today's material. And you can learn how to get rid of a more classic type of wall decoration from the article: “How to quickly remove wallpaper from walls.”
- Axe, hammer, chisel - rough but effective;
- Washing with special solutions;
- Thermal effects: hair dryer, iron;
- Grinder and drill - mechanics for quick results;
- Conclusion.
When should you remove old paint and why?
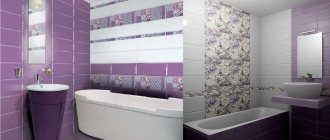
It's no secret that 15-20 years ago, the favorite finishing materials of all builders were paint and paper wallpaper. You can especially often find painted walls in the bathroom and toilet, in the kitchen or in the hallway. Builders with a creative approach to their work often decorated the walls with flowers and boats. Unfortunately, such a print stops touching when it becomes necessary to get rid of it. It’s one thing when the old paint has already peeled off and can be easily removed with the help of a spatula. And it’s quite another thing when there are several layers, they are applied conscientiously and adhere with enviable strength. Assuming the full burden of future work, many give up and the thought creeps in: “ what about him?” "
We hasten to please you - in some cases,
old paint really not an obstacle to further finishing work. It all depends on their type:
- For example, if we are talking about a bathroom, where there is a need to level the plane of the walls for further laying of facing tiles, you can simplify the task with the help of plasterboard. Some walls are so curved and have such obvious differences that sometimes it is actually faster and even more economical to level them with plasterboard fixed to profiles than with plaster. Plus you will get a surface with excellent adhesive properties;
- For fastening plastic or other wall panels, lining, old paint will also not be an obstacle;
- If you plan to repaint and the surface of the walls allows you to do without leveling them, you can apply a layer of new coating on top of the old one. Provided that it does not swell, does not peel, holds tightly and does not have cracks. In some cases, individual areas of peeling paint can be removed, and the resulting unevenness can be filled with finishing plaster. But please note, this point only applies to situations where acrylic paint is applied to old acrylic paint, or enamel paint to old oil paint. If acrylic or water-based paint is applied to old enamel paint, these compounds simply will not “stick” to the glossy surface. Perhaps, when applied, it will seem to you that the paint is still evenly distributed on the surface and everything worked out, but after drying you will find separate islands of a new color, which are interconnected by thin cobwebs;
- Modern means will allow you to avoid the need for old coating before tiling the walls. For example, a primer composition called “concrete contact” and other interpretations of the name with a similar meaning promise good adhesion after drying, even with a completely smooth surface. Even glass appears on the list, and on the Internet you can find a lot of video evidence.
- If you plan to apply wet plaster and other compounds, such as wallpaper glue, for example, to the walls, the paint must be removed without fail . Plaster simply will not “stick” to a smooth surface. The paint has minimal ability to absorb liquid, so the usual primer simply will not be able to penetrate its structure and ensure adhesion. And under the weight of heavy wallpaper soaked in glue, the paint can simply come off along with the freshly pasted wallpaper. Even if at first glance, it seems that she is holding on tightly.
When to remove oil paint from walls
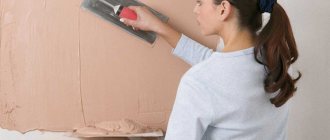
The need to remove the old coating arises when the walls need to be leveled with plaster, putty, painted, wallpapered or tiled with ceramic tiles. This is necessary for the new coating to last. If the work is done on an old paint layer, the result may not last long.
What to consider when choosing a paint removal method?
Before starting labor-intensive and time-consuming work, it is necessary to understand what we are dealing with and try to choose a method that will still prove to be most effective with the least amount of labor and time. To do this, you need to pay attention to five determining factors:
- Decide how much money you are willing to spend on purchasing the necessary tools or solutions, and whether you are ready at all;
- What time do you have? After all, it happens that the worker whom you hired to lay the same tiles suddenly gets released earlier than the agreed time and is ready to begin work at your home within a day. Then you will have to prepare the walls at a very fast pace;
- An important role is played by type of base. It can be plaster, cement, brick or concrete;
- Type of paint – acrylic, water-based, oil or enamel. Of course, it is very difficult to do this by visual inspection, but it is still possible to distinguish the oil composition from others. Let’s say right away that the hardest part will be removing oil paint from a concrete base;
- And the last thing - number of layers paint coating. A thin layer can sometimes be much more difficult to remove than a thick layer, which breaks off in plates upon impact due to its own rigidity.
It’s best to “test it by the teeth” and try to remove a fragment of paint on a small section of the wall using each of the methods in turn, starting with the simplest ones.
Mechanical restoration
When figuring out how to remove old paint from wooden surfaces, they often choose the simplest method. It comes down to mechanical removal of the paint layer. There are several ways to do this. First you should evaluate the structure of the material. If the wood is soft, then abrasive particles from tools will destroy the product.
When using any mechanical method, do not press hard on the tool.
Processing the product with sandpaper
Sandpaper allows you to quickly erase the old coating. But suitable for a thin layer. Repeated staining of sandpaper will not completely remove it. Also not suitable for difficult places on the product.
The technology for using sandpaper consists of the following steps:
- Prepare the sandpaper. You will need several sheets of different grain sizes.
- Begin by processing with coarse sandpaper. This will remove the top layer.
- Change the coarse grain to a finer one and use this sandpaper to clean the wood. The treatment is carried out until the surface becomes smooth.
To make the process easier, it is recommended to take a piece of timber and wrap it with sandpaper. It’s more convenient to work this way. The advantage of this method is the low probability of damage to the product and the availability of tools.
To make the process easier, it is recommended to take a piece of timber and wrap it with sandpaper.
Cleaning the product with an angle grinder (angle grinder)
The grinder cannot be turned on at full power when used in this case. It can damage the wood. To quickly get rid of the old paint layer, it is recommended to use a petal nozzle. The workflow is simple. You need to take a stable position, grasp the tool with both hands so that it does not slip out, and begin to process the surface. Paint particles quickly clog the discs of the machine. Therefore it is necessary to change them regularly. When the last layer of paint appears, it must be removed manually. To do this, use sandpaper. The resulting dust can be wiped off with a cloth previously moistened with water.
The grinder cannot be turned on at full power when used in this case.
Using a drill
The drill must be kept perpendicular to the wood when processing. The movements are not abrupt, smooth and accurate. Efforts need to be applied slowly and gradually. Paint particles may fly in different directions. Therefore, when choosing this method, be sure to use safety glasses. To avoid damaging the product, it is recommended to use special grinding attachments.
The drill must be kept perpendicular to the wood when processing.
Hard paint brushes
When using a hard brush, the product being treated must be taken outside. If this is not possible, all surrounding objects and surfaces are wrapped and covered with polyethylene.
This method consists of the following steps:
- An ax is used to make notches on the product. The wood is moistened with water and left for a couple of minutes so that the liquid is absorbed.
- The surface is treated with a metal brush, removing the top painted layer. To increase the effect of the process, it is recommended to hold the tool at an angle to the product.
- The bottom paint layer is removed with sandpaper.
This method is often used to process doors and window frames.
When using a hard brush, the product being treated must be taken outside.
Mechanical methods of paint removal
Usually, first of all, they try to remove the coating mechanically. It should immediately be noted that these methods are the most labor-intensive, but at the same time one of the most accessible. A variety of tools are used, starting from the simplest. Before starting work, it is necessary, if possible, to clear the room of furniture or cover the surfaces with film, which should remain clean and free of dust and paint particles. Let's take a closer look.
No. 1. Using a spatula
This is the very first tool you might want to use to scrape off peeling paint. A spatula can definitely be found in almost any home. The advantage of the method is the complete absence of dust and the fact that it is possible to remove paint even in corners and other hard-to-reach places - around switches or sockets. Disadvantages inability to cover a large surface area in one approach. During operation, small particles of paint break off and can get into your eyes, thereby injuring them. Therefore, be sure to think about personal protective equipment. This rule applies to absolutely all methods of removing old coating.
No. 2. Using a chisel and hammer
When you reach a section of the wall where there are no cracks or blisters of paint and the spatula is no longer effective, you can try to remove it with a chisel. It does not bend during operation, unlike a spatula, and if necessary, you can tap its handle with a hammer. It is necessary to sharpen the tool periodically. It will quickly become dull from constant friction on a hard surface.
No. 3. Using an ax or pick
This method is incredibly labor intensive. You will have to swing the ax for a long time, so we advise you to choose a tool that is not too heavy. At the same time, it should not be too sharp. The essence of the method is to apply notches to the wall. The blows must be directed tangentially to the wall. The length of the notches can reach several centimeters, and they should be located at a distance of no more than 10 mm from each other. Only on such a surface will the putty or adhesive composition lie quite reliably. But the main drawback of the method actually lies a little deeper. Think about how many blows you will have to hit the wall and understand that each of them will little by little destroy the integrity of the base that you want to rid of the hated paint. Not all walls can withstand such torture and remain strong and reliable.
No. 4. Using a drill with various attachments
This method can be called optimal in terms of speed and safety. Plus, due to the fact that a drill is not the heaviest hand tool, your hands will get much less tired when working. Safety is achieved due to the fact that work is performed at low speeds. Before you start, be sure to check the functionality of the tools - whether the wire is broken, whether the cartridge is holding well, whether the device is sparking. In order not to be distracted by trifles, make sure that the cord is long enough to move freely along the entire length of the room, use an extension cord. Be sure to wear a protective mask, closed clothing and shoes, and a hat. Never leave the sleeves of your clothing unfastened and do not wear gloves. When working with torquey tools, their use is unacceptable - the reliability of fixing the tool in your hand deteriorates and you simply may not be able to hold it. In the best case, the instrument itself will suffer if it falls; in the worst case, it will injure the performer.
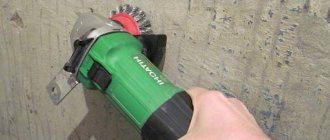
Now you need to adjust the speed of rotation - turn on the drill without an attachment and select the minimum mode. Now attach the attachment, tighten the chuck well and get to work. It is necessary to touch the wall only with the surface of the nozzle and do not move too quickly. The most commonly used is a wire brush. But in practice, it is less effective than an attachment in the form of several connected chains of 3-4 links with a washer at the ends. In addition, sometimes the metal bristles come off and can dig into unprotected areas of the skin;
No. 5. Using a grinder
This method can be called the fastest and at the same time the most dangerous. The grinder is a high-speed tool. If you do not have the skills to work with it, you can be seriously injured. No one is immune from the destruction of a disk during operation, the fragments of which fly at incredible speed in different directions. The disadvantages include a high noise level and a huge amount of dust. The work is usually carried out using a wide range of tools.
To summarize , we can say that mechanical methods are suitable for removing absolutely any type of paint - both acrylic and oil. It’s just that some of them will need to be wetted periodically and then removed with a spatula, wire brush or power tool.
Choosing a cleaning method depending on the type of paint
All of the above methods are perfect for removing oily compounds. However, some modern compositions, for example, water-based or acrylic, require a special approach.
To figure out how to clean walls from old paint, you need to know what components it is made from.
Water-based
Water-based emulsion is often used in rooms with high humidity. Although the composition contains water, it will not be possible to wash it off the walls by simply rubbing the surface with a wet brush or sponge.
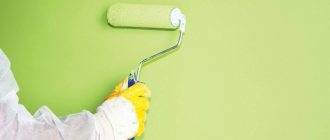
To clean the wall, you will first need to moisten it well with a roller. In order for the paint layer to completely soften, you will have to treat the surface with a wet roller several times. If the room is warm, it will dry out very quickly, so you may need to dampen the wall at least 8-10 times. Then the water-based emulsion is removed using a scraper or wide spatula.
Before removing the water-based finishing coating, it must first be softened with water Source duluxe.ru
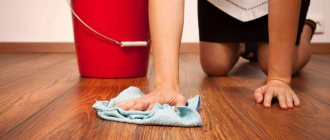
It must be taken into account that the softened paint will flow onto the floor. To protect laminate or parquet, you must first cover the corners between the floor and walls with moisture-absorbing fabric.
If desired, instead of water, you can use paste, wallpaper glue or PVA glue. These compositions also promote the dissolution of the water emulsion. However, at the end of the work they will have to be washed off with water.
Acrylic
To remove acrylic paint, use the dry method. It is not recommended to wet the wall with this type of finishing coating. You can knock it down with an ax or scrape it off with coarse sandpaper, or take a drill with a brush attachment made of metal.
There is another answer to the question of how to remove old paint if you don’t have the necessary tools at hand. The acrylic coating is easily removed with a regular metal mesh for cleaning dishes.
The choice of cleaning method depends on the strength of the coating: the higher quality the paint, the more difficult it is to remove. If you plan to paint the wall again with acrylic paint, then you don’t have to remove the old one.
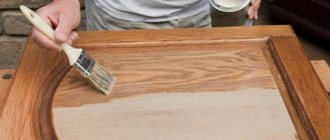
There are many attachments for drills and grinders that make it easier to remove a layer of paint and clean the surface Source ytimg.com
Thermal methods
Methods of removing old paint layers using elevated temperatures are also considered extremely dangerous. When carrying out such work, you need reliable protection and concentration and, of course, experience with the tools below. There are three commonly used methods.
No. 6. We use a regular iron
For a coating that is no longer held in the most reliable way, the method of applying temperature using a regular iron is suitable. Through a sheet of thick foil, food grade, the desired area is heated well, and then the softened coating is removed using a spatula.
No. 7. We use a hair dryer
In a similar way, only much faster, you can “melt” the paint using hair dryer, and then remove it with the same spatula or other convenient scraper.
No. 8. Blowtorch method
Sometimes a blowtorch is used. Or in other words, a burner running on kerosene or gasoline vapors. On average, one liter of fuel is enough for continuous operation for 20-50 minutes. The flame must be brought as close to the paint as possible and watched carefully. When the paint begins to melt but not burn, you can scrape it off the wall.
All thermal methods are necessarily accompanied by a sharp and unpleasant odor that appears when the paint is heated. Therefore, it is strictly not recommended to work in unventilated areas. Also, under no circumstances should you heat places where electrical wires pass or where there are wooden embedded parts in the wall.
Thermal effects: hair dryer, iron
Perhaps, this method of removing old paint from walls can be safely recommended to anyone who does not want to bother with an ax or expose themselves to the risk of getting a chemical burn when working with stripping solutions.
- heating the old layer makes it more accessible to a narrow spatula;
- the entire wall surface is divided into segments - sequential work is carried out with each;
- during the process of heating the paint, some toxic substances can be released into the air - it is necessary to ensure a flow of fresh air during the operation;
- The use of this method in areas with electrical wiring is excluded.
What you will need
- construction hair dryer;
- iron;
- foil;
- putty knife.
Work order
- turn on the hair dryer and heat the selected area until the old layer softens;
- scrape it off with a spatula;
- We take on the next section - and further according to the developed algorithm;
- if you don’t have a hairdryer, you can use a regular household iron and foil: heat the selected treatment area through the foil and then use a spatula.
If your wall is not made of concrete, but of plasterboard or plastic, then you should exclude the thermal method
of removing oil paint - this will simply destroy the wall. In addition, be extremely careful when handling the iron - due to inattention, you can get burned.
Chemical methods
Methods for removing old coating using chemical reagents can be called the least labor-intensive. You just need to carefully distribute the product on the surface, let it act on the paint for the recommended time, and then remove the softened coating.
No. 9. Ready-made paint remover
The time interval is always indicated on the packaging, as well as recommendations for use, which we advise you to strictly adhere to.
- All chemical compounds have pungent, unpleasant odors and are very aggressive. Be sure to work with gloves and a respirator, and while the solution is working, it is better to leave the apartment altogether, opening the windows for ventilation;
- Also, after completing the work, you cannot simply take and pour the remaining solution into the sewer. Chemicals are very caustic and must be disposed of properly. This is also mentioned on the packaging or in the instructions;
- The cost of can also be intimidating , but believe me, after you try to remove paint with a spatula, an ax or a grinder and none of the above gives the desired result, you will not want to save. Often, one liter of solution is enough to remove paint from the walls of a standard-sized bathroom and toilet;
- Please also note that some compounds may be intended for use only on horizontal surfaces.
Depending on the component of the base, ready-made compositions are:
- Acidic - based on hydrochloric or phosphoric acid;
- Alkaline - based on salts of various origins;
- Organic - which does not contain any salts or acids.
For removing old paint from stone surfaces, the most suitable .
According to the release form, solutions can be in the form of:
- Liquids - alkaline or acidic concentrates that must be diluted;
- Gels – have a milder effect and are produced on the basis of organic compounds. More convenient for use in enclosed spaces, as they do not have such a strong odor;
- Powders - used both in the form of solutions and independently;
- Aerosols - designed for working with small areas and are very convenient.
Selecting a composition for a specific type of paint is not difficult. In order not to make a mistake in choosing a remover, it is better to purchase universal solutions that are suitable for removing any type of paint. For example:
- Wash "Fail-5" — designed specifically for removing old paint and dissolving even powder compositions. It begins to act a few minutes after application. You will see how the old coating begins to become covered with small cracks;
- “Anti-paint” is a universal fast-acting remover suitable for removing paint not only from walls, but also from the floor, floor, metal, wood, plastic;
- “Docker S4” is a general construction remover used to remove all types of paintwork.
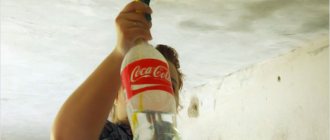
No. 10. How to make a wash with your own hands?
Still, you can try to save money and prepare paint yourself:
- You need to mix 250 ml of ammonia with a liter of cold water. The alcohol must be 10%. Add 2 kg of regular chalk to the resulting liquid and mix thoroughly until a paste-like mixture without lumps is formed. The resulting slurry is applied to the wall in an even layer. After a couple of hours, you can start removing the paint. Such a composition should not destroy the paint layer itself, but disrupt the strength of its adhesion to the base material;
- Another popular method is to mix 1.2 kg of quicklime with 400 g of soda ash, then add water. The mixture should resemble thick sour cream in consistency. It is applied to the wall for at least 12 hours;
- You can use liquid glass. It is applied in a thin layer over the old paint. After drying, a thin silicate film is formed, which should peel off along with the paint.
Typically, the above methods work well for either removing recently applied or worn-out coatings. For strong layers of paint, it is better to use ready-made, special washes.
Washing with special solutions
Compared to the previous method, this one can confidently be called more elegant. Of course, why create so much dust and swing an ax non-stop if you can use what modern industry kindly provides us with.
- the compositions contain dangerous reagents;
- good ventilation is required during work;
- quite high cost of flushing fluids;
- More suitable for floors than walls.
What you will need
- flushing solution;
- roller or brush;
- putty knife;
- protective gloves and respirator.
Work order
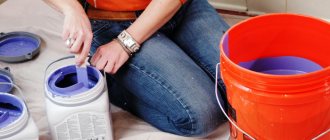
- using a roller or brush, apply the solution to the wall;
- wait for the oil paint layer to soften;
- remove it with a spatula - quickly and easily;
- repeat the operation if the paint is applied in several layers;
- At the end of the work, we clean the wall with water and dispose of the solution.
Washing technology
When the choice of a suitable product has been made, it’s time to figure out the correct technology for its application:
- For the most effective and deep penetration of the reagent into the layer of old paint, the surface must be free of dust and other contaminants. You can wash the walls using household chemicals, and then scrub them with a stiff brush or coarse sandpaper;
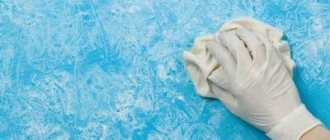
- Now we apply the chemical composition itself. This should be done using a wide brush or roller. Do not wet them too much so that the product flows or drips onto the floor. It is better to direct movements in one direction;
- So that the reagent does not evaporate from the surface so quickly and has time to have the proper effect on it, you can cover the surface with a film. This, of course, must be done with gloves;
- After the recommended time, remove the film and remove the paint;
- At the end, you need to wash off the remaining reagent from the wall and neutralize its effect. The manufacturer will definitely provide recommendations on this matter.
That's all, your walls are ready for further transformation. If one of the above methods does not give full effect, try combining it with other methods. By and large, they are all suitable for removing any type of paint.
The article was written for the site.
Tags:Preparation for room renovation, Enamels and paints
The need to clean the walls from previous finishing
Repair and finishing work is resorted to quite often:
- When the owner of a building (premises) changes, there is often a desire to transform the interior and exterior space. Redecoration often involves changing colors and finishing methods.
- Over time, fading and destruction of old paints on enclosing surfaces occurs. Removing oil paint from walls will allow for a high-quality replacement and extension of the life of houses.
- The desire to completely renovate the interior makes it necessary to remove old oil paint from the walls.
If you leave the existing coating, it is difficult to guarantee the long-term preservation of the new finishing layer. Therefore, the technology for carrying out work involves performing it only on prepared surfaces. When developing an estimate for repair work, measures to clean the space must be taken into account.
Those who neglect these requirements are faced with the following defects:
- the wallpaper on the walls does not adhere well, swelling occurs, and moisture accumulates;
- the new paint begins to peel off, in some places the walls may freeze, as “cold bridges” form in some places;
- The oil coating does not “breathe”. Therefore, in heated rooms, condensation may appear on walls in contact with open space in winter.
Tools
To remove oil paint use the following tools:
- Construction hair dryer or blowtorch.
- Spatula, sharp knife, chisel, ax for notching.
- Brush (old).
- Chemical removers.
- Electrical appliances (grinder, drill, hammer drill).
- Tool attachments.
When doing rough work, it is recommended to wear a mask or respirator, safety glasses, and rubber gloves.