Varnishing parquet is a mandatory procedure, performed at prescribed intervals or if necessary. Scheduled varnishing is carried out every 7-10 years after economical scraping and sanding of the wood surface. Unscheduled work is ordered after serious damage to the parquet caused by mechanical, chemical or abrasive action has been eliminated. Varnishing parquet is the final stage of arranging floor coverings, because without a reliable protector, the wooden base of the floor will become unusable in a matter of months. Therefore, every owner of a parquet floor should become familiar with the technology of applying varnish.
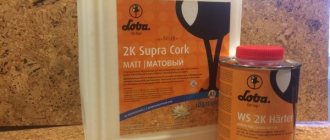
Materials for varnishing parquet - general list
Before covering the parquet boards with varnish, you need to prepare the base using special preparations, and if you want to change the color of the floor, you will need tinting compounds. Therefore, one varnish will not be enough to care for parquet. The general list of materials used during parquet varnishing is as follows:
- special impregnations - protect wood from mold and mildew, fire and insects;
- priming compositions - increase the adhesion of parquet boards and reduce the consumption of the main product;
- tinting agents - they can be used to change the tone or color of parquet;
- varnish coating - the product is used as a protector that protects the parquet board from moisture and other dangers.
In addition to varnishes, oil and wax can be used to form the finishing layer. These materials should be included in this list as an alternative. It is worth noting that when using oil as a topcoat, the use of paint and varnish material becomes impossible, since it will crack and peel. In addition, the surface is prone to rapid contamination, and wet cleaning can only be carried out using special products.
Choosing the right composition
The choice of varnish or oil is an important step on the path to obtaining the perfect coating. Experienced manufacturers always provide their product with a detailed description of its components and characteristics (consumption per square meter, shelf life, care, etc.). They should be carefully studied before starting work.
The main selection criterion is the current load on the existing flooring. In other words, spaces with a high degree of traffic require varnishes that can withstand increased loads. But if you want to cover the floor for decades, then it is better to prefer more expensive but reliable wax mastics or oil impregnations. Application of such a composition will allow the floor to be used for decades. Of course, it is worth understanding that oil is characterized by a higher cost.
High traffic areas should be coated with a special “wear-resistant” varnish
Important points that should also be taken into account are the following characteristics of the composition for application to the board:
- drying time;
- shelf life;
- estimated material consumption per square meter of board;
- rules for use and care, etc.
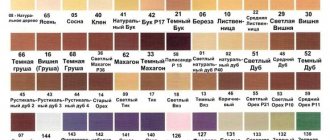
As for the color shade of varnish that should be used to cover the floor, there are no restrictions. Modern manufacturers delight customers with a variety of compositions of different shades, so you can choose the appropriate application for absolutely any style of interior decoration of the house. Manufacturers' assortment also includes materials for which maintenance is minimal.
Oil and wax - the pros and cons of natural coatings
Natural or artificial oils protect the parquet floor from water and dirt, forming a hydrophobic layer that repels moisture and dust particles. Moreover, even artificial oils are absolutely safe for human health. Another advantage of the coating is the deep impregnation of the board, which allows you to save on priming and tinting during the next treatment of the parquet.
Vegetable and beeswax are another natural material for protecting parquet flooring from moisture and dirt. Once applied to wood, it forms a thin film, so a waxed floor looks very impressive.
The disadvantages of oils and waxes, as well as complex products based on them, include the low strength characteristics of the hardened coating. Such a protector requires periodic restoration of the protective film and cannot resist abrasion.
Unlike durable varnishes, effective oil- and wax-based coatings “live” from 1 to 6 months.
Why varnish wooden floors?
- Firstly
, to protect the wooden structure from moisture, since it is the main enemy of any wood. Moreover, the tree is adversely affected not only by excess moisture, but also by its lack. With a lack of moisture, a wooden structure can change its geometric dimensions and shape. In addition, cracks may appear on it. Coating the floor with varnish provides the wooden structure with optimal operating conditions, preventing moisture loss, as well as preventing moisture from getting inside the wood. - Secondly
, the tree attracts various insects and rodents that feed on the wood. Having created a protective film, many insects and parasites are unable to reach living wood. - Thirdly
, the protective varnish film improves the mechanical characteristics of the floor, making it more resistant to abrasion. - Fourthly
, a varnished floor is less dirty and easier to care for. - Fifthly
, varnish can make floors more attractive by highlighting the natural structure of the wood, and sometimes even enhancing this effect.
Types of parquet varnish
If you need a durable finish, skip the oil and wax in favor of paints and varnishes. Modern industry is ready to offer you the following compositions:
- environmentally friendly water-based polyurethane-acrylic varnishes;
- cheap urethane-alkyd and alkyd varnishes based on chemical solvents;
- heavy-duty polyurethane compounds used in rooms with maximum throughput.
Varnish provides a uniform and thin coating that protects the wood from moisture, dirt, sunburn and abrasion. In addition, coating parquet with varnish gives the effect of preserving the positive properties acquired through impregnations, tinting and primers.
Varnishing technology is a more complex process that requires special hand tools and machines.
Which varnish to choose
The texture of the coating is chosen solely to suit the taste of the home owner. It can be glossy, matte or semi-matte. The color of the paint and varnish material is selected in a similar way - it depends on the preferences of the homeowner. But when choosing a chemical composition, you need to focus on the following recommendations:
- cheap urethane-alkyd and alkyd compositions retain the smell of solvent and are not suitable for home use;
- safe polyurethane-acrylic compounds do not withstand heavy loads, so they are used in bedrooms or children's rooms.
- two-component polyurethane compounds are more expensive, but this is the best option for the hallway, kitchen, hall and hall.
If you follow these recommendations, the chosen varnish will not disappoint you under any circumstances.
Advice from the master: the matte surface of the coating requires the application of a thicker layer of varnish, so this varnish lasts longer than the glossy version
.
Hand tools for varnishing parquet
In addition to the chemical composition, different types of varnish differ from each other in the consistency of the solutions. Compositions with different densities are applied to the parquet using special tools:
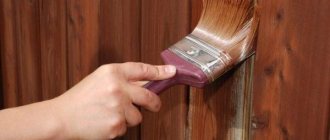
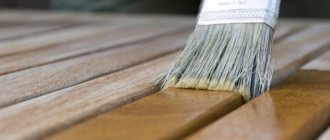
- Wide brush - suitable for liquid varnishes that are distributed over the parquet board in a U-shaped motion. The tool is used by professionals and amateurs.
- Short-pile velor roller - suitable for liquid compositions and medium-thick varnishes, which are distributed over the floor in a cross-shaped motion.
- Stainless steel spatula - used with thick compounds that are spread over the floor in an S-shaped motion. The varnish application technique saves time and material.
In addition to hand tools, you can use a spray gun, but real craftsmen prefer to work with their hands, controlling the thickness of the coating and the consumption of paintwork materials.
Possible problems
Improper varnishing of parquet can be complicated by certain problems if inaccuracies were made during the scraping, sanding stage or when applying the varnish yourself.
Ideally, the floor should be varnished evenly. Although it is almost impossible to achieve the same thickness of the varnish layer over the entire area of the room.
Of course, minor defects on the covered floor can be ignored. However, problems such as blistering or roughness will need to be addressed.
If the coating does not dry for a long time, mistakes were made at the preparatory stage. For example, the material consumption was too great, or the sanding done by hand was not done well enough. Also, improperly performed sanding can cause swelling of the varnish layer or its roughness.
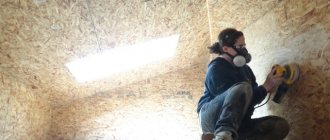
Grinding and polishing machines
To get the smoothest possible finish, you'll need more than just hand tools. Any varnish application technique requires mandatory sanding of intermediate layers and polishing of the finish. You can’t do this kind of work manually anymore, so you need to go over the parquet with a sanding machine, using wheels or a tape of different grain sizes.
The most convenient options for grinding tools are a belt machine, a planetary machine for flat grinding and an angle grinder “boot”. The first tool allows you to process strips with a width of 6-7 cm, the second and third options are designed for grinding in a circular motion, which gives maximum processing quality.
Sandpaper from 220 to 600 grit should be used as an abrasive material for intermediate sanding. The final finishing should be entrusted to a round nozzle with fine grain up to 120 units.
Carrying out grinding work
Sanding the floor is a responsible job, the quality of which will determine how beautiful the surface will be and how long the varnish will last on this surface. Therefore, grinding cannot be neglected.
The main task of cleaning the floor is to remove the layer of wood that has absorbed many different contaminants. The main thing is to get to the living wood, and at the same time clean the surface so that there are no flaws on it.
Belt, disc and other types of grinding machines are suitable for grinding work.
Although grinding machines have high productivity, they leave part of the surface untreated (near the walls).
In such places, floors have to be processed manually, therefore:
- To begin with, in order to remove the main layer that has contaminants, install sandpaper with a grain size of 60-80 units on the machine.
- After this stage, the surface is cleaned. A similar operation is carried out after each grinding stage so that the quality of the surface finish can be determined.
- Then, sandpaper with 120-180 grits is installed on the machine and the floor is sanded again. The floor should be very smooth, and the wood should acquire a natural pattern and color. At the same time, you must not forget to treat those places where the machine could not reach.
- At the next stage, the floors are opened with an antiseptic, although this is not necessary. But since this will not damage, but will protect the wooden floor from the invasion of microorganisms, such impregnation should still be carried out.
- Finally, after the floor has completely dried, it is sanded with sandpaper with a grit of about 400 units.
- Before applying the varnish, the room is thoroughly cleaned using a vacuum cleaner. For greater reliability, the floor is wiped with a damp cloth, which will remove the smallest particles of dust.
- If you add detergent to the water, this will improve the quality of cleaning, but you need to remember that some types of wood can react with chemistry, then all the work will go down the drain.
- It is better to wipe the floor with clean water, but slowly, so that the cleaning is done well. In this case, you should use rags that cannot leave behind the slightest particles of lint. The best option in this case is to use microfiber, then you can rest assured about the quality.
Sanding, rough grinding and other preparatory work
Grinding machines are used not only to smooth out the finished coating, but also to remove the old paint layer and level the wooden base. The last procedure can be replaced by scraping the parquet - cutting off the top layer of the floor covering up to 5 mm in depth. In addition to these operations, the following preparatory work is performed at the initial stage:
- Dry cleaning of sanded or scraped parquet boards - dust and shavings are removed manually and with an industrial vacuum cleaner.
- Coating the parquet with special means - antiseptics and fire retardants for wood. The former protect the parquet from fungi, mold and woodworms, the latter reduce the likelihood of fire.
- Priming parquet with a special compound.
Finally, you should prepare the microclimate at home. Before applying varnish, you need to reduce the temperature in the room to 15-25 °C and stabilize the air humidity at 60%.
What to do with serious defects - chips, cracks, swelling of planks
During preparatory work, defects in the integrity of the lamellas can be detected. Most often these include chips and cracks in the plank; a little less often there are swellings that lift two or three lamellas above the floor plane. In the latter case, leveling the parquet with a regular plane will correct the situation. Repairing chips and cracks requires more serious efforts.
Before covering the parquet with varnish, the chips are covered with a special putty. After hardening, it is ground level with the floor. Parquet paint mixed with PVA glue or in its pure form is poured into the cracks using a syringe with a thick needle.
If the lamella is cracked from edge to edge, it will have to be replaced. Glue will not fix this situation.
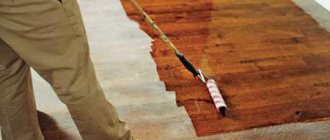
Varnishing parquet flooring - step-by-step instructions
The process of varnishing parquet begins with selecting the tone of paints and varnishes. To do this, choose a place in the far corner of the room and apply a thin layer of varnish and tinting to the cleaned old parquet. If you are satisfied with the resulting shade, you can continue varnishing the parquet, following the instructions:
- Pour the paint material from the can into the tray. Dip a wide brush or roller into the paint.
- Run the tool along the lamella, moving along the grain of the wood, in the direction from the window to the door of the room.
- After covering the entire area of the room with varnish, let it sit for several hours. The exact drying time is indicated on the varnish label.
- After waiting for the varnish to dry, carefully sand the coating using a 220-400 grit abrasive.
- After dry cleaning, apply another coat of varnish, repeating all steps.
After applying the required number of layers, proceed to final sanding of the parquet using wheels No. 100 or No. 120.
Main stages of work
Varnishing work is carried out in 6 stages.
Stage 1. Cleaning
After sanding and sanding are completed, the parquet needs to be dust-free.
To do this, the surface is cleaned with a construction vacuum cleaner or wiped with a damp microfiber cloth.
Stage 2. Priming or tinting
Primers or tinting compounds are applied with a roller or brush with wide movements in one layer. Drying time is at least 24 hours.
Stage 3. Elimination of visible defects
If there are small cracks, fallen knots, dents and other damage, they need to be filled with ready-made parquet putty (Dulux, Sadolin) or you can purchase a liquid for preparing tinted putty (Lega Stucco, Vidaron) and mix it with fine sawdust.
The result will be a composition that will match the color of the parquet planks. Craftsmen use ordinary PF series varnishes or PVA glue for the same purposes. The latter melts during grinding and begins to stretch, which has an adverse effect on the sander.
After eliminating the defects, the putty must be sanded in a circular motion with fine-grained paper 320-440 units to eliminate roughness. Dust is removed with a damp cloth.
Stage 4. Applying 1 layer
Apply the first coat of varnish with a brush, roller or spatula in a thin layer and allow to dry for 24-48 hours.
Stage 5. Grinding
At this stage, small wood fibers that were picked up by a brush or roller during the application of varnish are removed.
Sand the surface by hand or with a belt sander, wipe with a damp cloth or clean the surface with an industrial vacuum cleaner.
Stage 6. Application of the second and third layers
Apply subsequent layers of varnish at intervals of 24-48 hours and leave until complete polymerization for 7-14 days. Foot traffic is allowed on the second or third day after varnishing.
How to care for varnished floors
Parquet floors in perfectly clean condition are pleasing to the eye. But even small stains, specks and blots on the surface of the parquet destroy the aura of an expensive floor, negating the efforts of the parquet floor workers and the financial costs of the homeowner.
To wash the parquet surface to a mirror shine, you must use the following wet cleaning technology:
- Dissolve 100-250 ml of cleaning agent in 10 liters of water and wash off all the dirt from the parquet using a thoroughly wrung-out cloth.
- Using dry wipes, remove any remaining moisture from the surface of the parquet. This must be done as quickly as possible, otherwise you will have to varnish the coating of the swollen floor (after repair).
- We apply an anti-slip compound and an antistatic agent that repels dust to the dry floor. The coating protects the parquet and its owners well from accidental injuries.
Parquet floors need to be vacuumed and washed with special compounds at least once a week.
Preparing the floor for varnishing
If the parquet floor is new, it needs to be vacuumed and wiped with an almost dry cloth. Before you paint old parquet with varnish, you need to carefully check its condition, and if there are creaks or sagging, repair it. It is important to remove protruding nails and other sharp objects so that they do not damage the sander. Next, you need to perform wet cleaning using detergents for wooden floors, remove existing stains, remove old varnish or wax with solvents and wipe the coating with a dry cloth. Oak and chestnut parquet should be cleaned without using detergents.
Areas damaged by fungus or insects should be treated with a wood antiseptic; severely damaged boards should be replaced. If there are significant differences, scraping is necessary. The cleaned and dried surface must be sanded: first with large grains, then with medium and fine grains. Before varnishing, the floor must be cleaned of dust.
Possible problems when covering floors with paints and varnishes and ways to eliminate them
Coating parquet boards with varnish is not an easy job, the results of which depend on the skill of the parquet floorer, the quality of the materials and the moisture content of the lamellas. Therefore, upon completion of varnishing, the homeowner can expect several unpleasant surprises due to the fault of the parquet floorer or the paint manufacturer. The TOP 5 possible problems include the following defects:
- A long period of drying of the coating - in this case, the parquet floorer is to blame for violating the technology of mixing paints and varnishes. The defect can be corrected only with time - the floor will completely dry in a few days.
- White or black stripes - the defect may be caused by a dirty tool. It is no longer possible to correct this oversight; you will have to order a new varnish.
- Different tone - a defect occurs when a draft appears during drying of the layer.
- Peeling - the cause is poor quality materials or the use of paints and varnishes with different bases and from different manufacturers.
- Darkening of the tone - in this case, the manufacturer of the composition should be blamed for using too strong chemical reagents that “burn” the surface layer of the wood.
If you don’t want to deal with such shortcomings, order varnishing and sanding of parquet from professionals who will select the ideal paint materials and tinting compounds and warn you about the danger of drafts. In addition, professionals guarantee the quality of the services provided, so if a defect occurs, they will eliminate any defects at their own expense.
Varnish processing technology
Before varnishing begins, the parquet goes through the stages of sanding, thorough dust removal and priming. Small defects are repaired with a special parquet putty and sanded again with sandpaper.
A variety of tools can be used to evenly distribute the composition. A spray gun helps automate the process, but since this unit is not found in every household, traditional hand tools are used: a spatula, a brush and a roller.
Varnishing with a spatula
It makes sense to use a spatula when it comes to primer varnish, or if the product is applied only as the first layer.
Work begins from any corner of the wall opposite the front door; Each subsequent layer should lie perpendicular to the previous one. This method is good because it allows you to evenly clog the pores of the wood, as well as the joints at the border of adjacent planks.
The first step is to dilute the base varnish - detailed technology is usually indicated in the instructions. Then 100-150 grams of the product are measured out: it is poured onto the parquet and they begin to disperse it with smooth gestures. The trajectory of the movements should be S-shaped, as if you were outlining a figure eight, and the spatula should not be pressed too hard.
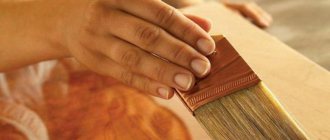
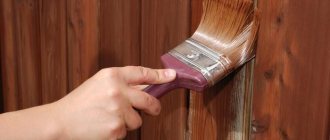
Varnishing with a brush
Working with a brush is somewhat more difficult, and a low-quality tool risks greatly spoiling the impression of the final result. The width of the brush should be at least 8 centimeters. Make sure that the lint does not remain on the surface and that the consistency of the varnish is sufficiently fluid throughout the entire procedure.
The composition should be distributed very carefully - preferably in a U-shaped movement, so that each subsequent strip intersperses the previous one. Wet the brush as often as possible; after the first layer has dried, the process is repeated 1-2 more times.
Roller varnishing
If you have a roller with an extendable handle, the process of processing parquet is significantly easier and faster. The optimal length of the pile will be 1-1.2 centimeters, natural composition is preferable. As for the width of the instrument, it should not exceed 1.5 cm.
You can pour the varnish directly onto the floor or into a special paint bath. The starting point is an area 1 meter from the left wall. The roller is advanced from left to right in the same direction, each time the master takes a step back. Please note: the movements are performed crosswise, that is, the horizontal stripe is constantly alternating with the vertical one.
Handling a roller will require some skill: you need to act quickly and accurately, painting the same area twice in a row. The greatest difficulty is in processing the corners, as well as the boundaries of the floor and the wall - in these places it is very important not to overdo it with the amount of varnish. Proceed with extreme caution; if varnish gets on the walls or baseboards, they must be cleaned immediately with a dry cloth. Throughout the entire work, the viscosity of the varnish is closely monitored and, if necessary, adjusted.
According to average estimates, it takes at least a day, and sometimes even two, for the varnished surface to completely dry. The brush that remains “out of use” must be washed with a solvent; As for the varnish, it will need to be carefully rolled out before the next painting session.
Dried parquet needs to be sanded again. The coating is sanded with fine-grained sandpaper, then vacuumed and wiped with a slightly damp cloth. Next, according to the already familiar scheme, the second layer of varnish is distributed (in the case when it is planned to apply 3 or more layers, the floor is sanded only before the very last stage).
Note: if the parquet is made of soft wood (for example, pine or spruce), the varnish is applied in more than one layer.
Upon completion of finishing work, it is strictly not recommended to rush into arranging furniture: varnished parquet is entitled to a well-deserved two-week rest. You can wash and vacuum the treated floor only after 7-10 days; during regular cleaning, it is advisable to use specialized products for varnish coatings.