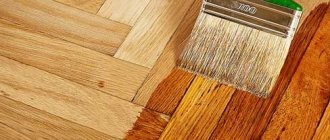
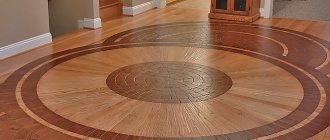
Varnishing parquet is a mandatory procedure, performed at prescribed intervals or if necessary. Scheduled varnishing is carried out every 7-10 years after economical scraping and sanding of the wood surface. Unscheduled work is ordered after serious damage to the parquet caused by mechanical, chemical or abrasive action has been eliminated. Varnishing parquet is the final stage of arranging floor coverings, because without a reliable protector, the wooden base of the floor will become unusable in a matter of months. Therefore, every owner of a parquet floor should become familiar with the technology of applying varnish.
Materials for varnishing parquet - general list
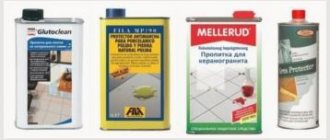
Before covering the parquet boards with varnish, you need to prepare the base using special preparations, and if you want to change the color of the floor, you will need tinting compounds. Therefore, one varnish will not be enough to care for parquet. The general list of materials used during parquet varnishing is as follows:
- special impregnations - protect wood from mold and mildew, fire and insects;
- priming compositions - increase the adhesion of parquet boards and reduce the consumption of the main product;
- tinting agents - they can be used to change the tone or color of parquet;
- varnish coating - the product is used as a protector that protects the parquet board from moisture and other dangers.
In addition to varnishes, oil and wax can be used to form the finishing layer. These materials should be included in this list as an alternative. It is worth noting that when using oil as a topcoat, the use of paint and varnish material becomes impossible, since it will crack and peel. In addition, the surface is prone to rapid contamination, and wet cleaning can only be carried out using special products.
Operating Information
It is imperative to take such nuances into account.
- Surface hardness – this includes wear resistance and impact strength characteristics. High coefficients of these characteristics indicate the possibility of long-term use of parquet flooring.
- Gloss level – there are 3 types of varnishes for parquet flooring:
- matte, semi-matte and silky-matte – no more than 25%. As a rule, this parameter is marked in the name. Examples are: Tikkurila Parketti-Assa 20, Synteko Pro 20.
- half glossy – add about 50% shine;
- glossy – add up to 90%.
- Resistance to frost - this characteristic is noted in the instructions in the “Storage” section. It is a pity that most consumers do not attach importance to this data, which is in vain. Varnish whose storage temperature is above +5 ° C, after standing in the cold for some time, will simply begin to curl. It is impossible to use such varnish, and the only thing left is to throw it away. The verification is quite simple: ask the seller to open a jar of products. Inhomogeneity of the composition, flakes that pop up when shaking, and other impurities indicate that the product is unsuitable for use.
When choosing a varnish for parquet, you need to pay attention to whether it is glossy or matte, and whether it is resistant to low and high temperatures
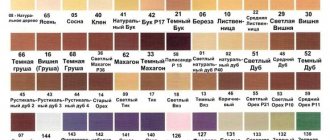
- The resulting color and the ability to add color - colorless, water-based compositions do not affect the tint characteristics of the wood. If there is a solvent in the composition, it slightly makes the color richer, and a familiar yellowish color appears. If you need the wood to acquire a certain color shade, then you can choose an already prepared composition or mix it yourself using a color scheme; the possibility of diluting the composition should be noted on the label.
- The approximate amount of varnish is an average value, which depends on the type of tools used and the preparedness of the wood. The most inexpensive way is to use a spatula on a coating that has undergone a priming process. Ultimately, the layer is applied thinly and evenly. Consumption varies from 80 to 150 ml for each m2 of parquet flooring.
- Drying period and acquisition of strength characteristics. Varnishes containing oils will take the longest to dry. The drying speed of varnish mixtures containing a hardener is the highest; an 8-hour period is enough to dry one layer and about 4 days to fully acquire the expected strength characteristics.
Be sure to pay attention to how long it takes for a particular type of varnish to dry.
Oil and wax - the pros and cons of natural coatings
Natural or artificial oils protect the parquet floor from water and dirt, forming a hydrophobic layer that repels moisture and dust particles. Moreover, even artificial oils are absolutely safe for human health. Another advantage of the coating is the deep impregnation of the board, which allows you to save on priming and tinting during the next treatment of the parquet.
Vegetable and beeswax are another natural material for protecting parquet flooring from moisture and dirt. Once applied to wood, it forms a thin film, so a waxed floor looks very impressive.
The disadvantages of oils and waxes, as well as complex products based on them, include the low strength characteristics of the hardened coating. Such a protector requires periodic restoration of the protective film and cannot resist abrasion.
Unlike durable varnishes, effective oil- and wax-based coatings “live” from 1 to 6 months.
Types of parquet varnish
If you need a durable finish, skip the oil and wax in favor of paints and varnishes. Modern industry is ready to offer you the following compositions:
- environmentally friendly water-based polyurethane-acrylic varnishes;
- cheap urethane-alkyd and alkyd varnishes based on chemical solvents;
- heavy-duty polyurethane compounds used in rooms with maximum throughput.
Varnish provides a uniform and thin coating that protects the wood from moisture, dirt, sunburn and abrasion. In addition, coating parquet with varnish gives the effect of preserving the positive properties acquired through impregnations, tinting and primers.
Varnishing technology is a more complex process that requires special hand tools and machines.
Purpose of varnish
In areas of severe abrasion, use polyurethane compounds.
When choosing parquet varnish, you should pay attention to its functions and for what premises it is intended.
Polyurethane and urethane-alkyd moisture-resistant varnishes are used:
- in the kitchen;
- bathroom;
- at the dachas.
For large areas with high traffic, a water-based varnish based on polyurethane resin will do.
It is best to coat the floors in a nursery with a water-based polyurethane varnish that dries quickly. Its packaging bears the inscription “EN 71.3”.
If the floor is subject to heavy loads, a urethane varnish with an anti-slip effect is applied to it.
How to prepare parquet for applying varnish?
Be sure to prime the surface before varnishing.
To varnish the parquet with your own hands, you need to carry out some preparation.
You need to decide on the materials and tools. Of these you will need the following:
- wood primer;
- azure, which is used to tint parquet;
- putty for parquet;
- solvents;
- varnish
The tools you will need are:
- brushes of various sizes;
- putty knife;
- container for stirring varnish;
- velor roller;
- sandpaper 220-440 units;
- industrial vacuum cleaner;
- Grinder.
It is better to rent large professional equipment.
Preparing the base
You need to start work by removing furniture and other items located in the room. All interfering nails and damaged dies are removed.
The resulting holes can be sealed by kneading a paste. It consists of sawdust and wood glue.
Small gaps in the parquet are eliminated with wood putty. Everything should dry out, the developed resin can be freely removed with gasoline.
Wax or oil floors are cleaned with white spirit to avoid clogging of the sanding apparatus, as well as for good adhesion of the varnish to the wood.
The old parquet will have to be scraped several times
. Having received a clean surface, if necessary, the formed thresholds between the dies are scraped, the surface is leveled, and the old layer is removed from the wood. All this is done by a scraping machine and, if necessary, more than once.
Next, the floor is cleared of debris and sanding begins with a special machine. As a result, the floor becomes absolutely flat, and the wood returns to its original appearance. Then use an industrial vacuum cleaner to remove all dust. For more information about varnishing parquet, watch this video:
If necessary, the new floor is prepared in a similar way. If the condition is excellent, newly laid parquet blocks can be immediately sanded and varnished.
Which varnish to choose
The texture of the coating is chosen solely to suit the taste of the home owner. It can be glossy, matte or semi-matte. The color of the paint and varnish material is selected in a similar way - it depends on the preferences of the homeowner. But when choosing a chemical composition, you need to focus on the following recommendations:
- cheap urethane-alkyd and alkyd compositions retain the smell of solvent and are not suitable for home use;
- safe polyurethane-acrylic compounds do not withstand heavy loads, so they are used in bedrooms or children's rooms.
- two-component polyurethane compounds are more expensive, but this is the best option for the hallway, kitchen, hall and hall.
If you follow these recommendations, the chosen varnish will not disappoint you under any circumstances.
Advice from the master: the matte surface of the coating requires the application of a thicker layer of varnish, so this varnish lasts longer than the glossy version
.
Types of varnish for parquet (video)
If you have parquet in your home, you cannot do without varnish for it. It is important to choose high quality varnish so that the coating is reliable, durable and hard. A good varnish hardens quickly, has no pungent odor, and is safe for human health. It also gives the surface a beautiful appearance. One of the well-known and reliable coatings is the Turkish Marshal varnish. Modern manufacturers offer a wide range of varnish products, thanks to which the parquet will last for many years. Of course, a lot depends on careful handling of the floor covering.
Hand tools for varnishing parquet
In addition to the chemical composition, different types of varnish differ from each other in the consistency of the solutions. Compositions with different densities are applied to the parquet using special tools:
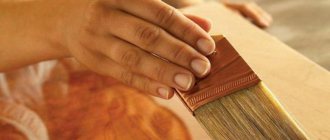
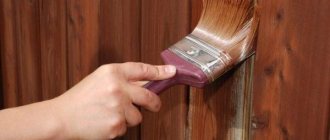
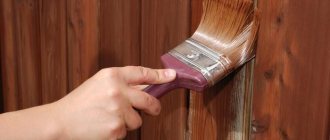
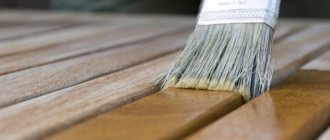
- Wide brush - suitable for liquid varnishes that are distributed over the parquet board in a U-shaped motion. The tool is used by professionals and amateurs.
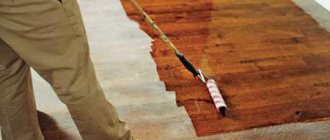
- Short-pile velor roller - suitable for liquid compositions and medium-thick varnishes, which are distributed over the floor in a cross-shaped motion.
- Stainless steel spatula - used with thick compounds that are spread over the floor in an S-shaped motion. The varnish application technique saves time and material.
In addition to hand tools, you can use a spray gun, but real craftsmen prefer to work with their hands, controlling the thickness of the coating and the consumption of paintwork materials.
How to properly varnish parquet and what are the nuances involved?
Parquet varnishes are produced in a separate series and are characterized by increased resistance to abrasive and foot loads on the floor covering. That is why it is not recommended to use so-called yacht, universal and other types of varnishes.
Varnishes are available in 4 types:
- alkyd;
- urethane-alkyd;
- water-based (polyurethane-acrylic);
- polyurethane.
Please note that the most durable and wear-resistant are polyurethane varnishes.
Many manufacturers produce two-component polyurethane varnishes for parquet in professional series: for gyms, for retail spaces, etc. The safest are water-based, as they are practically odorless, and after use, tools can be washed with plain running water rather than with a solvent.
Alkyd and urethane-alkyd varnishes are cheaper and more resistant to abrasion than water-based ones. But since they are solvent-based and have a sharp, toxic odor, it is necessary to use personal protective equipment (respirators, gloves) when working.
All compositions are available in glossy, semi-matte and matte variations. The choice of varnish based on this parameter depends on your aesthetic perception and does not particularly affect the performance characteristics of the hardened coating.
Traditionally used alkyd and urethane-alkyd varnishes emit strong, unpleasant odors. They are diluted with solvents or solvents and are most often used for independent work.
The compositions are available in two variations: one-component and two-component (with a hardener). The first ones take longer to polymerize, the average drying time is at least 24 hours.
Conditions for the varnishing process:
- air temperature – from +15 to +25 °;
- relative humidity – not less than 60%;
- wood moisture content (measured with a hygrometer with a needle probe or a non-contact moisture meter): for small boards - no more than 10%, for large solid boards - up to 6%.
The last parameter is very important, since wood that is too damp can begin to shrink over time, the varnish coating will crack, and seams will appear between the planks. Such parquet is subject to complete restoration or replacement.
Varnishes should not be applied after applying oil or wax. Because of them, adhesion to the base is significantly deteriorated; accordingly, the coating simply does not “lay down” smoothly and beautifully.
So, how to varnish parquet correctly? The compositions are applied in 4 ways:
- Use a wide brush in a U-shaped motion. Varnishing in this way allows you to fairly evenly distribute the composition over the surface of the parquet, but at the same time it strongly raises the wood fibers, so between layers it is recommended to sand with fine-grained paper (from 200 to 600 units) or tape.
- Use a short-haired velor roller (up to 5 mm long) using crosswise movements. Since this tool picks up too much varnish, it is recommended to use special plastic paint trays. Just as in the case of a brush, intermediate sanding is necessary between layers to remove excess fibers.
- Use a sharp-edged stainless steel spatula using light S-shaped movements. This tool is very convenient for applying thick compounds, as it allows you to create a thin and uniform coating while cutting off raised fibers. Thus, intermediate sanding is not required, which significantly saves time, effort and money. In addition, three layers of varnish applied with a spatula are equivalent to one layer of composition applied with a roller.
- With a spray gun. The coating turns out to be quite thin, but the material consumption is considerable. In addition, it is difficult for an inexperienced master to ensure uniform application. The advantages of this method are the speed of work and easy cleaning of the tools. However, professionals prefer not to use spray bottles. In their opinion, it is very difficult to achieve a beautiful and durable coating with such a tool; a lot of experience is needed.
Each subsequent layer of varnish should be applied perpendicular to the previous one, that is, crosswise. This scheme provides a uniform, smooth coating.
Grinding and polishing machines
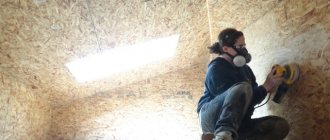
To get the smoothest possible finish, you'll need more than just hand tools. Any varnish application technique requires mandatory sanding of intermediate layers and polishing of the finish. You can’t do this kind of work manually anymore, so you need to go over the parquet with a sanding machine, using wheels or a tape of different grain sizes.
The most convenient options for grinding tools are a belt machine, a planetary machine for flat grinding and an angle grinder “boot”. The first tool allows you to process strips with a width of 6-7 cm, the second and third options are designed for grinding in a circular motion, which gives maximum processing quality.
Sandpaper from 220 to 600 grit should be used as an abrasive material for intermediate sanding. The final finishing should be entrusted to a round nozzle with fine grain up to 120 units.
Sanding, rough grinding and other preparatory work
Grinding machines are used not only to smooth out the finished coating, but also to remove the old paint layer and level the wooden base. The last procedure can be replaced by scraping the parquet - cutting off the top layer of the floor covering up to 5 mm in depth. In addition to these operations, the following preparatory work is performed at the initial stage:
- Dry cleaning of sanded or scraped parquet boards - dust and shavings are removed manually and with an industrial vacuum cleaner.
- Coating the parquet with special means - antiseptics and fire retardants for wood. The former protect the parquet from fungi, mold and woodworms, the latter reduce the likelihood of fire.
- Priming parquet with a special compound.
Finally, you should prepare the microclimate at home. Before applying varnish, you need to reduce the temperature in the room to 15-25 °C and stabilize the air humidity at 60%.
Technology of varnishing parquet boards
Before applying new varnish, be sure to clean the floor surface with special cleaning products - we most often use Berger-Seidle BioSoap cleaner and Berger-Seidle L91 quick-drying cleaning solvent. To apply cleaning products, we use a single-disc grinder and special pads of varying degrees of hardness. This will clear the floor surface of accumulated dirt and significantly improve adhesion performance.
After cleaning the parquet board, fine sanding of the varnish coating is necessary (in fact, this is not sanding, but “matting” or “matting”), which will also increase adhesion rates. For this purpose we also use disc grinders and mesh abrasives for them. Without cleaning and matting the varnish, not a single decent company will apply varnish to a parquet board over the old varnish.
Next, you need to vacuum the floor surface with an industrial vacuum cleaner and preferably remove micro-dust using a special mop with an electrostatic cleaning attachment. This will allow you to remove as much dust as possible from the surface and achieve the optimal final result.
What to do with serious defects - chips, cracks, swelling of planks
During preparatory work, defects in the integrity of the lamellas can be detected. Most often these include chips and cracks in the plank; a little less often there are swellings that lift two or three lamellas above the floor plane. In the latter case, leveling the parquet with a regular plane will correct the situation. Repairing chips and cracks requires more serious efforts.
Before covering the parquet with varnish, the chips are covered with a special putty. After hardening, it is ground level with the floor. Parquet paint mixed with PVA glue or in its pure form is poured into the cracks using a syringe with a thick needle.
If the lamella is cracked from edge to edge, it will have to be replaced. Glue will not fix this situation.
How to restore old parquet without sanding
Without sanding, parquet can be restored using cosmetic putty, parquet glue and specialized equipment. Most cracks and dents can be removed with proper putty. Loose or unsuitable areas can be replaced, and then these places can be puttied and varnished.
How to renew parquet flooring with cosmetic putty with your own hands: joints, dents, cracks
For minor damage, such as material falling out of the seams, cosmetic putty is used. It will help eliminate cracks no more than 5 mm. and will hide small dents.
To apply the putty, it is recommended to use a rubber or metal spatula. Excess around the seam is immediately removed with a sponge, and if the putty is epoxy-based, it is recommended to use a stencil to avoid getting it on the dies.
If such material gets on the boards, it can be removed with a solvent. After hardening, it is necessary to sand, remove dust and varnish.
How to choose putty
When choosing putty for parquet, you need to pay attention to its purpose. That is, it must be indicated that it is suitable for parquet and plank floors.
The second thing you should pay attention to is the color; it should not be too dark or light relative to the overall color.
Formation of joints
If during the puttying process the joints are filled flush with the entire surface and the pattern is broken, then the seams must be renewed.
The formation of joints must be carried out when the putty sets.
A ruler is applied to the joint and a line is drawn under it with an awl. When the putty has completely hardened, this process will require effort to scratch the seam.
Repairing a wide gap between parquet flooring
Hook for parquet boards
Putty is not suitable for repairing cracks larger than 5 mm. When laying dies in parallel, they heat up for 15-20 minutes, and then they are moved with a tie hook so that 2 narrow gaps are formed, which can be eliminated with putty.
If a gap has formed between several boards, they are moved to one side using the same tool. A narrow strip is placed in the resulting void, flush with the entire parquet. When laying patterned parquet, the voids are filled with thin wood chips mixed with putty.
Removing damage to parquet using wax
Fastening loose parquet floors
Parquet flooring can become loose over time for various reasons and this needs to be corrected before painting. There are 3 ways to secure loose elements.
Fastening with nails
Nails can help out when fixing problems with loose parquet boards. Nails 15-20 mm long are driven into the gap between the parquet flooring at an angle of 45 degrees.
It is important to know that after driving a nail with a hammer, its head must be deepened into the wood with a hammer.
Afterwards these places are plastered and sanded. In this way, fixation of loose parts is achieved.
Fastening to the base with glue through the holes
Some of the dies could rise up and lag a little from the floor, but they are no longer damaged in any way. In this case, there is no need to remove them. It is enough to make several holes in each loose part.
After this, you need to inject glue into them using a mounting gun or syringe. At the end, add sawdust left over from drilling to hide the holes.
It is recommended to use a two-component one; its drying time is about a day. When the glue is introduced, you need to leave the boards under pressure until completely dry.
Fastening parquet flooring with bamboo
This original method works due to the unique properties of bamboo. This material is highly hygroscopic (it absorbs moisture from the air), so it will quickly swell and prevent the slats from moving.
In order to make this type of fastening, it is necessary to drill 2 holes at the joints of parquet elements with a diameter of 5-6 mm. Bamboo chops are driven into them, which are trimmed if necessary.
The parquet creaks in some areas
Parquet squeaking can have several reasons. These include:
- wobbly dies,
- voids under the parquet,
- sagging of spacer wedges.
Each cause is corrected differently. So if the problem is with the dies, then everything can be solved by fixing them or replacing them.
If there are voids under the parquet, there are several ways to solve the problem. The easiest way is to drill several holes in each problem part and pour glue through them until the voids are completely filled. Afterwards, a press is installed on top of the hammered pins.
You can also use crushed wax to eliminate voids. It must be carefully poured into the joints between the boards, pushing it into the cracks with a spatula and a brush. As soon as the void is filled, the creaking part of the parquet is heated with a hairdryer.
If the cause of the squeak is the spacer wedges, then they need to be replaced. This procedure can only be done when humidity is less than 40%. In these simple ways you can remove creaking parquet flooring.
Coating swelling
Parquet may swell if over-moistened. If this happens, you need to act as soon as possible; a successful outcome depends on when the repairs are made.
To eliminate this problem, the swollen coating must be heated with a hairdryer until the smell of mastic and heated varnish appears. All the moisture will not go away, but the wood will become more pliable.
After heating, we place plywood 8-10 mm thick on this area and leave it under pressure for a day. If after these manipulations the swelling remains, you can repeat the procedure 3-4 times.
If the swelling is successfully corrected, it is necessary to dismantle the old putty and re-putty the seams. After puttying, it is important to leave this area under a load until it dries completely, otherwise the swelling may return.
Swelling of parquet can only be corrected while the board is wet; otherwise, the damaged area will need to be replaced.
What to do if the dies have come off - reinstall part of the parquet
Removing stuck gum
There are several ways to remove chewing gum from parquet floors.
- Using a wooden spatula, gradually lift up the newly glued gum.
- Heat the contamination and carefully remove the soft chewing gum.
- Let it cool and it will become hard and come off easily.
Varnishing parquet flooring - step-by-step instructions
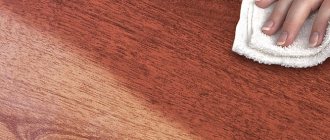
The process of varnishing parquet begins with selecting the tone of paints and varnishes. To do this, choose a place in the far corner of the room and apply a thin layer of varnish and tinting to the cleaned old parquet. If you are satisfied with the resulting shade, you can continue varnishing the parquet, following the instructions:
- Pour the paint material from the can into the tray. Dip a wide brush or roller into the paint.
- Run the tool along the lamella, moving along the grain of the wood, in the direction from the window to the door of the room.
- After covering the entire area of the room with varnish, let it sit for several hours. The exact drying time is indicated on the varnish label.
- After waiting for the varnish to dry, carefully sand the coating using a 220-400 grit abrasive.
- After dry cleaning, apply another coat of varnish, repeating all steps.
After applying the required number of layers, proceed to final sanding of the parquet using wheels No. 100 or No. 120.
Does the choice of varnish depend on the type of wood?
Almost any varnish performs its functions well on ordinary parquet flooring made of oak, beech, maple, etc. If the parquet flooring is made of cork, oily, resin-containing and exotic woods, you will have to carefully select the varnish, taking into account all the features of the material.
Often the types of wood that can be varnished are marked on the packaging material. If such recommendations are not indicated, it turns out that it is permissible to apply varnish only to a standard parquet flooring made of undemanding material.
Usually the instructions for using parquet varnish indicate what type of wood it can be combined with
How to care for varnished floors
Parquet floors in perfectly clean condition are pleasing to the eye. But even small stains, specks and blots on the surface of the parquet destroy the aura of an expensive floor, negating the efforts of the parquet floor workers and the financial costs of the homeowner.
To wash the parquet surface to a mirror shine, you must use the following wet cleaning technology:
- Dissolve 100-250 ml of cleaning agent in 10 liters of water and wash off all the dirt from the parquet using a thoroughly wrung-out cloth.
- Using dry wipes, remove any remaining moisture from the surface of the parquet. This must be done as quickly as possible, otherwise you will have to varnish the coating of the swollen floor (after repair).
- We apply an anti-slip compound and an antistatic agent that repels dust to the dry floor. The coating protects the parquet and its owners well from accidental injuries.
Parquet floors need to be vacuumed and washed with special compounds at least once a week.
Surface preparation
First, the surface needs preparation, for which the following steps can be distinguished:
- A full inspection of the parquet surface is carried out. All protruding nail heads, screws and any other metal objects will need to be driven into the parquet or pulled out. Otherwise, during the scraping and grinding process, the corresponding equipment can be damaged. If the parquet is old enough and creaks in some places, it will need to be repaired a little.
- Next, the parquet needs to be thoroughly rinsed with water, to which a special detergent intended for the care of parquet floors is added. After this, you need to wait until the parquet is completely dry.
- Now you can start removing the old varnish and protective wax coating. If this is not done, the sandpaper will constantly become clogged during the grinding process, and as a result the work will not be carried out as efficiently. To remove varnish and wax, you can use special solvents or simple white spirit.
- After the surface is completely cleaned, you can proceed directly to sanding. This stage is necessary if there are significant differences between the parquet floors. The scraping device levels the surface and also removes a layer of wood that has darkened over time. Cycling also allows you to get rid of the old varnish layer. But it’s better not to do this, as the machine’s knives will soon become dull, which will lead to further damage to the top layer of wood.
It is worth noting that the scraping stage can be divided into several approaches, and an 8-15 mm layer can be removed. Different types of wood require different sanding methods. The scraping process is a rather painstaking part of the work, requiring some skills and patience. If you have not encountered such work before, perhaps you should entrust this stage to the masters.
- After sanding, you need to clean the surface, and then you can grind it. Using a sanding machine, the final leveling of the parquet is carried out - as a result, the parquet acquires a natural color. First, sanding is carried out with coarse sandpaper. During the next pass, the sandpaper is replaced with medium grit, the last pass is carried out with the finest sandpaper.
- All that remains is to remove the layer of dust from the surface, for example, using an industrial vacuum cleaner. You can, of course, use the household option, but you will need to change the filters often.
It is worth noting that after sanding and cleaning the parquet surface, before varnishing the parquet with your own hands, it is worth checking the entire surface again. It happens that after removing several layers of wood, cracks and other defects obtained by various methods are often discovered. In this case, you will need to carry out a small repair of the parquet with a special putty, and then sand the floor again with fine sandpaper (more details: “How to repair parquet with your own hands - step-by-step instructions”).
The indicator of how many layers of varnish should be applied to the parquet after preparatory work does not depend on whether the floor is old or just laid. The only difference in the work is that the new parquet is first sanded and only then varnished. Apparatus for scraping, grinding and garbage collection can be either purchased new or rented. The decision, in part, depends on whether you will use such machines in the future or not. Now you can think about what varnish to cover the parquet after sanding.
Possible problems when covering floors with paints and varnishes and ways to eliminate them
Coating parquet boards with varnish is not an easy job, the results of which depend on the skill of the parquet floorer, the quality of the materials and the moisture content of the lamellas. Therefore, upon completion of varnishing, the homeowner can expect several unpleasant surprises due to the fault of the parquet floorer or the paint manufacturer. The TOP 5 possible problems include the following defects:
- A long period of drying of the coating - in this case, the parquet floorer is to blame for violating the technology of mixing paints and varnishes. The defect can be corrected only with time - the floor will completely dry in a few days.
- White or black stripes - the defect may be caused by a dirty tool. It is no longer possible to correct this oversight; you will have to order a new varnish.
- Different tone - a defect occurs when a draft appears during drying of the layer.
- Peeling - the cause is poor quality materials or the use of paints and varnishes with different bases and from different manufacturers.
- Darkening of the tone - in this case, the manufacturer of the composition should be blamed for using too strong chemical reagents that “burn” the surface layer of the wood.
If you don’t want to deal with such shortcomings, order varnishing and sanding of parquet from professionals who will select the ideal paint materials and tinting compounds and warn you about the danger of drafts. In addition, professionals guarantee the quality of the services provided, so if a defect occurs, they will eliminate any defects at their own expense.
Mistakes when painting with varnish yourself
Often, when painting the floor on their own, home craftsmen are faced with various problems:
- Poor drying of varnish. This usually happens when the varnish is incorrectly selected or the recommended temperature conditions are not observed during work. If a two-component composition is used, then slow drying indicates an insufficient amount of hardener.
- The appearance of whitish stains on the varnished floor. This indicates that moisture has entered the coating due to high humidity in the room.
- Formation of air bubbles on the surface and swelling of the coating. Such problems arise due to violations of varnish application technology.
- Uneven and uneven coverage. This is a typical mistake that inexperienced craftsmen make. Some types of varnishes dry out very quickly, which does not allow a person who does not have the skills to apply the composition evenly.
Only professionals can make a beautiful and smooth floor covering. Don't skimp on quality! Order this work, which has been finishing and painting wooden houses for over ten years.
We employ qualified craftsmen who have undergone special training, have extensive experience and the necessary work skills.
You can contact us using the coordinates on the “Contacts” page.
Calculate the cost of painting and insulating your home right now
