Despite the abundance of modern means, lime is still in demand among summer residents. It is used to deoxidize the soil, to disinfect premises, and to protect trees. How to dilute lime correctly for each case?
Lime comes in different forms. Most often, summer residents use three types of whitewashing:
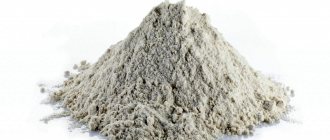
- quicklime (lumpy) lime is a white substance that is obtained by the decomposition of limestone; it contains calcium and magnesium;
- slaked (hydrated) lime, or fluff, is a white powder that is obtained by dissolving quicklime in a small amount of water;
- bleach (bleach) is a powder containing chlorine and slaked lime.
Lime is used on the farm not only for whitewashing, but also for other purposes:
- Why do you need slaked lime in the country house and garden?
Lime is used in the country to improve soil properties, increase productivity and during construction work. What is her secret?
Which whitewash is better - lime or chalk?
First you need to decide on the material that will serve as the basis for making the bleach solution. Chalk or lime are the most widely used options. However, every decision to whitewash a house has a list of pros and cons.
Lime is a type of composition for which carbonate-based rocks are burned. This is a relevant solution not only for the construction industry, but also for the production of compounds with various chemical properties. Lime whitening should be done using a slaked type of solution. It is obtained by combining water and lime powder.
Let us list the positive characteristics of lime whitening:
- ability to adhere well to any type of surface;
- tightening of small cracks during application;
- moisture resistance;
- resistance to temperature fluctuations;
- presence of bactericidal properties;
- affordable cost of the material combined with low costs during painting.
There are also some negative aspects, although the lime mixture does not have many of them:
- the likelihood of burns for those who perform painting;
- possible appearance of defects in the form of stains and stripes on the surface.
Lime, in fact, is a sodium alkali, therefore precautions are required, otherwise health cannot be protected.
But chalk is a material of natural origin, known and familiar to many. This finish has its own advantages:
- simple, safe painting work;
- easy rinsing, removal of layers on the surface;
- deep whiteness, whitewash does not turn yellow over time;
- environmental friendliness;
- affordable price.
There are also a couple of disadvantages:
- the likelihood of defects occurring during subsequent coating of walls with lime;
- unsuitable for use in damp environments.
Scope of application
The characteristics of an antiseptic and fungicide make slaked lime a leader among facing building materials for decorating damp, cold rooms. Allowed to be used for finishing walls and ceilings. Due to its weather resistance, it is used for painting the facade of a building.
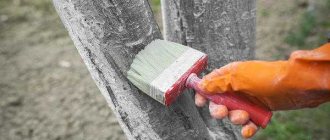
Most of all, the lime composition is used by summer residents. The walls are whitewashed inside and outside the house. They paint the trunks of trees and bushes to protect them from rodents and other pests. Painting borders for beauty, giving a fresh white color. For technical premises, outbuildings.
In multi-storey buildings, staircases and corridors in public foyers are treated with lime.
In school, medical, and other municipal institutions, walls are painted with a lime-based composition. After drying, calcium hydroxide becomes safe for the body. No hazardous substances are released into the air.
How to slak lime correctly and safely
The rules for preparing and slaking lime are required for those who have chosen this particular whitewash option when finishing. Lye is purchased in construction stores in slaked or unslaked form. With the first option, you can connect elements to work immediately. In the second case, before whitening, it is assumed that the composition must be extinguished.
It is important to make sure in advance that there is no health hazard. To ensure the necessary measures you need:
- achieve good ventilation of the room where whitening will be carried out;
- prepare a suitable bucket for the composition - lime is slaked only in metal containers;
- put on a respirator and protect your eyes with special glasses;
- You can’t do without overalls, headgear and rubber gloves.
The name quenching is given to the reaction during which the elements interact with each other. The result is a special powder or lime paste. The exact results are determined by the bases used. Next, we’ll tell you how to properly dilute lime:
1. Fluff is obtained by mixing lime and water in proportions 1:1. For example, one kilogram of dry material needs to be diluted with a liter of water. Lime powder is poured into a clean container, then everything is filled with cold water.
2. The lime gets very hot when it reacts. This causes hissing and splashing. At least 30-40 minutes should pass before everything calms down.
3. To stir the composition, use a wooden stick. The powder is obtained when the moisture finally evaporates. At this stage, it is considered that it was possible to dilute the lime for whitewashing.
For whitewashing and filling small cracks, a thicker composition is needed. Lime dough is a mass of plastic form, in the preparation of which alkali and water are used in a ratio of 1:3. In the future, the process is slightly different from the first option: we take a container with lumps of lime, gradually add water to it in small portions, and slowly stir everything with a brush.
Lime paste helps strengthen cement-sand mortars; the mixture helps in preparing materials for plastering work.
On video: recipe for making lime whitewash.
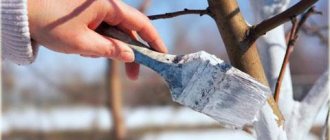
Why are the trunks of fruit-bearing trees whitened?
Whitewashing of trees is carried out in late autumn (November) and early spring (March). Gardeners do this not for beauty. Bark is a protective barrier for trees: it protects them from environmental influences. Therefore, it is the material that is primarily exposed to temperature changes: it dries out, flakes, cracks from the heat, freezes in the cold, and is damaged by bark beetles.
If it is not strengthened and taken care of, the wood becomes exposed and begins to deteriorate and rot. This greatly weakens the plants, which ultimately leads to their death. What does the whitewash layer protect against?
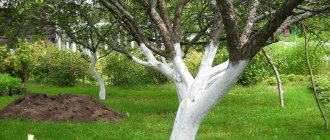
- White color has reflective properties, so it does not allow the sun's rays to overheat and burn the shell of the plant and its branches.
- Autumn whitewashing protects the trunk shell in winter from the formation of ice during the period of alternating thaws and frosts.
- The smell of lime repels animals gnawing on the bark of the trunk.
- A layer of white will protect the plant from insect pests crawling out of the soil and destroy those that have hidden in the cracks of the shell for the winter.
It is obvious that whitewashing plays the role of strong protection of the plant from external destructive factors.
It is necessary to whitewash trunks in spring and autumn in dry weather, otherwise the whitewash layer will be washed away by rain.
After drying, the lime layer will become more resistant to precipitation; some gardeners sometimes even add glue to the solution to make the paint more moisture-resistant.
Secrets of uniform whitewashing
Preparatory work
Windows, furniture, doors and floors in the house should be covered with plastic film, you can also use old newspapers, then cleaning the room will not be so difficult. Prepare working tools, in case of whitewashing the ceiling - a stepladder.
The surface also requires preliminary preparation. Old chalk whitewash must be completely removed, the same goes for crumbling plaster. The surface is cleaned of stains and dirt.
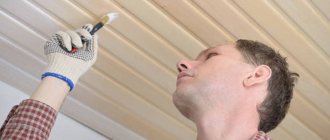
How to apply lime mortar
There is nothing complicated in the application process. Simply dip a painting tool (a wide brush or roller) into a container with whitewash. The solution is then distributed over the surface only in a thin layer. It’s good if you can use devices with long handles. They are easy to make yourself. Then there will be no need to make additional efforts during processing, and the whitewash consumption will not increase.
Application is carried out in several layers, at least 2-3. Each layer is applied perpendicular to the previous ones, then thickening and streaks will not appear, and the coating will be uniform. It is important to maintain time intervals between applying layers. For old ones, complete drying is mandatory. If you make the layers thin, this process ends faster.
Often areas appear in the corners without proper treatment. It is recommended to simply go over them again using a whitewash brush.
Ceiling finishing methods
When choosing what you can use to whiten the ceiling, take into account the volume of work, the condition of its surface, taking into account design ideas.
Tools
- Brush.
- Roller.
- Sprinkler (spray gun).
- Vacuum cleaner.
Whitening the ceiling with a brush is the simplest and most common method . However, if the surface area is large, then hand tools will not be the most effective solution - use a sprayer.
You can use a regular home vacuum cleaner for this. Just attach a special sprinkler to it, which can be included in the kit or purchase it separately.
How to whitewash a ceiling with a sprayer? Pour whitewash into a jar (from 0.5 to 2 liters) and put this simple device on top. Next, you need to look at the design features of your vacuum cleaner.
If you have a model that simply turns the knob to change the direction of air supply from suction to blowing, that’s good. For other options, you need to connect the end of the vacuum cleaner hose to the hole from which the air comes out.
Before starting work, you must first clean off the old whitewash, and then carefully cover all parts of the room’s interior. It is best to attach a protective film from the ceiling itself, then you will not have to clean the room for a long time.
The Best Alternatives to Brushes
Using brushes used to be the only available solution for whitewashing walls. But thanks to modern technologies, repair costs are significantly reduced, and large spaces can be whitewashed. Brushes remain relevant only for rooms with a small area.
The following devices greatly facilitate the work of whitewashing a wall:
- Spray guns for whitening. You can use the same tools as for plants, for example, a sprayer. The main thing is to have a container with a volume of 5 to 15 liters.
- Special apparatus for whitewashing with lime. Useful when large areas are being processed. The principle of operation has much in common with a spray gun.
- Spray gun. Thanks to this tool, lime is easily distributed over the surface.
There are several types of spray guns available: pneumatic, electric, manual. The latter are the best option when processing small areas. Devices of different types operate according to a similar scheme. Electric ones cost more than manual ones. But they also distribute the lime better.
Uniformity of layers per 1 m2 and simplification of work are the main advantages that distinguish any such devices. The labor intensity of the process becomes minimal, and the whitewashed ceiling has no streaks or other defects.
Whitewashing process with a spray gun
Follow these tips when whitewashing:
- For work, the lime composition is additionally diluted and filtered if the work is carried out using spray guns or sprayers.
- The lime whitening solution is mixed before adding each new portion.
- The surface must be slightly moistened before applying the material.
- Limestone whitewash is poured into the spray gun, and air is pumped into it. The spray nozzle is adjustable to ensure even material distribution.
- If problems arise with spraying, then the material is too thick. You need to add water to dilute even more if necessary.
- The distance between the surface and the sprayer should not exceed 15-20 centimeters.
- Application requires circular and smooth movements.
- New layers should be applied at intervals of one and a half to two hours.
Tools
The main tools are the usual things for a builder: a roller, a paint brush, a spray gun with a spray gun. A household vacuum cleaner with an air flow blowing function is suitable.
For beginners it is recommended:
- use a roller or brush to cover a small surface - a cellar, a small room in the house;
- The roller is suitable for painting high ceilings. The tool is fixed on a long stick as a handle. The work is done in the same way. Smooth movements;
- mechanical devices - for processing large-scale coatings. For painting external walls with a porous, uneven structure, a spray bottle or a standard household vacuum cleaner is suitable.
Sprayer
Option - brush with natural bristles. The width is 15-20 cm. Periodically, the instrument is washed under a drain tap to extend its service life.
Before use, soak the brush in water.
The roller is used to perform whitewashing in one ball. The application of the secondary layer is carried out after the first has dried. The result is a matte finish.
It's easier to work with a sprayer. The solution is applied with a thick ball in one go. Small defects on the surface of the base are instantly masked. But lime consumption will increase in direct proportion. There is no need to be sad. The raw materials are cheap. There will not be a significant increase in costs for building materials.
A vacuum cleaner with a blow-out function, equipped with a polyethylene cover with a tube, can be transformed into a construction tool.
Use of special additives
There are additional components, the use of which helps to improve the properties of the original composition. Shallowing is the first problem that such materials solve. To solve the issue you can add:
- salt;
- drying oil;
- acrylic primer;
- wallpaper glue or PVA;
- grated laundry soap.
Thanks to such additives, bloating and blistering are eliminated and effects such as maximum adhesion to any type of surface are enhanced. The listed components allow you to quickly wash off the lime with water.
White is not the only option
Adding ordinary blue will help to cope with the situation when the lime coating turns yellowish after application. 10-20 grams of material per liter of composition will be enough. After this, the whitewashed ceilings become snow-white.
Sometimes it is necessary to obtain other colors. Not every dye will be suitable in this case, and the name whitewash will not be suitable for the technology. It is required to use pigments with maximum resistance to alkaline environments. Lime paints are combined with the following pigments:
- ultramarine for blue;
- lithopone for white;
- titanium dioxide for white;
- chromium oxide for green;
- mumiyo for red-brown;
- red lead for orange;
- umber for greenish brown;
- ocher for a yellow tint.
It is recommended not to add pigments in their original form, in powder form. You should first dilute everything with water until a paste appears. Then the dye is given time to infuse for 24 hours, only after which the pigment can be added to the lime mortar.
For borders
To perform such work, you can use various products: from water-based paints to oil paints. However, the most classic method is whitewashing with lime mortar.
Cancelled
This material is immediately ready for use. All you need to do is simply mix it with water until you get the desired consistency.
Quicklime
The initial product is quenched according to all standard rules, after which the working substance is prepared.
The question of whether any additional components can be saved for these purposes is quite controversial. On the one hand, the requirements for painting borders are not as high as, say, for residential premises or chicken coops.
On the other hand, these objects are often installed in open space, where there is exposure to various aggressive factors: from natural-climatic to man-made. Therefore, to prolong the “novelty” effect, it makes sense to use various strengthening additives.
If we talk in general about all the goals and processes discussed above, then it’s still not worth saving on components. Moreover, all of them are not only quite cheap, but also publicly available.
Painting and puttying on lime
It is unlikely that the quality of the repair will be satisfactory if the materials are applied one after another at once. The paint usually quickly adheres to the whitewash and rolls off along with it. After everything dries, there is a high probability of air bubbles appearing; painting the walls does not give the right result.
To avoid such results, first wash the surface with water and soap. Then additional processing is carried out using a stiff brush. This is done to prevent additional defects from appearing.
Putty helps level the base when repairs are made. Removing old layers of finishing is necessary if puttying is carried out on walls covered with lime. You can use a scraper to remove all the swollen areas, and then apply a primer, after which the original base can be removed without any problems.
A quick and easy way to whitewash (2 videos)
Different types of lime and its use (27 photos)
Precautions during operation
The rules for safe and proper self-preparation of slaked lime suggest filling the container no more than thirty percent. In this case, the ingredients should be mixed carefully and slowly to prevent the material from getting onto areas of the body. The lime solution can especially damage the eyes and skin of the hands. If this happens, you should immediately rinse the contaminated area with running water. Exposure to lime solution over a long period of time can cause damage to the internal tissues of the human body. After washing, it would be a good idea to consult a doctor to examine the affected area and take preventive measures to maintain health.
Immediately rinse the contaminated area with running water.
Do-it-yourself whitewashed walls are a profitable, simple and quick way to refresh your interior. Having figured out how to properly slak lime for whitewashing walls, you can easily complete the cosmetic renovation of the room.