Wooden lining is a popular material for cladding ceilings. It is environmentally friendly, distinguished by its ability to release moisture in a dry, heated environment, and neutralizes temperature changes. However, despite all the positive qualities, in its raw form it has a short service life (5-10 years). To preserve the properties of wood, appropriate protection and painting are necessary. For these purposes, manufacturers offer a wide range of products. Let's look at how to paint a lining ceiling step by step.
Which company should I buy ceiling paint from?
Dufa
A popular German brand that has proven itself well in the water-based paint market. The Dufa company traces its history back to the middle of the last century, and throughout all these years it continues to hold a leading position in world rankings.
The manufacturer’s range is very extensive, which allows you to choose the right paint for any design concept, and texture paints make it possible to experiment not only with colors, but also with textures, creating a truly original and stylish interior.
Caparol
Another brand from Germany, produced by the DAW SE group of companies. A distinctive feature of this company is their meticulous approach to the quality of their products. Despite the fact that DAW SE has more than 30 factories around the world, each can of paint is a standard of German pedantry in the approach to work.
Paints of the Caparol brand are resistant to abrasion and washing; they are chosen for work on objects of increased complexity and in places with high traffic volumes, and due to the fact that DAW SE factories are located all over the world, the company can afford to set affordable prices, without damage product quality.
Dulux
An English brand that focuses not only on the quality and durability of its products, but also on their complete environmental friendliness. It is Dulux brand paints that are recommended to be used for renovations in children's rooms and bedrooms.
For more than 10 years, Dulux paints have received the palm in most European ratings, as well as awards in various competitions. Dulux is distinguished by high quality products, but due to the relatively high cost, we do not put it in first place.
TIKKURILA
Anyone who has ever dealt with renovations has probably heard about TIKKURILA paint. The brand from Finland has been the leader in sales of the domestic market for many years, and even today, when the market is flooded with a variety of brands, it continues to maintain its position in the top ten.
TIKKURILA can rightfully be considered an ideal price-quality ratio. The Finns are constantly modernizing their production and improving the quality of their products, adding more and more new types of paints to their catalogue.
To date, TIKKURILA's catalog includes more than 40 different types of paint, optimized to work on a wide variety of surfaces.
This is interesting: The use of mineral paints: we tell the question
Paint for clapboards inside the house - a detailed guide
When decorating a room with clapboard, we want not only perfectly smooth walls, but also a beautiful aesthetic appearance. To do this, we cover the lining with varnish or paint. Choosing a color scheme and manufacturer becomes difficult. After all, the store has a fairly wide range of varnish and coloring products.
- What's better?
- Choice
- Color
- Methods
- How to paint
- Adviсe
Which ones are best to use?
- acrylic
- oil
- polyurethane
- latex.
They are able to decorate any room, attracting admiring glances from visitors.
In addition, by painting, you get a long-lasting result that does not require constant monitoring.
The paint is resistant to any changes in temperature, exposure to sunlight, high humidity, etc.
The best paint manufacturers are Eurotex, Tikkurila, Panel-Yassya, Senezhem Aquadecor.
Video - how to choose an antiseptic (tikkurila):
Paint or varnish?
Many people wonder what to paint the surface with and what will be healthier for it?
As a rule, the lining is varnished. It is this that protects the wood from premature darkening and drying out, which means it has protective properties.
Paint for lining is used when the room has its own style that needs to be maintained. Otherwise, it will stand out from the overall artistic composition.
But this does not mean at all that the paint will not retain the properties of wood. They simply choose it when they want to make light repairs or maintain the design of a room.
How to choose a color?
- If you want to visually expand the space, it is best to choose light shades - white, sand, beige.
- If you like dark, muted colors, choose blue, purple, black, burgundy, green. They will fill your room with exquisite beauty, visually narrowing the space.
- Focus on the overall style of the interior. All rooms of a residential building must be connected by one idea and compositionally consistent.
- Do not choose colors that contrast with the floor, furniture and ceiling.
- It is best to paint the kitchen in warm shades; cold ones will create a feeling of dampness.
- It is better to choose cool tones for the office.
- The bedroom will suit the natural color of wood.
- When choosing a white color, remember that it requires careful care, because... often gets dirty.
Coloring methods
- plain
- combined.
A well-chosen combination of colors will make your room original. It is best to paint the bottom in dark colors and the top in light colors.
To create a bright holiday mood, try experimenting and painting each stripe a different color. This coloring would be appropriate in a children's room.
Video - DIY painting:
List of required tools and materials
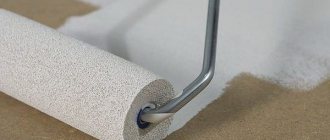
To paint the lining, you will need the following tools: brushes and a roller (not wool or foam), a ladder, pumice stone, a bucket, safety glasses at your discretion.
Consider using a floor covering material if you plan to paint the walls or ceiling.
Paint is a liquid substance, although it has a thick consistency, and can end up on a surface that is undesirable for painting.
How to paint wooden lining?
1. Preparatory stage
- Cleaning from dust and dirt using solvents and bleaches.
- Surface grinding.
- Putty or primer of cracks and crevices. This is important because the painted one will show all the imperfections that will ruin the overall impression.
2. Coloring
Paint for lining will adhere best if it is applied in a thin, even layer, remembering that any drip will be immediately noticeable.
Therefore, it is more advisable to take a small amount. If you want to achieve a shiny effect, use gloss enamel.
3. Final stage
Be sure to coat the painted surface with a water-repellent anti-slip agent. This is especially necessary if you have painted a floor that requires maintenance with a lot of water.
Tips for the best coloring
- Stir the paint thoroughly to achieve an even shade and even distribution.
- Instead of regular paint for the lining inside the house, you can use water-based paint. Then you won't need to coat it with water repellent. Two or three layers should be applied. But be careful - it can hide the structure of the tree. But it is the wooden surface that gives it a special charm.
- When painting the lining with oil and wax, do not forget about a material that will remove excess wax. It is best to use a waffle towel or lint-free cloth.
- When using varnish or stain, make sure the selected shade is accurate by testing the substance on a separate area. If you don't like the color, it can be easily decorated with stain of a different color. But you don't have to repaint it completely.
Video - coloring visual aid:
Approximate cost of work
The main working tool is paint, which, depending on the volume and the degree of fame of the manufacturer, may have the following cost.
- Water-based - from 600 rubles for 2.5 liters
- Acrylic - from 100 rubles per 3 kg
- Latex - from 200 rub. for 1 kg
- Polyurethane - from 200 rubles per 1 kg
- Oil - from 100 rub. for 1 kg
- Varnishes - from 150 rub. for 1 kg
- Stains - from 300 rub. for 1 liter
Despite the fact that lining is the simplest finishing material, it requires a lot of attention when painting. You need to take your choice seriously, because it depends on whether you like the end result.
kubvagonki.ru
The best acrylic paints
Paints based on acrylic resins are rightfully considered the most popular due to their low cost and ease of application. Acrylic is resistant to changes in temperature and humidity, although in general characteristics it is inferior to competitors based on silicone or silicate.
Due to great demand, all well-known manufacturers today produce lines of acrylic paints, so you can always choose the right option based on your financial capabilities.
The most popular acrylic paint
PROFILUX PL-04 A. When choosing acrylic paint, and having modest financial resources, or simply wanting to save money, consumers prefer German Profilux paint.
Of course, when comparing the quality characteristics with the world's leading manufacturers, this paint will lose, but given the very high cost of some famous brands, the popularity of Profilux products becomes understandable.
Advantages:
- High vapor permeability;
- Resistance to water and detergents based on active alkalis;
- Low cost;
- Smoothness of the finished coating;
- Absence of substances harmful to health;
- Fade resistant.
Flaws:
- Long drying (up to five days);
- Lack of gloss;
- Low resistance to chemical solvents.
We did not include Profilux products in our main rating, but based on the mass of positive reviews and popularity among consumers, we could not ignore them.
The best acrylic paint
DULUX MASTER LUX AQUA 40 is a premium acrylic paint with excellent quality characteristics and a long service life. The DULUX company focuses on the environmental friendliness of its products, which is why they are recommended for use in children's institutions.
MASTER LUX AQUA is a whole line of DULUX products suitable for both external and internal work.
Advantages:
- Complete safety for health even at the time of dyeing;
- High hiding power, capable of masking defects in the surface being painted;
- High adhesion to any surfaces;
- Does not fade or turn yellow over time;
- Long service life.
Flaws:
- Relatively high price;
- High consumption per meter of surface to be painted.
The English company DULUX values its reputation and carries out careful control over the quality of its products, which, of course, is reflected in positive customer reviews.
How to paint a wooden ceiling in a house
In this case, when the ceiling is treated in a room where there is a huge amount of wood parts and the same ceiling, in other words, very close to the natural design, it is recommended to opt for a glaze or disinfectant coating.
They have a number of advantages, including:
- Increasing the service life of wood ceilings;
- Giving the surface an appropriate shine and light color;
- Full preservation of wood texture.
Each of them pursues its own goal, which is carefully written in the annotation to the substance.
Pay attention! From time to time, it may be necessary to apply two or more layers of coating in order for the final color to have a decent appearance.
Almost always they prefer to choose varnish for wooden ceilings. Taking into account that interior finishing work is being carried out, it is better to choose acrylic varnishes on an aqua base. This coating dries quite quickly, while at the same time preserving and emphasizing the natural outline of the wood.
Also, depending on the design of the room, the ceiling can be painted with matte or glossy varnish. When choosing ordinary paints, preference should be given to acrylate coating, because oil and acrylic are used only for external work. The advantages include long-term preservation of the original color, the wood does not fade, and is protected from cracks and the penetration of water and steam.
Preparing and cleaning the ceiling
If the ceiling tiles are laid flat, it is enough to remove any remaining wallpaper, glue and/or whitewash from the ceiling. To remove whitewash or wallpaper, the surface of the ceiling must be moistened with water using a sponge. As soon as the layer of whitewash or wallpaper to be removed is saturated, it can be easily removed with a spatula. However, there is no need to wet large surfaces at once, as they can dry out quickly. It is best to do this step by step, wetting and cleaning small sections of the flow, perhaps meter by meter.
An example of removing soaked whitewash using a spatula.
For better adhesion of the putty to the ceiling, it is necessary to cover the surface with a primer mixture. The primer should be applied to the ceiling in two layers. The first is parallel to the wall with the window, the second is perpendicular to it. Apply the primer evenly, leaving no drips or brush or roller marks. The brush should touch the ceiling with the tips of the bristles. We hold the brush at an angle of 60-70 degrees to the ceiling, while during work the brush should be rotated around its axis, allowing it to wear evenly on all sides. The best result is obtained by priming with a roller. It is better to take a roller with short pile; prime the surface without pressing hard on the tool.
If the ceiling has fairly strong drops and steps, then before starting puttying, in some cases it will need to be plastered to eliminate the most significant irregularities, then primed after complete drying.
Painting technology: we will take into account every detail
If there are traces of old paint on the walls, both inside and outside the house, you need to check how well it is holding. If it is strong enough, then it must be washed with a 2% soda solution.
In some cases, this is enough to give the walls of the house a noble appearance, and there is no need for painting.
Up to 300 grams of soda are diluted into a bucket of hot water. After the walls are cleaned, they must be puttied and covered with drying oil. For grinding, you can use ordinary pumice.
After completing the preparatory work, a primer layer should be applied to the lining. This is required to secure the putty surface.
For the primer, use the same composition that will subsequently be used for painting. The primer layer must dry completely; before this, you cannot start painting.
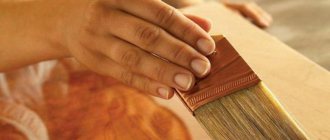
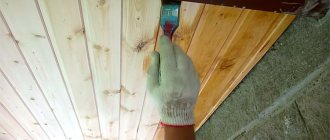
Painting: brush is still in fashion
The paint is applied to the lining in a thin layer with continuous movements from top to bottom. It is not recommended to brush over the same area several times.
Only paint the ends of the brush bristles, not the base.
One layer of paint is usually not enough, so after the first layer has completely dried, a second one is applied. We should not forget that several thin ones will last much longer than one thick one.
Ceiling made of lining
The final layer is applied starting from the top. Otherwise, the streaks left by the brush will be noticeable.
To paint the frames of the windows, as well as the baseboards and the bottom of the doors of the house, you should use a small brush with a diameter of no more than 5 cm. The doors are painted from the panels, gradually moving to the surfaces that protrude.
The paint is smoothed over with an almost dry brush, preferably with upward strokes. The lining painted in this way will serve faithfully for a long time.
If you need to paint a narrow surface - a window frame, a door frame, then you should try not to stain the glass or wall located end-to-end with paint.
In this case, a piece of plywood or cardboard will come to the rescue, which is glued to the glass using soaked soap. The width of the strips is approximately 5 cm.
Thanks to this, there is no need to subsequently remove paint from the glass. At the end of the work, the paper strips can be easily removed with warm water.
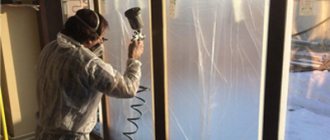
Spray: when to use it?
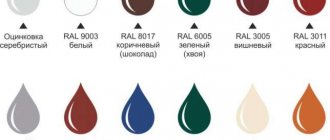
Variety of colors and options for painting lining
Sometimes, when finishing with clapboard, it is necessary to apply nitro paint to small metal or wooden surfaces.
This is best done with a spray bottle.
You can make it yourself, just find two tubes. The diameter of each is about 3 mm, the length is 15-20 cm.
The tube through which air will flow should be slightly thicker.
Don't forget about windows and pipes
If paint does get on the glass, it is removed with a special paste containing chalk and concentrated soda. The paste is applied to the painted area and left on. When the paint becomes soft, it can be easily removed.
If you need to remove previously applied oil paint from a wall, it is good to use a hot iron, which is used to iron the area through aluminum foil.
The paint softens and is easily removed with a spatula.
Secrets of dyeing with mittens
Before painting the lining, which contains metal elements, for example, pipes, strips, etc., they are wiped with vinegar.
The paint adheres better to such a base and does not peel off. It is no secret that it is quite difficult to paint removed pipes due to the fact that one side always lies on the ground.
This kind of hand painting is quite effective. In one minute, you can paint up to 5 meters of pipe in this way.
Silicone paint
You can choose it if you are not limited by budget. Its cost is quite high. But it is this material that combines all the advantages of organic and mineral materials. In some cases, even acrylic products cannot be compared with it. It can be used for both ceiling and wall finishing. It has the following advantages:
- This material is capable of tightening even cracks whose thickness is about 2 mm.
- It has excellent vapor permeability and water-repellent properties. This allows the ceiling to breathe well.
- The finished surface is practically not contaminated.
- The fresh silicate composition has virtually no unpleasant odor even when fresh.
- This material can extend the durability of the finish and prevents the development of fungus.
Haven't decided yet what to paint the ceiling in your kitchen with? In this case, this finishing material will be the best option.
The sequence of work on putty
Mix the dry mixture
This work is best done using a special mixer or drill attachment. Using such a tool will allow you to obtain a homogeneous mass without lumps. Add water to the dry mixture little by little, trying to eventually get a mass with the thickness of sour cream.
Mixing and preparing putty.
Applying putty to the ceiling
The puttying process is absolutely the same for any type of putty. Using a small spatula, scoop up a little mixture and distribute it evenly over the surface of a wide spatula. Then the mixture is applied to the ceiling with a wide spatula in as thin and uniform a layer as possible. The remaining mixture is removed from the wide spatula with the narrow one back into the basin. We continue to do this procedure until the entire ceiling is plastered with the first layer.
Applying the first layer of putty.
After the first layer has completely dried, it is necessary to remove all irregularities that rise above the base layer. Sagging can be removed with a spatula or sandpaper. After sanding, dust remains, which can affect the quality of the second layer. Therefore, using a wide spatula to smooth out defects is more appropriate.
Number of layers
The more uneven the ceiling, the larger it is. With each applied layer, you should strive to level the surface horizontally, applying more mixture to uneven areas. Each subsequent layer can be applied only after the previous one has completely dried.
Last layer
The finishing layer should be thinner than all previous ones. The finishing layer must be applied quickly, without allowing the mixture to dry out on the edges. Using a wide spatula, apply a layer of putty and with the next movement remove all excess, pressing the spatula firmly against the surface of the ceiling. In this case, it is better to hold the tool almost perpendicular to the surface being processed. If the finishing layer is applied correctly, subsequent sanding of the surface may not even be necessary.
Final finishing
If the ceiling is being prepared for wallpapering, finishing sanding may not be necessary. If you plan to paint the ceiling, we will give it perfect smoothness by treating it with fine sandpaper, and after the putty has dried, highlighting and revealing irregularities using a carrying lamp. You can resort to using a grinding machine.
Sanding the putty surface.
Putty technology
Depending on the evenness of the ceiling, puttying may require starting and finishing treatment: if the surface does not have significant defects, then only finishing putty can be used.
If there are seams, cracks and significant irregularities, it is necessary to use a starting putty
Do-it-yourself putty technology involves the following activities:
- The mass is collected with a narrow spatula and transferred to a wide spatula or trowel, after which it is applied to the ceiling surface, starting from the corner.
- The tool must be pressed firmly to the base, carefully pressing the mixture, filling all cracks and depressions.
- The applied material should be leveled so that the coating does not have stripes at the boundaries of the treated areas.
- After the layer has dried, you need to sand it in a circular motion using a construction float.
Advice! To eliminate flaws during the work process, experts recommend checking the surface with light from a light bulb directed at it.
Then finishing putty is applied to the ceiling. Most finishers prefer to use polymer compounds - they provide the smoothest possible surface, which is ideal for further painting. The mixture is applied with smooth movements, starting from the far wall; if necessary, a second layer can be applied to eliminate microcracks and tool marks. After drying, the surface should be rubbed with sandpaper and primed.
Correctly executed putty significantly simplifies the further painting process and allows you to preserve the finishing result for many years. If during technical painting of the ceiling the aesthetic appearance of the surface is not of significant importance, then during decorative finishing everything should be as smooth and beautiful as possible, and in this case there is no way to do without puttying.
- Interior decoration Ceiling
- Walls
- Floor
- Doors, arches
- Window
- Stove, fireplace
- Kitchen decoration
- Bathroom, toilet
- Corridor, hallway
- Balcony, loggia
- Other rooms
- Finishing of buildings Country and private houses
- Wooden houses
- Baths, saunas
- Finishing materials Drywall
- Cladding panels
- Wallpaper, cork
- Tile
- Laminate, linoleum
- Decorative plaster
- Finishing work Plaster
- Primer
- putty
- Painting, whitewashing
Not so long ago, wallpaper became an obsolete material for decorating surfaces. However, s.
Perhaps one of the most popular design tricks of our time is decorative brick plaster.
An apron is a mandatory element of any kitchen, provided that its owner wants to preserve the walls around it.
Painting a wooden ceiling: main stages of work
It is noteworthy that when painting a ceiling, the whole difficulty lies not in the painting process itself, but in the preliminary step. If the material is not carefully processed, then the final result cannot be called satisfactory.
Preparation consists of the following:
Attention! You should not choose cheap paint, otherwise there is a possibility of losing the texture of the wood and spoiling the design.
As for the painting process itself, everything is quite simple: you need to work with a brush in one direction, and if several layers are applied, then you need to alternate horizontal stripes and vertical ones.
Ceiling leveling
After thorough cleaning, you can begin to level the ceiling and get rid of cracks using putty. But before that, you need to familiarize yourself with the principles of repair work of this type.
- Before applying the putty, it must be treated with a primer. It will help prevent the appearance of fungus and ensure good adhesion of its substance to the leveling layer.
- It is recommended to dilute the putty with water in a separate container to a certain consistency using a special nozzle. It is necessary to comply with the proportions indicated on the product packaging.
Before puttying, it is worth treating the ceiling with a primer.
Now you can proceed directly to applying the putty.
- It is necessary to evenly treat the surface with the mixture. If there is no smooth surface, additional layers are applied. Each of them requires complete drying separately.
- Next, the ceiling must be thoroughly sanded to ensure good coverage of the paint layer;
- After sanding, you need to sweep away the gypsum dust.
- For good adhesion of the putty coating to the acrylic solution and lower costs, the surface should again be treated with a primer.
Note!
- Qualified specialists do not recommend painting the ceiling with acrylic water-based paint if the plaster is fresh and about two weeks have not passed since its application.
- It is not advisable to paint at too low or high temperatures. The best option: from +5 to +27 degrees.
- Unused remaining paint should not be left exposed.
- Acrylic solution is not suitable if it thaws after freezing.
After putting the putty, you should wait for it to dry completely.
Wood bleaches and purposes of their use
One of the chemical methods for treating darkened wood is bleaching. Wood bleach returns the original color of the material, helps lighten darkened areas, and destroys fungi, which prevents further darkening.
Bleaching agents that differ in their active ingredients will help lighten darkened elements:
- chlorine-containing, contain sodium or potassium hypochlorites, bleach and chlorine dioxide,
- preparations without chlorine - hydrogen peroxide, ammonia and oxalic acid.
Most bleaches have a disinfectant, fungicidal effect and can be used for preventive and protective purposes. Whitening wood helps improve the appearance of discolored areas.
Preparations for wood bleaching
Lightening of darkened surfaces is carried out using a wide range of preparations developed by the chemical industry.
A well-known preparation for lightening is Woodmaster Frost bleach. Its difference is that after processing a darkened area of wood, the natural color is restored and the pattern and structure of the wood is not damaged. In addition, it has protective properties and is used before painting or impregnating structures. Due to the gentle composition of the bleach, it is used indoors to improve the appearance of wood trim. Frost bleach, which is applied to a clean, dry surface with a brush and left to dry for 5-12 hours. Then it is recommended to wash the treated area with water. The active ingredient in bleach is an aqueous solution of sodium hypochlorite.
Belsin bleach contains chlorine-containing substances. It is applied with a brush, sponge or spray method; to achieve the desired degree of whitening, you can repeat the procedure. Belsin wood bleach is used for preventive, protective treatment of wooden elements if it is known in advance that they will lie in a damp place. The product can be easily applied to material of any moisture content. The composition of wood bleach makes it easy to wash away traces of use remaining on the surface with water.
Senezh is a line of antiseptics for preventive and protective treatment of wooden structures for various purposes. It is not recommended for use on surfaces previously treated with varnish, drying oil and other protective and water-repellent agents. Senezh penetrates deeply into wood, destroys and suppresses the development of mold fungi. The preparation is applied to the cleaned wood using brushes, rollers, or sprayers. Also suitable for soaking and deep impregnation processes in an autoclave, which improves protection and extends its life to 30-35 years.
Neomid 500 is a Russian bleaching impregnation for wooden structures. Restores the natural color of wood and provides protection against fungal damage for a long time. As a side effect of the treatment, salt is formed on the surface, which is easily removed with water. The concentration of the bleach solution depends on the purpose. To remove small stains and for preventive treatment, a 1:2 ratio of concentrate and water is sufficient. If the surface is damaged less than 3 mm, it is enough to dilute the impregnation with water one to one. For deep and extensive darkening of the surface, the use of undiluted concentrate is allowed.
General preparation of the room for painting
Before preparing the ceiling for painting, you should take preparatory measures in relation to the entire room being repaired:
- Clear the room of furniture and other interior elements. If for some reason this cannot be done, you must at least cover them with plastic film as protection from dust, paint, etc.
- De-energize the electrical wiring in the room, since during the preparation process you will need to wet the ceiling with water.
Protecting windows from dust and paint
- Window and door openings should also be covered with film, and it is better to temporarily remove the lamps altogether, since it will be difficult to wash them off from chalk splashes.
Advice! It is most convenient to carry out the work in an empty room, the walls of which have not yet been finished (for example, covered with wallpaper), then they will not have to be additionally protected.
Painting a wooden ceiling: main stages of work
It is noteworthy that when painting a ceiling, the whole difficulty lies not in the painting process itself, but in the preliminary step. If the material is not carefully processed, then the final result cannot be called satisfactory.
Preparation consists of the following:
Attention! You should not choose cheap paint, otherwise there is a possibility of losing the texture of the wood and spoiling the design.
As for the painting process itself, everything is quite simple: you need to work with a brush in one direction, and if several layers are applied, then you need to alternate horizontal stripes and vertical ones.
People's rating of products
Caparol is a manufacturer of paint and varnish coatings that has earned the trust of not only experts, but also consumers
Considering their own painting experience, many people share recommendations for choosing a quality composition.
Thus, reviews from people confirm the reliability of such paint coatings:
back to menu
Caparol AmphiSilan-Plus (Silicone)
PROS:
- It has vapor permeability and dirt-repellent properties.
- Waterproof and remains glossy even after washing with aggressive detergents
back to menu
Profilux (Acrylic)
PROS:
Characterized by high vapor permeability, does not fade, provides a smooth finish, inexpensive
MINUSES:
Susceptible to chemical solvents, takes a long time to dry, does not provide a glossy finish
back to menu
Ceresit CT 54 (Silicate)
PROS:
Resistant to moisture, easily tinted, inexpensive
MINUSES:
Poor adhesion to non-mineral surfaces and susceptibility to fading
back to menu
Tikkurila Joker (Latex)
PROS:
It has a long service life, is non-toxic and safe, adhesion to most surfaces is noteworthy
MINUSES:
May be difficult to apply, high price
Choosing high-quality paint that will delight you with its decorative properties for a long time is a responsible task. The final decision when purchasing should be made taking into account the type of room, the impact factors that the coloring composition will encounter and its consumption rates.
Experts give advice on what type of paint to choose in the video:
Recommendations for proper painting of ceilings are given in the story:
back to menu
What paint is better to use
On sale you can find water-based and water-dispersion paints. Their properties differ in that the first option is afraid of moisture, that is, such ceilings cannot be washed. The second option will not lose its appearance after wet cleaning. There are also oil paints, but they leave a dense layer on the ceiling that does not allow air to pass through, which can contribute to future damage to the surface.
Water-based paints do not have this drawback. Such mixtures are fireproof, environmentally friendly and practically odorless. Once applied, the paint dries very quickly (about 2 hours), it is very easy to work with, and once applied it lasts a very long time. It is worth noting that water-based white ceiling paint can be painted in any shade, while the predominant color on sale is white.
The client can easily choose the right shade for himself directly in the store, thus solving any design problem.
No. 1. What are the differences between different wood varnishes?
Varnish is a viscous product consisting of a solvent, resins and polymers. After application to the surface, the solvent evaporates, leaving a dense, durable film. This barrier protects the tree from various kinds of negative factors. Since wood was previously the main building material, the first varnishes appeared in the 12th century. It was the invention of a German monk, and the composition of the protective substance was kept secret for a long time. Attempts to develop a means to extend the life of wood have been made constantly. Thus, in the 15th century, oil-type compositions appeared in England, and later in Holland and Portugal they began to produce resin-based varnishes.
Since then, the range of such products has expanded significantly, compositions with specific properties have appeared, so today you can’t just go to the store and buy the first wood varnish you come across - it is important to take into account a lot of nuances of different compositions, otherwise you may not only fail to protect the material, but also harm it
When choosing a wood varnish, you should take into account the following factors:
terms of Use. Outdoors, the material is affected by factors such as high humidity, constant temperature changes and ultraviolet radiation, so the composition for protection must be selected accordingly - only wood varnishes are suitable for outdoor use. As a rule, the manufacturer indicates on the packaging the conditions under which the composition can be used. Parquet, furniture and wall finishing materials can be safely coated with wood varnish for interior work;
wear resistance. It is not always possible to cover the floor with the same composition as the furniture, since the load on the surface will be completely different. If even the least resistant nitrocellulose varnish is suitable for furniture and other wooden objects that are not subject to heavy wear, then for flooring it is necessary to take more durable compounds;
toxicity. Most modern formulations have an unpleasant, pungent odor when drying, as they contain organic solvents. Of course, this smell will disappear when the varnish is completely dry, but until then you will, at best, have a headache, and at worst, get serious poisoning. Polyurethane, acrylic, polyester varnishes and nitro varnishes are applied with special protective equipment in carpentry workshops or non-residential premises. After drying, all these compounds become safe. If the work needs to be carried out at home, and the household members are not going to leave anywhere, then it is better to take the least toxic composition - these are water-based varnishes, they are practically odorless;
drying time. A layer of varnish can dry from 6 to 72 hours and sometimes longer. Water-based varnishes and oil-based varnishes take the longest to dry; alcohol-based and nitrocellulose varnishes take 20 minutes or more. According to this parameter, all compositions are divided into slow- and quick-drying. Take this characteristic of the varnish into account when calculating the duration of the work;
resistance to high temperatures. It makes sense to apply heat-resistant varnishes to wood in rooms where the risk of fire is increased
It is important not only to choose the appropriate composition, but also to properly expose the surface with it, because the result largely depends on the application technique;
shine. Thanks to the varnish you can get a glossy or matte surface
The choice in this case is based only on aesthetic preferences, since performance qualities do not depend much on the degree of gloss. Gloss gives visual volume, and the matte surface can highlight the beauty of the wood. The degree of gloss is determined as a percentage of the reflected light flux. For example, high-gloss varnish reflects more than 90% of light, glossy varnish reflects 80-90%, and matte varnish reflects less than 10%. There are also semi-gloss and semi-matte compositions, so there is a wide choice;
varnish components. For doing the work yourself, one-component varnishes are best suited, those that are simply applied and form a protective film by evaporating the solvent. Professionals often use two-component varnishes, in which the protective film is formed as a result of a chemical reaction between two substances. As a rule, such compositions are more durable;
need for primer. Self-priming varnishes can be applied directly to wood. Other compositions require preliminary preparation of the surface: if you do not prime it, you may soon experience peeling of the varnish, the appearance of cracks and craters.
You can also find tinting varnishes on sale. With their help, you can give the wood the desired shade or even completely change the color. However, the classic option is still transparent varnish, which allows you to preserve the original wood pattern.
Silicate dyes
Silicate paints are inexpensive dyes based on silicate glue. This type of coating has high moisture resistance, adheres well to damp surfaces, has antifungal properties and does not require pre-treatment of the ceiling with antiseptics. At the same time, silicate paints are sensitive to abrasion and are easily washed off with ordinary water, so re-painting the ceilings will be required to restore the original appearance. Silicate paints are most often used to coat the interior surfaces of garages, workshops, basements, boiler rooms and other technical premises.
How to paint a wooden ceiling in a house
In this case, when the ceiling is treated in a room where there is a huge amount of wood parts and the same ceiling , in other words, very close to the natural design, it is recommended to opt for a glaze or disinfectant coating.
They have a number of advantages, including:
- Increasing the service life of wood ceilings;
- Giving the surface an appropriate shine and light color;
- Full preservation of wood texture.
- Acrylic;
- Latex;
- Water-based;
- Silicone;
- Silicate;
- Textured.
Each of them pursues its own goal, which is carefully written in the annotation to the substance.
Pay attention! From time to time, it may be necessary to apply two or more layers of coating in order for the final color to have a decent appearance.
Almost always they prefer to choose varnish for wooden ceilings. Taking into account that interior finishing work is being carried out, it is better to choose acrylic varnishes on an aqua base. This coating dries quite quickly, while at the same time preserving and emphasizing the natural outline of the wood.
Also, depending on the design of the room, the ceiling can be painted with matte or glossy varnish. When choosing ordinary paints, preference should be given to acrylate coating, because oil and acrylic are used only for external work. The advantages include long-term preservation of the original color, the wood does not fade, and is protected from cracks and the penetration of water and steam.
Types of additives
When deciding which ceiling paint is best, you should pay attention to some nuances when choosing it. If you decide to paint the ceiling in the bathroom, then it would be a good idea to buy a mixture with fungicidal additives to prevent the formation of mold.
Paint manufacturers often add all kinds of antiseptics to them to prevent the development of microorganisms. Thixotropic properties will allow the mixture to lie more evenly on the surface. In order for the ceiling surface to acquire decorative properties, you can purchase paints with texture additives. They are a fine powder, due to which the surface becomes rough visually and to the touch. There are paints with matting additives, but such impurities make the mixture not so resistant to abrasion.
Color solutions
Varnish is a clear liquid, not necessarily colorless. With the help of color added to the varnish, you can change the overall appearance of the room.
Tips for choosing colors:
- You should not use dark shades in a room for a wooden ceiling - they give a gloomy look, make the room look like a den,
- the colors of the ceiling, floor and walls should be combined (they should not contradict each other),
- the bedroom will be more comfortable if covered with colorless varnish; for the office it is better to use strict shades,
- there is a main rule that no one has canceled: light colors expand the space, and dark ones limit it (this should be taken into account when working with varnish).
Beams and boards
When deciding how to cover the ceiling in a wooden house so that the finish looks impressive and stylish, you can pay attention to the option with false beams. This type of finishing is suitable for spacious rooms; it allows you to zone the space
Only natural wood is used: the beams are positioned in such a way as to divide the ceiling plane into sections (usually square or rectangular in shape, but triangles can also be created). Each section is covered with boards, and the direction of their laying can be varied to create a unique ornament on the ceiling.
It is recommended to stain the joists a dark color to contrast with the lighter siding boards. An artificially aged tree will look great.
To make a ceiling in a wooden house using this principle, it is best to use a tongue and groove board. In this case, the casing will not have any gaps.
Using panels
Panels for interior decoration are popular in the construction market due to their attractive appearance and simple installation technology. The same fastening principle is used as when covering with standard narrow lining, but the labor intensity of the process is lower, since the usual panel width is 250 mm.
It is best to cover the ceiling in a private wooden house using MDF panels with a wood texture, choosing the tone of the finish in accordance with the overall color scheme of the interior. In wet rooms, PVC ceiling panels mounted on a metal frame are used.
Preparing for work
Before you start painting the ceiling with your own hands, you need to clear the room of furniture and equipment or cover everything with plastic wrap. To prepare the surface for painting with your own hands, you need to wet the ceiling with water, so before starting work you need to turn off the power to the electrical wiring. Remove or, as a last resort, cover de-energized lamps with film. It is also necessary to cover the floor, windows and door blocks with film, because... In the future, splashes of finishing material will be quite difficult to wash off. Wear gloves and a hat. Initial preparation of the ceiling for painting is carried out using the following tools:
Ceiling preparation can be done in different order. This depends on the specific type of surface.
The fastest way to remove paint from the ceiling is to use a grinder or sander.
For example, the procedure for preparing a slab that requires preliminary putty, or a ceiling with old putty or whitewash will vary. If renovations are being done in an old private house, then it may well have a clay ceiling that requires an individual approach. Also, plasterboard sheets can be used to finish the ceiling, the work with which has individual characteristics. Thus, the surface of the ceiling can be very different. The above surface types are the most popular.
Depending on what materials were previously used to finish the ceiling, you will need to use different methods to remove them. It is recommended to begin finishing the ceiling only after the surface has been thoroughly cleaned, washed and completely dried.
How to choose wood varnish
Choosing a suitable wood coating from a large selection is not easy. Therefore, experts advise taking into account the main criteria that determine a useful purchase.
Manufacturer When choosing a varnish, preference should be given to well-known brands that pay special attention to product quality. Among the leaders: Faktura, Marshal, EUROTEX, Pinotex, Parade, VGT, Lakra, TEKS, Tikkurila. Scope of application The manufacturer indicates on each product the scope of application of the varnish: floor, ceiling, walls, furniture, wet rooms. Exterior/interior work Each composition is positioned according to its intended purpose. Varnish for interior work cannot be used outdoors, as it loses its properties in unfavorable conditions. Exterior coatings may contain toxic substances that, when used indoors, can cause harm to the health of household members. How to dilute this criterion will help you decide on the type of diluent to dilute the thickened varnish. This may be a solvent or water, depending on the base of the composition.
Drying time, hours
Depending on the type of base, the drying time of the varnished surface is determined. The range of polymerization period is from 0.5 to 168 hours. Heat resistance This indicator indicates the resistance of the coating to high temperatures. The varnish retains its physical properties thanks to heat-resistant additives.
UV protection
Some varnishes contain substances that protect wood from exposure to UV rays. This coating prevents the formation of cracks and darkening of the surface due to ultraviolet radiation. Components One-component formulations are ready for use. Their shelf life is long. Two-component varnish requires mixing of hardener and varnish before use. This product hardens quickly and has a short shelf life. Its cost is cheaper than ready-made coating.
Color
Varnishes are available in different colors: white, gray, black, orange, red, brown, golden, yellow, silver, pink, green, blue. An alternative option is a colorless coating.
Minimum flow rate (sq.m/l), m2/l
The indicator gives information about the minimum area that can be covered using 1 liter of varnish. Compositions for wood: from 0.7 to 16.
Maximum flow (sq.m/l), m2/l
The indicator gives information about the maximum area that can be covered using 1 liter of varnish. Compositions for wood: from 4.6 to 35.
Gloss level (glossy, matte);
The surface opened with varnish can be glossy in varying intensities or matte. The degree of gloss is indicated on the label: matte – s/g 2; eggshells – s/g 7-12; semi-matte – s/g 20; semi-gloss – s/g 40; glossy – s/g 80.
Volume, l/Weight, kg
The weight of the varnish does not correspond to the volume
It is important to take this into account when calculating the required amount of coverage. The product is poured into containers with a volume of 0.13-25 l
Packaging by weight – 0.5-45 kg. How to apply Before using the varnish, you need to read the information on the label. Depending on the consistency of the composition and its purpose, the following methods of applying the product are possible: brush, roller, spray, spatula, sponge, applicator.
Features of choice
There are a large number of coloring finishing materials on the market. But not all of them can be used to color concrete. It is strictly forbidden to use oil-based compounds for coloring it. This is due to the fact that after drying, the result is a finish that is completely impermeable to moisture and air. As a result, this leads to the gradual destruction of the ceilings. Therefore, it is better not to choose oil-based compounds for large concrete pavements. What finish is best to buy for the ceiling?
You can choose from a wide variety of colors. They are suitable not only for ceilings, but also for walls. There are the following types of paints, which are distinguished by the effect they produce:
- Matte. This is the best paint that becomes an ideal choice if you are undecided on a specific product. It does not give shine, which allows you to hide small defects.
- Glossy. This ceiling paint has a good shine. But at the same time it emphasizes all the irregularities. It looks good on a large and flat surface.
- Semi-matte. This option has a slight shine. There are several levels of gloss, so you can choose the option that suits you.
What colors will be optimal? Everything is determined by specific conditions and surface features. Moreover, they are suitable not only for the ceiling, but also for painting walls.
Dulux Bindo 40 Water-dispersion (latex) paint of increased moisture resistance and wear resistance for walls and ceilings
Painting the lining white: a few tips
Even such a durable and relatively expensive finishing material as wooden lining loses its former attractiveness over time. The surface becomes dirty, darkens, and surface cracks and scratches form on it. To extend the life of the wall covering, it can be painted.
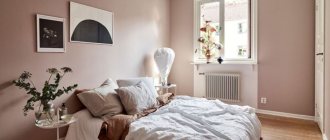
White lining looks good in interiors
Why white?
Indeed, for painting panels, in principle, you can use paint of any color. But white color still has a number of undeniable advantages:
- Suitable for any style and color scheme of the interior.
- Visually makes the room more “airy” and bright (even if it comes to a room facing south, white color is acceptable because it is not perceived as “warm”).
- It improves mood, which is especially noticeable when rooms for children and teenagers are painted white.
- For a small room, painting it white is a relatively simple way to visually increase its size.
Naturally, there will be some limitations: first of all, they relate to the need for much more careful care of painted surfaces. But the considered painting technology will take this circumstance into account.
How to prepare lining for painting
Any surface painting of wood impairs access not only to rot and dampness, but also to air. Therefore, at the preliminary stage, it is necessary to take care of protecting the lining from anaerobic bacteria. There are several possible methods:
- brightening the surface of the lining with a light-colored stain;
- bleaching using diluted base paint (suitable for water-based compositions);
- treating the surface of the material with a translucent antiseptic.
The greatest durability is achieved in the latter case, however, the other options are quite suitable for non-problematic rooms.
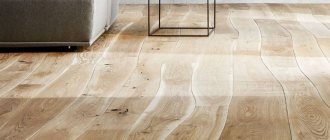
White color allows you to visually expand the space
Cleaning the surface of the material before painting
It consists of sealing surface cracks and scratches, as well as mechanical impurities. Surface defects are eliminated using wood putty; build-ups of dirt or grease are removed by sanding the lining using coarse sandpaper. Using more radical means, for example, a spatula, is dangerous: you can irreversibly damage the wood, even if the paneling is painted from hardwood: beech or oak.
After puttying and sanding, the surface is washed with a three percent solution of soda ash - this will eliminate possible fatty deposits that are not visible to the eye.
After this, it is worth visually inspecting the treated surface again. Even with your finger you can determine local differences by surface unevenness up to 0.5 mm.
Choosing paint for painting
In most cases, we are talking about painting internal surfaces, and the type of paint is selected accordingly - acrylic, water-based or oil-based (white).
The advantage of acrylic paints is their environmental friendliness and comparative cheapness. Oil paints dry faster, but at the same time they emit a specific odor that is not always acceptable to others. Water-based paint, for all its non-toxicity, is still inferior to the other two types in terms of coating durability. Therefore, the use of a certain type of paint is determined by the specific conditions of its use.
The choice of paint is also influenced by the subsequent aesthetic perception of the painted panels. For example, if the lining had a beautiful surface texture, then it is better to paint it with translucent white paint: in this case, the original structure of the wood will still be visible.
Recently, scuba paints have been actively used for painting linings, previously used mainly for painting ceilings. The advantage of scuba tanks is that, while forming the color of the surface, they also form a dirt-repellent layer. Therefore, caring for the white panels, which were decided to be painted with aqualac, will be much less labor-intensive. The downside of scuba gear is its high cost.
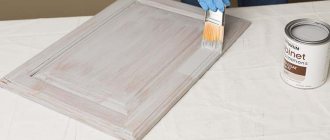
Dyeing technology
Modern paint and varnish compositions are characterized by high adhesion strength to the surface being painted, so in most cases there is no need to pre-prime the lining, for example, with drying oil. Firstly, drying oil takes a long time to dry, and secondly, to apply the main coating you will definitely need a paint roller.
Translucent white paint for lining
In order to paint the lining evenly and efficiently, it is necessary to move the brush only in the direction of laying the panels. With slightly more paint, this problem can be solved by using a paint roller. The coating will be more even and pleasant to perceive if white paint is applied in two layers.
High-quality painting of the lining will extend the life of the panels for several more years.
povagonke.ru
Elimination of irregularities
Do-it-yourself putty will not bring the desired result if there are strong differences and deviations from the level on the ceiling surface. Any imperfections will clearly appear on the painted surface, especially under artificial lighting. Therefore, before you putty the ceiling, it is necessary to eliminate these defects and make the base as even as possible.
To determine the evenness of the ceiling, you need to find the lowest corner in the room and put a mark at the junction of the walls and ceiling. Using a building level, draw a straight line to the next corner and thus connect all the corners. Thanks to this manipulation, you can quickly determine the curvature of the base. If this parameter is less than a centimeter, then the ceiling must be leveled with starting putty. If the deviation is 1.5 -2 cm, then the base will have to be plastered before puttying. If the indicator exceeds 2 cm, then leveling the ceiling is only possible with plasterboard sheets.
Determining the curvature of the ceiling using a laser level
Acrylic paint
When choosing a coloring composition, you need to pay attention to indicators such as resistance to moisture and exposure to sunlight. When deciding which paint is best to paint the ceiling, try acrylic compositions
Advantages of acrylic-based compositions:
- despite the cost, it is higher than water-based emulsion and has better characteristics;
- withstands frequent wet cleaning, while the ceiling remains in its original form (not tarnished);
- withstands exposure to sunlight;
- large selection of composition colors;
- hides minor defects in the form of cracks;
- no pungent odor.
If it is difficult to decide which acrylic paint for the ceiling is better, consult a specialist in the construction market. If you need to mix colors, then there will be no problems - there are a variety of color options for acrylic compositions on sale.
The advantages of acrylic compositions include a long service life and easy application. If desired, you can use pure white dye.
Important: the color on the can of acrylic dye is much darker than stated in the instructions. The manufacturer specifically indicates a darker shade, because after applying and drying the composition, the color becomes darker
Consider this nuance when purchasing.
The best silicate water-based paint for ceilings and walls
The use of liquid glass in paint and varnish production has made the painted surface resistant to various negative factors. Silicate paint can be used for both interior and exterior work. At the same time, many manufacturers have managed to offer affordable prices to customers. Considering the environmental friendliness of the material, it is an excellent option for decorating children's rooms, kitchens and bedrooms.
TIKKURILA FINNGARD SILIKAATTIMAALI
Silicate paint TIKKURILA FINNGARD SILIKAATTIMAALI is a one-component deep matte material. Along with the usual high performance qualities, experts especially highlighted the wide temperature range of application. The painted surface holds up well both in 50-degree frost and in tropical heat of + 60°C. But it is not only for this feature that the paint became the winner of our rating. Factors such as the vapor permeability of the layer and its dirt-repellent ability also had an impact. The material consumption also looks good, especially compared to its closest competitors.
Not only builders and finishers liked the paint. It is actively used by owners of freshwater and sea vessels, which once again confirms the high level of quality of the Finnish manufacturer.
- wide temperature range;
- acceptable consumption;
- resistance to aggressive environments.
not detected.
BAUMIT SILIKAT COLOR REPRO
Experts classify BAUMIT SILIKAT COLOR REPRO paint as an elite building material. The quality characteristics of Austrian silicate products are at the highest level. Particularly noteworthy is the reliable binder, which is liquid potassium glass. The paint coating is non-flammable, UV resistant, dirt-repellent, and vapor permeable. Despite the lower price, this paint failed to take first place in the ranking.
First of all, specialists and ordinary people are not happy with the consumption, which reaches 500 g per 1 sq. m. m. The second negative factor is the low temperature range of application. The paint layer retains its properties only at air temperatures above +8°C.
- high performance properties;
- resistance to fire, light and dirt;
- acceptable price.
- high consumption;
- temperature restrictions.