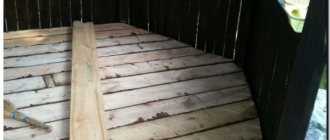
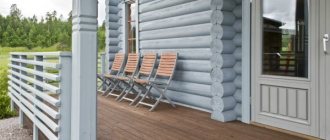
Over the many years of use, the floor boards have been painted more than once. Old paint cracks, causing chips. In this article we will focus on the topic: how to paint old and new wooden floors.
Varnishing a wooden floor
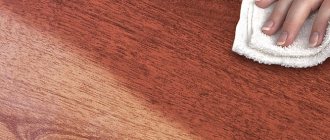
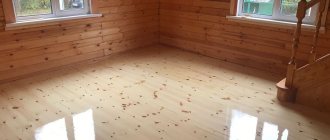
If the floor is new and the wood has a beautiful smooth texture, then it is quite possible not to paint wooden floors with regular paint, but to varnish them. Here you need to choose the right varnish.
Varnishes are sold that contain white spirit, acetone, and there are water-soluble compounds. The first two options emit toxic substances and smell bad. Water-soluble varnish is best - it does not emit toxic substances, is almost odorless and dries quickly.
Based on the presence of resins, three main groups of varnishes can be distinguished:
- Polyurethane. These compounds are more expensive, but their properties are better than others; they are resistant to abrasion, moisture and household chemicals. But they attract dust and give the tree a yellowish tint.
- Based on artificial resins. These varnishes take a long time to dry, wear out faster and change the color of the wood.
- Based on formaldehyde resins. The cheapest option, durable, resistant to mechanical stress. But they contain toxic substances and turn yellow over time.
Despite some disadvantages, wood varnishes are very popular. The new varnished wooden flooring looks very beautiful.
When to paint parquet
Although hardwood floors last a long time, they do not last forever. A clear sign that it is time to renew the flooring will be wear and tear on the flooring. If it has worn down, nicks have formed on the boards, and the varnish has worn off, then repairs are necessary. Not everyone knows whether the parquet can be painted or whether it will have to be completely replaced. In fact, there is nothing complicated about it. You can carry out all the repair work yourself, and it will cost less than completely replacing the materials with new ones. A painted board will look renewed and will last for several more years or decades.
Old parquet
Painting a Wooden Floor
Painting a wood floor is more common than applying varnish, especially if the floor is already old. Wood floor paint should be wear-resistant, preferably quick-drying, and non-toxic. Let's look at what types of paints there are for wooden floors.
All paint compositions used to paint wooden floors come in two types: transparent and opaque. Transparent floor paints are suitable for new floor coverings, and the wood should be hardwood, free of knots, with an interesting texture.
Opaque paint for wood floors covers the entire floor covering. It is suitable for both soft wood and old floors.
In addition, you need to distinguish between wood paints for interior use and for exterior use. They have different purposes, toxicity and resistance to atmospheric agents.
Materials and tools
Before you begin, you need to prepare the tools and materials that will be required in the process:
- respirator for respiratory protection;
- Grinder;
- cuvette;
- putty knife;
- roller;
- primer;
- wood putty;
- masking tape;
- sandpaper;
- broom or vacuum cleaner;
- brush for treating hard-to-reach areas.
It is necessary to carry out painting with gloves and work clothes, so that later there is less contact with detergents. You can use a stencil for applique, which will make a section of the wooden floor on the veranda, in the kitchen, or anywhere else, original.
How to Paint an Old Wood Floor
If the house has old wooden floors, then you need to be especially careful when painting them. You may have to replace some boards and fill the cracks. It is necessary to prepare the floor surface for painting. If the gaps are large, you will have to close them with wooden slanting strips, literally driving them into the gap.
If the floor is old, and you have already forgotten what paint you used to paint it, you will have to remove the old paint so that there is no swelling of the new coating and bubbles. For repeatedly painted floors, this is especially important. Read more about this separately in the article How to remove old paint from the floor.
What paint should I use? Acrylic paint for wood floors is a good option.
A floor covered with an acrylic composition according to all the rules is wear-resistant and, most importantly, environmentally friendly. The matte shine of the paints will not bother you, and scratches left by hard shoes will not be noticeable.
Acrylic paints are water-dispersed compositions based on acrylic resin, into which a coloring pigment is introduced, creating a stable painted surface that is absolutely safe for health. Such paints are especially good for country flooring, which is used less often than in a house or apartment.
An inexpensive acrylic composition is applied in at least 3 layers, since the wood partially absorbs it. Acrylic-based paints are more expensive and require less consumption.
Against fires
The main danger associated with the use of any wooden elements in the house is their fire hazard. However, in the 21st century there are substances that can nullify such properties.
We are talking about fire retardant impregnations. They protect the wooden floor from fire and subsequent ignition. How do they do it? The impregnation receives fire-fighting properties thanks to special substances. At high temperatures they form compounds that prevent fire. To be fair, it is worth noting that impregnation for wooden floors with fire-fighting properties will not protect against fire 100%, because it only helps to resist fire when heated to 700 degrees for the first 15 minutes.
What colors can you choose?
In addition to acrylic paint, which successfully combines environmental safety, lack of unpleasant odor, fire resistance, quick drying and long service life, you can choose the following types of paint compositions for wooden floors:
- Alkyd. They quickly penetrate the wood, dry quickly, are durable, and have anti-fungal and anti-mold protection. But, unlike acrylic ones, they can be flammable, have an unpleasant odor, and are not resistant to chemicals.
- Polyurethane. They have high wear resistance, but are toxic. Suitable for rooms that are frequently visited, such as the living room.
- Oily. They take a long time to dry, but are durable, protect the floor surface well, and are heat-resistant - can withstand high temperatures. For baseboards that run near heating radiators, oil paint is an ideal option, except for acrylic paint.
Of course, there are other compositions. But the ones listed are the most used and popular. We should not forget that all cans of paint must be purchased from the same batch, otherwise it may happen that the paint runs out, and the additional paint purchased, even of the same brand and color, may differ in shades.
Famous manufacturers
When choosing, you should give preference to reputable manufacturers:
- Tikkurila is one of the largest paint and varnish manufacturers producing products not only in Russia, but also in Europe. Offers a large assortment and a wide range of colors.
- "Prestige". The products are manufactured on modern equipment using the latest technologies and have the necessary certificates confirming the quality and safety of the produced compounds.
- "Zebra". Ukrainian-made products with an affordable price. The plant produces alkyd enamel and varnish, a universal paint that can be used to treat wooden floors.
There are manufacturers specializing in polyurethane or exclusively acrylic floor paints. Before use, any composition must be tested on a small section of the board and only then covered the entire floor.
How to paint a wooden floor correctly
After choosing paint, you need to prepare your tools. Usually you need a roller for painting large areas, flat brushes for hard-to-reach places, a painting tray, spatulas for filling cracks, and a chisel for cleaning the old putty.
Putty
You can find many types of putty in stores. The following are suitable for wooden floors:
- Oil or oil-glue. They contain glue, drying oil, carefully sifted chalk and a siccative to speed up drying. This type of putty takes a long time to dry, but is very durable.
- Acrylic. It is made on the basis of zinc white, talc or gypsum with the addition of ocher. It should only be applied to a clean, dry floor. This putty fits perfectly into cracks, dries well and levels out. It's easy to work with her. Acrylic putty is suitable not only for filling cracks, but also for small irregularities in boards.
- Homemade. Also works well. Made from wood glue and small sawdust.
In addition to putty, you will need drying oil or wood primer for a more uniform application of the paint composition and protection from wood pests.
Preparing the surface for painting
If the floor is no longer new, then you will have to remove the baseboards and check whether the heads of the nails with which the boards are nailed to the joists are protruding. If this is the case, then recess the nails so that they do not interfere with painting.
It is better to remove old paint, especially if the floors have been painted several times. Usually, a construction hair dryer is used for this, which heats up a section of the surface, and then removes the old layer with a spatula. If the paint layer is thin, it can be successfully removed with a sanding machine or simply by hand, but the manual version is of lower quality.
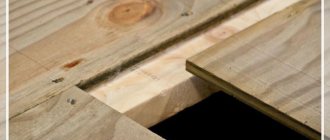
If the floor is completely uneven, with large differences in height between the boards and uneven joints, the floor covering will have to be sanded. Then you need to seal all the cracks. If the cracks are wide, wedge-shaped strips covered with putty can be driven into them and cleaned with a plane.
When all the treated areas are dry, final sanding of the surface is carried out, all debris is removed and dust is removed. Apply drying oil or primer to a flat, dry surface. It is better to use special modern impregnations - they will contain the antiseptic, smooth the surface well and provide improved adhesion of wood to paint.
A new floor does not require as much labor as sealing cracks, but you will still need to sand it. When all the compounds have dried, you can proceed directly to painting.
What to do if the floorboards are held together?
When the floor squeaks a lot, it is very annoying. How to repair an old creaky wooden floor? In this case, you first need to find out the reasons for the creaking sound, and most often there are three of them:
- Floorboards rub against each other or against joists.
- There is no gap between the floorboards and the wall.
- The creaking comes from the fact that friction occurs between the nails driven into the floor and the wood.
Often this problem can be solved by using a small wedge made of wood: hammered between the joist and the floorboard. This action will allow you to support the boards that are very loose and eliminate the backlash, then the creaking will stop. But if friction occurs between the boards, clean the cracks from the accumulated debris and only then seal them with foam. However, it will relieve the squeak for a short time, because over time it will begin to deteriorate, and then the unpleasant squeak will reappear.
If the cause of the annoying creaking of the flooring is the friction of nails hammered into the boards against the wood, in this case, instead of nails, you need to screw in self-tapping screws, then the boards laid on the floor will be more strongly attracted to the installed joists, eliminate the formed cracks, and will not allow the floorboards to bend. Today, this is an effective way to repair floors on joists while eliminating squeaks.
There is another way that allows you to remove squeaking - installing anchors.
Attention! It makes sense to use anchors if there is a concrete base under the wooden floor. However, please note that this method will require labor from you.
True, this method of elimination is expensive, but you will get rid of squeaks for a long time. The wood is fixed to the concrete base using anchors. Due to the fact that the anchors provide reliable fixation of the floorboards, the risk of sagging disappears, and therefore there will be no squeaking. This method is used when there is a concrete base under a wooden floor.
Ways to eliminate squeaking
Painting the floor
The final stage of work, which must be performed with special care. It doesn’t matter whether the floor is painted one color or several, the first layer should always be a single color. The process is as follows:
- The paint is thoroughly mixed and poured into the cuvette.
- Using a wide brush, paint over the areas on which the baseboards will then be installed.
- Places not intended for painting are sealed with masking tape.
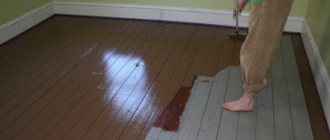
- It is better to paint the main area with a paint roller.
- After the first layer has dried, install the baseboards and paint them with a narrow brush in two layers.
- After this, a second layer of paint is applied to the remaining area.
- When the paint has dried, wash the floor with a light soap solution.
After all these operations, the work can be considered complete. It remains to wait a little for the new paint to completely set and equip the room with furniture.
Safety precautions
Almost all work associated with painting floors with any dyes is flammable and toxic. Smoking in areas where paint and varnish work is carried out can lead to death.
When painting the floor, do not forget to ventilate the room
All rooms should be well ventilated during painting. Workers must wear respirators and safety glasses. The painted floor is dried for a long time until the fumes completely disappear.
Source
Adviсe
When painting your floor, you should use the following tips.
- The thinner the layer of paint applied, and the better it is dried, the better the final finishing result will be.
- When treating the surface with putty, it is recommended to add a little paint of the color that will be used later for finishing. This trick will allow you to get the highest quality result, the joints of the boards will be almost invisible, and the base itself will take on an attractive appearance, similar to linoleum.
- When painting the floor, it is better to choose a wool roller. A tool with a foam coat can slip over the surface, which will lead to the formation of unpainted “bald spots”. It is very difficult to notice such a defect during the process.
- The floor must be dry and clean.
- Before finishing, you should test the paint composition: apply a thin layer to a small area of the board. If after two days the paint does not stick to your fingers, it means that the material dries well and can be worked with.
- When working, the paint should be constantly stirred, which will eliminate the appearance of streaks during the process.
Painted wood floor
Oil technology
The oil does not form a continuous film on the floor, but is absorbed into the wood, protecting it from the inside. This floor will not be glossy, but you will be pleased with its durability. In addition, this product is absolutely environmentally friendly. In most cases, it does not contain solvents, and if it does, it is in minimal quantities. You can impregnate a wooden floor with oil even in high-traffic areas, such as a hallway or living room. There are also oils for external use. They can cover the floor on a wooden terrace.
Oil reveals all wood flaws much more strongly than varnish. Therefore, coating must be done in stages, in full accordance with the manufacturer’s instructions.
It is important to remove excess oil from the surface in time, otherwise dark spots will form on it. It is advisable to renew the coating twice a year - in spring and autumn
After the first application of oil, it is quite difficult to care for a wooden floor - it gets very dirty. And only after a few years, when the wood is completely saturated, this process will become much easier. But such a floor is easy to restore, which cannot be said about all other coatings. Simply sand the damaged area and saturate it with oil again.
Impregnation doesn’t care about moisture
Wooden floors absorb moisture well. True, in this case, the word “excellent” is not at all pleasing. Porous wood material allows water to penetrate into the very depths of the fibers, as a result of which the floor swells and is easily susceptible to mold, rot, and fungus. Preventive impregnation will save the situation. When you apply it to the floor, the substance, like moisture, penetrates the pores of the wood and clogs them. After drying, it remains in the wood channels, forming a reliable protection against water. This floor is not afraid of high humidity, which means you will avoid many problems in the future. For example, the creaking of boards, which also occurs due to the swelling of wood.
