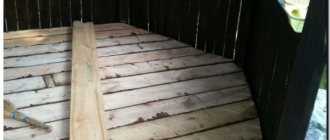
Despite the fact that today there are quite a lot of modern floor coverings, wood floors are traditional for wooden house construction. Such floors look natural in a country cottage, in a private house made of timber, and in a small country house. But over time, the flooring wears out, the paint fades and wears off. An old wooden floor with peeling paint is not a pleasant sight. This type of flooring will ruin the look of any interior. The most common, but far from the easiest way to update the coating is painting a wooden floor. What is the best way to paint a wooden floor, how to paint it correctly so that it remains like new for a long time? We will try to answer these questions.
Materials for painting wood floors
Before painting, the floorboards must be prepared, and this will require various materials, and first of all putty.
Putty is necessary for sealing cracks and crevices that exist in both the old and newly laid new floors. How to putty a plank floor? There are two types of putty for wooden floors:
- Oily. Its main advantage is reliability and a very long service life. However, the oil composition also has a drawback - it takes a long time to dry.
- Acrylic. After drying, the putty remains elastic and does not form cracks. The product can be used not only to fill cracks, it is also suitable for leveling the floor for painting if it has small depressions.
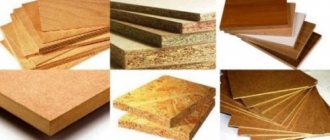
Before painting the floor, it also needs to be primed. The primer promotes better adhesion of paint to the wooden floor and provides protection against the appearance of unwanted inhabitants: microorganisms and insects. If a plywood floor requires painting, then in order to avoid the formation of mold on it, as well as to protect it from temperature changes, it must be treated with drying oil.
What tools will you need?
In most cases, no complicated tools will be needed.
You need to worry about protective equipment - a respirator, gloves, goggles.
You should also purchase several brushes of different sizes and a roller with a long handle, preferably a telescopic one, since it is easier to adapt to the required parameters.
Small brushes are needed to make it convenient to paint corners and baseboards. In addition, you will need a bath. If painting with an oil composition, prepare a solvent in a separate container. For alkyd paint, it is advisable to use a sprayer.
To cover areas of the surface that do not need to be painted, use masking tape.
Floor paints and varnishes
For the floor in a wooden house, you can use topcoat paints that form a monolithic coating that completely hides the natural wood structure.
The floor takes on most of the load, both mechanical and physical, and this factor must be taken into account when choosing paint. To determine which coloring agent to paint the floors with, you need to make sure that the chosen paint is actually intended for the floor, is wear-resistant and can withstand intense loads. The following dyes are suitable for painting the floor:
- Oily. They are considered one of the most durable and wear-resistant coatings.
- Polyurethane. They are distinguished by a high degree of reliability and durability, and in addition they dry very quickly.
- Acrylic. They consist of ingredients dissolved in an aqueous solution, which makes them safe and environmentally friendly. They have practically no odor and have excellent performance qualities.
- Alkyd. They have high covering characteristics and provide good adhesion to the surface.
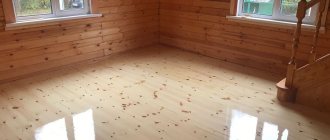
How to paint a wooden floor in a house to preserve the structure of the wood? In this case, it is best to varnish the wooden floor. It creates a transparent or tinted film on the floor that completely preserves the wood grain. This decorative coating not only looks impressive, demonstrating the wood texture under the varnish film, but also performs a protective function, protecting the floor from various negative factors.
When choosing a varnish, you must take into account what type of wood the product is intended for. For example, for a pine floor, you need to choose a varnish coating marked “for soft wood.” Such varnishes have enhanced protective characteristics that protect the pine board from deformation.
For soft conifers, you can also use special oil impregnations, after which a layer of wax is applied. However, if these products were used, then neither paint nor varnish should be applied in the future.
Color selection
After choosing a covering, you need to decide what color to paint the veranda. After all, the overall appearance of the room depends on this. The most popular colors:
Brown-beige palette. Beige is very often used in decoration. This is all thanks to its advantages: a wide palette of shades, combined with different cold and warm tones, can be used as the main color and as an additional background for more saturated colors, for example, brown.
The combination of brown and beige creates a pleasant, relaxing atmosphere on the veranda. What styles should you use this palette for? These are chalet style houses in the mountains of Switzerland. Use wood and stone for decoration. Solid wood furniture with a rough texture with pillows and a blanket, and a couple of stone lighting fixtures on the wall are what you need. For decoration, you can use fur skins or hunting trophies, if available.
And country is a universal type of style for a country cottage. To cover a veranda in a style called country, you need to use varnish to emphasize the texture. Install simple furniture - benches, stools, a huge table. Complement all this with textiles with a simple pattern: checkered or floral print.
Brown-green combination. Natural wood shades, complemented by green accents, look good indoors in a country house, indicate unity with nature and create a calm atmosphere. Ideal for eco-style. Complete the veranda with various plants in vases or wall panels. Furniture products should be large; you can put tree stumps instead of chairs, and make a table yourself from sawn wood.
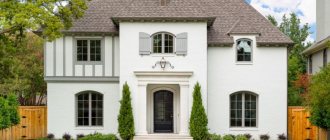
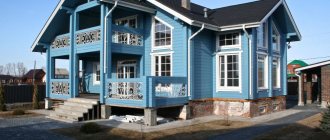
White and blue palette. White as a base helps to expand the space in the room visually, adds airiness, and bright blue or azure brings the necessary dynamics and reminds the owners of the veranda of sea waves.
White and gray palette. Gray color is as beautiful as beige; summer residents often use it as a base. On a gray background, other color solutions look cleaner, and thanks to the large number of shades, you can create an unusual monochrome interior. Together with white, this color looks a little restrained and can be used for a Nordic style, for example, Scandinavian. This functional and strict style direction can be said to be simply created for practical citizens. Compact furniture, light and cool shades in the decoration - the Nordic character is best highlighted by the glazed building on the north side of the cottage.
White and pastel color schemes. When using a pastel palette, it is better to rely on similar shades, avoiding bright inserts. The most important step is choosing the right color. Light and pastel colors highlight classic interiors. For example, in the English style. Upholstered furniture with carved legs is perhaps the main attribute of English houses; complement the decor with it, and also install a chair with ears, throw a blanket and a couple of pillows on the sofa.
Preparatory work before painting the floor
Preparation is necessary for any surface: both a newly laid covering and a floor that has already served its owners a fair amount.
But if you plan to paint an old wooden floor, the work ahead will be more labor-intensive. The boards must be brought into satisfactory condition so that they can be painted. The old floor is prepared in the following sequence:
- Removing old paint. If the remaining layer of the old coating is thin, you can simply sand it with a sanding machine. If the floor has been painted several times, you can remove the old painted layers in one of two ways. In the first case, the boards are heated with a construction hairdryer, the old paint becomes soft and rises, and then all that remains is to remove it with a spatula. The second method is to apply a special remover to the painted floor, cover the area with a film, and after the reaction occurs, the paint can also be easily removed with a spatula.
- Leveling the floor. If there are rotten boards, they will have to be replaced. All protruding metal fasteners (nail heads) are hammered in such a way that they are recessed. Protruding areas are cut off with a chisel. Next, the surface is processed with a sanding machine, and hard-to-reach places are processed with a hand scraper. Leveling the floor is completed by sanding with fine-grained sandpaper.
- Putty. Large and small gaps, cracks and holes between the boards are filled with putty. It is more convenient to putty a wooden floor with two spatulas. One person takes the product from a jar, while the other applies the putty and smoothes it on the surface. After the composition has completely hardened, it is necessary to sand the entire floor again.
- Surface priming. Before treating with a primer, remove wood shavings from the floor that remain after sanding. The primer is best applied using a roller, which allows you to evenly distribute the product over the entire surface. It is necessary to wait until the soil is completely dry and then apply another layer.
If the coating is new, then preparing the wooden floor for painting is much easier. When laying new boards, they immediately fit together, so there is no need for putty. In this case, the work begins with the grinding stage, and then the surface is covered with two layers of primer. After the primer has dried, you can begin painting the floor.
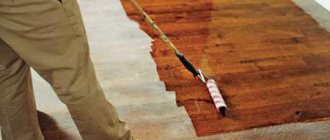
Painting the floor in a wooden house
- Before work, the paint is mixed well. This must be done for better and even application of the composition. It is best to immediately pour part of the solution into a small tray, from which you can draw paint with a roller or brush. This makes painting wooden floors much more convenient.
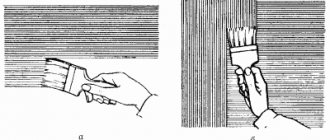
- First, use a wide brush to paint the areas along the walls where the baseboards will be installed in the future. After this, the surface of the entire floor is painted with a roller.
- Once the paint has dried, install the baseboards. The joints between them are sealed with putty, and after it dries, the baseboards are sanded. Then two layers of paint are alternately applied to them.
- Next, secondary painting of the entire floor area is carried out.
Floor varnishing is carried out in the same sequence as painting, but at least three layers of varnish are required. To improve aesthetic characteristics, each layer (except the finishing layer) is sanded after complete drying.
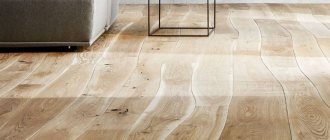
Geometric figures.
Painting in the shape of squares or hexagons in a checkerboard style are very popular. The most traditional option is to alternate black and white squares, but there are many other examples. Choose bolder colors that will radically change the atmosphere of your interior.
Self-coloring mistakes
Some people believe that painting a wooden floor yourself is an easy job and can be done on your own. However, despite its apparent simplicity, painting a wooden floor requires a serious approach and certain knowledge.
Usually, even at the surface preparation stage, many people make mistakes, which then affect the quality of the painting:
- work is carried out in violation of technology,
- gaps are left between the boards,
- Only one coat of primer is applied.
To get a smooth and beautiful decorative coating, you need to sand the surface well. This work requires special devices and professional grinding equipment, which, due to its high cost, is inaccessible to most home craftsmen. As a result, grinding is performed using improvised means. All this leads to the fact that the coating is of insufficient quality and durability.
Main destructive factors
Exposed wooden structures are close to nature. The structure of the tree can easily pass any liquid. It is precisely because of the accumulation of moisture in this material that various harmful microorganisms begin to develop. As a result, the product begins to collapse. Throughout the year, the boards either heat up or cool down, so they become deformed.
In this case, not every coating will be able to protect the building material. Natural wood is considered very nutritious for many fungi. They attack building materials with a lot of moisture, destroying all the fibers from the inside.
Attention! There are fungi that can destroy the entire structure in a short period of time.
Ultraviolet radiation emanating from the sun has a negative effect on wooden surfaces. It can also ruin the painting, making the veranda faded. Wood is also loved by dangerous insects. Bark beetles gnaw through many different tunnels, and over time they eat products made from this material. In addition, the tree is attacked by mice and rats, which often live in summer cottages.
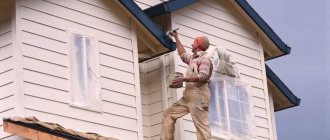
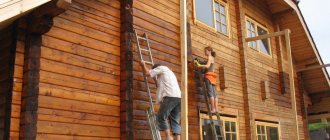
Professional painting services
Experienced specialists will perform any amount of floor painting and varnishing work efficiently and in a short time. We will carry out standard single-color painting, and will also fulfill any of your wishes regarding the decorative design of the floor. After the work of our professional craftsmen, your old wooden floor will miraculously be transformed into a new floor covering. We work only under a contract and provide a guarantee for all types of work. To submit an application, visit the “Contacts” page.
Calculate the cost of painting and insulating your home right now