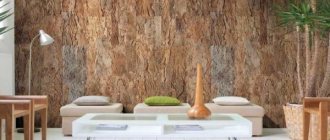
The use of wood in the interior is relevant regardless of time. Whatever fashion trends dictate, strict beauty is always popular. This material is most often used for finishing walls, furniture, ceilings and decorative items. Marquetry is becoming more and more popular every day. The features of the technology, its essence and methods of execution will be of interest to people who want to update their interior.
Wooden mosaic for walls
This type of finishing consists of pieces of wood of various sizes and shapes. Advantages of mosaic:
- combines with other types of finishes;
- keeps warm;
- creates a feeling of comfort;
- will last a long time;
- environmentally friendly material;
- masks uneven walls;
- helps with zoning space;
- original drawing.
Flaws:
- some types of wood are not resistant to moisture;
- such finishing is not cheap;
- requires painstaking work.
Material advantages
Wood mosaic has a number of advantages that set it apart from its analogues. Among them:
- environmental friendliness, lack of toxins in the composition - there is no risk of releasing harmful fumes when heated or increased humidity in the room;
- durability, especially with strict adherence to installation technology and the presence of a protective coating;
- low thermal conductivity, heat retention in the room;
- high vapor permeability, improved microclimate in the house, absence of fungus and mold;
- excellent compatibility with other types of finishing - tiles, brick, stone, wallpaper, plaster;
- ease of dismantling, the ability to perform local repairs to the coating if individual elements are damaged;
- flexibility and adjustment to any surface contours, hiding minor defects in the base;
- improving the sound insulation of a room due to partial absorption of sound waves.
Where is it used?
It is used not only to decorate houses, but also cafes, restaurants and theaters, because this decoration creates a unique atmosphere in the room. It is suitable for rooms decorated in classic, modern or retro style. Suitable for country, Provence, Baroque. Looks great if the interior contains glass or metal parts. It is best to use it in large rooms. With the help of such finishing, you can highlight any part of the room, for example, a dining area, a fireplace, a relaxation area.
What to consider when choosing?
The most important criteria:
- degree of strength, products differ in color depending on the grade: red is the most durable mosaic, blue is the second grade, etc.;
- flat or volumetric surface;
- dimensions;
- anti-slip coating;
- texture and natural pattern;
- for installation in rooms where the material will come into contact with aggressive substances (for example, in a bathroom), it is recommended to select products marked in the form of a flask;
- wood type;
- color design, which is determined taking into account the style of the interior.
You should also be guided by the arrangement of modules and individual mosaics. Pay attention to the material from which the substrate is made.
Kinds
Depending on the installation technique, as well as the size of the planned installation, you can choose a separate mosaic option.
- Intarsia
It represents images and patterns created from wooden plates of various species and colors (mostly uses no more than 4 tones). The prepared and polished plates are glued together and then attached to the base with glue, where a recess has been made in advance. To change the color of wood, special oils or boiling are sometimes used.
- Inlay
With this method, plates of other materials, such as ivory, are cut into a wood base. Moreover, the plates must be at the same level as the base. Expensive materials are usually used as inserts, making the finished mosaic striking in its luxury.
- Marquetry
Thin wooden plates - veneer - of various colors and types are glued onto the base, which can be made of wood. When creating paintings, the direction of the fibers is also taken into account.
- Block mosaic
This technique involves gluing bars of different colors or cross-sections, and then cutting them crosswise. Thus, bars with the same pattern are obtained, from which a mosaic is then created. They can be glued to the base or inserted into a prepared recess.
Application options
Over the entire existence of the marquetry technique, experts have come up with many methods for creating mosaics. Some of them:
- The principle of mosaic . First, the master cuts the finished model into pieces, which he then applies to veneer. The first step is to assemble the basic parts. The latter in most cases serve as the background. Then small elements are inserted. After completing the manipulations, the drawing is assembled on a paper model and the mosaic is fixed with adhesive tape on the front side. The main thing in the work process is to minimize the likelihood of gaps and cracks. In addition, you need to glue the tape very carefully, because shifts on the surface are unacceptable.
- Set in veneer . The essence of the method is that a design is applied to wood using carbon paper, and then the elements are cut out along the contour. Then inserts are made from other wood to later fill the voids on the background board. All parts are connected to each other using paper tape.
- Reverse dialing . First of all, a sheet of paper with a sketch of the future ornament is attached to the board. Then the shaped parts are cut out of the veneer. The master applies a gluten adhesive composition to the front part of each element with a soft brush and installs it in the right place. The specialist tries to fit the mosaic pieces tightly. You can check the quality of work done in the light. This is the simplest method of creating marquetry.
- Set on paper . First of all, the specialist draws thin contours of the details on thick Whatman paper. Then, by vertically installing a sharp knife, the craftsman cuts through each element in order to subsequently fix it on the veneer. The fallen paper blank on the wood is carefully traced along the contour. All parts of the composition are manufactured in a similar manner.
Test: Can you guess the country?
Marquetry is the art of creating wooden mosaics.
Today, novice masters take great pleasure in studying all the nuances of this technique, being inspired by the works of their predecessors.
DIY wooden mosaic for walls: manufacturing process
Work on finishing the surface of a room with wooden mosaic slabs or small cubes:
- The size of the area that will be decorated with mosaics is measured.
- Then it is divided into small parts that need to be manufactured.
- After this, the parts are drawn on the wood and cut with a saw.
- The edges of the cut parts are formed using a milling machine.
The finished parts are treated with an antiseptic, then dried and polished, using first larger and then finer abrasives.
Installation features
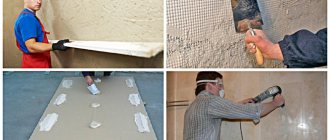
A modern manufacturer produces products that are characterized by improved properties, but before starting work it is still necessary to prepare the base. On a crooked wall, even a mosaic with excellent geometry does not lie smoothly. Installation features:
- The surface is prepared. In this case, it is necessary to eliminate large and medium-sized irregularities. For such work, putty or cement mortar is prepared.
- Wood-look mosaics are laid on a surface that has been primed. This will provide improved adhesion of materials and prevent the formation of fungus between the wall and the cladding.
- The mosaic is fixed to the surface using a special water-free glue. For example, a parquet mixture is an excellent option. On sale you can find types of different brands. It should be taken into account that such cladding is laid on the wall in the form of modules, so you do not have to deal with the installation of individual products.
- The joints are being grouted. For this purpose, an epoxy composition (from the group of two-component mixtures) is used. Mineral materials are prohibited from being used for finishing wooden surfaces.
Decorating walls with wooden mosaics: a guide
First you need to clean and level the walls (for faster leveling it is recommended to use plywood or drywall).
Then a primer is applied, which makes the walls absorbent. Mosaics need to be glued with compounds that do not contain water. Therefore, you need to use parquet glue rather than tile adhesive.
When filling joints, do not use grout that is used for ceramic tiles. Due to changes in humidity and temperature, the wood can change size, as a result of which the grout may simply crack. Therefore, special epoxy grouts are used.
What is the essence of technology?
Creating a mosaic picture involves three basic stages:
- Sawing mosaic segments according to a pre-prepared pattern. Depending on the complexity of the project, the number of elements and their sizes, both a machine and a manual jigsaw can be used for these purposes.
- The second stage is grinding the sawn segments and smoothing their angularity. This is done in order to give the wood mosaic volume and depth.
- The final stage is gluing all the pieces into a single picture and fixing it on a plywood or cardboard backing made in the shape of the final product.
Tips and tricks
To increase the service life, the finished mosaic is coated with wax or special oils.
Mosaic does not require special care. Simply wipe it with a damp cloth and then dry it.
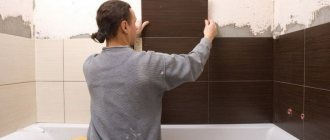
Mosaic can also be used to decorate a kitchen backsplash or bathroom walls, but only after treating it with varnish.
To create a more interesting coating, use three-dimensional parts or combine parts of different shapes, for example, circles and rectangles. This design is suitable for spacious rooms, as it takes up a lot of space.
Considering all the advantages of mosaic, the ease of self-installation and the way it transforms the interior, we can call it an excellent material. With it you can easily make the room unique and cozy.
Color solutions
Wooden mosaic amazes with its color variety. The specific shade depends on the type of wood that was used in production.
For example, ash gives delicate, light tones of wood, oak is darker, more noble, wenge is a very dark, almost black material. A panel or wall that combines elements of different shades looks more interesting.
Advice! For small rooms, lighter finishes are usually used, and dark mosaics are used for accent decoration.
Shell
Preparation
The technique of preparing eggshells for crackle mosaics (sometimes spoken in English - krake, from crack) is illustrated by the drawing. The shells are first kept for a day or three in a baking soda solution, this will soften the organic matter. Then the remaining protein is removed with a brush (pos. a). There is no need to remove the inner film from the shell! Paint in the desired colors with Easter egg dye; It’s better to take shells from eaten paints, the paint holds more firmly there.
Preparing shells for mosaics
Next, on a flat wooden board, not necessarily the same size as the panel, place a sheet of paper or plastic tracing paper with the rough side up, grease with PVA, and leave until gelatinized (sticky, 3-15 minutes). Lay out the shells with the convex side up at intervals of their size, apply the same board and press firmly, flattening the shells, pos. b.
After 10-20 minutes, the top board is removed and the shells are smoothed with a smoothing iron - a wooden stick with a rounded end, pos. V. Then the same board is applied again and the bag is held under pressure until the glue dries completely, pos. d. Next, we apply thin paper (cigarette, newspaper without text or the thinnest writing paper, not glued) on a thin flour paste, pos. d. All that remains is to cut the pieces with scissors to match the design and start laying, pos. e.
Laying
The drawing is also laid out on PVA. After the glue has completely dried, the covering paper is soaked and removed, then the remaining paste is washed off with a soft damp sponge. Now you need to wait a few days until the shell is completely dry in order to proceed to the penultimate stage - the appearance of small craquelure cracks.
Craquelures are developed with ink, dripping it from a pipette. You can immediately see how the mascara spreads along the cracks. When the development has stopped, they drip onto the adjacent area, and so on until the end. Now you need to wait a few minutes and use a soft damp sponge to remove the remaining mascara from the surface; It may take several passes, but the movements should be as light as possible, without pressure! The drawing has not yet gained strength!
The essence of the method is this: the mascara contains shellac and bile. Thanks to bile, mascara spreads over the smallest cracks, and shellac, polymerizing, gives the set strength. With free access of air, the shellac layer will come out weak and wash off, but it will stick very firmly along the cracks. Therefore, we wait another day or three and only now we begin to complete it - polishing.
Eggshell crackle mosaic
Polish the shell mosaic with coated paper. Any other abrasives, even something as delicate as felt, can rub through a thin shell (especially if the eggs are from factory hens). The composition of coated paper includes chalk and kaolin, minerals softer than the shell. But you still need to rub a little and without pressure.
As you can see, it’s simple, but it requires painstaking work. But the result may be a table with an image like the one in Fig. Are you drooling? And, sealed with shellac, it will last for at least 15 years, because thanks to the bile, the mascara will penetrate into the pores of the shell from the inside out.
Wet method
This is a more reliable method, but at the same time, such preparation will take more time and require more investment. The idea is to pour a leveling concrete screed over the boards.
Before laying tiles, the floor is inspected. If necessary, the boards are removed from the joists and replaced. If possible, the boards are laid with small gaps for ventilation. If this is not possible, then many holes are made in the floor surface.
A layer of moisture-resistant plywood with a thickness of at least 12 mm should be placed on top of the boards. You can use other wood sheet materials instead of plywood.
Then we lay waterproofing material on top. It will protect the wood from moisture from the concrete. Waterproofing must be done with an overlap on the walls.
Now, along the perimeter of the room, you need to glue a damper tape to the walls, which will compensate for the thermal expansion of concrete and will also prevent moisture from the floor surface from penetrating to the wood. At the end, fill in the screed. The thickness of the concrete should be small so as not to create excessive load on the tree.
Even 5 centimeters will be a lot, the optimal thickness is 3 cm. If the moderate curvature of the floor allows, then special self-leveling masses can be used instead of ordinary concrete.
After drying and hardening, the tiles can be laid in the most conventional way. This is the most thorough preparation, but even it is not able to save the floor from destruction after the wooden base becomes unusable.
Work examples
Here in Fig. examples of homemade mosaics. The first one on the left is a shell tabletop. The plot is not for a gourmet, but just right for a coffee table in a boudoir.
Homemade mosaics
Second from the left is a bathroom with a mosaic made from factory-made 5 cm tiles. Laying mosaic tiles in this case has some features. The first is the choice of drawing. Dolphins and naiads looked good in the huge Roman baths, even if they were crudely executed, but modern bathrooms do not provide the sense of spaciousness necessary to perceive such scenes.
The second is that the use of black grout on a white background made it possible to get by with standard 3-mm crosses and conventional tiling techniques. By the way, there is no point in printing out the design for such large mosaics on sheets. You need one A4 printout to keep in front of your eyes. And on the wall only outlines are sketched with a pencil or marker. For greater reliability, you can mark each piece with a tick of the appropriate color, colored pencil or felt-tip pen.
Next pos. – mosaic sink. There are some subtleties here too. Look at any finished sink. There will definitely be bends of small radius, at least along the edges, on which no mosaic will fit. That is, you need to make the base for the sink yourself to match the mosaic.
Most often it is recommended to use wood for this. But, firstly, in conditions of constant humidity it will quickly begin to rot and become slimy. Secondly, not every carpenter, not to mention home-made people, will undertake to make a product of complex shape with smooth contours from wood.
Therefore, it is better to use extruded polystyrene foam or EPS as a blank for a mosaic sink. It is durable, like wood, but easily processed, like polystyrene foam, resistant to moisture, non-porous, and therefore hygienic. Sheets can be glued together to the required thickness with PVA without any problems, but the mosaic itself must be laid on silicone. Any other binder will create a favorable environment for microbes.
And finally, the last pos. – a mosaic made of broken tiles as is, only the round pieces have been turned on a grinder. Thanks to the author's developed taste and careful selection of fragments, the drawing turned out to be very nice.
