Marking the plane and assembling the frame are important steps in arranging a gypsum board ceiling. If the markings are made incorrectly, the structure may turn out crooked, and its load-bearing strength will be low. Proper installation of the profile is an important and integral part of the installation. The stiffer the structure, the more reliable the ceiling above your head will be. Before you mount the ceiling frame under plasterboard, you need to know the types of such construction.
Design option for a suspended ceiling frame made of plasterboard
Installation of a multi-level frame
There are also several installation methods for installing a two-level plasterboard ceiling.
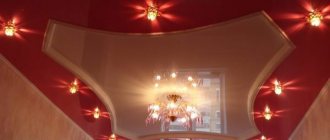
Previously, the first ceiling level was initially installed, and then markings were applied for the second level. But this method requires a lot of material, and the structure becomes heavy. Nowadays, many craftsmen make a frame for the levels, and only then comes the sheathing with plasterboard. This version of a floating ceiling will take time, but the structure itself is more reliable than mounting the 2nd level on a plasterboard floor. The ceiling “floats” with the help of lighting and creates the illusion of a fairy tale.
Video on how to make a multi-level frame.
https://youtube.com/watch?v=9O9VEDgtgS4
In order to make a two-level plasterboard ceiling, you need to follow the following algorithm:
Initially, you need to find the lowest point from the ceiling to attach the guide profile.
guide profile fastening
- The points of the two-tier frame should be marked on the ceiling.
- In order to bend the guide profile, it needs to be trimmed on the sides. The steeper the bend, the more often cuts will need to be made.
- It is also worth making pieces from the supporting metal profile, the length of which will be the same as the height of the planned ceiling.
- Workpieces should be installed in a vertical position.
- A ceiling profile is attached across the entire surface of the second tier, connecting the guide to the wall.
The next step for a two-level plasterboard ceiling is the wiring under the plasterboard for the backlit ceiling. The wires should not come into contact with the profiles, so they should be insulated in a sleeve.
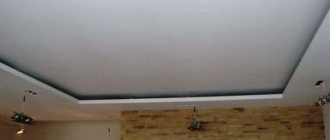
After the frame for the plasterboard on the ceiling has been made, you can begin finishing and puttying the new surface.
finishing the frame with plasterboard
In the video you can see step-by-step instructions for completing this frame.
When all methods of building a frame have been studied, you can choose the best option that is most suitable for the living space and the owner’s priorities. The main thing in all designs is compliance with the stages of work, as well as the accuracy of measurements. So that later, at the end of the work with your own hands, the flat surface of the plasterboard ceiling does not go uphill or, conversely, does not fall on your head.
Pay attention to the video: how to make a two-level plasterboard ceiling. https://www.youtube.com/embed/8C5Y3m_BUCA
A plasterboard ceiling can last in a house for a very long time; all you need to do is maintain the temperature in the room (without sudden changes) and do not open the champagne with the neck pointing up.
Scheme
Using these diagrams, you can take a closer look at the subtleties and features of installing a frame for drywall:
Box frame diagram
Backlight organization diagram
Frame without perimeter guides Attaching a wooden frame
Diagram of a suspended ceiling Sheathing a log house with plasterboard
Carrying out illumination
Technology of wall cladding using profiles Frame location
Drywall calculation diagram
Ceiling with wall profile
Location of drywall joints
Creating a cornice
Diagram of a cross frame
Did the article help you?
What is a frame and its purpose
One of the popular finishing materials for decorating the ceiling surface is plasterboard sheets. How attractive the appearance of the structure is and its durability depends on the correct design and assembly of the gypsum plasterboard ceiling frame under a concrete or wood floor.
If errors and miscalculations are made during its arrangement due to ignorance or inattention, the entire work has to be redone completely.
Therefore, it is so important to know how to assemble a frame, which is a load-bearing structure assembled from linear elements such as a steel profile or a wooden beam.
It is intended to hold plasterboard sheets under the ceiling base, since there is no other way to secure them. In addition, the frame serves to level ceilings, the surface of which is usually far from flat in apartments. This drawback can be corrected by installing a suspension system made of profiles and gypsum boards.
Another task of installing a frame under plasterboard on the ceiling is to create space for laying electrical wiring for lamps built into the covering material.
Finishing
Puttying the box
Work on finishing a plasterboard box begins with priming the entire surface. After drying, it’s time for the starting putty. Applying putty is a responsible and complex procedure; incorrect finishing will spoil the overall impression of the appearance of the structure. To perform the job efficiently, professional craftsmen use two spatulas - a working one and an auxiliary one; it is worth taking into account their experience and preparing a wide and narrow spatula. A layer of putty is applied with the auxiliary tool, and leveled with the main tool.
Simple box
The corners of the structure are formed with a metal corner attached to the starting putty. It is necessary to press the element to ensure a tight fit to the box. After removing the corners, the connecting seams are glued with mesh and filled with putty. When the finishing of the joints has dried, putty is applied to the entire surface of the box. This procedure occurs more than once, each layer gradually removes all irregularities. The finishing layer is very thin. Another secret is to use starting and finishing putty from the same manufacturer, this guarantees compatibility of materials. Dried putty requires sanding the surface. To do this, use first coarse and then fine sandpaper.
Cellular frame for a single-level ceiling
Arrangement of cellular frame elements
For a single-level structure, a single-plane plasterboard frame is used for a single-plane ceiling, made in the form of a lattice with an intersection of 90. Before you begin assembly, you need to decide on the level and height.
Water level
- In order to set marks for the frame, use a water level of the required length. A mark is made randomly at some place on the wall and then transferred to each outer or inner corner.
- It should be taken into account that in low rooms the ceiling frame for plasterboard is raised as high as possible. Therefore, you need to determine the lowest point on the main ceiling and step back from it by at least 25 mm - this is the thickness of the CD profile, and it is simply impossible to raise the sheathing higher.
Choking the control line with a chockline
Now all that remains is to connect the marks with a chockline, and we will get the level at which the frame for the plasterboard on the ceiling will be located - the gypsum board itself, together with the putty, will take no more than 10 mm. This procedure is easiest to do with a painter's cord (chockline), stretching it between two points and marking a reference line. However, you can use a rule or a long level as a ruler, but in this case, you will have to put more marks along the length of the object being used.
Galvanized UD profile
- Now we take the UD profile and install it so that its lower part lies strictly along the control line, and screw the profile to the wall.
For fixation, regular (dummies) or impact dowels are used, which are located at a distance of 30-40 cm from each other. Sometimes such profiles are produced with ready-made holes for installation, and the question of the fixation step does not arise. - Considering that the frame for the ceiling plasterboard will be cross or cellular, we need to mark the walls under the ceiling every 60 cm and mark the lines on the ceiling with a chockline.
The result will be a grid with a cell of 60x60 cm, and along these lines we will have to install consoles, but not at the intersection points, but in the middle. Installation of hangers is necessary only for one direction of the profiles.
U-shaped suspensions are installed on the main ceiling, and a UD profile is installed around the perimeter
- Screw the hangers to the main ceiling 60 cm apart from each other along the main direction of the profiles.
The main direction should be considered the one in which the profiles will be mounted as a whole, and not as jumpers, and most often, this is the shortest distance, because the length of all profiles of this type is either 3500 mm or 4000 mm. - It is best to screw the hangers onto dowels 6 mm in diameter, with a ring at the inlet hole, so that they do not fall into the voids of the concrete floor slabs.
Impact dowel-nails have this configuration, but they have a weak spacer, so such configurations can be used, in this case, only by replacing the screw with a thicker one.To level the frame, a nylon thread is stretched underneath it
- We are looking at how the frame is assembled - a plasterboard ceiling on one level (see also plasterboard box on the ceiling). Now we need to install entire profiles in any of the directions. They need to be cut 5 mm longer than the required length to prevent deformation during installation.
- To level the plane under the sheathing, you should stretch a nylon thread, but how can you make sure that the inserted profiles do not pull it back?
To do this, you should bend the ears of the middle dewlap under each of them, lifting them a little higher. Then lower each CD one by one and screw it to the hangers with special small self-tapping screws for plasterboard profiles (h - 11 mm), and also fix the CD with UD with them.
Connecting profiles using crabs (top view)
Since we are making a cellular ceiling frame from plasterboard, we now need to install lintels, and this can be done with the help of crabs, as shown in the photo. Pieces of the CD profile are cut to the required length and inserted across the already hanging frame at an angle of 90. The crab and the jumper are fixed with small screws.
Attaching hangers
Before attaching drywall profiles, the base must be marked and hangers installed according to the markings.
They come in two types: straight and with a knitting needle.
A direct hanger is a perforated metal strip that has holes for attaching to the base and holes for attaching a profile to the hanger itself.
Direct suspension and method of fixing the profile in it
A hanger with a spoke is used for installing plasterboard suspended ceilings. It consists of a shaped metal plate to which the profile is attached, an expansion element and a rod (spokes). At the end of the knitting needle there is a hook through which the suspension is attached to the base. Using the expanding element, the rod is released to the desired length.
Suspension with traction
The choice of fasteners depends not on the type of suspension, but on the material of the supporting base. If it is wood, you can use regular wood screws or nails.
For fastening to a brick or concrete base, dowel-nails are used, for which it is necessary to drill holes with a diameter equal to the diameter of the plasterboard dowel.
For hollow brick or aerated concrete, it is better to choose dowels with transverse notches and spacer whiskers.
Dowels for hollow bricks
The strength of the entire structure depends on how the suspensions are fixed.
But here it is important not only the reliability of the fastening, but also the correct determination of their position, since the profiles for drywall need to be fastened at a certain distance from each other.
- The width of the gypsum board sheet is 120 cm, so the profiles should be located parallel to each other at a distance of 40 or 60 cm between the axes. This will allow you to attach two adjacent sheets to one extreme profile.
- The suspensions are fixed strictly on one line, which is marked in advance. Deviating from it will not allow you to set a profile.
If you install the profile in the guides, you can do without preliminary marking
Cutting plasterboard sheets
For cutting plasterboard slabs, use aluminum rule, previously cleaned of any contaminants. If you don’t have such a tool, you can use a flat strip.
The process consists of sequential actions:
- Markings are applied to the sheet according to which cutting is performed.
- A sharp construction knife is used along the lath to a depth of 2-4 millimeters, making an incision in the plasterboard. You should get a continuous and even line.
- The product is placed along the cut line on the edge of the table and carefully but confidently broken. If the preparation is done correctly, part of the sheet will break off evenly.
- The back side of the cardboard is cut off with a construction knife.
- The edges of the cut are trimmed with a plane or sandpaper.
Accessories - profiles
The frame design includes profiles, connectors and fasteners. This part of the article talks about metal profiles, their standard sizes and how exactly the elements are used to create a suspended ceiling.
In general, the profile is a long product made of zinc-coated metal sheet. The cross-section and size of the profiles depend on what tasks it performs in the frame design.
Construction of a suspended ceiling frame
- Ceiling profile, abbreviated PP (in the Western classification CD). The section is U-shaped, with a width of 60 and a height of 27 mm. The “shelf” of the profile has longitudinal grooves, giving the element additional rigidity and strength. The main element of the frame for a suspended ceiling, it is to the PP profile that the plasterboard sheets are directly attached.
Ceiling profile CD 60x27 for plasterboard
- Ceiling guide profile, abbreviated PNP (in the Western classification UD). It has a similar cross-section, but different dimensions - height 28 mm, width 27 mm. It is attached to the walls along the perimeter of the room under the ceiling and acts as a guide for PP profiles. Has ready-made holes for fastening.
Ceiling guide profile (PNP)
- Arched profile, abbreviated PA. It is used to create a frame of a curvilinear shape, for example, wavy. It is very often used when creating a multi-tiered plasterboard ceiling. Profile height – 60 mm, width 27 mm. It does not have longitudinal stiffeners; an image of the PA is shown below.
Arched profile (PA)
- PU corner profile - small profile elements with many holes, serve to increase the strength of corners and accurately maintain their parameters.
Galvanized perforated corner profile
Table. Main characteristics of profiles used to create suspended ceilings.
| Name | Height, mm | Width, mm | Length, mm | Weight per 1 m length, kg |
| PP 60/27 | 60 | 27 | 2750, 3000, 4000 and 4500 | 0,6 |
| PNP 28/27 | 28 | 27 | 2750, 3000, 4000 and 4500 | 0,4 |
| PA 60/27 | 60 | 27 | 2750, 3000, 4000 and 4500 | 0,6 |
More complex designs
Creating a multi-level ceiling frame of complex shape is a creative process. But there are a few principles that apply to all such designs.
Creating a design with smooth transitions
First, the frame of the first level is installed and covered with plasterboard. Then the contours of the next figured layer are outlined on it. The guides of the second row are cut in accordance with the pattern and attached to the profile of the first row. Sometimes the joints are reinforced with suspensions.
If the coating provides for bends, then in order to achieve smooth transitions, the profile is cut at regular intervals and bent to the desired shape. The steeper the bend, the shorter the distances between cuts are made. The material prepared in this way is mounted to the guides, sheathed and, if there are more than two levels, the process is repeated again.
Partition marking
You will need two types of profile: PN
and
PS
. The first is cut with metal scissors and attached to the floor and ceiling. Before cutting and installing it, mark the floor. It is marked on it: the design thickness of the wall (based on the pieces of cardboard attached to the profile), the binding of the racks, window and door openings. A gap in the guide profile is provided between the pillars of the doorway.
Methods for marking the partition are given below:
3.1 Perpendicular marking (90° angle)
Most often, a plasterboard partition is built perpendicular to the existing wall, so it becomes necessary to draw a line at an angle of 90°.
This task can be accomplished in several ways, which we will discuss in detail below.
a) Egyptian triangle method
The Egyptian triangle is a triangle with an aspect ratio of 3:4:5
It is very important that the Egyptian triangle always has a right angle. For example, a triangle with sides 15 cm, 20 cm and 25 cm is Egyptian and, accordingly, rectangular
In order to set aside a perpendicular, we need to build an Egyptian triangle, one of the legs of which will lie on the load-bearing wall. An example of the construction is given below:
The figure above uses a triangle with sides of 1.5, 2.0 and 2.5 m. You may find it more convenient to construct a larger or smaller triangle. The main thing is to grasp the essence: we take a certain conditional length of the segment, for example, 0.5 m, then multiply this number by 3, 4 and 5, and thus get the lengths of the sides of our triangle: 1.5 m, 2.0 m and 2.5 m.
We carry out the construction: we put point “A” - the base of our perpendicular, then after 1.5 m along the tape measure we put point “B”. From point “B” we draw an arc with a radius of 2.5 m, for this you can use a nylon rope and a pencil, and from point “A” we similarly draw an arc with a radius of 2.0 m.
The intersection point of the arcs - “C” will be the third vertex of the Egyptian triangle. Segment AC will be perpendicular to segment AB, and accordingly to the load-bearing wall. Then, using a metal profile or a nylon cord, you can extend the speaker line to the opposite wall. Accordingly, straight line AD will be perpendicular to the load-bearing wall, which is what we need.
b) Perpendicular using a square
This method is less accurate than the first. This is due to the fact that the square is small in size and any unevenness of the wall can affect the final result.
To mark, we apply the square with the short side to the load-bearing wall, and draw a line along the long side, then this line is extended to the opposite wall.
This method is suitable for smooth walls and small marking areas.
c) Perpendicular using a tape measure
We set aside equal sections from the existing wall, as shown in the figure above. This method is also not completely accurate, since existing walls may have flaws and may not be perpendicular to each other. However, you can combine the methods and check the perpendicular obtained using a tape measure with a square.
3.2 Transferring marks from the floor to the ceiling
After marking the base of the partition, you need to transfer these marks to the ceiling. There are also several ways to do this.
a) Using a plumb line
This method is clearly demonstrated in the figure below. The more points you transfer from the floor to the ceiling, the more accurate the final result will be. We draw a line through the transferred points using a profile; it is also very convenient to use a dyeing (tapping) cord.
b) Using a bubble level:
Using a bubble level, you can only transfer the extreme points located near the walls. The method is less accurate than using a plumb line.
Installation instructions
Installation of sheathing under plasterboard should begin with measuring the room and selecting high-quality finishing raw materials. It is also necessary to decide on the material for the structure – wood or metal. Wooden lathing under plasterboard is often used, since its cost is lower. But metal sheathing is still used more often, as it has some advantages. Unlike wooden ones, it can be installed in any conditions, since it is not afraid of such factors as moisture and rotting.
Metal structures are stronger and have a longer service life. If we compare drywall without sheathing and the frame method of fastening this material, then in the second case it is necessary to prepare not only the material, but also a number of necessary tools.
Tool:
- Drill (perforator);
- Screwdriver and screw bits;
- Hammer;
- Pencil for marking;
- Bulgarian;
- Plumb;
- Level.
Profiles:
- Profile marked Mon. Used to fasten ceiling or side sheets;
- Profile with stiffening rib marked Ps. This type is used for the construction of partitions and serves as a tie for the entire frame;
- Profile marked C. Used to build relief structures (mainly used for ceilings).
Fastening:
- Connecting brackets;
- Dowel for fixing a metal profile to the wall;
- Self-tapping screws for fastening sheets.
Important tips before installation:
- Carefully take all measurements of the required surface, especially in the case of a wooden frame.;
- When purchasing material, you can make a certain reserve;
- You need to be extremely careful and careful when screwing in self-tapping screws. They must not touch or penetrate wiring or other wires;
- You need to screw in the screws so that their heads do not stick out. When installing sheets, they will interfere with their tight fit;
- To speed up the installation process, it is better to cut the metal profile with a grinder;
- To cut wooden blocks on site, you can use a wood saw or a cutting machine.
How to make sheathing for plasterboard walls? The first step is to make markings on the wall for the future base for finishing. Using a tape measure and a pencil, you need to draw starting lines. To do this, you need to make an indent of 60 millimeters from the edges of the wall (including from the ceiling). If necessary (if the wall has some unevenness), you can make a larger indentation, but not significantly. The first line is drawn on the wall under the ceiling - it serves as a guide for the guide profile. At the bottom of the wall, another horizontal line is drawn, which is the point for installing the lower guide profile. After this, you can begin attaching the first guide profiles (upper and lower).
Using a hammer drill and a drill, you need to make holes for the dowels and attach guide strips around the perimeter of the wall. Next, you can install the main racks. First, vertical profiles are installed and attached to the guides from below and above. Next you need to install the transverse ones. Longitudinal and transverse slats must be installed in such a way that a sheet of insulation can be placed between the slats. The grille is attached using brackets or homemade corners.
How to make plasterboard sheathing for a wood frame wall? You can mount a wooden frame using the same technology as a metal one. But there are some differences. The surface is divided into sections, each of which corresponds to the size of a sheet of material. Before starting work, you need to prepare the material. Unlike a metal profile, wooden blocks must be adjusted to the required dimensions before installation. To do this, it is necessary to carefully measure the surface. The lower guide rail is installed on the floor, and vertical bars are attached to it at a distance of 50 centimeters from each other.
For rigidity, transverse strips are installed. The wooden beam is fastened with wood screws. One rule must be observed: a sheet of finishing material must be attached to two adjacent vertical beams. Two adjacent edges of a sheet of material are attached to one beam. In this case, it is also possible to use insulation.
The presence of a frame makes it possible to cover the walls without any additional processing. In addition, installation can be done with your own hands if you have the necessary material, tools and follow the rules for creating the structure.
Preparatory work
First of all, you should decide on the material from which the frame for the plasterboard ceiling will be made. Usually it is made either from wooden beams or using a special profile.
Wooden lathing for plasterboard ceilings is distinguished by ease of processing and environmental friendliness, which has been appreciated recently. Based on the design, a sheathing is made, its dimensions should be less than the dimensions of the room along the perimeter of 1-2 cm. It is worth taking into account the features of this material, and in particular, changes in shape and dimensions depending on the microclimatic conditions of the room - temperature and humidity. To avoid their influence on the frame on the ceiling surface as much as possible, before assembling the sheathing, it is necessary to thoroughly treat each element with an antiseptic solution and allow the material to dry. It is also worth noting that such processing must be carried out after installation of the frame and mechanical processing of the elements.
When using a profile, such a labor-intensive process as applying a protective coating to the base for plasterboard on the ceiling is absent, since it is made of aluminum or galvanized steel.
The advantage of using this material is its low weight, ease of processing and the availability of various connectors. Having decided on the configuration of the future covering (single-level or two-level plasterboard ceiling), prepare the required number of connectors of each type (straight, corner, crab, T-shaped, two-level), and the suspensions used (straight or anchor suspensions). Based on the dimensions of the room and the design, the elements of the future structure from the profile are cut to the required length:
- for horizontal orientation of the future surface, a guide profile PN (UD) is used; it has the shape of a channel;
- for the longitudinal and transverse ribs of the structure, the PP profile (CD), which has a C-shape.
Usually a profile with a length of 3 m is used, but if its length is not enough, then it is extended using straight connectors. After preparing the profiles of the required length, sealing tape is glued to their back part.
The next stage of the preparatory work is to apply horizontal markings to the walls of the room, along which the future frame will be oriented to the plasterboard ceiling. To do this, use a tape measure to redo the very bottom corner. To make sure that the ceiling does not sag, it is worth taking measurements in the center of the room. Next, from the selected bottom point, the distance necessary for the location of the next frame is set aside. This will be influenced by the material used, the design and, if necessary, the communications and heat and sound insulation placed inside the base. On average, this distance is 5-8 cm. Then we apply a hydraulic level to this point and make marks in the corners corresponding to the horizontal. After this, with the help of a partner, we mark out the horizon line on each wall using painter’s thread. To reduce the installation time of the suspended plasterboard covering frame, it is recommended to draw up a diagram or mark the axes of the suspension locations on the main ceiling. They are placed transversely in increments of 40 cm.
A guide profile is applied to the horizon line marked on the wall and the mounting points are moved along the existing holes. If the holes on the profile are located far from the edges, then using a screwdriver we make additional ones with an indentation of 10-15 cm. Using the markings, we make holes in the wall using a hammer drill and attach the guide profile using dowels.
After this, you can begin installing the suspended ceiling frame made of plasterboard.
Leveling walls by gluing gypsum boards
The frameless method of attaching gypsum boards seems simple. But to get a high-quality result, you need to do quite a lot of work. Gluing is carried out according to the following scheme:
Complete removal of old finishes
It is especially important to remove adhesives previously used for tiles or wallpaper. Degreasing the surface to eliminate the presence of areas to which drywall will not stick. Priming the walls to ensure good adhesion of the adhesive composition on the drywall to the cleaned wall. Direct gluing of gypsum boards should be carried out taking into account the characteristics of the wall to which they will be attached. If differences along the wall are no more than 5 mm, gypsum putty is applied around the perimeter of the sheet with a notched trowel
Also, two long strips of adhesive are applied at a distance of 40 cm from the edges
If differences along the wall are no more than 5 mm, gypsum putty is applied around the perimeter of the sheet using a notched trowel. Also, two long strips of adhesive are applied at a distance of 40 cm from the edges.
If the difference is from 5 mm to 2 cm, you need to use thicker plasterboard adhesive. It is applied with a regular spatula in the form of small piles around the perimeter and inside the perimeter at a distance of 10-15 cm from each other.
With differences of 2 to 4 cm, strips or squares of plasterboard - beacons - are initially glued to the wall. They are glued to gypsum putty, creating a non-standard frame. In this case, the joints of the sheets should be in the center of the lighthouse. Only after the putty has dried (this may take 2-3 days) are the sheets glued. The adhesive composition is pre-applied to the beacons.
How to check a laser level for accuracy?
During operation, the device is carried and transported. Measuring equipment used at a construction site is not immune to shocks and falls. From time to time the device is checked for accuracy.
To check horizontal lines you will need:
- a tripod or a flat, solid base for mounting the tool;
- a room with a distance between two opposite walls of about 5 meters.
When starting verification, the device is installed at the first wall (A), marking the center of the beam on its surface. Then the level is rotated 180 degrees , fixing the center of the beam on the opposite wall (B).
The instrument is transferred to wall B without turning and adjusted with a tripod or base so that the center of the beam coincides with the point previously marked on wall B. After this, turn the level 180 degrees again .
Mark the center of the beam on wall A. The difference between the resulting points will be the measurement error of the device . At a distance between walls of 5 meters, the error should not exceed 2 mm .
Is lathing always necessary?
A suspension system made of metal profiles or wooden beams is used quite often, but there are cases that do not involve the use of such structures:
- The ceiling surface does not have significant deviations or deformations. The most common problem is incorrect joining of floor slabs, which requires a lot of effort to align. In houses and apartments built in compliance with all technologies, there are no such differences, which makes it possible to quickly correct minor irregularities by filing gypsum boards.
- The height of the ceilings does not allow for the creation of lathing, since the structure eats up part of the space. In such a situation, drywall is mounted with glue and reinforced with dowels or anchors.
- It is necessary to carry out repair work as soon as possible. This installation method is suitable for office or residential premises in which a full renovation is planned over time.
The absence of a frame has significant disadvantages:
- The need for careful preparation of the base. The surface must be extremely reliable, so a set of measures is carried out to help identify hidden problems. With the frameless method, fixation is carried out with glue and not with screws, which presupposes good adhesion.
- Difficulty in laying communications. You will need many grooves for electrical wires, which is especially difficult if you want to create a large number of lighting points.
- It is very difficult to do all the work yourself: in order to fix the element, you need to align it and hold it for some time.
The technology for gluing plasterboard to the ceiling is simple, but it is practiced extremely rarely, since there is no absolute guarantee of the reliability of such cladding, especially if the work was carried out by a home craftsman without relevant experience
Advantages and disadvantages
In a wooden house, you can also cover the ceiling with plasterboard. Regardless of where the sheet material will be installed, this finishing option has its advantages and disadvantages. Among the first, we should highlight the durability of the material and the speed of work.
The sheets have a relatively small mass, so they will not put additional load on the floors. The material is environmentally friendly, so it can be installed even in children's rooms. According to experts, plasterboard walls are also good because they are able to regulate the microclimate in the room. An additional bonus is that the fabrics are hypoallergenic. They do not emit foreign odors during installation or during operation.
Wooden walls are considered quite warm, and if they are also covered with plasterboard with a layer of thermal insulation, the house will become more comfortable and economical to live in. After all, its owners will be able to save on heating. Drywall is characterized by flexibility, which allows it to be used when decorating arches. And if such work is planned to be carried out, you should select material with the appropriate marking.
The walls in a wooden house cannot be called fireproof, but if they are covered with plasterboard, the core of the sheet material can become a kind of barrier to the spread of flame. On such walls, only the cardboard layer will burn out. Moreover, gypsum plasterboard is also sold in a fire-resistant version, which can be used in rooms with appropriate requirements for finishing materials.
Another advantage of plasterboard walls is that they can hide communications, which, however, must be laid in heat-insulating corrugation. Finishers like plasterboard so much for another reason that it is easy to process. The sheets are easy to cut, and you only need to use a sharp knife. The walls of private houses usually have requirements for vapor permeability. Drywall has the ability to breathe.
Although it is usually used in conjunction with soundproofing materials, the sheets themselves also have similar properties. And this finishing is quite inexpensive. After its installation, the walls turn out to be even and smooth, which practically does not require additional preparation before decorating.
Before you start finishing with plasterboard, you should also familiarize yourself with the disadvantages of this material. Among others, fragility and inability to endure high loads should be highlighted. The last factor does not allow attaching heavy objects to such walls. Moreover, if the surface is damaged, the gypsum core will be exposed, which will crumble easily. Repairing such a defect involves the use of putty, which does not always allow achieving an ideal result.
Before attaching drywall, you should ask under what conditions it will be used. If we are talking about a kitchen or bathroom, you should choose moisture-resistant sheets, which are more expensive. This also applies to canvases with fire-resistant characteristics. If you cover the walls of a wooden house with the usual type of plasterboard, which then comes into contact with water, you may encounter the problem of swelling and deformation of the material.
Drywall on wooden walls is installed using a certain technology, which necessarily involves the installation of a frame. If you cover the walls using timber, its natural moisture can negatively affect the drywall, which will swell and change its original linear dimensions.
Material selection
Previously, frames for suspended ceilings were often made of wood. The material used for them was only well-dried slats treated with an antiseptic composition. But even such wood did not cope with its functions in all cases. In rooms with high humidity, the slatted frame quickly deteriorated, deforming the ceiling covering, so this material gradually lost popularity.
Galvanized profile - a modern material for the frameToday, in apartments and houses, it is common practice to install frames made of galvanized metal profiles. They are resistant to moisture, fire, chemicals and are many times stronger than wood. Another advantage is the ability to bend the material and its easy cutting. The profile varies in shape and section. For the ceiling, U-shaped parts with a thickness of 25 to 100 mm are more often used, depending on the planned load. For multi-level structures, it is recommended to choose a profile no thinner than 50 mm. If you are not limited in spending, it is advisable to purchase parts that already have holes for fasteners - this will speed up their installation.
Based on the above, we can say that a galvanized profile ceiling frame is a reasonable solution for installing a suspended ceiling, making it easier to repair work and obtaining a reliable coating. Let's look at the nuances of preparation and installation using his example.
Basic rules for installing gypsum boards in a wooden house
Let's go a little off topic
If you plan to install plasterboard covering not only the ceiling, but also the walls, it is important to take into account one small but very significant detail:
- The installation of the frame is carried out first on the ceiling and only then on the walls (see Frame for a plasterboard ceiling - it’s all about the little things, or there are no little things.).
- Under no circumstances should the frame of the ceiling and walls be connected together. There should be a gap between them.
Our advice is that if you are worried that the gap between the walls and the ceiling will ruin the appearance of your home, then this is completely in vain.
There is a large variety of ceiling plinths that can be used to cover this gap. In this case, the plinth should also be attached to only one surface, the ceiling or wall. By fulfilling this condition, you will provide sufficient space for the shrinkage of wooden structures without visible impact on the external finishing coating. As you can see, the rules are simple, but following them will avoid big problems in the future.
Advantages of finishing
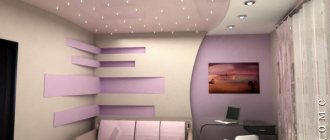
Can be built in backlight
- Drywall is a safe and environmentally friendly material, its use is safe for health.
- The design allows you to create any geometric shapes and serves as an important element of ceiling decor.
- Possibility to integrate additional lighting.
- Easy to process and install.
- High degree of fire safety.
Advantages of multi-level plasterboard ceilings
The question of choosing a ceiling finish always arises when carrying out renovations. A very popular solution was the installation of a plasterboard box. Using gypsum plasterboard it will be possible to realize the most unusual designs of designers - gypsum sheets are easy to process and easy to install. The box on the ceiling performs not only an aesthetic, but also a practical function.
The construction of a box from plasterboard has a number of significant advantages:
- the ability to place a large number of lighting fixtures for primary and secondary purposes on the ceiling;
- using the box you can hide unevenness and defects on the ceiling;
- inside the plasterboard structure it will be possible to hide ventilation channels, pipes and other communications;
- creating an original “relief” of all possible shapes and sizes;
- using a box to visually divide a room into functional zones.
Drywall itself is an environmentally friendly material, flexible and bendable. The surface of the gypsum board can be treated with plaster, putty, tiled or covered with wallpaper.
Installation technology
Metal frame
The technology for installing plasterboard partitions has its own characteristics:
The frame can be mounted only after all communications have been prepared
Lay pipes, install electrical wiring and connect the necessary devices (distribution panels, sockets, switches). When installing a double reinforced frame, it is necessary to glue a special noise-insulating sealing tape between the profiles. Pay attention to the fact that the height of the vertical profile (rack) should be 10-15 mm less than the height of the ceiling. The gypsum board is attached first on one side and after performing all the following manipulations on the other. The electrical cable should be placed perpendicular to the posts. Insulation and sound insulation are carried out only after all electrical installation work has been completed.
Necessary tool
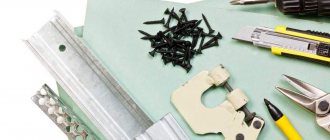
Materials and tools
To install a plasterboard partition quickly and without problems, you will need a reliable tool:
- drill or screwdriver (purchased complete with bits for self-tapping screws);
- construction knife (for cutting plasterboard);
- perforator;
- plumb line for marking;
- building level;
- marker or soft pencil;
- dowels;
- self-tapping screws;
- hammer;
- roulette;
- metal scissors;
- special reinforcing tape;
- plasterboard sheets;
- expanded polystyrene (this material is used as sound and heat insulation).
Installation
Visual installation diagram
So, here we come close to the question - how to install a plasterboard partition. Let's start with the fact that all work is carried out in rooms where the air temperature is at least 10 ˚С.
Now let's look at the step-by-step assembly diagram:
- Like any other type of installation, the installation of a plasterboard partition begins with markings. Marks are made on the floor, walls and ceiling. The markings should clearly indicate the location of future doorways and pillars.
Markings on the floor and wall
Markings on the ceiling
- After you mount the frame, you need to stick a tape on the front part of the profile, which will serve as sound insulation. As an alternative, you can use adhesive sealant.
- As mentioned earlier, you can install a frame under drywall in several ways.
As practice has shown, the majority prefer to assemble partitions from a metal frame. The main reason is the lower price of the metal profile:
- The frame for the partition is usually assembled from 2 types of profile PN50 and PS50 (guide and rack profile). The guides are mounted to the floor and ceiling using dowels. Rack profiles are installed perpendicular to the guides.
Rack profile in guide profile
- The maximum spacing between dowels should not exceed a distance of 1 m.
- Rack profiles are attached to the upper and lower rails, forming a complete structure.
- The step between the racks is no more than 60 cm (the closer the racks are to each other, the stronger the structure). If you want to strengthen the frame, you can put several racks on the jumpers, securing them horizontally to the frame.
- If you plan to install a door in a plasterboard partition, the opening must be strengthened by installing an additional profile.
Metal frame with doorway
So, after we have assembled the metal frame, we can safely begin installing the gypsum boards:
- First, you need to correlate the dimensions of the sheets with the height of the partition. If something does not fit together, use a construction knife and cut off unnecessary elements. (see also the article How to calculate the thickness of a plasterboard partition)
Sheathing the gypsum board frame
- To strengthen the corners of the structure, you can use a special reinforcing tape, although this item cannot be called mandatory.
Reinforcing tape
- Place a sheet of drywall against the frame and press firmly. Then, armed with a screwdriver, start turning it around the entire perimeter. Do not skimp on self-tapping screws - the maximum step between them is no more than 25-30 cm.
- When tightening the screws, the caps should enter the material 1 mm.
- Do not forget about the gap between the floor and the gypsum board sheet (1-1.5 cm is enough).
- Now we proceed to the installation of electrical accessories (sockets, switches). For installation, use special boxes, which will greatly facilitate further installation (and, in case of malfunction, replacement) of electrical accessories.
- When attaching insulating materials, you can use the remaining trim profiles.
Tools
The installation of a plasterboard ceiling structure will not require the use of special devices.
To work, you need the following tools, which are often found in the collection of any home craftsman:
- Electric hammer drill and drill set. With its help, the supporting frame is fixed to the rough concrete floor. A powerful impact drill will do just fine.
- Screwdriver. Considering the fact that during the work you will have to tighten a lot of screws, it will be problematic to manage with just one screwdriver.
- Grinder and metal disc. For cutting pieces, a metal profile of the required size. You should also have a hand saw and metal scissors on hand.
- Construction knife and set of blades. For straight cutting of gypsum plaster boards. Curly cutouts are usually made with an electric jigsaw with a wood or metal attachment.
- Measuring devices. We are talking about a square, a tape measure, a building level, a water or laser level, a plumb line, and a tapping cord.
- Hammer and plane. To align the cut points of plasterboard sheets.
- Set of spatulas (narrow and wide blade). As a rule, putty work is carried out on top of the finished cladding.
- Grater and painting sandpaper. After drying, the putty is sanded for subsequent painting or wallpapering.
How to make a wooden frame for a suspended ceiling from plasterboard
We treat slats with a cross section of 5*4 cm with an antiseptic composition. This is necessary to protect the wood from mold, mildew, insects and rodents. We make markings on the ceiling and walls using a tapping cord, tape measure and laser level
At this stage, it is important to take into account the pitch of the longitudinal fastening of 0.4 meters and the fixation of the suspensions - 0.6 meters. In the marked places for attaching the hangers, we use a hammer drill to make holes with a diameter of 0.6 cm and a depth of 4 cm. We fix the rods, previously fixed in the hanger, in the holes and hammer them in using dowel nails. At this stage, do not forget to glue sealing tape to the back of the suspension to prevent the appearance of sound bridges. When all the hangers are installed, we temporarily attach the strips to them. We stretch a strong thread across the installation lines of the sheathing at the same level as the line of fastening of the suspended structure. We align the beams along the stretched cord and attach them with four self-tapping screws, first to the outer hangers, and then to the rest.
How to bring the device into working position?
Before work is carried out, the device is installed in the working position, fixed, and then adjusted.
The device has several modes:
- building horizontal lines;
- projection of vertical lines;
- cross construction mode. The vertical and horizon lines intersect to form an angle of 90 degrees;
- point projection mode.
Setting the level
The plastic, rubber-coated body of the device can be installed on any surface. Rigid fixation of the device is the main principle of fastening.
To install the laser level use:
- smooth horizontal surfaces at hand: chairs, window sills, tables;
- Mounting with a tripod to the wall, rods and tripods.
Wall mounts hold the tool with suction cups or magnets, Velcro . The tripod allows you to lift the device up, the rod is convenient for marking the ceiling. Accessories are included in the kit upon purchase or purchased separately as needed.
Settings
Preparing the device for operation consists of setting the level strictly horizontally , it will depend on the type of laser level, and does not require professional skills.
Plug-and-play tools will be ready automatically. Adjustment occurs in the range of 5-10 degrees.
When adjusting the working position, the device emits a sound or light signal.
When turned on, the laser level will project the desired beam according to the set measurement mode.
A bright luminous line, one or more, a dot, a cross will appear on the surface.
The laser level is manually adjusted by aligning the bubble in the viewing window of the device to the central position . The position is adjusted using screws located on the housing.
Precautionary measures
Safety precautions for working with the device include protecting your eyesight . Direct exposure of the beam to unprotected eyes can cause various damages and diseases, including retinal detachment.
When working, be sure to use special glasses , avoid the beam hitting those present, and isolate pets. Safety glasses improve the visibility of lines in sunny weather.